Let me remind you that hard disk partitions are, simply put, areas on your hard disk allocated for ease of use. You can partition the HDD into partitions either during the installation process operating system, or later, but with the use specialized programs, because in Windows initially there are no tools for more or less flexible work with partitions.
It is, of course, convenient to perform manipulations with Windows partitions, being right in it, using special programs, but it is not less safe than performing these operations with boot disk! From a boot disk, it means that we will work with partitions using the program even before Windows itself loads, and this option is more reliable.
Therefore, in the article for today I will tell you how to work with AOMEI Partition Assistant in the form of a free bootable version - another program for editing hard disk partitions!
You may be wondering: “Why did you show how to work with partitions using EaseUS Partition Master in Windows, but use completely different software as a boot version?”.
But the fact is that EaseUS Partition Master does not include the ability to create a boot disk in its free functionality. But AOMEI Partition Assistant can perform almost all the same functions, but there is still a free opportunity to create a boot disk.
Unfortunately, a boot disk can only be created from the interface of a program already installed on the computer, so let's start by installing the AOMEI Partition Assistant utility.
You perform all operations on partitions at your own peril and risk. The program was tested by me and I did not encounter any problems in the operation of the system after using it. But there are always risks, no matter what program you use! I recommend making backup copies of data, for example, using the program Acronis True Image.
Download and Install AOMEI Partition Assistant
Disk-partition.com
Scroll down the window a little and click the “Download Freeware” button under the heading “Download AOMEI Partition Assistant Standard”:
In the next window, click "Download now":
Aomei Partition Assistant will automatically start downloading to your computer.
We launch the downloaded program (if the browser downloaded automatically, then most likely it will be in the "Downloads" folder):
The Aomei Partition Assistant setup wizard will launch before installation. There is nothing special in the installation itself, everything is easy and intuitive.
In the first window, check that the Russian language is selected and click "OK":
We accept the conditions license agreement and click "Next" again:
In the next window, you have the option to change the installation path for Aomei Partition Assistant. I recommend that you always put programs in the folder that is offered by default. But if it is very necessary for some reason, then change the installation folder by clicking on the "Browse" button. Then click "Next":
Next, you can specify a folder in the Start menu that will store a shortcut to launch the program, and often other shortcuts related to the program. Again, there is little point in changing the name of the folder, so it's easier to leave the one set by default. Click "Next":
In the next step, you can enable the creation of shortcuts to launch the program in the Start menu and on the desktop, which will appear after its installation:
And in the last window we see 2 options. If you check the first one, then Aomei Partition Assistant will start immediately after clicking the "Finish" button. The second option, if enabled, will launch a short tutorial for this program. Since the program is in English, the training, respectively, will also be in English, which means that the second option can be turned off. Moreover, we will consider how to work with Aomei Partition Assistant in this article. Click "Finish":
Installation completed!
Creating a boot disk and working with AOMEI Partition Assistant
The interface of the program is very similar to the one in the program "EaseUS Partition Master". This program can work with partitions directly in Windows, but I promised to show everything using the boot version as an example, which, in principle, will not differ in interface.
To create a bootable disk, in the AOMEI Partition Assistant program, go to the "Wizard" menu and select the "Make bootable CD master" item:
In the window, select the first item (Create a simple Windows PE) and click "Next":
In the next window, we are offered 3 options:
In general, choose the option that is convenient for you and click "Go". If you chose to record to a disk or flash drive, then do not forget to immediately insert the appropriate media into your computer :)
After you write the program to a disk or flash drive, you can start working with the program.
Now you need to prepare your computer to boot from a disk or flash drive (depending on which media you recorded to) and boot.
After you run the bootable version of the program, you will see that it does not differ from the one that runs in Windows.
Now let's look at how to work with Aomei Partition Assistant and go through the most basic and useful features programs.
All operations that you can do with partitions are located on the left side of the program, in the "Partition Operations" window. Also, these same operations can be seen by opening the "Section" menu at the top of the program:
In the center of the program is the main window where your sections are displayed.
In my example (see the image above), you can see 2 partitions created: "D" and "C". Sections can be combined into one, and for this we select one of the sections, and then click on the "Merge Sections" button:
In the window, check the boxes next to the sections that we want to merge, then select the letter below that will be assigned to the merged section, and click "OK":
The main window of the Aomei Partition Assistant program now displays one partition with the letter that I specified. But the sections haven't really been merged yet! This operation was performed as if in a virtual mode, which now needs to be confirmed in order to perform the action in reality.
All operations that you have done, but have not yet confirmed, will be accumulated in the window on the left "Pending operations".
To apply the action, click on the "Apply" button.
In the window that opens, we are warned that a reboot is required to complete the operation. Click on the "Go" button:
We confirm the reboot in the next window by clicking "Yes":
It happens that Aomei Partition Assistant for some reason does not want to reboot and perform the planned action. In this case, try closing the window, select a section in the program, and click the "Apply" button again. As a rule, after 2-3 attempts, it is possible to complete the operation without rebooting at all.
After the operation is completed, we will see the corresponding message:
Now you will actually have 2 sections merged into one!
You can also, on the contrary, divide one partition into 2. For example, when installing the system, you decided to make one partition for everything, but then changed your mind, because the partition is very large and decided to allocate a separate partition for your data, and let the system and programs be installed on one .
Select the section and click on the "Split section" button in the operations window:
In the window, you need to move the slider to specify the size of the partitions that will be obtained after the divisions. The same can be done manually by specifying the desired values in numbers in the appropriate fields. Then click "OK":
In the program, you can simply reduce the size of the selected partition, thereby creating unallocated disk space from which you can create a new partition. Or you can increase the size of the partition at the expense of free space if some part of the disk is not partitioned. To resize a partition, select it again and click on the "Resize/Move" button:
In the window that opens, you need to move the slider, thereby reducing or increasing the size of the partition. My partition takes up all the space on my hard drive, so, accordingly, I can only reduce it. You can also specify a new partition size manually below, in the corresponding "Partition size" field.
Using the same tool, you can move a partition on a hard disk (shift). To do this, check the checkbox "I need to move this section" and then, holding the mouse cursor on the section in the upper part of the window, move it to the left or right:
Click "OK" to save the changes.
In the main window of Aomei Partition Assistant in preview mode, we will see that the size of the partition has changed, and an additional unallocated area has appeared below, which can then be turned into a partition. In the Pending Operations window, we see that there is one unapplied operation to resize the disk. Click on the "Apply" button to perform the pending action:
From the existing unallocated area (marked with an asterisk), you can create a new partition. To do this, select this area and in the operations window click "Create Partition":
In the settings window, we, in principle, need to specify only the letter of the partition to be created. But you can also specify the size (using the sliders or manually in the "Partition size" field), for example, if you do not want the partition to be created on the entire free area of \u200b\u200bthe disk. Press the "OK" button:
Don't forget to apply the created preliminary operation with the "Apply" button!
Above, we discussed the basic operations in Aomei Partition Assistant for working with partitions that the tools built into Windows itself cannot do. The program can also format (i.e. clear all data) the necessary partitions, delete partitions, change labels. This can already be done in Windows itself. True, through Windows it will not be possible to format the system drive (usually it is the “C” drive), if you want to do this. This is because the system cannot delete the data that is part of the system in any way. But on the other hand, you can format the system disk using this AOMEI Partition Assistant program, or similar ones.
Always use such programs carefully! For example, I first test them on virtual machines and check if everything is in order with the system itself. And only after that I can start working with the real system (and then, while maintaining a backup copy of the data).
I think after reading given material, you will not be left with questions about how to work with Aomei Partition Assistant.
Hello everyone, dear friends! Many users have personal computers or laptops there is a problem of insufficient hard disk space.
There will be a review today special program, which will help get out of this situation-AOMEI Partition Assistant.
We will consider the properties, capabilities of this program, we will try to perform any actions with hard drives and find out why people use this utility.
Reasons for use
Let's look at why users have to increase the space on their first local drive.
The most common reason is wrong setting computer before installing the operating system for the first time.
Not all people really know how to do this, so I call the “specialists”.
These wizards divide the physical disk into two before installing the system. logical partitions, and under the system (the first section), they allocate at least + 5-10 gigabytes of memory. They think that this should be enough.
There are no problems at first, but as you use it, the computer begins to clog, especially for an inexperienced user.
Not all computer and laptop users know that all user folders such as “Desktop” or “My Documents” are stored on the same partition as the system.
Therefore, when all files are saved to the desktop, the disk becomes full. This can lead to system slowdowns and lags.
Also the reason is that most programs are programmed to automatic installation to the disk with the system (although this can be fixed before starting the installation), which also leads to clogging and brakes.
If you are faced with the above, then AOMEI Partition Assistant will help you, which is completely free for home and commercial use and which you can download directly from the official website http://www.disk-partition.com/.
Interface and features
So, you have downloaded and installed Partition Assistant. We launch the program from the icon on the desktop. This program was not chosen by chance. It has the most pleasant interface, thanks to which an inexperienced user can deal with it himself.
Also, this program actually performs actions with hard drive unlike other programs that do not work with all computers, and some even just imitate the process of transferring memory.
This review is specifically written for the program with GUI, which works in the system itself, so as not to bother users with BIOS settings.
Partition Assistant also supports Russian. After starting the program, we see that the interface is divided into 4 parts.

The column on the left has two menus: the wizards menu, which will help you perform some action, and the disc operations menu, where you can change, convert, delete discs.
On the right, we see two large blocks that show information about the disks.
The block at the top shows detailed information about all connected media in numbers, and the block at the bottom tells us this graphically, showing how many parts the disk has and how they are filled.
Partition and disk formats are also indicated.
The long bar at the very top has buttons with icons for quick actions.
Well, at the very top there is a standard control panel for the entire application.
So, let's see what all this is for, and how it will help us.
The work will be carried out first manually, and then with the masters, so as not to do too much and not make mistakes.
The wizards will also help if you have a few more disks between two large ones in the lower block.
Among the features of the program is the creation of a boot disk, but it will only work after downloading a special extension.
Splitting and rejoining discs
So, let's get started, but first we need to defragment both drives in order to avoid all sorts of errors. This is optional if you have automatic defragmentation installed, but still worth doing just in case.
It can be done standard means Windows: go to My / This computer, right-click on any drive, go to Properties.
Go to the Tools tab, then select “Optimize and defragment” and click “Optimize”.
Now we first check, and then optimize as necessary.

The duration of the process will depend on the size of your hard drive. (The example shows defragmentation based on Windows 10. In previous versions all names may vary.)
Below is a screenshot from Windows 7.

Let's get back to the program. First, we do everything manually. The first thing we do is right-click on the D: drive and select "Resize Partition" (to avoid confusion, select the drive in the bottom right block, not the top one).
A window opened before us. It is necessary to drag the left (not right, it will be more convenient) slider to the right as much as you want to increase the first local disk. After that, click “OK”.

We have another section in the bottom block, which we just cut off. If, as in the example, you can see a couple more unknown partitions between the main disks, then they need to be moved to the side.
To do this, first click on the second of them with the right mouse button and select “Move Partition”.
Now drag the section with the left mouse button to the right as far as it will go and click OK.

The smallest section will automatically disappear, but that's okay. Now the first disk and the cut off part are nearby.
To connect them, you need to right-click on the C: drive and click "Resize Partition".
Drag the right slider all the way to the right and click OK.

But that is not all. All actions in the program are carried out in visual mode, so that it is possible to return to the step below.
You can also start over by clicking the “Reset” button in the very top bar. Well, if you are sure of your choice, then feel free to click “Apply” and wait for the end of the memory transfer process.

The duration of the process will depend on how much memory you are transferring and on overall performance your device. At the end, the computer will restart, and you can check your disk: its volume will increase due to the second disk.
Results
AOMEI Partition Assistant is a free, intuitive, easy-to-use, feature-packed hard drive management software. It has helped many users of computers and laptops.
From this review, you can understand that using it will not be difficult. Thank you all for your attention, see you soon!
One day, the user encounters such a problem: a message pops up about insufficient space on the C drive (with all this, windows usually starts to slow down a lot! the solution is the link below). And, as a result, a completely logical question arises: how to increase the C drive, and it would be nice to use the D drive?
Unfortunately, standard Windows tools changing the partition structure on the HDD without losing data will not work! (possibly true preliminary saving to a third-party disk)! - you can also try to compress drive D in the standard disk management utility, but in this case it will not work to increase the space of drive C at the expense of D. And therefore, whatever one may say, you have to use third party software(tools).
The Aomei Partition Assistant program - that's about it and other details in the article:
Text by paragraph:
general information about disk partitions C and D windows
If we are talking specifically about increasing the size (space) of partition C due to partition D, then in this case the partitions will have to be on the same physical hard drive, or SSD. However, it should be remembered that the very space (partition) of disk D, which we want to add in favor of C, must certainly be free.
And if we comply with these standards, then the narration of the article is great for us, and for Windows 8.1, Windows 7, Windows 10.
... how to increase disk C by D without using programs narration at the end of the article.
increase the size of drive C in Aomei Partition Assistant
The Aomei Partition Assistant program will just cleverly help you usefully expand the system partition of your hard drive, or SSD.
The program is free! and is compatible with Windows 10, 8.1 and Windows 7.
When installing the program, we will not get extra (unnecessary) software - a clean installation!
…what else, the program supports the Russian language.
download the program from the website
download…
Keep in mind: if an unexpected power outage of the PC occurs during the procedures while working with disks through the program, you can easily lose valuable data! So take care of this caution)
Installing the program is trivial to obscene! so I won't litter with screenshots ...
After launching Aomei Partition Assistant, a simple and understandable interface, even for a non-advanced user, will immediately appear - as mentioned above, in Russian.
Just remember that you need to set the program language during installation!
While working with disks, the computer will be restarted twice!
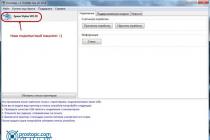
This window will appear immediately after starting the program: ... which displays all the disks of our computer and, of course, their explicit partitions ...
What zhzh!! increasing the size of drive C by D in Aomei Partition Assistant is a fairly simple matter.
Right-click on the "D" drive, and select, as you understand, "Resize partition".
Further interesting: in the window that opens, you can easily change the size of disk partitions by controlling the mouse ... changing the checkpoint data on the right and left. Or the dimensions of the disk (partition) are set manually (circled in brown).
All that needs to be done is that the unallocated space after compressing the partition is in front of it - drive D (i.e. free, as mentioned above).
Click OK.

Now we need to resize drive C by increasing its partition size using the free space on the right... Let's open "resize drive C".
Click "OK"...

After the procedures done, it is important not to forget that in the main window Partition programs Assistant - after our adjustments - you must click on the "Apply" button for the specified parameters.
So, what we wanted is what we got - namely, a larger size system disk C by reducing the second logical space of partition D.
Knowledge for...
Also, with the help of the program, we can easily make a bootable USB flash drive! For what? and in order to work with the Aomei Partiton Assistant program, booting from a flash drive, which will ensure that disk settings are performed without restarting the computer.
It is also easy to create a similar flash drive in Acronis Disk Director - and it's just as easy to adjust (change) the size of hard disk or SSD partitions.
how to increase disk C at the expense of D without using programs
You should be aware of the existing drawback: the data of drive D will have to be deleted (as an option, you can first transfer them to a USB flash drive or external drive).
And if this method is to your liking, then let's get started:
Open the "Run" interpreter (more details - all) - click Win + R -
...and of course... "Enter".
Before our eyes, the Windows Disk Management console will appear: here we observe all the drives (disks) connected to the computer, as well as their partitions ...

It is not recommended to perform any actions with hidden partitions of drives C and D !!
Let's go: in order to start editing disk sizes, right-click on the "D" disk partition and, as you guessed it, select the "Delete volume" option - partition!
Remember: all data from partition D will be permanently deleted!
It's simple: as soon as the partition is deleted, now unallocated — that is, unallocated space — will appear to the right of the “C” drive, which, from this moment of partition release, can be changed at our discretion ... i.e. to expand the system partition C.

... in the meantime, if you need to increase the C drive, right-click on the partition and select the "Expand volume" option. Next, in the adjustment wizard - expanding disk volumes - set the required amount of disk space (however, do not forget that - you need to leave space for the deleted partition D !!) ...
The picture below shows the approximate dimensions for 5000 MB (that's about 5 GB).
The disk will be expanded to the specified parameters ...

...as an epilogue...
The work that solves the current problem remains this: convert the remaining possible space into partition (volume) "D".
We click on the free space - “Create a simple volume”, and using the volume creation wizard, we achieve an indispensable solution to the problem of increasing the disk partition ...
By the way: by default, the space for disk "D" is leased automatically - all the remaining unallocated space! ..

The disk will be automatically formatted with the assignment of the letter we specified (its name), for example, "D" ...
That's all things...
... And I can only bow ... and wish useful work online
... and offer for viewing an equally useful video that talks about the decency of users))
If something is not clear and you have questions, share them in the comments ...
Unlike the "old lady" XP, they require at least 16 GB and 20 GB of space on the system partition of the hard disk, drive C, to install 32- and 64-bit systems, respectively. But this is only a technical minimum. For modern programs and games, this is a negligible amount. A system partition of 80-100 GB is today the standard for ordinary users. And if resource-intensive games are also installed on the system disk, the standard 80-100 GB may not be enough. So, the system partition of a disk, unlike non-system and removable media, should never be 100% full. At least 15% of the C drive must always remain free to ensure the performance of Windows.
What if the size of the C drive is so small that system notifications about the lack of free space on it, Windows slowdowns and freezes are quite a common thing in a computer? How to enlarge the C drive without data loss, so that the system always has its legal 15% of the disk space available for its own needs?
If storing user files on a non-system drive is welcome to avoid losing them in case of a crash Windows work, then the constant fuss with cleaning the trash, Temp folders, Internet cache and other temporary files is far from a solid solution to the problem of having free space on the system disk. The cardinal solution to the problem can only be an increase in the system partition due to the volume of other, non-system partitions of the disk. We will talk about this in more detail below.
1. AOMEI Partition Assistant
Earlier in the article "" we considered the reverse process of increasing the system partition: the size of drive C was reduced, and a non-system drive was formed from the remaining space. For this purpose, we used the program AOMEI Partition Assistant Standard Edition- hard disk partition manager, free analogue professional programs for systems engineers such as Paragon Hard Disk Manager And Acronis Disk Manager. AOMEI Partition Assistant Standard Edition will also be used in this case to increase the system partition of the disk.
Download the program from the developer's site and install. Installing AOMEI Partition Assistant Standard Edition is standard.
2. Data backup
Hard disk partition managers are far from the programs with the functionality of which you can experiment, quench your thirst for curiosity and replenish your PC user experience. It is necessary to redistribute the disk space of the computer while maintaining the operability of the operating system and user data in strict compliance with instructions below. Availability backup and system, and significant user files in cloud storage or on removable media is welcome. For Reserve copy and system recovery, there are a huge number of programs on the software market, including the free AOMEI Backupper Standard, the brainchild of the developer AOMEI Technology, who created the AOMEI Partition Assistant program.
3. Expansion of the system partition of the disk due to part of the non-system
Well, let's get down to work on increasing the space on the C drive. In AOMEI Partition Assistant, expanding the system partition by taking space on one of the non-system partitions of the disk is the simplest procedure that does not require the program to run in preload mode, or even restart Windows itself. At the same time, everything happens without damage to the system itself and without loss of user data.
Launch AOMEI Partition Assistant Standard Edition. In the program window we will see a representation of the existing disk partitions - 350 MB reserved by the system, system drive C, non-system partitions, additional hard disks or flash drives, if available. In the upper part of the program window, disk partitions are presented in a data table, and in the lower part you can see their visual layout.

To increase the C drive, we will use a test one with a small hard drive size - only 25 GB. Regardless of the size of the hard disk, the procedure for increasing the system partition by physical computer will be exactly the same.
So, we have a system partition C with a size of 20 GB and a non-system partition F, the size of which is 4.56 GB. First, we will not completely destroy the non-system partition of the hard disk, we will only take away half of the volume from it and give this half to the C drive.
Important! In no case should the increase in disk C be due to the 350 MB reserved by the system. It's a Windows emergency.
Open the program menu Master"and in the list of commands select" Split Wizard Extension". The same command is available in the panel quick access to some functions in the program window on the left.

In the wizard window that appears, the option we need is preinstalled - this is an extension of the system partition. Click " Further».


If HDD has several non-system partitions, in the partition selection window, due to which the C drive will expand, select the desired one. In our case, there is only one non-system partition, it is selected by the program by default. Click " Further».

We get into the window for setting the size of the future system disk. Either using the slider or in the table for setting numerical indicators, you must set the new size of the system drive C. As mentioned, for smooth operation of Windows, it needs at least 80 GB. In our case, we will symbolically increase the system partition by a little more than 2 GB, leaving the non-system partition about the same. Click " Further».

Detailed information about the planned operation. Click " Go».

AOMEI Partition Assistant will issue a warning that during the operation it is better to leave the computer alone and not carry out any parallel actions. Click " Yes».

Upon completion of the operation, press " OK».

Then - " End».

After that, we will return again to the window of the wizard for expanding disk partitions, click " Cancel' to get out of it.

In the main window of AOMEI Partition Assistant, we will see the converted picture of the hard disk partitions - the system partition C will be enlarged, while the non-system one will be reduced.

The same picture will be displayed in Windows Explorer.

4. Increasing the system partition of the disk by merging with the non-system one
If one of the non-system partitions of the hard disk is not needed, its space can be attached to the entire system partition. In our case, we return to the original picture of hard disk partitions, where we have drive C - system - and drive F - non-system. The latter will soon disappear, giving all its space to the needs of Windows. As in the previous case, nothing will happen to the system itself or to user files - after the partitions are merged, all data will be in place.
In the main window of AOMEI Partition Assistant on the system partition, call the context menu and click " Merging Sections».


The program will return to the main window, where we will observe the future picture of disk partitions. As you can see, the non-system partition F has disappeared, and the size of drive C has become larger. We press the button " Apply».

In the window with detailed information about the planned operation, click " Go».

We confirm our decision, click " Yes».

We are waiting for the completion of the operation.

Click " OK».

As in the case of expanding the system partition, restart Windows not required. In the system explorer window, we can observe the disappearance of the non-system partition, while the system partition has increased.

Everything - the problem with the constant lack of space on the C drive is solved forever.
Did this article help you?
ImunuroRich
Our contacts
Skype: maksimovgenya
Qip (icq): 248923748
We do not indicate the site so as not to be considered spam. Simply contact us for details or request a live presentation or meeting.
The largest tourist club on the planet with 2 million members, the only commercial company awarded 24 Oscars in the tourism business, the best travel commercial company in the world in 2016 according to the World Travel Awards, a company included in the TOP-25 of the 100 best corporations in the world in the ranking Global 100 Direct Selling News for 2017 dealing with direct selling. It continues its activities in Russia and develops the CIS countries and offers you:
The only, guaranteed most low prices on the:
* all-inclusive tours on any continent of our planet
* travel and sea cruises
* flights of any airlines and from any airports in the world
* hotels in any part of the world
For all our services you get three best price guarantees.
Many of us have seen advertisements for various travel services more than once, which some allegedly scan affordable hotels and hotels and offer us the best price for hotels following the example of Trivaga, and quite a few similar services look for affordable air tickets for you at the supposedly lowest cost, by type Skyscanner or Aviasales. But none of them talk about guarantees, because after all, the market for tourism and plane tickets is very volatile and the fare can change constantly. The question is, will your sums be returned to you from your overpaid price for an air flight or for a hotel if, nevertheless, the payment turns out to be not the best? And isn't it not convenient to use various services to form or search for an air flight or hotel booking, and even more so for finding a suitable tour or vacation for yourself and your family and friends. Our exclusive international travel club offers you an inimitable service in which you can forget about all the existing inconvenient services for finding flights, hotels, tours and cruises and the entire list of tourist offers, after all, the entire world tourist base is at your fingertips, in any time of the day or night, all year round. Any plane, any hotel, the Hermitage, any safaris, any islands. It is available to everyone at any convenient time at a guaranteed low price.
Which of the travel corporations or air ticket offices is able to offer you the following?
* If you find any air flight of your choice lower than ours, you will take 150 percent of the difference during the day
* If someone finds any hotel, any hotel, any hostel lower than ours, then you will take 150% of the difference during the working day
* If after the purchase of your air flight and before the moment of your check-in for a flight, the price of an air ticket has fallen in price (regardless of the booking, for example, a week), then your air flight will be rescheduled at the most best price and you will receive the difference within one business day.
* If someone finds a tour similar to ours "All inclusive - All inclusive" in any corporation of our land cheaper than ours, then we will present this tour to you
At the same time, club members are advised, if they wish, to start their own private tourism business within a short time, up to one day, these are:
* Establish your own personal tourism organization
* promote the interests of the company in your own country or in any place you are interested in with earnings many times higher than the average
* for lovers of MLM business, the ideal potential to establish their own binary structure
* for connoisseurs of team business (from 2 to ... people) the ideal potential to organize their own travel business in different regions
The salary for a business subscription starts from 1500 US dollars / per month. There is no salary cap.
On initial stage We train and help you organize your tourism business and your structures.
The fee for a package of documents is purely insignificant, one-time and indefinite. Payback from one person in your team.
Your travel business passes to your grandchildren.
And the most important thing is that you are joining a family of 2 million wealthy and positive people from all over the world and from various business areas.
We officially operate in 30 countries of the world, and also develop in Uzbekistan (Samarkand), Armenia (Yerevan), Belarus (Minsk), Azerbaijan (Baku), Kyrgyzstan (Bishkek), Georgia (Tbilisi), Moldova (Chisinau), Kazakhstan ( Astana), Russia (Moscow), Transnistria (Tiraspol), Ukraine (Odessa, Kiev), Tajikistan (Dushanbe).