There is an excellent free script for backing up virtual machines on a VMWare ESXi server, and it works on free versions of ESXi 4 and 5 without installing any additional VMA gimmicks, etc. The only problem is that the instruction there is not entirely accurate, so I fiddled with this script for a long time so that it still works in automatic mode ...
I will not describe in detail how to connect to ESXi via SSH, I will only describe the setup steps with which everything worked for me.
First, download the script from the link above and upload it to the server, you need to upload it directly in the archive! The easiest way to do this is through the vSphere Client. I have two disks on the server - machines work on one, and all sorts of iso-images and backups themselves lie on the other. The disks are called datastore1 and datastore2 respectively. All backups, script and configs are in the backup folder. Also note that the names of files and folders are case sensitive, so if the folder is called backup, and you write in a script Backup, then it won't work!
- Upload the archive with the script here /vmfs/volumes/datastore2
- Next to SSH cd /vmfs/volumes/datastore2- go to the directory with the script
- Unpacking the script from the archive tar -zxvf archive_filename.tar.gz
- Through vSphere, rename the unpacked folder to something simpler, for example, just backup
- Now let's go to this folder - cd backup
- Create a folder inside it to store individual configs mkdir BackupConfig
- Now in BackupConfig drop the necessary individual configs for machines, if they are not needed and all machines need to be backed up with the same settings, you can leave it empty
- Correct the variables in the configuration file through the vi editor, the main thing is the backup paths, i.e. Change the first line to this: VM_BACKUP_VOLUME=/vmfs/volumes/datastore2/backup, well, then see for yourself what else you need - vi ghettoVCB.conf
- Create script StartBackup.sh(2 lines) - vi StartBackup.sh
2nd line, where the call of the script itself, you can remake for yourself
cd /vmfs/volumes/datastore2/backup
./ghettoVCB.sh -a -g ./ghettoVCB.conf -c BackupConfig -l ghettoVCB.log - Run chmod +x ghettoVCB.sh
- Run chmod +x StartBackup.sh
Stage 1 completed! Now if you run StartBackup.sh, the backup will start. For the duration of debugging, you can change the 2nd line to something like this ./ghettoVCB.sh -a -g ./ghettoVCB.conf -c BackupConfig -l ghettoVCB.log -d dryrun- this will allow you to run the script and track the progress without copying the disks. To backup more efficiently and quickly, I recommend setting the disk type in the settings thin.
Configuring Cron (to automatically run a script)
- Give permission to write to a file chmod +w
- Add a line through vi to /var/spool/cron/crontabs/root
15 0 */3 * * /vmfs/volumes/datastore2/backup/StartBackup.sh
Launches at 00:15 at night every three days. My time zone is +4 Moscow, i.е. actually the script is run at 4:15 am, this will be visible by the date the log was modified through vSphere. Of course, you can choose another time and frequency. - Now you need to run two commands to restart cron
kill $(cat /var/run/crond.pid)
crond - Add with vi 3 lines to the very end of the file /etc/rc.local
This is necessary because after rebooting the server, the contents of the file from the 2nd point with the launch of our script will be restored to the previous state, so in rc.local we indicate that after rebooting, the following commands must be executed - stopping cron, adding a line to automatically run the script and starting cron .
/bin/kill $(cat /var/run/crond.pid)
/bin/echo "15 0 */3 * * /vmfs/volumes/datastore2/backup/StartBackup.sh" >> /var/spool/cron/crontabs/root
crond - Now let's run the command /sbin/auto-backup.sh to make sure all our changes are saved.
A little explanation - why you need to create a script StartBackup.sh, and not just take and put its contents into /var/spool/cron/crontabs/root? There is some limit on the size of this file and some of the lines in it simply will not work, although you can try to do it this way, at first it worked for me, but then, apparently, some patches came out and stopped. Moreover, it's just more convenient - if you need to change the backup schedule, then you just edit the file StartBackup.sh and there is no need to dance with a tambourine around cron with its restart and making the same changes to /etc/rc.local.
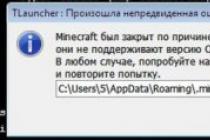
PS: Time passes, everything changes, the script itself changes, ESXi5 has already been released, so somewhere, something may no longer work 🙂
Appendix: Cron Syntax
The cron command looks like this:
1 2 3 4 5 /vmfs/volumes/datastore2/backup/StartBackup.sh
Where,
1: Minutes (0-59)
2: Clock (0-23)
3: Days (0-31)
4: Months (0-12 )
5: Day of the week (0-7)
A few examples:
- Run at 5 minutes past midnight, every day
5 0 * * * /vmfs/volumes/datastore2/backup/StartBackup.sh - Launch at 2:15 every first day of the month
15 14 1 * * /vmfs/volumes/datastore2/backup/StartBackup.sh - Start at 22:00 every business day
0 22 * * 1-5 /vmfs/volumes/datastore2/backup/StartBackup.sh - Runs at 23 minutes after midnight and every two hours thereafter (2:23, 4:23… etc.), every third day
23 0-23/2 * * */3 /vmfs/volumes/datastore2/backup/StartBackup.sh
If you have a desire to understand in more detail the processes of setting up and ensuring the integrated security of a local and network infrastructure built on the Linux OS, I recommend getting acquainted with OTUS. The course is not for beginners, for admission you need to pass.
If you have not set up the free hyper-v hypervisor yet, I recommend that you familiarize yourself with my material on this topic -. If you already have it configured and the question arose of how to quickly, conveniently and free of charge back it up, then I recommend using the free HV Backup utility.
HVBackup utility description for hyper-v
The main goal of the HVBackup project was to create a free, simple and effective backup solution for hyper-v virtual machines running both in single mode and in a cluster.
The utility works on all versions of the operating system, from Windows Server 2008 onwards, both in graphical mode and Server Core installations. The utility also supports the free edition of the Hyper-V Server hypervisor.
HVBackup supports app consistent and crash consistent hyper-v backups using VSS built into the system. There are many commercial solutions based on the same method of backing up virtual machines, but among the free ones, I know only this product.
Company codeplex, the manufacturer of the program, claims that it regularly uses HVBackup in its infrastructure, which guarantees high quality work and timely corrections or changes.
The program can be launched from command line, called from Powershell scripts, or be built into any .Net application through the appropriate library.
The principle of operation of this utility is quite simple. The program creates in the specified directory a separate zip archive for each virtual machine, which includes all the information related to it.
System requirements:
.Net Framework 3.5
Installing .Net Framework 3.5 on the command line
To install .Net Framework 3.5 you need to run the following commands in Powershell.
Windows Server or Hyper-V Server 2012:
Install-WindowsFeature NET-Framework-Core
Windows Server 2008 or 2008 R2 (non-core):
Ocsetup NetFx3
Windows Server (core) or Hyper-V Server 2008 / 2008 R2:
Ocsetup NetFx3-ServerCore
HVBackup usage example
Perform a full VSS backup of all host virtual machines:
HVBackup -a -o d:\vm-backup
Perform a full VSS backup of the list of virtual machines (quotes must be used if machine names contain spaces). Backup is performed on a remote server:
HVBackup -l "VM1,VM2" -o \\backup-server\wm-backup
Make a full backup of virtual machines, the list of which is contained in a text file (each VM on a separate line):
HVBackup -f list.txt -o d:\wm-backup
Script for automatic backup
If you want to schedule automatic backups, then it is most convenient to make a simple bat file for this purpose and schedule its execution. Let's create backup-all.cmd the following content:
Set BCKPATH="\\backup-server\wm-backup" rem net use %BCKPATH% /user:
This script will delete zip files older than 7 days in the specified directory before performing a backup of all virtual machines. You can edit the paths and parameters to suit your needs.
Now let's create a scheduled task on the server to periodically perform backups using the previously created script:
Schtasks.exe /create /tn HVBackup /tr c:\backup-all.cmd /sc DAILY /ru
If you want to delete a job:
Schtasks.exe /delete /tn HVBackup /f
Immediate task execution:
Schtasks.exe /run /tn HVBackup
HVBackup command line options
Usage: HVBackup.exe-b, --backup
Run a backup (default).
-r, --restore
Perform recovery.
-f, --file
A text file containing a list of virtual machines, one per line.
-l, --list
List of virtual machines for backup.
-a, -all
Backup of all virtual machines on the server.
-n, --name
If specified, only the listed virtual machines are backed up.
-g, guid
If specified, the listed virtual machines are backed up by GUID.
-o, --output
Required parameter. Destination folder for archives. Can be in the form of a local or network path.
--output format
The format of the virtual machine archive name. (0) machine name, (1) machine GUID, and (2) current date and time. Default: "(0)_(2:yyyyMMddHHmmss).zip"
-s, --singlevss
Make one snapshot for all virtual machines.
--help
Display command help:
Conclusion
That's all. The only remark is that I did not test the performance drop during the backup. By eye, I did not notice any brakes in the operation of virtual machines. But they were all unloaded for me. The time it takes to back up each machine is significant. But of course it depends on many factors.
There is a good opportunity to combine HVBackup and . For example, make archives locally on a server with hyper-v, mount a folder to the linux server and use rsync to grab zip files with virtual machines. Or just do a backup on a Linux samba, for example. The link above has an example on this topic.
Online Linux Security Course
If you have a desire to understand in more detail the processes of setting up and ensuring the security of a local and network infrastructure built on the Linux OS, I recommend that you get acquainted with online course "Linux Security" in OTUS. The training lasts 3 months, after which successful graduates of the course will be able to be interviewed by partners. The course program is designed as a series of practical workshops and is aimed at prepared students who already have knowledge and experience in Linux administration. What will you learn:- Apply the best world practices and information security standards (Debian, RedHat, MitRE);
- Use tools to detect and exploit vulnerabilities in Linux OS;
- Install and configure network systems for detecting and preventing attacks;
- Work with monitoring and containerization systems based on Docker;
At the moment, there are several manufacturers of programs for backup storage, both paid and free. We decided that free programs are either inconvenient to use (difficult installation, constant risk of failure, lack of their own interfaces), or they lack the most important backup options. In this case, it is worth purchasing a paid program, which, unlike a free one, will be fully functional with all the basic backup functions. Below is a list of the best backup solutions according to experts:
Veeam BackUp & Replication 5
These programs are the main backup programs used by most users:
Data Recovery with VCenter Server support
As already written in the past, this is the surest way to create a backup of the machine if you bought VCenter Server and no longer have the desire or the means to deal with this issue. This technology is quite easy to set up, a complete guide can be found at the following link:
This solution works both with and without VCenterServer, but it will not be possible to configure the backup by time. We'll cover all the main features just below when we compare all the products.
Emergency System Recovery
Server Consolidation
Licensing Type
Specifications
Volume and frequency of backup
This product is now quite popular, since the type of licensing of this product (licensed by sockets) for server rooms with low-power servers will be extremely beneficial. Below we will look at several configurations of servers and consider price characteristics. Also, this product supports the option of instant data recovery after a failure thanks to its vPower technology.
Also recently releases tools for backup in virtual environments. In addition, Symantec is the only one of all backup solutions that uses V2P technology (converting a virtual environment to physical servers). True, Vcenter has such technology, but no longer within the framework of backup technology
But the capabilities of Acronis are not limited to this. Acronis has included another feature in the Acronis Backup & Recovery 10 AdvancedServer VirtualEdition package, this is server consolidation for moving systems from physical to virtual platforms, and with a built-in task scheduler. As a result, we have that this program performs 2 main functions:
Main advantages compared to other technologies:
The ability to work both with physical servers and in a virtual environment, which allows, at the initial stages of the company's development, to combine consolidation with high reliability ratings
Wide range of supported backup storage devices (up to optical devices and magnetic tapes)
Creating an Acronis Secure Zone partition on the same VM server, which allows you to restore the machine in a short time, and this partition will be protected by deduplication mode on another server
If backup is one of our main goals, regardless of price, we should definitely choose between solutions from Veeam, Acronis or Symantec. Both of these products are leaders in data backup and storage, and have a number of individual benefits.
In choosing between these technologies, it is necessary to draw a line on several distinctions:
With different types of licensing, it is worth deciding which one suits us best. If we have powerful servers with a large number of sockets for processors, we should lean in favor of Acronis and Symantec. If we have a lot of weak servers with few sockets, Veeam is the best option.
It is also necessary to understand what we need, that is, what requirements we will impose on backup, the availability of those functions that are especially important to us.
A very important factor is how often and at what time we will backup. If we need to create backup machines for the entire infrastructure, and the frequency is not important, this is one thing (we set the backup scheduler at night). It is completely different if we have one priority machine, for which we need to create a backup with a period of several minutes (we will already need a backup throughout the day).
After determining for a particular case all these parameters, it will not be difficult for us to decide for ourselves which product suits us best.
"There are sysadmins who don't back up and there are those who already do backups."
(c) From these your internets.
Good afternoon.
This article will focus on such a necessary and urgent issue in system administration as backup tools for virtual machines. (VM). This article can rightly be considered a logical continuation of a couple of previous ones, which dealt with the deployment of hypervisor systems based on VMware and Microsoft products, respectively. This time, the conversation is about how to set up a server that will be responsible for creating and storing backups of vSphere ESXi and Hyper-V virtual machines.
Both options will be based on the free version of Veeam Backup & Replication. (hereinafter Veeam B&R). In my case, a regular PC with Windows 7 was chosen as a "backup server" (64 bits). About the bit depth of the OS in brackets is not mentioned by chance - from a certain version (probably from 7th or earlier) Veeam B&R ships as a 64-bit application, ditching 32-bit systems for Veeam Backup & Replication Server.
Full information with a list of supported server OS versions can be found in the manual for the latest release (at the time of this writing - v9), which in turn can always be found on the Veeam FAQ page.
Wanting to get a budget version of the project and the maximum possible cost savings, as far as possible within the framework of compliance with license agreements, we will use the free version of the Veeam Backup & Replication package. This, in turn, will somewhat limit the working functionality of the package. In particular, the free version does not have access to the task scheduler and, for example, incremental copy mode (only whole full copies of the VM, instead of partial ones - according to changes between backup versions). If at the very least you can live without the second, albeit with reservations, then in the first case we will use the built-in Windows scheduler as an alternative.
Our scheduler will be launched by tasks based on executable Windows Powershell scripts, for which in the Veeam B&R distribution (starting from version 8 + update 3) There are necessary cmdlets, which is very good.
If you will be working with an ESXI hypervisor version 6 (as in this article), then the kb2068 update or a later version of the program itself must be installed over the installed Veeam B&R v8 - otherwise you will not be able to connect to ESXI (failed to login to "SERVER_IP" by SOAP, port 443, user "root", proxy srv: port:0 Unknown API version format: "dev").
VMware vSphere ESXi VM backup
I believe there is no need to describe the process of installing Veeam Backup & Replication on a future backup server - it differs little from most windows installers, except for the long duration due to the installation of all necessary components, so let's immediately proceed to review the package from Veeam.
Installing, configuring and verifying Veeam Backup & Replication
After installation, launch Veeam B&R - administrator rights are required to run.
 Rice. 01
After the first launch, the main window of the program will appear in front of you.
First of all, you need to add a new server to the configuration, for which we select the appropriate sub-item:
Add Server - VMware vSphere.
 Rice. 02
The following steps demonstrate the process of adding a new ESXi server, in addition to the IP address, most of this is setting up a server administrator account (Credentials).
 Rice. 03
On the next tab, add the ESXi administrator account itself (root)
 Rice. 04
Server added.
 Rice. 05
Upon completion of the addition, in the "VMware vSphere" node, in the list of servers, we will see our new hypervisor. By clicking on its name, you can see a list of virtual machines hosted on the server and their brief description.
 Rice. 06
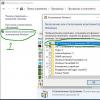
Before further configuration steps, perform a test backup of the virtual machine, for which, in the list of VMs, right-click on any of them and give the VeeamZIP command.
 Rice. 07
A dialog will open with a choice of the location of the future archive with the VM image. Choose a location and confirm the changes.
 Rice. 08
After that, the process of creating a backup copy of the entire system of the remote virtual machine to the selected storage will be started.
 Rice. 09
Upon completion of the process, an archive with a backup copy of our VM will be written in the designated directory (file with *.vbk extension).
The speed of the process largely depends on the size of the VM file system (occupied disk space), characteristics of the backup server and hypervisor (disk system, network interface speed), and on the architecture of the network through which this operation is performed.
In my example, SATA-II disks and gigabit network controllers, both on the backup server and on the hypervisor, between them there is a switch - also with 1GB / s ports, network patch cords of small length and are compressed, respectively, to work on this bandwidth standard (analogous to "rack" cross-connect connections).
Among other things, I can recommend that all VMs running on VMware products install the VMware Tools package in the guest OS to optimize the operation of all interconnected services and utilities within the VMware infrastructure.
We go further.
Create a Scheduler Job in Windows PowerShell
After we have made sure that there are no difficulties in manual mode, we proceed to adding a task to the Windows Task Scheduler. But before that, let's create the actual executable object itself, which will be our task - a powershell script.
You can create a script from scratch, or you can use a ready-made one that you can borrow from the blog (also in Russian) one of the developers from Veeam. From the latest recommendations - the version of powershell should be starting from the 3rd, in order to avoid possible problems in the work of cmdlets with the old version (if necessary, update before starting creative research). You can find out the current version by typing the command in the powershell console:
In my lazy case, I took ready-made scripts and edited the fields I needed, leading to the required values.
Below you can see what my script looks like after the changes (file named VeeamZIP2.ps1). Changed fields with my values are highlighted in red.
# Author: Vladimir Eremin # Created Date: 3/24/2015 # http://forums.veeam.com/member31097.html # ##################### ############################################ # User Defined Variables # ################################################### ############### # Names of VMs to backup separated by semicolon (Mandatory) # example from V. Eremin: # $VMNames = "VM1", "VM2", "VM3" $ VMNames = "win_xp1", "zabbix" # Name of vCenter or standalone host VMs to backup reside on (Mandatory) $HostName = "192.168.55.100" # Directory that VM backups should go to (Mandatory; for instance, C:\Backup ) $Directory = "d:\backup\arch\veeam-esxi\" # Desired compression level (Optional; Possible values: 0 - None, 4 - Dedupe-friendly, 5 - Optimal, 6 - High, 9 - Extreme) $ CompressionLevel = "5" # Quiesce VM when taking snapshot (Optional; VMware Tools are required; Possible values: $True/$False) $EnableQuiescence = $True # Protect resulting backup with encryption key (Optional; $True/$False) $ EnableEncryption=$ False # Encryption Key (Optional; path to a secure string) $EncryptionKey = "" # Retention settings (Optional; By default, VeeamZIP files are not removed and kept in the specified location for an indefinite period of time. # Possible values: Never , Tonight, TomorrowNight, In3days, In1Week, In2Weeks, In1Month) $Retention = "In3days" ##################################### ############################ # Notification Settings #################### ############################################## # Enable notification (Optional) $EnableNotification = $False # Email SMTP server $SMTPServer = "" # Email FROM $EmailFrom = "" # Email TO $EmailTo = "" # Email subject $EmailSubject = "" ######### ################################################### ####### # Email formatting ######################################## ########################## $style = "" ################################################# ################# # End User Defined Variables ########################### #################################################### ######## DO NOT MODIFY PAST THIS LINE ################ Asnp VeeamPSSnapin $Server = Get-VBRServer -name $HostName $MesssagyBody = @() foreach ( $VMName in $VMNames) ( $VM = Find-VBRViEntity -Name $VMName -Server $Server If ($EnableEncryption) ( $EncryptionKey = Add-VBREncryptionKey -Password (cat $EncryptionKey | ConvertTo-SecureString) $ZIPSession = Start-VBRZip -Entity $VM -Folder $Directory -Compression $CompressionLevel -DisableQuiesce:(!$EnableQuiescence) -AutoDelete $Retention -EncryptionKey $EncryptionKey ) Else ( $ZIPSession = Start-VBRZip -Entity $VM -Folder $Directory -Compression $CompressionLevel - DisableQuiesce:(!$EnableQuiescence) -AutoDelete $Retention ) If ($EnableNotification) ( $TaskSessions = $ZIPSession.GetTaskSessions().logger.getlog().updatedrecords $FailedSessions = $TaskSessions | where ($ _.status -eq "EWarning" -or $_.Status -eq "EFailed") if ($FailedSessions -ne $Null) ( $MesssagyBody = $MesssagyBody + ($ZIPSession | Select-Object @(n="Name";e=(($_.name).Substring(0, $_.name.LastIndexOf("(")))) ,@(n="Start Time";e =($_.CreationTime)),@(n="End Time";e=($_.EndTime)),Result,@(n="Details";e=($FailedSessions.Title))) ) Else ( $MesssagyBody = $MesssagyBody + ($ZIPSession | Select-Object @(n="Name";e=(($_.name).Substring(0, $_.name.LastIndexOf("(")))) ,@(n="Start Time";e=($_.CreationTime)),@(n="End Time";e=($_.EndTime)),Result,@(n="Details";e =(($TaskSessions | sort creationtime -Descending | select -first 1).Title))) ) ) ) If ($EnableNotification) ( $Message = New-Object System.Net.Mail.MailMessage $EmailFrom, $EmailTo $Message .Subject = $EmailSubject $Message.IsBodyHTML = $True $message.Body = $MesssagyBody |ConvertTo-Html -head $style |Out-String $SMTP = New-Object Net.Mail.SmtpClient($SMTPServer) $SMTP.Send ($Message) )
As you can see from the example above, I only changed a few fields:
$VMNames = "win_xp1", "zabbix"
names of virtual machines from the list in Veeam B&R
$HostName = "192.168.55.100"
ESXi hypervisor IP address
$Directory = "d:\backup\arch\veeam-esxi\"
directory for storing archives of virtual machine images
$EnableEncryption = $False
disable archive encryption
$Retention = "In3days"
automatic deletion of the virtual machine image archive after the period of time specified in the variable has elapsed.
Here you can set your value. - possible options are listed in the script comments.
$EnableNotification = $False
Here I turned off e-mail notifications because I have not yet planned such a function for myself. Optionally, you can customize this if required.
When all options are defined, it is necessary to check the operation of our script.
Launch CMD Console on behalf of the administrator and run the command:
Powershell –file “c:\bin\VeeamZIP\vmware\VeeamZIP2.ps1”
If everything is set up correctly, you will see the script running:
 Rice. 10
 Rice. eleven
After completing this step, we proceed to the next step.
Adding a Task to the Windows Task Scheduler
Run as administrator "Windows Task Scheduler".
Right-click on the "Task Scheduler Library" folder and select "Create a simple task". We give our task a name: "VeeamZIP-test" and set the properties of the new task.
 Rice. 12
Describe the nature of the task if necessary
 Rice. thirteen
Set a schedule for a new task
 Rice. 14
Let's set the actions to be performed for the task.
 Rice. 15
Pay attention to this step, namely, how the command and its arguments are distributed in form:
- in my case, the scheduler agreed to execute my script only with this method of filling in the fields (Separately 2 lines: "Program ..." and "Add arguments ...").
 Rice. sixteen
 Rice. 17
 Rice. eighteen
 Rice. nineteen
After setting up the task, we will force it to run outside the schedule for debugging.
It should be noted that the VeeamZIP mechanism does not start working immediately, but after a certain period of time necessary for the service procedures for preparing the copy job. Keep this in mind while waiting, while performing checks on the operation of the backup.
 Rice. twenty
It should work the same as in the previous example, with one difference - the process will be launched in the background, without launching any windows on the screen.
For this reason, you can track its successful launch in several ways, including:
— creation of a new archive file of the VM image in the storage;
- for debugging purposes - recording events in the log of our task.
Below is a typical peak of activity on the lan-pci interface while downloading VM images from ESXi to the Veeam B&R server:
 Rice. 21
Captured VM image archives in the destination directory (backup storage).
 Rice. 22
It remains to make sure that the backup works both in manual mode and according to the appointed schedule.
I would like to say a few words about the types of licenses.
For the operation of the above backup method, the following conditions must be met for the software used:
Backup server OS - Windows 7 x64 sp1/ Server 2008R2 / 2012 or newer;
Veeam Backup & Replication (Free, not lower than v8 + obligatory installation of the latest updates, but not lower than upd v.3);
VMware ESXi 6 (it will probably work with v5.5) Essential Kit or higher (more extended license). Free (ESXi Freeware) version blocks the ability to create VM backups.
As of the first half of 2016, the cost of licenses under the above scheme will be within 45 thousand rubles. (ESXi Essential Kit x 3 servers)+ 10 t. rub. on Windows 7 (8)
.
Regarding ESXi, you can separately note that the Essential Kit license will allow you to access the functioning of the mechanism for backing up entire copies of virtual machines. If there is a financial opportunity to expand the license, say to Enterprise, partial copy mode will open for use (incremental scheme and a number of other useful and interesting options).
This mode is of course even more optimal, if you do not look at the final estimate. Moreover, if there are funds for full corporate packages of VMware ESXi, then apparently we can already talk about purchasing a full commercial version for Veeam Backup & Replication, which will open the way to using all the options of this software, including the scheduler. It is easy to see that this option makes you think about the advisability of using the backup technique described in the article and, obviously, is given for general orientation on the topic.
If you don’t have extra finances for extended licenses, then I suppose the use of the bundle described in the article looks more than optimal and budgetary.
This concludes the first part of the article on backing up virtual machines from the VMware ESXi 6 hypervisor to the Veeam Backup & Replication v8 server storage. The second part will look at setting up a backup server to work with virtual machines based on Hyper-V.
Many businesses, as well as home users, are increasingly using virtual machines to perform various tasks and increase the efficiency of their activities. While previously virtual machines were mainly used by enthusiasts, now the quality of desktop and server virtualization platforms has allowed them to be used by professionals on a large scale. The ability to run multiple virtual systems on a single physical computer has many benefits, including savings on hardware, easier maintenance, and reduced energy costs in large data centers. In addition, an important advantage of virtual machines is their easy portability to another physical platform and a simple procedure for backing them up. But just like conventional operating systems, virtual environments require high attention to backing up critical data. When running virtual machines in an enterprise production environment, many companies plan entire strategies for backing up and restoring virtual infrastructure after failures, which are called Disaster Recovery.
Many commercial virtualization platform vendors offer enterprise users built-in virtual machine backups, such as VMware Consolidated Backup (VCB) for the ESX Server platform. However, in the SMB (Small and Medium Business) sector, where the number of used virtual machines is small, there are practically no backup tools provided by the platform manufacturer. As a result, small companies have to involve system administrators to write various scripts, as well as use standard operating system utilities that provide archiving and restoring files and folders with vital data.
General information about data backup
Simultaneously with the virtual infrastructure planning process, you must also initiate the process to develop a backup and disaster recovery plan (Disaster Recovery Plan). First of all, it is necessary to highlight the most critical elements of the IT infrastructure that are potentially susceptible to damage from internal and external sources, such as power outages, hard drive failures, virus threats, and others. After that, it is necessary to consider the frequency of backup of virtual machines of various categories, depending on the degree of criticality. The company's virtual production servers, which operate in full public availability mode, should be backed up quite often and regularly and have the ability to recover quickly in the event of a failure. Internal servers in an organization that do not require as much attention and quick recovery can be backed up less often, with a longer recovery time. Next, you need to determine which storage devices will be used for archiving (IDE or SCSI drives from other servers, SAN devices, etc.).
When choosing a backup frequency, keep in mind that some types of backups have the property of fast backups, but slower restores. Conversely, it is possible to perform a longer backup with a shorter recovery time. The following are the main types of data backup that can also be applied to virtual machines:
- Normal (full) archiving (full backup)
This type of archiving creates a complete copy of all stored data. The process of creating such a backup is quite lengthy, but it does not take much time to restore, since there are no multiple restore tasks required. A full backup resets the file and folder backup markers that are used to determine which files to back up. These markers are used to check the status of files during incremental and differential backups. - Incremental backup
This type of backup involves copying files and folders that have changed since the last backup. Therefore, if you perform two incremental backups in succession and do not modify the file in between, it will not be added to the recovery image. - Differential backup
This backup includes all changes that have occurred to files and folders since the last full backup. Accordingly, with two consecutive differential backups, a file that has not changed between them, but has changed since the last full backup, will be archived both times.
In order to explain how these types of archiving differ, we will give an example of combining types of backup. When using full and incremental backups, the backup time is significantly reduced, but the recovery time is increased. For example, if we did a full backup on Monday and rolled incremental backups daily, and the system was damaged on Friday, we will need to restore the full backup on Monday and sequentially all incremental backups until Friday, which will take a very long time. Combining full and differential activation, on the contrary, requires more time for archiving, but less for restoration, since it will be necessary to restore only the full backup copy of Monday's data and roll Friday's differential archive onto it.
These, of course, are not all types of archiving that can be used when backing up data, however, the listed types are among the most commonly used. It is obvious that for servers with high recovery time criticality it is more reasonable to use differential backup in combination with full backup rather than incremental backup. The first is suitable for external servers of the organization, the second - for internal ones, which are allowed more downtime.
Since, basically, a virtual machine is a folder with files, you can use the built-in backup tools of the host operating system if you use a virtualization platform on top of the host system, such as, for example, Microsoft Virtual Server or VMware Server. In Microsoft Windows, you can use the utility for this purpose. ntbackup. When using bare-metal (bare metal) platforms, such as ESX Server or Virtual Iron, you need to use the tools of the virtualization system manufacturer or third-party products.
In addition, virtual machines can be backed up by creating guest system images using software such as Acronis True Image. It is also worth noting that there are situations when it is necessary to back up not the entire virtual machine, but some data in the guest system. In this case, when writing batch backup scripts, you can use utilities to mount virtual disks on the host system. For VMware platforms, this utility is the VMware Disk Mount application.
Backing up and restoring virtual machines on the VMware ESX Server platform
VMware's pilot product, the ESX Server platform, is a key element of virtual infrastructure in an enterprise's production environment. Virtual Infrastructure VI3 (Virtual Infrastructure 3) is a set of products and tools that allow a fleet of virtual machines to efficiently perform their tasks and function smoothly in various conditions, including such force majeure factors as sudden load spikes, power outages and equipment damage. One of the most important tools for implementing a Disaster Recovery strategy is the VMware Consolidated Backup (VCB) backup tool. VCB can be used to create backups of individual ESX servers, as well as in conjunction with the VMware Virtual Center virtual server fleet management tool. VCB provides the following features:
- creation of backup copies of virtual machines with various types of archiving using a special VCB Proxy Host proxy server, which removes the burden of creating backups from the production server of the company where the virtual machines are running
- does not require installation of additional agents on ESX servers
- provides ample opportunities for integration with third-party backup products, support for various packages is already built into VCB
- supports file-level archiving for Windows guests (you can create archive copies of individual files and folders inside the guest system), as well as archiving at the level of virtual machine images for any guest OS
Creating backup copies of virtual machines using VCB occurs by creating instant snapshots of virtual machines without stopping their work. VCB also supports SANs. If the virtual machines are located on a SAN storage device, the backup procedure is as follows: 
Snapshots of virtual machine states created during operation using an agent located on the VCB proxy server are stored on backup media, from where they can then be restored in the event of a failure of the running guest system or equipment damage. In this case, the backup agent has direct access to the LUNs (Logical Unit Number) in the SAN devices. For SANs, VCBs support the Fiber Channel protocol as well as tape media for archiving. VCB closely uses the capabilities of VMware Tools running inside the guest system to back up guest OS data.
VMware Consolidated Backup currently supports the following packages (the list includes only officially tested software with the ESX Server product):
- Symantec Backup Exec 10.0
- Symantec Backup Exec 10d
- Veritas Netbackup 5.0
- Veritas Netbackup 5.0 MP4
- Veritas Netbackup 5.1
- Veritas Netbackup 5.1 MP2
- Veritas Netbackup 5.1 MP3
- Veritas Netbackup 6.0
- Tivoli Storage Manager v5.2.1
- Tivoli Storage Manager v 5.2.3
- Tivoli Storage Manager v5.3
- EMC Networker v7.0
- EMC Networker v 7.1.x
- EMC Networker v7.2
- EMC Networker v 7.3
- CA BrightStor ARCServe r11
- CA BrightStor ARCServe r11.1
- CA BrightStor ARCServe r11.5
- Commvault Galaxy 5.9
- Commvault Galaxy 6.1
The work of creating archive copies of virtual machines in the general case can be represented as follows:
- The backup software runs a backup preparation script that performs the following tasks:
- makes sure that read-write operations do not occur inside the guest system on saved folders and files (Windows guest OS only)
- switches the virtual machine to "snapshot" mode, creates a snapshot of the state of the virtual machine and makes it available to the application using VCB
- mounts a snapshot of the virtual machine from the SAN to the proxy server
- A virtual machine snapshot is backed up at the image level, or at the level of files and folders of the guest system (full, differential, or incremental backup).
- The backup software calls a post-backup script that completes the backup (dismounts snapshots of virtual machines from the proxy server and brings the virtual machine out of snapshot mode).
The VCB tools use the following virtual infrastructure components in the backup process: 
In summary, VMware Consolidated Backup is a powerful tool for creating backups of virtual machines and allows you to use standard backup software used in an organization to create archive copies of data.
Backup with Vizioncore esxRanger
The esxRanger product from Vizioncore, now controlled by Quest Software, is currently one of the most popular solutions for creating archival copies of virtual machines on the ESX Server platform. esxRanger does not require any additional agents to be installed on ESX servers and creates archive copies of virtual machines from one server or a group of servers through integration with the Virtual Center product. The process of creating backups takes place on a single Windows server, from where archive images of virtual systems can be stored on various storage devices in the organization's production environment.
esxRanger has both a GUI and a command line interface, which allows you to use the regular Windows Task Scheduler to run scheduled backup jobs, eliminating the need to write additional scripts. The main window of the esxRanger product is shown below: 
By connecting to VMware Virtual Center, with the appropriate permissions, you can select individual data center server virtual machines for backup. The copied images are automatically compressed when archived and decompressed when restored, saving time for system administrators.
esxRanger integrates with VMware Consolidated Backup when used in SANs and allows you to create full or differential copies of virtual machines, as well as individual files and folders in Windows guests. In addition, during the backup process, esxRanger collects various information about backup metrics (such as the time spent on backup and restore), stores it in a database, and allows you to use it to trend the Disaster Recovery strategy. In addition, esxRanger has a policy engine that allows you to build a data archiving strategy based on templates and integrate it with other components of the organization's IT infrastructure, minimizing the load on system administrators.
The backup procedure with esxRanger looks like this:
- A VM savepoint is created and stored in the database.
- Using the VMware API, virtual disk files are “unlocked” for reading (they are locked by default) and .REDO files are created that will store changes to virtual disks since the save point.
- Virtual disk files are compressed.
- The compressed files are backed up and the .REDO files are applied to the VMDK files of the virtual machines.
- After the changes are applied, the VMDK files are returned to their original locked state.
- The system administrator adds comments to archived copies of virtual machines that provide guidance in case the virtual machines fail.
All in all, esxRanger is a convenient, reliable and easy-to-use tool for creating virtual machine backups in Virtual Infrastructure 3, which integrates with VMware Consolidated Backup, which allows it to be used in SANs of companies of any size.
Backing up virtual machines on the Microsoft Virtual Server platform
Unfortunately, Microsoft, the owner and developer of the Virtual Server 2005 server virtualization product, does not provide users with the same powerful backup and recovery tool as VMware Consolidated Backup. At the moment, Microsoft is focusing mainly on the development of hypervisor-based virtualization support built into the next version of the Windows Server platform, codenamed Viridian. However, Microsoft is constantly postponing the date of the final release of Windows Virtualization, as well as cutting down on its announced features, so it's hard to say anything definite about the backup capabilities in the upcoming virtualization platform right now. With a fairly high probability, we can say that there will be built-in support for "live" archiving, but it is not clear yet in what form. Today, virtual machines in Virtual Server can be backed up in "two and a half ways", including:
- using standard operating system image backup tools that can be created by agents running inside guest systems, such as Symantec Backup Exec.
- writing specialized scripts that save the state of the virtual machine, copy its data to backup media and start the virtual machine again
- the use of volume shadow copy services (Volume Shadow Service, VSS), support for which has appeared in Virtual Server quite recently and is not yet supported by manufacturers of data backup systems
In order to back up running virtual machines on the Virtual Server platform, you can use its COM interface by writing a script, for example, using Visual Basic Scripting (vbs). When creating a backup copy of a virtual machine, you must first transfer it to the saved state (Saved State), then copy its files to the specified location and, after that, start it again. Below is an example of a vbs script that does these necessary steps to copy a single virtual machine. It can be scheduled to run using the standard Windows Task Scheduler. "backupvm.vbs" author: John Savill "usage: backupvm.vbs Option Explicit On Error Resume Next Dim objFSO, objVirtualServer, objVM, objSaveTask, objVHD" Connection with file system object set objFSO=CreateObject("Scripting.FileSystemObject")" Connecting to Virtual Server set objVirtualServer = CreateObject("VirtualServer.Application")" Finding a virtual machine set objVM = objVirtualServer.FindVirtualMachine(WScript.Arguments(0))" Saving the state of the virtual machine set objSaveTask = objVM.Save" Pause to perform save operation while not objSaveTask.isComplete WScript.Sleep 1000 wend " Copying virtual disks and UNDO disks for each objVHD in objVM.HardDiskConnections If objFSO.FileExists(objVHD.HardDisk.file) Then "Wscript.Echo objVHD.HardDisk.file & " " & WScript.Arguments(1) objFSO.CopyFile objVHD.HardDisk.file, WScript.Arguments (1) End If If objFSO.FileExists(objVHD.undoHardDisk.file) Then "Wscript.Echo objVHD.undoHardDisk.file & " " & WScript.Arguments(1) objFSO.CopyFile objVHD.undoHardDisk.file, WScript.Arguments(1 ) End If Next" Copy vsv and vmc files objFSO.CopyFile objVM.File, WScript.Arguments(1) objFSO.CopyFile objVM.SavedStateFilePath, WScript.Arguments(1) " Starting the virtual machine objVM.Startup
This script must be used as follows:
C: emp>cscript backupvm.vbs
It should be noted that Microsoft does not officially support such a backup process, since the integrity of a virtual machine copied in a saved state may be compromised due to the fact that part of its memory is not saved in this case in the vsv and vhd files.
Using the Volume Shadow Service
Support for VSS services was introduced in the recent release of Virtual Server 2005 R2 SP1. Using Shadow Copy Services in Virtual Server involves creating backup copies of running virtual machines by creating images, which should greatly simplify and speed up the backup and restore procedure. However, it is not enough for backup software to support VSS, it also needs to support the new Virtual Server VSS Writer Service (VS Writer), support for which, at the moment, has not been found in any of the backup systems. According to Microsoft, backup tools can use VS Writer to back up and restore virtual machines in the following way: they notify Virtual Server that the backup process has begun, Virtual Server responds by creating a snapshot of the virtual machine, after which the copy process begins. At the moment, the NTBackup utility also does not support this mechanism.
Backing Up Xen Virtual Machines
XenSource, which maintains the Xen open-source project and distributes the XenEnterprise commercial virtualization platform, offers few options for archiving virtual machines on the Xen platform. One of them is shown below using NFS (Network File System) storage devices.
Initial information:
- XenServer host (in the example of the backup procedure, its IP is 192.168.1.10)
- The computer used as the backup storage server (in the example, its IP is 192.168.1.1)
- XenVM virtual machine (in the example, its IP is 192.168.1.12)
Backup procedure:
- Install the NFS server by adding the following line to the /etc/exports file:
/ *(rw,sync,no_root_squash) - On the XenServer host, add the following to the /etc/xen/xmexample1 file:
kernel /boot/xenkernel
name="ExampleDomain"root=/dev/nfs
nfs_server = "192.168.1.1"
nfs_root="/ip=192.168.1.10:192.168.1.1:192.168.1.1:255.255.255.0:::" - Save a copy of the /etc/fstab file and add the following lines to it:
192.168.1.1:rootdevice / nfs rw,hard,intr 1 1
192.168.1.1:swapdevice swap swap defaults 0 0
192.168.1.1:usrpartition /usr nfs rw,hard,intr 1 1
192.168.1.1:varpartition /var nfs rw,hard,intr 1 1
none /dev/pts devpts gid=5,mode=620 0 0
none /proc proc defaults 0 0 - Copy /lib/modules/2.6.16.29-xen from the XenServer host to the backup device
- Run the following command on the archive copy server:
#scp 192.168.1.10:/lib/modules/2.2.16.29-xen /lib/modules/ - To activate the console using udev, run the following commands on the backup server:
mkdir /tmp/dev
mount --move /dev /tmp/dev
sbin/MAKEDEV null console zero
mount --move /tmp/dev /dev - Run the following command to mount the backup device on the Xen host:
#xm create -c xmexample1 - Make a backup copy of the xenstore-ls file and copy the contents of the file system (excluding the /proc and /sys directories) to another folder:
#rsync -a -e ssh --exclude="/proc/*" --exclude="/sys/*" 192.168.1.10:/ /backupdir
Conclusion
Drawing up and implementing a plan for backup and recovery after failures (Disaster Recover Plan) of the most important servers and workstations of the organization is a necessary part of its activities. Virtual machines, even larger than physical ones, require a high level of attention to data archiving, since usually several virtual systems are consolidated on a single physical host. Leading virtualization platform vendors are striving to provide powerful and easy-to-use backup tools, but so far only VMware has succeeded. A backup strategy can be implemented in two ways: one of the easiest ways is to do it as part of a standard backup strategy for a company's IT infrastructure, by installing backup agents and imaging in guests. Another, more convenient and faster way is to use built-in platform tools such as VMware Consolidated Backup or scripting by system administrators. In any case, it must never be forgotten that equipment failure or other force majeure should not significantly affect the company's critical business.