The Asus rt-n12 router is a fairly popular budget router that has successfully implemented all the necessary home network functions. The device is a portable WiFi access point with a data exchange rate of up to 150 Mbit, while the device supports the widespread 802.11n communication standard with an operating frequency of 2.4 GHz and is equipped with 4 LAN ports for "hard" connection of local computers.
Router Asus rt-n12: indicators and connectors
There are seven LED indicators on the front of the router:
 1 - power indicator (Power);
- - off - power is not connected;
- - lights up with a steady green light - the system can be used;
- - flashes quickly - process.
2 - indicator of the state of the wireless network WiFi;
- - "off" - no power supply (or the network is disconnected);
- - solid green light - the system is ready to exchange data via a wireless channel;
- - blinking - data transmission is in progress (wireless network).
3 - indicator of connection to the Internet (WAN);
- - "off" - the Internet from the provider "to the router" does not come (possibly, there were problems "on the line" or the service was suspended for non-payment);
- - steady light - active internet connection;
4 - LAN connection indicators (LAN ports 1-4);
- - "off" - network cable not connected (or no electricity);
- - lit — the corresponding port is busy with active connection of external devices to the network via an Ethernet cable;
- - blinking - data is being transmitted (via cable).
The rear panel is equipped with several RJ 45 connectors and switches:

- - one separately located WAN port (for connecting an Ethernet cable);
- - connectors LAN1-LAN4 (connection of network devices);
- - one round connector for connecting a power adapter;
- - standard power button;
- - WPS button for quick authorization in the home network;
- - button to reset the router settings to factory settings (hold for 7 seconds);
How to connect a Wi-Fi router asus rt - n12
It is quite simple to install and configure the connection of the asus rt n12 router yourself:
- - connect the plug of the power adapter to the DC In jack located on the back of the router;
- - connect the power supply to the 220 V power supply;
- - for the initial setup, use the "hard" connection of the asus access point wireless router to a computer via an Ethernet cable (to avoid wireless interference);
- - connect the Internet cable provided by the provider to the WAN socket of the asus rt n12 router (if you need to connect this port to the LAN connector of the modem);
- - Connect the LAN port of the router to the network card connector of the "classic" computer using an Ethernet cable from the "basic" set of the router;
- - if you have a TV set-top box, also connect it to the LAN connector of the router;
- - turn on the power button.
This completes the installation and connection of the asus rt n 12 Wi-Fi router - the device is completely ready for use. Step by step setup the modem is carried out through the built-in web interface of the device, which can be accessed through any Internet browser installed on the computer.
To enter the router settings in the address bar, enter the combination of numbers 192.168.1.1 and enter the authentication data in the window that opens.
 By default, the login and password are "admin / admin".
If the router was previously in operation, you should first reset the asus rt n 12 router to factory settings according to the instructions in the final part of this article.
Configuring an asus wirelessroute rt n12 router for rostelecom
To set up wifi asus router rt n 12 to connect to the Internet through providers such as Rostelecom and Dom ru, go to the router settings, find the "Additional settings" tab and select "WAN" here.

In the upper part of the window, set the following Internet connection settings:
- - WAN type — select PPPoE from the drop-down list of connections;
Most of Rostelecom subscribers use PPPoE internet connection. However, with self-configuration the router is still recommended to clarify your type of Internet connection: this information can be found in the agreement with the provider or by phone in the technical support of your Internet service provider.
- - port selection for IPTV settings STB depends on which port you connected the set-top box to, but by default it is recommended to use the LAN4 connector;
- - enable UPnP - mark the option "Yes" with a marker;
- - get WAN IP address automatically - choose "Yes";
- - enable PPPoE relaying - it is recommended to set the option "no" from the list.
- - in the fields for username and password, enter the data received from the operator "Rostelecom" to connect to the Internet.

Setting up an asus rt n12 router for beeline and mts
In general, the instructions for setting up an asus rt n12 router for mts, beeline and other "mobile" providers are similar to setting up a router for Rostelecom.
Here, in the "WAN" - "Internet Connection" tab, set the following values:
- - type of WAN connection - set the L2TP item;
- - enable UPnP - set the marker to "Yes";
- - get WAN IP address automatically - mark "Yes";
- - connect to the DNS server automatically - select the "Yes" option;
- - L2TP server (VPN) - for beeline, type in this address tp.internet.beeline.ru.
"Username" and "password" in this case are issued to the subscriber by the service provider "Beeline". Enter them. The rest of the parameters do not need to be changed - feel free to click the "Apply" button.
However, when setting up a router for MTS, there are certain subtleties.
In the WAN connection selection tab, you need to set auto mode connections. Login and password must be entered in the appropriate tab "Account and connection settings" - you get them directly from the operator.
How to set up wifi on an asus rt n12 router?
WiFi setting on the asus rt n12 router is carried out in the tab “ Wireless network", Where you need to set the following parameters:


Configuring an asus rt n12 router for viewing IPTV consists of the following steps:
- - select the "local network" tab in the menu;
- - further IPTV;
- - enable multicast routing - mark the "Enable" option with a marker;
- - enable IGMP Snooping - set the marker to “Enable”.

Leave the rest of the items unchanged and click the "Apply" button to save the new settings.
asus rt - n12 vpn server setup
Go to the router control menu and step by step follow the instructions below:

Set any IP address in the range from 192.168.10.2 to 192.168.10.254: asus rt -n12 router supports up to 10 clients at the same time. In the VPN Server tab, you must enter a username and password. Save your changes.  In the network map section, you can see the status of your VPN server, its IP address and connection status.
How to reset the settings of the asus rt n12 router?
Resetting custom settings to factory settings is straightforward: you need a regular needle or pin to do this. On the back of the router, locate the socket labeled "Reset". Press and hold for 10 seconds. The device has been reset. Release the button.
How to set password asus rt n12?


Connect to PC or laptop
Most people put a router in an apartment, and only then I start to think about how to set it up "over the air" -. Which is not particularly correct. For convenience, it is easier to configure the router by connecting it to the computer directly, and after setting it up, put it wherever it will be more convenient for you.
To make the connection, first turn on the router to the network, then insert the wire from the provider into a separate socket, the color of which is different from all the others (white, blue or other color, under this socket there should be an inscription in the form of an "e" with a rim). Take the wire that comes with the kit - patchcord, and connect it to one of the 4 "LAN" sockets, connect the other end of this wire to network card... It needs to be inserted where the wire from the provider was connected. This completes the connection of RT N12 D1 to the computer.
Reset router settings RT N12 D1
Before you start configuring your router, I advise p. Maybe you didn't get a new router, or after checking at the factory, the settings were forgotten to return to the standard state. To reset the settings, you need to press the Reset button, for this you need an object with which you can reach the button, for example, a match or a straightened paper clip. After pressing the button, hold it in this position for 10-12 seconds, or wait until all the lights on the front panel light up at the same time. And after that, wait until the router completely restarts.
Input setting on RT N12 D1
After the router is connected, you need. Login is performed as standard, as on all Asus routers. First, run. After that, write 192.168.1.1 in the address bar, login - admin, password - admin, and press Enter.
When you are finished logging in, you will see the quick settings page. For a better understanding of the process, it is better to do everything yourself. By clicking on the button, which looks like a "house", and is in upper corner on the right, you will be taken to the main page. For some firmwares, just click the Next button.

Setting up the Internet on the Asus RT N12 D1
First, set up your Internet connection. To do this, find a contract with your provider, which indicates the settings and type of connection. If for some reason you cannot see these settings in the contract, please contact technical support your ISP and ask them for these settings. After that, go to the "Internet" menu, located on the right side.

IP address, dynamic. Setting for Rostelecom, Volya, TDK-Ural, Kyivstar
This type of connection is the simplest. To configure it is enough: in the Type-WAN-connection field, select "Automatic IP". After that, be sure to put "Yes" in the "enable WAN" and "enable NAT" fields, you can also enable "UPnP" - so that there are no problems when working with file hosting services.
Some providers have a binding to a specific MAC address, in which case it is worth specifying it. This address most likely belongs to the computer that was previously connected to the Internet. If you are configuring on the same computer, just click on the "Clone MAC" button, and then click the "Accept" button.

Setting up PPPoE connections for Rostelecom, TTK and Dom.ru
First, select the WAN connection type - "PPPoE", also enable WAN, NAT and UPnP by putting dots in the "Yes" field. The main thing is, in the account settings, in the "Username" field, indicate your login, which you looked at in your agreement or learned from the support service. And in the field "Password" - in the same way, enter the desired value assigned to the login, provided by the contract.
Similar to the Dynamic IP settings, some ISPs bind to the "MAC" address. When setting up on a computer that was previously connected to the Internet, just use the "Copy MAC" button. If you are using a different device, please enter this address manually. When you have finished entering all the settings, click the "Apply" button.

Configuring RT N12 D1 with L2TP connection type and Beeline provider
To configure, if your provider is Beeline, you need to select the type of L2TP connection. Then enable WAN, NAT and UPnP. The username, in this situation, is the contract number, this is the same number to which you pay for the Internet. Password - identical with the password from personal account... In the "VPN connection" point, specify - tp.internet.beeline.ru. At the end, it remains to click "Apply".

IPTV, setting up Asus RT N12 D1
IPTV settings in this router are incomplete due to new firmware... You can select the port through which the signal will be received. If your ISP requires you to specify a "VLAN ID", I will disappoint you, because this router does not have this, and therefore it does not suit you.
In order to select a port, go to the item " The local network". At this point, in the "Select IPTV-STB port" field, you will need to select the port to which you will subsequently connect the iptv set-top box. At the end, click the "Apply" button.

Customization Wi-Fi Asus RT N12 D1
For Wi-Fi settings on this router model, you need to go to the "Wireless network" tab. In this tab, select "General" and fill in some information there. SSDI - the name of your network, you can enter any name in the Latin alphabet. "Authentication Method" - selects only WPA2-Personal, "WPA Preshared Key" - this, specify whatever you want, but not less than 8 characters and click "Accept".
When you are finished entering any settings, restart your router. The button for this is located at the very top of the interface. The whole reboot procedure will take about 2-3 minutes. After that, the setup of the Asus RT N12 D1 is completely finished.

That's all. I have created a small manual for setting up asus rt n12. Setting it up isn't as difficult as it sounds, you just need to set aside a few minutes of your personal time. And then, after all the actions done, you can fully use the purchased router. Hope this information helps you in setting up asus rt n12.
ASUS RT-N12 is a very popular device that belongs to the budget options. It contains all the necessary characteristics for the successful work of ordinary home, social or working network... The device is a portable Wi-Fi access point, which has a data transfer rate of up to 150 megabits per second (possible Internet speed). Working frequency of this device is 2.4 GHz. According to the standard, it has 4 network (normal cable) ports, these are standard characteristics for the ASUS RT router, which are needed for direct connection to a desktop computer.
Overview of all bulbs and connectors
The front part contains 7 indicators that will give you an idea of the state of the device at this moment.
Number 1 we have marked the most important LED indicator. This is a power indicator. The indicator can have several configurations:
- The light is off. This means that there is no power, or the device is simply turned off.
- The light flashes with great amplitude. This means that the router is just starting up.
- The light flashes with a small amplitude, quickly. This means that automation is taking place.
- The light is on without flashing. This means that the system is loaded and can be used.
Number 2 we have designated an indicator that determines states Wi-Fi router ASUS RT N12 D1 at the moment. It has three configurations:
1. The light is off. No power or wireless mode may be disabled.
2. The light flashes. This means that information is being transmitted.
3. The light just burns. The device is ready to transfer data, but no packet exchange is currently taking place.
Number 3 we have marked the indicator that determines the connection of the router to the Internet. Only two configurations:
1. Off - there is no Internet. This may be due to non-payment, due to communication problems, due to disconnection from the Internet in equipment installations.
2. Lights up - everything should work properly.
By numbers 4-7 Indicates the status indicators of the local ports. Each has three configurations:
1. Off - the cord is disconnected.
2. Light flashing - communication is in progress.
3. The light is just on - this is a sign that the port is busy with the cable connecting the PC to the network.
The rear panel contains connectors and switches. There are no indicators on it.

1. WPS button (starting from the right side of the side), which is used for quick access to the network.
2. WAN port, it is designed to connect the internet cable to the router.
3. Four network ports, which are needed to directly connect the PC to the router via cables.
4. Micro connector for power cord.
5. On and off key.
6. Key for resetting settings. It is inside the hole, hold it for seven seconds to reset to factory settings. Factory default is standard password and login.
How to install a router
Installing a router is not tricky and does not take much time. Connecting and configuring takes longer. First, it is worth checking the presence of all components, so that the installation is correct:
· The router itself.
· Power Supply.
· Internet cable, which must be provided by the company or provider.
· For the first installation, you need to use a local (direct) internet connection so that there is no interference.

Once you have found everything you need, you can proceed with a fairly simple installation. First you need to figure out how to connect the Internet to the router using an Internet cable. We designated the connector for this cable with number 2. After that, you need to connect using a network LAN cable. All that remains is to connect the router to the power supply by inserting one end of the power cord into the 220-watt power grid, and the other side into the connector number 4. Then press the power button. We act in this order.
Install, as you can see, is not difficult. After these steps, the router should start starting up. This completes the installation of the router, further debugging is done using a specific page built into the router.
Setting up ASUS RT-N12
You need any browser to set up a router. Write "192.168.0.1" or "192.168.1.1" as the site address - without quotes.
Attention! The PC or laptop should be connected to the router, and not to the Internet cable.
After switching to the page, a window with data entry fields will appear.
 Here you need to register the user name and password. When the router is just purchased, the default login and password are the same - “admin”. After full debugging, it is recommended to change both username and password to exclude the possibility of hacking.
There are times when the router has already been operated before, then the name and password sometimes differ from the standard ones. In order to fix the ASUS RT N12 device, the firmware is returned to its original state. To do this, you need to hold down the key, which was designated above as number 6. You need to clamp it with some thin object, the easiest way is with a paper clip. Hold the key for 7 seconds. After that, all changed router settings will return to their initial state.
If these manipulations do not help, the router does not return to the standard settings, then the setting should be performed by a specialist whose range of work includes the ASUS RT N12 firmware. You can cope with this task yourself, but the firmware of the router is not a standard situation for regular user... It is much more difficult to reflash a router.
Internet connection with full setup
In order to connect the Internet to the router, on the opened site you need to go to the router settings. Then - "additional settings". We select the "WAN" item we need (this is an Internet connection setting).

In the main settings, you need to set the following data:
· Type of WAN connection - choose here PPPoE (the most popular) or L2TP for Beeline (check with your provider).
· Enable WAN - our choice is "yes".
· Enable NAT - our choice is "yes".
· Enable UPnP - our choice is "yes".
In the next window, under the name of setting the WAN IP address, opposite the line "Obtain WAN IP address automatically" we need to mark the answer - "yes".
Configuring DNS WAN, similar to the points that went before, opposite to "Connect to DNS server automatically" you need to put the option - "yes".
In the username field, as you might have guessed, you need to register your number or login, which is provided by the Internet provider to log into the Internet.
The password is identical.
Some fields are allowed to be skipped. In the VPN server, enter the one provided by your Internet provider. If you are configuring the ASUS RT N12 router for beeline, then this is “tp.internet.beeline.ru”, you do not need to mark anything for Rostelecom.
After all this procedure, click on the "Apply" button. This completes the setting of the Internet itself on the router.
Internet connection using quick setup
The ASUS RT N12's quick setup can dramatically reduce the time it takes to full customization router. On home page press the "Go" or "Go" button of the router.
The router will then automatically detect your connection type. Although he himself will determine the necessary parameters, the login and password for the Internet will still need to be registered with the knobs in the WiFi settings.
Configuring Wireless Mode
Setting up ASUS RT N12 in wi-fi mode is quite simple thanks to the “quick setup”. The final stage quick setup- debugging of the wireless network parameters. Here you can set the SSID and network key or password.
They also perform the setting in manual mode... Here we go to the "Wireless network" window, we only need to set a few parameters. Among them:
· “SSID” is the name to detect your ASUS RT N12 Wi-Fi router. Prescribe in Latin letters (English).
· The field "Authentication method" - here we must highlight WPA2-Personal, it will help to secure your Internet from unwanted users.
· "Pre-Shared WPA Key" - a key or password from your Wi-Fi. Enter when connected to Wi-Fi. The key must be at least eight characters long.
Now you can save your settings. Now setup WiFi router ASUS RT N12 is absolutely complete. You can connect all the devices that are in the apartment and use Wi-Fi even on a washing machine.
Small addition
How do I perform port forwarding? Let's talk about how to open ports on the ASUS RT N12 C1 router, here the setup is quick. Since this is just an add-on, the instructions will be very concise. We act according to the following scheme:
192.168.1.1 (address) -> Local network tab -> DHCP server window -> Enable manual assignment field - "Yes" -> MAC address (here you need to select required computer, which will be assigned a static address) -> Select and apply (after you have selected the desired PC).
If that doesn't work, then check your antivirus and firewall software.
Related Videos
Fast Internet for you!
Today's talk will be about resetting the settings and password on the Asus router. The model line of the manufacturer is large, so I will try to show everything possible options reset to factory settings. Let's take the popular Asus RT-N12 router as a basic example.
What are the factory settings of the router?
Factory settings, or it is also called "default", is the state in which the router was when you took it out of the box for the first time. Some primary parameters are already set in it - for example, the address, data for entering the cabinet, the standard name of the network, and some others.
In the process of using it, during, you change them to your own, depending on the type of Internet connection and the necessary functions for the operation.
But over time, you can move to another apartment, change the provider. And in order not to bathe for a long time with detailed changes in its configurations, it is easier to reset the Asus router to factory settings in order to install everything from scratch for a new connection.
How do I reset my ASUS router to factory settings?
In general, I note that resetting the router to the factory settings solves a lot of glitches that appeared during operation. And what if the Internet does not work, WiFi is not distributed, the device is buggy and in general there is all sorts of nonsense that was not there from the very beginning of operation. In 90% of cases, it is treated full dump router.
ATTENTION! After the reset, you will need an Asus router. All previous data will be erased!
How to reset Asus router to factory settings with the button?
First of all, you can return to the factory state with the "Reset" button on the rear edge. On the Asus RT-N12 router, it is carried out with a separate button, which is recessed into the case to protect it from accidental pressing. To activate the function, you need to take a paper clip and hold it for 10-15 seconds.
But on some models, the reset button is combined with. it automatic connection to the router of other devices. So, for example, it was done in Asus RT-N11P. Then the return to the factory settings is carried out by long pressing on it until the LEDs flash.

By the way, this option is also suitable for resetting the password on an Asus router. If you do not know it or have forgotten it and cannot log in under account administrator in the device control panel. How without this cardinal method, we wrote separately.
Software reset on the Asus router
The second way to reset the Asus RT-N12 settings is from the control panel, which is located at 192.168.1.1. Read more about that also in another publication.
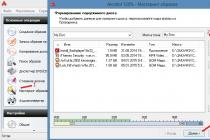
Here we need to go to the "Administration" section, the "Settings Management" tab.
Well, to reset the parameters, click on the "Factory settings" button and wait.

On earlier Asus models with old version personal account, the reset function is located in the same section "Administration". The difference is purely in the external design of the interface

That's all - I note that this manual will also be relevant for devices from other companies. Well, for completeness, you can also
Hello! Continuing the topic of routers. To be more precise, today I will tell you how and why they reset the settings to the default values. Our portal will most likely have instructions for routers different manufacturers... And I chose to reset the settings on the Asus router.
If in the course of reading you have any questions, or want to add something, be sure to write in the comments!
Why is this needed?
The option "Reset to factory settings" is available on all routers, regardless of the brand and model. What is this feature for? There are three main points when it can come in handy:
- When you set up a Wi-Fi router, you changed the login and password for accessing the administrative panel. It was necessary to change some parameters, but it turned out that the authorization data had been safely forgotten, and the piece of paper with the records was lost. Then the reset to the standard settings will be relevant. But there is one thing - be prepared to configure the router again.
- If in the process of working in the web interface you saved incorrect parameters, RESET will also help here. After restoring factory settings, you can reconfigure the device.
- In some cases, resetting helps to remove some problems with the router.
And the most important thing. How do I restore factory settings? There are two options that work for all routers:
- Press the RESET button on the device itself;
- Use the web interface (of course, if you remember your username / password).
Now you can move on to the main question - how to reset the Wi-Fi settings of an Asus router?
Immediately I suggest watching a video on the topic:
Hardware method
The easiest option is to press the button on the back of the device. On Asus models RT N16 resetting the parameters to the factory settings is done by pressing and holding the RESET button on the back of the device for 5-7 minutes.

The method is suitable for most models of routers from this company. On some older devices, the reset button is named RESTORE.

There may be such an option - the button is not signed. Look for the one recessed into the panel. Usually, you need to use a paper clip or needle to press RESET.
What if the button performs two functions - reset and WPS (intended for simplified connection to Wi-Fi networks)? In this case, hold for at least 10 seconds.

Programmatic way
A more complex option, but you need to know it. I will tell you how to reset to factory settings via the admin panel using the Asus RT N12 as an example:
- We open any browser and fill in the IP of the router in the address bar (not in the search one!). We have it 192.168.1.1. In the authorization menu, write your login / password. If you did not change them to your own, then this word is admin in both fields.
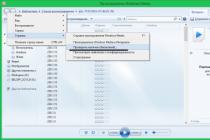
- In the "Additional settings" section, look for the "Administration" line. At the top, select the "Settings Management" tab.
- In the window that opens, we find "Factory settings" and press the button opposite "Restore".

- Now you need to confirm your intentions. In the confirmation window, click "Ok".
The router will reboot. The process takes a couple of minutes. Then you can re-enter admin panel and configure the router.
If the web interface is in English, you can reset the settings on the Asus router like this. We are looking for the "Administration" item, the "Restore / Save / Upload Setting" tab and click on "Restore".
Resetting the settings to Asus routers RT N10, N14, N18U, AC1200 and other models can be done as well - either with a button or through the control panel.

We are waiting for questions and comments. Be sure to write if something did not work out or if you need help setting up the router after restoring the factory settings. Bye everyone!