In this post we will walk through the router setup. D-Link DIR 300 NRU to work with the Beeline operator. It will tell you step by step what settings you need to pay attention to, how to configure L2TP and other important points.
It's worth starting with the firmware. The most latest version It is not necessary to install the software on your device, but the router will most likely not work stably with the old firmware. The newest firmware versions for D-Link DIR 300 are designated as 1.4.x - this article will consider the configuration Wi-Fi router D-Link DIR 300 for Beeline operator for this version.
The firmware from Beeline itself, which is offered to be installed on the provider's website, is not the best choice. It can be installed, however, and then reverting the standard version back is quite a difficult task.
PC connection
This point is quite simple - the Beeline Internet cable needs to be inserted into the "Internet" port, and then connect the PC to the router with an Ethernet cable. Now all that remains is to connect the D-link to the mains.
Attention: you do not need to start the Beeline connection. Otherwise, you will face a fairly common situation: everything works on the computer, but Wi-Fi does not distribute the Internet. Upon completion of the configuration, the router will itself establish the connection it needs, and after that it will "distribute" it to the rest of the devices. If you run it, then the router will not be able to establish a connection.

Checking the settings on the PC
Also, before starting the configuration, we recommend that you check the local connection.
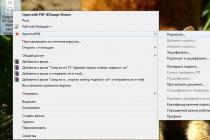
In Windows 7 and later, open the “Network and Sharing Center” general access”, In the appeared window select“ Change adapter parameters ”. Right click on the item with the name of your connection. Then click "Properties".
If you have Windows XP, then select the item network connections in the control panel, click on the icon local connection- "Properties".
Find "Internet Protocol Version 4 TCP / IPv4" in the list of components that the connection uses, select it, and click Properties.
IP address and Addresses DNS servers should be obtained automatically.

Accessing the settings
The main task is to get the router to connect to the Network instead of the PC. Beeline uses the L2TP protocol for connection.
Note: if you previously configured the DIR 300, but nothing came of it, then it is better to immediately return it to the factory default values: press and hold the Reset button for 10 seconds.
Now it's time to launch your browser and go to 192.168.0.1. Enter the standard values in the form there - admin / admin for the login and password, respectively.


L2TP configuration
Now we turn to the main thing - setting up L2TP connection parameters for Beeline. The fields must be filled in like this:

Click "Save". After that, you will be shown a page with connections: there should be a new connection. In addition, there will be an indicator at the top. It means that there have been certain changes in the settings and they need to be saved. Do it.
Now we need to set up Wi-Fi and set a password.
Wi-Fi setup
Go to the advanced settings page on the Wi-Fi page. There you will find the item "Basic settings". Fill in the fields there:
SSID - here you need to specify the networks in numbers and in Latin letters. It will be visible when connected.
Other items can be left alone. Click "Change"
- Network Authentication - WPA2-PSK
- The encryption key is the Wi-Fi password.
Click "Change"

Everything! Your DIR 300 router is now fully configured.
The D-Link device in question belongs to the segment of budget routers. Correct configuration of the router will allow Beeline subscribers to use the IPTV service on the DIR-300 and provide stable Wi-Fi coverage within a small apartment.
Information on technical characteristics and the capabilities of the device is presented in.
- The ISP cable connects to the WAN port signed as INTERNET;
- The computer is connected using a patch cord to the LAN 1 connector of the router;
- If you have a TV set-top box, it should be connected to the LAN port 4;
PC setup
After turning on the power, the DHCP server of the router will assign internal IP addresses to all devices connected to it. To get access from a computer to manage the router, you need to check if the settings are correct network adapter PC.
In Windows 7, 8 and 10, this is easiest to do by right-clicking on the connection icon in the taskbar.

The next step is to go to the parameters of the PC network adapter.

In the properties of an active connection, go to the TCP / IPv4 configuration.

The computer should receive the network configuration from the router automatically.

Login to the router interface
You can set up the router from a tablet connected via Wi-Fi, but it is better to do this from a computer, tk. mobile browser may display elements of the web interface incorrectly.
To access the administration panel of the router, you need to open the local IP address of the device in the browser.
Upon successful download home page web interface, an authorization request will be displayed.

Detailed information on establishing communication with the router is presented in a separate one.
Connection setup
The new firmware of the D-Link DIR-300 router provides for simplified configuration using the Click'n'Connect utility. But the Internet connection to the Beeline server is better done manually.
To do this, you need to switch to advanced mode and open the "Network - WAN" tab.


In a light air interface, the layout of the controls is different, but the options and menu items are named the same.


- Configuring the DIR-300 for BEELINE starts with choosing the Internet connection protocol: L2TP + Dynamic IP.
- Any name can be used as a connection name.

- Username - login 089 ******* and password for Internet access are specified in the contract.
- Server address through which Beeline provides its subscribers with access to the network: tp.internet.beeline.ru
- The "NAT" and "Firewall" options must be enabled;
- The "IGMP" option allows the router to process multicast traffic, so if the service is available Beeline IPTV, this checkbox must be checked.

After applying the settings, the router will notify you of the need to reboot, and upon its completion, the created connection will work.
IPTV setup
To implement IPTV services, Beeline uses untagged traffic. Configuring the router in this case is limited to the allocation of a port for the STB using the DIR-300 "Master" and there is no need to install a transparent bridge that works in parallel with the WAN.

Unlike the scenario of using the DIR-300 with TV box BEELINE, to watch TV on a computer, the rules for broadcasting virtual ports must be configured. This means that the router will begin to decapsulate multicast traffic and process data not at the data link, but at the network level.
Along with the processing of the L2TP Internet protocol, the routing of TV traffic will cause the DIR-300 processor to be loaded close to maximum, which will negatively affect the router's performance.
Wi-Fi setup
For WiFi settings on DIR-300 you can use the “Master wireless network". This method allows you to deploy a secure Wi-Fi network in a matter of seconds:
- Mode - Access Point;
- SSID - the name of the future WiFi network;
- Key - Password to access your home Wi-Fi.


Other ways to configure a wireless access point and recommendations for improving the quality of coverage and speed characteristics are presented in the detailed.
Firmware upgrade
Before configuring the Internet on the DIR-300, you need to download the latest firmware for the router from the D-Link FTP server and install it on the device. This is especially important when working in the Beeline network, since the provider connects subscribers using the L2TP protocol. When processing such traffic, the router processor is under heavy load, which leads to disconnections and hangs. WITH latest firmware the router will work with L2TP more stably.
Found a typo? Select the text and press Ctrl + Enter
Configuring the D-Link DIR-300 router is convenient and simple. To do this, you need to know the general rules for setting up D-Link routers and the features of the provider that provides you with an Internet connection. Let's consider how this router is configured for the Beeline network.
Initially, Beeline used these types of connection wireless internet like PPTP or PPoE. Currently, the L2TP type is used, which significantly reduces the load on the equipment. This has a positive effect on the work of the home Internet.
So, let's start configuring the D-Link DIR-300 router for Beeline. First of all, you need to ask correct settings network card. We need to set up automatic acquisition of an IP address. If your computer has operating system Windows XP, go to the "Start" menu, select "Control Panel" and look for the icon " Network connections". Right-click on it and click on "Properties". You will see a list in which you need to select "Internet Protocols TCP / IP".
Click on the "Properties" button and check which items are marked with a dot. We need to mark all phrases that end with the word "Automatically".

If you - windows user 7 , go to the "Start" menu, go to the "Control Panel", select "Network and Internet", and then - "Network and Sharing Center". In the left column we find the item "Changing adapter parameters". Click on it with the right mouse button and select "Properties". Double-click the item "Internet Protocols Version 4 (TCP / IPv4) and set the dots in front of the phrases that end with the word" Automatic ".
After we have made the settings, you can proceed directly to connecting the router. We plug the provider's cable into the "Internet" port, and the short wire into one of the four LAN ports. We install the other end of the wire into the computer's network card.
The next step is authorization. We launch any Internet browser on our computer and write the router's IP address in the address bar. The default is 192.168.0.1. An authorization window appears. In the fields "Username" and "Password" write "admin" and "admin", then click "Login".


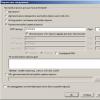
A new window will open in which you need to select the "WAN" item. By clicking on the "Add" button, you will be taken to the page for creating a new connection.

There you will need to enter the data required to set up the Beeline connection.
In the drop-down list "Connection type" select the option "L2TP + Dynamic IP". As mentioned above, it is L2TP that Beeline is currently using.

Then we fill in the fields "Username" and "Password". There you need to enter the data received from the provider. Usually they are indicated in the Internet connection agreement. If you have lost a copy of the contract, call the service technical support company Beeline and specify your data.
And finally, in the “VPN server address” column, enter “tp.internet.beeline.ru”. Then we press the "Change" button to save the new Internet connection settings.

The next step is setting up wi-fi. We return to the "Advanced settings" menu and in the "Wi-Fi" section we find the "Basic settings" item. In the "SSID" field, you must enter the name of the new network. You can choose any name you like. Enter the name and click the "Change" button.
In order to get into the web interface of the router, you need to open your Internet browser and type 192.168.0.1 in the address bar, User Name - admin , Password - leave this field blank(provided that the router has factory settings and its IP has not changed).
Changing the factory password
Default: Login admin, password empty.
MAINTENANCE, menu DEVICE ADMINISTRATION.
In field New Password Enter a new password.
In field Confirm Password repeat new password.
Then press the button Save Settings.
After that, the router will offer to re-enter its settings.

Setting up an Internet connection
In the router interface, select the tab at the top SETUP, in the list that opens, select INTERNET SETUP... Push the button Manual Internet Connection Setup

Configuring PPPoE connection
- In field My Internet Connection is: choose Russian PPPoE (Dual Access)
- User Name: Your login from the contract
- Password: Your password from the contract
- Confirm Password: password repeat
- Push the button Clone MAC Address
- MTU: 1472
- Connect mode select- connection setup mode Always-on for permanent connection
- Save the settings with the button Save Settings and wait for the router to reboot.

Configuring L2TP connection
- In field My Internet Connection is: choose Russian L2TP (Dual Access)
- Dynamic IP
- Push the button Clone MAC Address
- Server IP / Name- IP / Server name of the provider
- PPTP Account
- PPTP Password
- PPTP Confirm Password
- MTU value - 1400
- Connect mode select Always for permanent connection
- Save Settings

Configuring PPtP (VPN) when automatically obtaining a local IP address (DHCP)
- In field My Internet Connection is: choose Russia PPTP Dual Access
- Select a connection with dynamic address assignment by your ISP Dynamic IP
- Push the button Clone MAC Address
- Server IP / Name- IP / Server name of the provider
- PPTP Account- username for authorization in the provider's network
- PPTP Password- password for authorization in the provider's network
- PPTP Confirm Password- repeat the password for authorization in the provider's network
- MTU value - 1372
- Connect mode select- connection establishment mode. Please select Always for permanent connection
- Save the settings by pressing the key Save Settings

Configuring PPtP (VPN) with a static local IP address
- In field My Internet Connection is: choose Russia PPTP Dual Access
- We put a point opposite Static IP
- IP Address: We drive in your IP address under the contract
- Subnet Mask: We drive in the mask under the contract
- Gateway: We drive in the gateway under the contract
- DNS: We drive in the DNS of your provider (Rostelecom Omsk - 195.162.32.5)
- Server IP / Name: ppp.lan
- PPTP Account: Your login from the contract
- PPTP Password: Your password from the contract
- PPTP Confirm password: Your password from the contract
- Auto-reconnect: Always-on
- MTU: 1372
- Connect mode select- connection establishment mode. Please select Always for permanent connection
- Save the settings by pressing the key Save Settings.

NAT when automatically obtaining an IP address (DHCP)
- My Internet Connection is: choose Static IP
- Push the button Clone MAC Addres.
- Save the settings by pressing the key Save Settings.

Setting up Wi-Fi on the router
In the router interface, go to the tab Installation (SETUP), menu Wireless Setup... Button Manual Wireless Connection Setup.

- In chapter WI-FI PROTECTED SETUP from point Enable It is better to uncheck the box, since not all wireless adapters support Wi-Fi technology Protected Setup;
- Specify ID SSID Your wireless home network(tochka) in the field Wireless network Name(dlink by default)
- Select a wireless channel, any channel from the dropdown list Wireless Channel
- Select wireless security mode
- In the dropdown list Security Mode select Enable WPA / WPA2 Wireless Security (enhanced) is the most safe way protect your wireless network
- Cipher Type - TKIP
- PSK / EAP - PSK
- In field Network key You must enter any set of numbers from 8 to 63. They also need to be memorized so that you can specify them when connecting to the network
- Click on the button Save Settings to apply and save the settings

Checking Internet Connection Status

Saving / restoring router settings
After setting up, it is recommended to save them so that in case of problems, you can restore them. To do this, go to the tab Maintenance (MAINTENANCE), the Save and Restore menu.
- To save the current settings of the router, press the button Save(parameter Save Settings To Local Hard Drive). The settings file will be saved to the specified location on the hard disk.
- To restore the settings from the file, you must press the button Overview, specify the path to the file with settings, then click the button Upload Settings.
Attention! Pressing the button Restore device will restore factory settings!

Setup instructions D-Link DIR-300 / NRU for the Beeline network, we continue a series of guides on self- Wi-Fi setup routers.
Please note that Beeline itself recommends using the D-link DIR-300 / NRU router only with special proprietary firmware, which can be obtained from the D-Link service center. This manual is written for those who do not have the ability or desire to update standard firmware router. From the experience of our masters, we can say with confidence: with these settings D-Link routers DIR-300 / NRU work quite stably, at least at the current moment (mid-April 2012).
To enter the web-interface of the router, go to your favorite browser at 192.168.0.1 , enter in the Username field the word admin, Leave the Password field blank and press Enter.
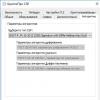
First, we check the firmware version. Our sample DIR-300 / NRU revision B5 was equipped with firmware 1.2.94 :
Open the section Network -> Connections... Click the button Add:

In the window that opens, specify the following settings (only those that need to be changed are written below):
Connection type: L2TP
PPTP / L2TP setup
How to set the service name: Url
Service name: tp.internet.beeline.ru
Without authorization: the jackdaw must be removed
PPP Username: your username like 0123456789
Password: usually matches the username
Encryption: No encryption
MTU: 1400
Miscellaneous
Enable RIP: the jackdaw must be removed
NAT: the jackdaw should be


Make sure the connection you just created is selected in the Default Gateway column. If so, click Save next to “Device configuration has been changed”. A notification about the successful saving of the settings should appear, after which the router will reboot.

Open the section Wi-Fi -> Basic Settings... Specify the name of the created Wi-Fi networks(or leave the standard "DIR-300"). Click the button Change.

Go to the section below - Security Settings... Recommended settings:
Network Authentication: WPA-PSK / WPA2-PSK mixed
Encryption key PSK: any password with a length of 8 characters (this is the password for connecting to Wi-Fi)
WPA encryption: TKIP + AES

Click the button Change at the bottom of the page.
Almost all. It remains to protect the router itself with a password. Open the section System -> Administrator Password and set your password to log into the web interface of the router. Remember to save your settings.

As a result, the router should connect to the Beeline network and distribute the Internet both via wire and Wi-Fi.
If you failed to configure the device, you can contact us for help and call the wizard for.