Now let's do the same operation using another popular program - Photoshop.
I have an old version installed on my computer - Adobe Photoshop CS2. And she suits me all. If you have a different version, it is possible that some aspects of working with the program will differ from those shown, but in general the algorithm will be the same.
Open the Adobe Photoshop program. Go in File - Open

and in the window that opens, select our template from the folder where it is located. Now our template has appeared in the program window:

Now we need to open a photo of our sailor. Go to the menu again File - Open and find our portrait on the computer. Our sailor appeared in the program window on top of our template.

I save all my templates at 300 dpi and 200 x 90 mm. Therefore, after opening the girl's photo, I fit her (photo) to the size of the template. Otherwise, the photo and template may differ greatly. To do this, go to the program menu Image - Image size ... and in the window that appears, I set the same resolution as the template, as well as a height that is approximately equal to the height of the template:

When resizing a photo, do not forget to check the box Maintain proportions.
Now we need to move our sailor to the template. First, we activate Move tool

then, by hovering over the photo and holding the left mouse button, you need to "drag" the sailor onto the template.
Some versions of Photoshop do not support direct drag and drop. In this case, we will act differently: on the tab with the sailor's photo, go Select all(our photo stood out) then Editing - Copy... Now go to the tab with the template (frame) and click Editing - Paste.
If such a window pops up, click Convert:

Now our photo is on top of the template and we can move it freely with the mouse. So that it is the sailor who moves, and not the template itself, in the window Layers the layer with the girl's photo should be activated (click on it and it will take on a dark blue color):

Move the photo closer to the frame cutout. Now we need to move it out of the frame so that it only shows through its cutout. For this in the window Layers by hovering over the layer with the sailor and holding the left mouse button down (drag) this layer down:

The layers changed places and our sailor "hid" out of the frame:

I would like to slightly increase the size of our photo. Making sure that the window Layers it is the layer with our photo that is active, go to the menu Editing - Free Transform:
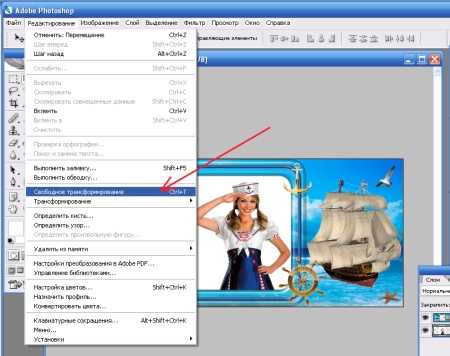
A frame appeared around the photo. While holding down the key Shift, using the cursor, you can reduce or increase the size of the photo by holding it at any of its corners:

After resizing and fitting the photo in the template window, click Enter and the frame around the photo will disappear. There is nothing left - save our template in the "mirror" for sublimation. Go to the menu Image - Rotate Canvas - Flip Canvas Horizontally:

Our template is ready!

Well, to consolidate, watch this video tutorial:
vYUDIdl4L6o
A large number of photo frames to choose from
We all enjoy trying different options. That is why Fotor offers you a variety of digital photo frames in different shapes and styles to help you update your images. From classic, shaded, simple ... to polaroid frames, whether you want to add photo frames to your family photos and customize them, or frame your photos to even out the texture of your images, Fotor gives you full support.
Easily elevate your photos with frames
Fotor is a free online photo editor that provides many free photo frames such as file frames, photo frames, retro picture frames, simple photo frames, lace frames ... Drag your photo or your design into the perfect digital photo frame, adjust frame color and change it to blue or other color beautiful photo frame. It will highlight your photo after a few clicks, no Photoshop skills required.
Get inspired and stimulate your unlimited potential
Photo frames are a unique photo effect and you can use a digital photo frame to add subtlety or contrast to your photo and improve its position. To fill the picture frame, Fotor online photo editor can give you some inspiration and create a beautiful perspective. You can adjust the outer size, inner size, round the corner of the picture in the Polaroid frame, and add a special perspective to the photo. This floral beautiful photo frame is perfect for your wedding photos. See what wonderful things you can create with square picture frames, vintage photo frames ... they all work for many occasions.
Do you want to know how to earn money consistently on the Internet from 500 rubles a day?
Download my free book
=>>
This article will tell you how to use the Paint program and how can you insert a photo into a frame using this program?
This program is usually included in the image of Windows 7 or newer developments of this popular OS. But the paint program, which is part of the standard set of Windows programs, is not very suitable for this operation.
Of course, you can whip up a photo with a frame and even insert an inscription. But this is more suitable for novice users.
For the more advanced, it is better to use other programs. To work with frames and photos, you need to either download and install the paint.net program on your computer.
There is little difference between the programs, but it usually has very few features. With such a program, you can open a photo of the downloaded frame, select the desired area and cut it out using the scissors tool.
Then copy the desired photo from your computer and paste it onto the cut-out area of the frame using the "paste from clipboard" function.
Often it is difficult for beginners to do this, since in a standard program you can insert text on a photo, do a little touch-up, resize photos and nothing more.
Although if you suffer for a long time, whatever happens. In such a program there are no layers, but in a similar program paint.net there are layers and for this reason it is much more convenient to work with photographs.
Step one - download frames for paint
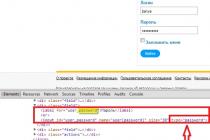
So, to insert a photo into a frame, you need to find this very frame on the Internet. Let's open any browser in the search bar and write, download the framework for paint.
Many sites will open where you can download frames on any topic. Next, download the frame you need to your computer. The frame must be in PNG format.
Why this format? It's just that images in this format do not contain a background, or rather, there is a background, but it is transparent. Or take a photo from your computer and carry out the necessary manipulations with it.
In paint.net, just like in the standard Paint program, you can upload a photo. Then, anywhere, select an area in the form of a square, oval or free-form and delete the selection.
Second action - open a new file in the program
Once you've stocked up on the frames you want, open up paint. In the upper left corner of the program we find the inscription "file", click on the word file and find in the drop-down window "open a new file or folder".
Click, and a standard loading window will open in front of you, where you need to find the downloaded frame, select it and at the very bottom of the loading window, click on the "open" button. After these simple actions, the frame of your choice will appear in the program.
Step three - importing a photo
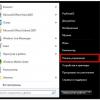
In the program we find the inscription "layers", click and find the tab "import from file". We find your photo and open the required photo. It will open on top of the frame, the next task is to place the photo outside the frame.

To do this, you need to click on the "layers" button in the program, in the window that opens, we find the image of an arrow pointing down. Click on this arrow, and your photo will be out of the frame.
Now you need to put a photo outside the frame, as you need. Although your photo is in the background, its outlines are highlighted with dotted lines.
Fourth action - photo and frame manipulation
Hovering over any corner of your photo with the mouse cursor, you will see a small image of a hand. Next, hold down Shift on the keyboard and simultaneously press the left mouse button. With the buttons pressed, start resizing your photo.

Such manipulations are needed in order not to lose their proportions. After resizing, release the "shift" button on the keyboard and hold down the left mouse button and move the photo to the desired location.
Step five - saving the photo in a frame
After you have merged the frame with the photo, you need to merge the layers. The easiest way is to click on the "save as" function, after clicking on such an inscription, a window will appear where you will be asked to combine the layers.
It is recommended to save the resulting photo with JPG or JPEG extension. Such extensions are optimal for saving photos, because when saving a photo with a different extension, you may not open it on your computer.
To do this, you will have to install additional programs with the desired extension. If you do not know what will happen to your operating system after installing such files, then it is better not to risk it.
If suddenly the photo does not want to move, it means that you have not activated the photo move function. The fix is very simple. You need to find the "tools" section on the left side of the program and click on the arrow symbol with a cross.
After that, your image can be moved in any direction. After the desired alignment, save the resulting photo to your computer. And we use the image at our discretion.
How to frame a photo in Paint, conclusion
Now you know how to frame a photo in Paint, but I would still recommend downloading a more convenient program for this. There are many such free programs now, and you have a choice.
For those who do not like downloading programs to a computer, I can suggest trying to use online Photoshop to insert a photo into a frame. How to use this service is described in one of my articles.
I wish you to create beautiful collages, no matter which program you use! Good luck to all.
P.S. I am attaching screenshots of my earnings in affiliate programs. And I remind you that everyone, even a beginner, can! The main thing is to do it correctly, which means to learn from those who are already earning money, that is, from professionals.
Do you want to know what mistakes beginners make?
99% of newbies make these mistakes and fail in business and making money on the Internet! Take a look so as not to repeat these mistakes - “3 + 1 BEGINNER ERRORS KILLING THE RESULT”.Do you urgently need money?
Download for free: “ TOP - 5 ways to make money on the Internet”. 5 best ways to make money on the Internet, which are guaranteed to bring you results from 1,000 rubles per day or more.Here is a ready-made solution for your business!
And for those who are used to taking ready-made solutions, there is "Project of ready-made solutions for the start of making money on the Internet"... Find out how to start your own business on the Internet, even the greenest newbie, without technical knowledge, and even without expertise.


An ordinary photo can be exquisitely decorated with the help of a colorful frame to your taste. Moreover, there are many different frames for photos on the Internet. But here many novice users are faced with a problem: they do not know how to insert a photo into a frame.
Today's article is a free Photoshop tutorial for beginners. In the process of getting acquainted with it, we will learn how to insert our photos into frames using the Adobe Photoshop program. If you have never worked in Photoshop - it does not matter, after reading this article, in the future you can easily insert your photos into frames - everything is very simple.
Popular photo frame formats are .psd and .png, a common feature of these image formats is that in images with these formats it is possible to make the background transparent. Just instead of this transparent background, a photograph is inserted.
In an image in .jpg format, the background will be white instead of a transparent background.
So, let's start inserting our photo into a beautiful Christmas frame in .psd format.
1. First, open Adobe Photoshop. Next, open the image of the selected frame ( File menu -> Open ...) or using the keyboard shortcut Ctrl + O:

In the center of the frame that opens, we see an area (indicated by white and gray squares) for inserting a photo.

The area of white and gray squares tells us that in this place there is a transparent background in the picture, it is indicated that way.
On the layers panel (on the right side of the program window), we see that the frame in .psd format consists of several layers - this is the peculiarity of images in the .psd format.

If desired, you can turn off unnecessary layers without redrawing the image again. You can play around a bit toggling layers off and on by clicking on the eye icon next to each layer.
2. We also open the photo that we are going to insert into the frame.

On the left on the toolbar, select the tool "Move"... Move the mouse pointer over the photo and hold down the left mouse button and drag the photo onto the window with a frame.
3. We see that the photo is overlaid on the frame and we need to lower it.

To do this, go to the layers panel. We see that another layer has been added to the frame layers. "Layer 1"- a layer with a photo.

In my case, it sits above all the layers in the frame. We need to move it under a certain layer so that the photo fits into the frame. To do this, click (select) the layer with the photo and hold down the left mouse button, alternately move the layer with the photo under each layer of the frame. In my case, I had to move the photo layer under all the layers of the frame to make the photo fit into the frame.

4. Now we need to fit the photo to the size of the frame, if the photo is larger than the frame, we reduce it; if less, like mine, then we increase it.

First, make sure that the layer with the photo is active (i.e. selected). After that, the keyboard shortcut Ctrl + T or through the menu ( Editing -> Free Transform) we call. After that, the following frame will appear around the photo:

Now enlarge, reduce or rotate the photo to fit the frame. To prevent your photo from being distorted and to maintain its proportions, hold down the key while changing the photo. Shift... If, when editing a photo, it goes beyond the frame, like mine, then there is nothing to worry about:

After the photo has been adjusted to the size of the frame, we double-click the left mouse button or press the key Enter... The editing frame around the photo will disappear:

5. Now we save our photo with a frame, for this we select the menu ( File -> Save As ...):

In the window that opens, enter the name of our made picture according to your desire, in my case "New Year's photography"... And choose the type of image .jpg... Choose a place to save the photo and press the button "Save".


Here in the field "Quality" put a number "eight"- high image quality. Usually the figure eight is enough to save the image in good quality.
This completes the insertion of the photo into the frame. We got this New Year's photo:

Now let's look at inserting a photo into a frame in .png format.
This method of inserting a photo into a frame is no different from the previous one. As I said, a .png frame can also have a transparent background.
1. In the same way, open the frame in .png format.

In the layers panel, we see that this frame has only one layer.

2. I deliberately chose a frame not for one photo, but for several, in order to show that inserting several photos or one is no different, but there are some nuances, which you can read about below.
We open the photo. We call "Free transformation" and adjust the photo to fit the first area for the framed photo.

We see that the photo goes beyond the area from below - it's okay, later we will cover this part with a third photo. The photo also extends beyond the area at the top and sides, but this is all hidden by the frame itself.
3. Add and adjust the second photo in the same way.

4. Now we just need to add and fit the last photo. The layer with the third photo should be higher than the layers with the previous two photos to hide them overlooking the insert area of the third photo.
5. I resized the photo, but still in one of the corners the photo is outside the area. We need to fix this. To do this, select the tool Rectangular Selection Margin and select the protruding part of the photo:

Press the key Delete and the bulging part of the photo is removed. To remove the selection, press the key combination Ctrl + D.
6. That's all. Now we repeat steps 5 and 6 from the previous example of inserting a photo into a frame to save our New Year's photo.
As a result, we got the following photo:

If you do not have Photoshop installed, then you can download the trial version from our website - Adobe Photoshop.
If you have any questions about working in Adobe Photoshop, then ask them in the comments, and perhaps in the next Photoshop tutorial we will consider exactly your question.
7 easy ways to create your own frames in Photoshop.
Greetings, dear reader of the site!
You don't need to know the program well to make a frame in Photoshop.
A minimal knowledge of Photoshop is enough.
So, we start from simple to more complex.
Method 1 – perform a stroke.
We open the image. Select either all or part of the image.
If you need to make a frame for the entire image, then it is best to use the CTRL + A keyboard shortcut, but if you need to select a part of the image, use the selection tools.
After the selection is ready, go to<Редактирование> –<выполнить обводку>
In the window that appears, select the thickness, color, location of the stroke - inside.


If the location of the stroke is selected - outside -, then the size of the image can be reduced using the command -Free transform - the keyboard shortcut CTRL + T, while holding down the Shift key to maintain the proportions.

Or, increase the canvas size to the required dimensions.

From the above it follows way 2:using an underlying layer:
The resulting empty space can be filled with any color, gradient or texture on a new layer.
In this case, the layer with the image must be above the color or texture layer.
If your layer with the image is a background, then it should be transferred to a regular layer by double-clicking on it and clicking OK in the window that appears.

Method 3. We use styles.
Create a new layer above the image layer and fill it with any style. Styles for every taste can be downloaded on the Internet.
Select, say, an oval area, clean it up by pressing the Del key.

In this case, the lower layer with the image can be moved, adjusting it to the resulting frame.
You can add text by applying a style to it as well.

Method 4: Using Blending Options - Layer Styles.
Create a new document, let's say 10 cm x 15 cm.
Fill the layer with the pattern you like.
Select the area, clean up the content - Del key
Remove selection, Ctrl + D.
Double click on the layer, or call the blending parameters by clicking on the icon:

Select the overlay parameters, let's say: shadow, embossing, stroke.

Place the image under the resulting layer.

Method 5. in photoshop.
Open the image and add a new layer.

On a new layer create a quick mask - the Q key.
Then free transform - reduce the size of the mask.
Go to Filter - Strokes - Airbrush.

Set the dimensions to your liking

Exit the quick mask: press the Q key again
Got a selection:

Invert the selection

Fill the selection (layer 1) with color or gradient.
Remove selection.

Method 6. Using bitmap shapes.
Open the image and unlock the background layer.

In the toolbar, select the bitmap shape that is more suitable for getting the frame. Figures can also be found on the Internet.
Select the desired fragment

Change the location of the layers, and by pressing the Alt key, move the mouse between the layers.
An icon will appear - click.
Then you can merge the layers Ctrl + E
Add a new layer below the image layer

Add blending effects on the image layer

Fill the bottom layer, and you can apply the filter<Эффекты освещения>.
Or any other, to play around - which will be to your liking the most.

By changing the transparency of the layer, applying masks, you can achieve various effects.

Method 7. Make a transparent frame in Photoshop.
Open the image, duplicate the background layer three times - pressing three times the keyboard shortcut Ctrl + J
Turn off the top two layers by clicking on the eye icon opposite the layer. And immediately rename the layers so as not to get confused.

While on layer 1, go to<Фильтр>-<Размытие>-<Размытие по Гауссу>.

Blurring the image

Let's add some noise. Go to<Фильтр>-<Шум>-<Добавить шум>