Hello everybody! Today I took some time to improve the design and work of the blog a little: I fixed a few imperfections in the layout, added a few subtle features, changed the background and, most importantly, changed the blog logo (I just took a pen and wrote it, and then scanned it). So one of the improvements was the addition of a site image to the Yandex Browser scoreboard. The fact is that the browser displays favorite or frequently visited sites and Yandex assigns the same template to all of them: some background of the plate, a favicon in a circle and the name of the site. But I think a lot of people have noticed that some sites look pretty much the same on the scoreboard, and some have "personal" tiles.
UPDATE: Yandex.Browser was recently updated and all old widget settings on the scoreboard stopped working. In addition, the links to the "Scoreboard API" documentation have also changed. So the article had to be rewritten in a new way.
For example Yandex, Google, In contact with, Rutracker have their beautiful easily recognizable dies, and the rest do not. For example, the picture above shows that such venerable masters of the Network as IXBT, Computerra and THG so far, they have not taken care of such a detail, albeit small, but still not superfluous, given the fact that many people now use Yandex Browser.
Personally, I am annoyed by sites with default tile designs. Now we will figure out how to make a beautiful plate (widget) for your website for the Yandex Browser scoreboard. Everything is very simple:
Create a PNG image in any image editor. Image size restrictions are shown below. The picture must have a transparent background. It is better to make a picture with the site logo. Let's call it logo.png.
Logo size restrictions:
- long horizontal logos - up to 300 pixels wide, up to 85 pixels high;
- short horizontal logos - up to 250 pixels wide, up to 120 pixels high;
- square logos can be up to 120 pixels high;
- the length of the logo should not exceed its width by more than 4.6 times.
("api_version": 4, "layout": ("logo": "http: //your.site/logo.png", "color": "#ffffff", "show_title": false))
where
"Logo": "http: //your.site/logo.png", - the path to the picture (and with the full address of the picture, this is the only way the new widget started working;
"Color": "#fbfbfb", - plate background
Now the picture logo.png and the file manifest.json fill in the root of the site. And in the code on all pages of the site between
and add the following line:
That's all. Now the site has its own beautiful plate. By the way, if it is not immediately displayed, you need to remove the site's plate from the scoreboard, and then add it there again. For other users, it will be updated the next time the browser and scoreboard are opened.
The manifest has a few more interesting functions that can be found on the Tableau API page. There is very interesting function notifiers - icons informing the user about a new personal message or any other updated information. This is very convenient if the site supports displaying notifications, that is, if there is something to show in two or three digits.
If it still does not work, then clear the site cache (just the site so that the new file is correctly served by the server). It didn't work for me even after that. And only removing the old widget from the “Scoreboard” and adding it again helped. And now, finally, everything became as it should be.

By default, on home page Yandex has a lot of all kinds of widgets and informers, such as weather, exchange rates, TV programs, traffic jams, etc.
Few people think about the fact that their can be customized and remove all unnecessary. You can remove everything altogether and only the search bar and the banner remain, which can also be blocked if there is desired program.
To configure Yandex for yourself, on the yandex.ru page, at the top, select the item in the menu "Configure Yandex":
Then you can remove unnecessary widgets or swap them.
I only kept the weather and Yandex Webmaster for myself, added blog widgets that I often read and several other useful sites, for example, the widget of the seobudget.ru site, which displays information about and results of Yandex.
Some of these widgets look like this:

It is very convenient to go to start page and see all the news you need.
You can create such informers yourself for any sites in. Select "Create Widget" -> "RSS Widget", paste the blog address and link to the RSS feed.

You can even try attract readers to your blog in this way and promote your site a little. To do this, you need to create an informer and take in your account "blog embed code"... Then add this code next to buttons social networks at the end of each post.
If you create an informer yourself, then in the developer's office there will be information about the average number of users per day. That is, you can trace the effect of widgets and find out how many people use them. It will look like this:
Do not forget to close 3 external links to Yandex.ru from indexing, otherwise it already has 270,000 TCI))). I left one external link "Add to Yandex", and made a link from the photo and from the name of the blog to inner pages site.
P. S. If you are already tired of earning money on the site, then open
When using Android OS, sooner or later some users may see the error "Failed to add widget" when editing desktop widgets. Everything you do with the device and all the settings you make affect the system and its behavior. If you decide to get root-rights for your smartphone or tablet, you should be prepared for the appearance of such errors and their elimination completely falls on your shoulders.
What action led to the appearance of such a message, as well as how to restore normal work devices, we will tell in this small material.
Why is the error "Failed to add widget" displayed?
There may be two reasons for the appearance of this error, but both of them, one way or another, are related to the Google Search application, which in Android Lollipop is even more integrated into various system components and constantly interacts with them.
- The Google Search app has stopped working in an emergency and there is no way to add a new widget.
- In the process of obtaining root rights, the Google Search application was disrupted and the system cannot start it or it works, but not quite correctly.
How do I restore the Google Search app to work?
- Check if in place system application Google Search and whether it works as expected. If not, we recommend doing the following:
- Open the Google Play store.
- In the search find google app A search that, although standard Android application Lollipop can be downloaded separately and installed from the store.
- Install it into the device.
- Open the Google Search app and check if it works.
It may happen that such a procedure did not correct the situation with adding a widget to the desktop. In this case, go to the next method.
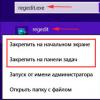
- Press and hold the power off button on your device until the power off menu appears.
- Press the Power off button and hold for a few seconds until you are prompted to put your phone into Safe Mode.
- Click OK and wait for the device to fully reboot.
- When the device is fully turned on, you will see a small message on the screen stating that the device is currently operating in safe mode.
- After that, turn off and turn on the device in the usual way, without making any additional manipulations.
After the procedure of booting the device in safe mode and returning to the standard mode of operation, try adding the widget to the desktop again. If you see the error message again, go to the next step in the instructions.
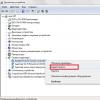
- Go to the Settings menu of your device.
- Select the Applications category.
- Find the Google Search app and open its properties page.
- Clear the cache and completely erase all its data by clicking the corresponding buttons on the property page.
The "Failed to add widget" error should no longer remind you of itself.
Greetings colleagues! Now I will try to explain why and how to install the Yandex Search widget on a site (Yandex.Search).
Every site / blog must have a site search. This applies to personal blogs, online stores and corporate portals.
And if the search is done clumsily, then the user leaves such a site without finding the information you need... This is fraught with the loss of customers, subscribers and ultimately money.
With regard to my activity, I can say the following - among my suppliers there are several large federal networks with their own corporate portals. Their assortment overlaps, the prices are the same, who to choose? The answer lies on the surface - the convenience of finding the right product and the ease of placing an order.
Such large corporations usually they implement portals on their own, but I must say this is not always good at it. There are internal and external revolutions of the medal. On the one hand, the system works without failures and errors, but on the other hand, the interface is poor and the search function is implemented badly.
Recently, one of my suppliers said that he bought a search module from Yandex, and after a while his sales began to increase. Do you understand what I'm getting at? But this is all lyrics, back to our blogs, where everything is much simpler.
The implementation of the search function can be organized in several ways:
- Built-in WordPress search
- Tool from search engines (Yandex.Search)
Installing a third-party module has a positive effect on SEO site optimization for search engines, as well as SEO optimization of your blog content. I highly recommend reading my article, in which you will find the answers to what a site should be from the point of view of search engines.
Installing Yandex Site Search Widget
The built-in search from the WordPress platform is rather poor, it does not have such advanced functions as Yandex.Search:
- Ability to take into account morphology;
- Flexibility of settings - the ability to customize the form for the site design;
- Issuance search hints for ease of search;
- Search statistics;
- Supplementing the database with synonyms for your options.
It is very easy to install the Yandex.Search module on your website. Let's walk through this procedure step by step.
Start installation
To install the Yandex search module, follow the link https://site.yandex.ru/ and press the big button of the same name.

Clarification - before starting the installation, you need to log into your Yandex account, those who do not have an account need to create one. After pressing the button Set search you will be prompted to accept the user agreement, which must be confirmed with a checkbox at the end of the agreement.
Step 1 - General Settings
Further on the installation, everything is logical and understandable. Specify the name of the search, leave the filter Moderate... You need to add your site to the search area, you can add several sites that belong to you, while when you enter a query, the search will occur on the specified sites.

Step 1 - General Settings
If the right to use your site has not been confirmed, you will not be allowed further. You must confirm the rights to the site in Yandex.Webmaster. It is very simple to do this, now we will not dwell on this procedure.
Step 2 - Customizing the Search Form
At this step, using a visual constructor, we create a search form design for our site. You can select a form with or without a background, select a background color, a color for a field for entering a request, etc. Be sure to experiment with these fields and match colors to your blog design.
The final search form is shown at the bottom of the constructor. In the future, it will always be possible to change the design of the form, so we do not dwell on this step for a long time and move on to the next.

Step 3 - Displaying Search Results
This step defines how the search results will look. Here I advise you not to change anything particularly, but only to correct the tab. Where to show results:
![]()
Customizing search results
The rest of the items can be left as default. The only thing I advise you to check here is by relevance.

Step 4 - Checking the Yandex Search module
At this step, you need to check how the Yandex Search module works on the site. In the search box, enter the title of any of your articles and make sure that the search works fine.

Checking the search work
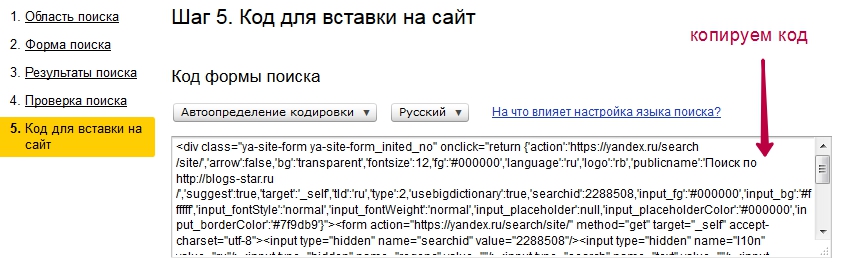
Step 5 - Embed Code
At this step, we get the code for the search module to insert into your site.
Step 6 - Insert the Code into Your Site
After copying the code (Ctrl-A), go to the admin panel of our blog - Appearance- Widgets. Choosing a widget Text and drag it to the sidebar to the desired location. As a rule, the Yandex Search widget is installed in the upper right part of the blog.