The error "Windows cannot connect to the System Event Notification Service" is caused by a failure of services and system components on the system. The failure can be caused by virus activity, hardware conflict, software incompatibility.
After the error appears, many system services stop working correctly. The ability to log in to the system under the accounts of other users is disabled. This is one of those cases when it will be easier for a user logged in as an administrator to fix the problem. Despite a warning from the system that the error "prevents login ordinary users”, Sometimes Windows does not allow you to change your regular account to the administrator account.
A common cause of the error is damage to system files as a result of virus activity. Some methods of fixing the problem require Windows rollback to a restore point and other actions that can damage or delete files on your computer. Before you start solving the problem yourself, you should save all important documents and files, create a restore point (instructions are attached).
Ways to solve the problem:
Using the command line cmd.exe
The "Unable to connect to service" error can be corrected by using the console commands netsh winsock reset and route -f. These commands reset network Windows installations to the default settings, which allows you to get rid of the error and restore the system and network to work. Resetting the settings will not fix the cause of the problem: viruses, hardware or software conflict.
After eliminating the error, it will take time to find and eliminate the cause of the error. Alternative option- roll back the system to one of the restore points, when a virus infection or other malfunction has not yet occurred.
The following actions must be performed on behalf of (in account) administrator:
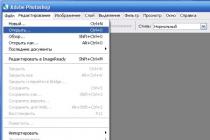
- Click Start -> Accessories -> Command Prompt or Start -> Run -> type cmd.exe in the window and press Enter.
- Enter the command route -f and press Enter. The command will be executed only if you have administrator rights and will clear the routing table from all unnecessary entries. All important network and node routes remain operational.
- Enter the command netsh winsock reset and press Enter. The command resets one of the key system handlers - Windows Sockets.
- Restart your computer for the changes to take effect. It is advisable to bookmark this page in case the notification about Windows inability to connect to the service bothers you again.
The Windows Sockets handler is modular and multitasking, and viruses and other applications can be embedded in its activity. This mechanism is necessary for the system so that applications can access the Internet quite simply, avoiding unnecessary interaction with drivers. A variety of handlers can be built into Windows Sockets; it is used by antiviruses to intercept and scan traffic for threats. If an error occurs at some stage of packet processing, the user will receive a non-working Internet, crashes in applications and an error of the following content:
Unable to connect to Windows service
Windows cannot connect to the System Event Notification Service. This issue prevents restricted users from logging on.
An administrator user can view the system event log to determine the cause of the problem.

System restore from checkpoint
If, after using console commands and restarting the computer, the error continues to appear, and the cause of the problem cannot be found, you can roll back the system to one of the last restore points. To use restore points, you need to have them earlier - this feature is disabled on many computers with Windows XP and 7.
Windows will prompt you to select a checkpoint and tell you what data will be deleted or restored. In any case, before starting the recovery process, it is advisable to save the most important files to removable media. It doesn't hurt to check your files for viruses, especially if the system event service error started appearing after the computer was infected.
Launch methods Windows recovery from checkpoint:
- Method 1: Click Start, enter Recovery in the search bar and select System Restore from the options that appear.
- Method 2: Go to Start -> Control Panel -> Backup and Restore, click Restore at the bottom of the screen system parameters or computer, and then click the Start System Restore button.
- Method 3: Click Start, enter rstrui in the search bar and press Enter. Or enter the same command in the Run menu (Win + R).
- Method 4: Go to Start -> Control Panel -> System -> System Protection and click on the System Restore button in the window that opens.
Regardless of which of the methods of starting the recovery system is selected, Windows will prompt you to select a checkpoint. It often happens that automatic archiving on the computer is disabled, and the user himself did not backups.
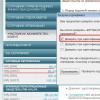
In this case, the following picture will be observed in the restore and archive section in the Control Panel: 
Even if this is the case, it is still worth trying to start the recovery process. In the "Restore system files and settings" window, you need to select the "Select another restore point" option to view all available archives.
Windows automatically saves checkpoints after critical system updates and in a number of other cases. When restoring the system from a checkpoint, another restore point will be created with initial state files and systems. In other words, the system rollback can then be rolled back, but it is still better to have backup copies of files on external media.
System scan with sfc / scannow
You can diagnose the system by entering the sfc / scannow command in the control panel. In order for Windows to be able to replace missing, damaged or deleted files, the drive (or other removable media) must have the same Windows version as on the device. This applies not only to the version of the system itself (XP, 7, 10), but also to the service pack (SP). It is best to use the drive from which Windows was installed on your computer.
To start a system scan, you need:
- Run command line... To do this, you need to enter cmd in the search bar in the Start menu, or in the Start -> Run window.
- Enter the sfc / scannow command and press Enter.
- Wait until the end of the system diagnostics.
Depending on the files recovered, Windows may require you to restart your computer after the system scan finishes. The result will also be shown: whether the errors were found at all, whether they were resolved, whether there were other problems during the check.
You can run a system check without the installation disc. If there are no errors, then the system will not need to restore any files. If errors are found, but the installation Windows disk missing, then replace damaged files will not come from. You will see a message that reads: Windows Resource Protection found corrupted files, but could not repair some of them. The path where you can view the verification log will also be indicated.

Using Windows Repair Free
To try to resolve the connection error to the System Event Notification service, use free version Windows programs Repair. Before starting the program, you should create a restore point in case of unforeseen problems.
Sequencing:
- Open Start -> Programs -> Accessories -> System Tools -> System Restore.
- Click "Create a restore point", then "Next", enter the name of the saved point and click the "Create" button again.
- Wait until the end of the restore point creation, download Windows Repair Free or Windows Repair (all in one) from the official website.
- Install the program on the computer, launch the application.
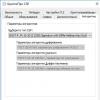
- Open the Step 2 tab.
- Click on the Do It button to check the disc. The computer will automatically restart.
- After restarting the PC, open the program again, open the Step 3 tab and start the next step by pressing the SFC button.
- After that, you need to go to the Start Repairs system recovery tab and start the process by clicking on the Start button.
- The program will offer to create a restore point - you should answer "No", since the backup was performed in advance.
- Next, you need to check the following two items on the left side of the window:
- Remove Policies Set By Infections
- Set Windows Services To Default Startup
- Click on the Start button to start the scanning process. The computer should not be used at all while the scan is in progress.
If none of the above methods helped to solve the problem, you should use another method - disconnect all unnecessary devices from the computer. For example, an error can be caused by simultaneously connecting a microphone, headphones and music center... If the devices are not connected at the same time, the System Event Notification Service error does not occur.
A very common problem when you connect to WiFi networks in Windows 10 / 8.1 and you get an error can't connect to this network... With this problem, windows system does not show us the reason or the code of the error itself, which complicates the task and we can only guess on the coffee grounds. Let's take a look at what can be done and how to fix an error with connecting to a WiFi network or local network in Windows 10 / 8.1.
Possible solutions for network connection problem in Windows 10
If you are having problems connecting to your network, the first thing you should do is try to fix any problems you may have with your network devices. To do this, first of all, you need to turn off and turn on all network devices, such as a router, access point, modems, everything that is connected to the computer and connected to the Internet, the network.
- Click on Win + R and enter devmgmt.msc to start Device Manager.
- Expand " Network adapters"and right-click on the network devices and update them. If you don't know where the local or WiFi card is, then follow the word Wireless, this is WiFi. Controller is a network local card for wired connection.
- You may also want to consider reinstalling them and rebooting your system. If the above methods don't work, try downloading and installing the drivers from the manufacturer's website.

2. Run troubleshooting network problems, hardware and devices
- Go to All Settings> Updates & Security> Troubleshoot. In the list on the left, select the diagnostics in order Hardware and devices, Network adapters, Incoming connections.
- I collected on the site special utilities from Microsoft by; download the utility that suits you.

3. Network reset
If nothing worked, it might help.
- Open " Options" > "Network and Internet" > "State"and on the right find Network reset. This will reset all default network adapters.

If the problem with WiFi connection, then I advise you to also delete the existing wireless connection.
- Open " Options" > "Network and Internet" > "WiFi"> on the right, click on the word" Famous network management". Next, select from the list that network to which you cannot connect and click Forget... If you have a huge list and you don't need them, then I advise you to delete unnecessary connections.

Hello everyone, in this thread we will talk about the problem with the network connection. Let's say you have a router with the function wireless network... Via Wi-Fi, you can connect to this network and access the Internet. There are times when it is not possible to connect to the network, in other words, you see this error:. Quite sad, but it's worth working out with this.
By the way, one could use the most simple method- forget the network you are trying to connect to. You need to go to the network parameters, then to the parameters management Wi-Fi networks, there click on the "Manage known networks" button and find the problem network among the list and click on the "Forget" button, then restart the computer and try to connect again. Unfortunately, this method does not always help, so we will use more effective ones.
I can't connect to WiFi, what should I do?
The error of not being able to connect to the network looks like this. And she can appear at any moment.
There are several points why this problem appears:
- In the parameters of the router itself, you changed the specification from WPA-PSK to WPA2-PSK, or vice versa.
- Changed the security key in the router settings.
Then you will be prompted to enter a new security key as usual, and a message may also pop up that some data has been changed. Try to re-enter the Wi-Fi key and connect, the new data should be automatically applied.

But here is the case when, instead of requiring the key to be entered, an error appears about the impossibility of connecting to the network.
The first way is "Forget this web"
Yes, at the beginning I said that this method does not always help, but I did not say that it does not help at all.
Click on the Wi-Fi icon in the taskbar and then go to "Network parameters"

Go to the tab "Wi-Fi", if not already on it and scroll to the very bottom, select the item "Managing Wi-Fi Network Settings", or item "Managing Famous Networks".

A window appears where you can see a list of all the networks to which you have ever connected. We find ours there, click on it and click on the button "Forget".

Close all windows and click on the network icon in the taskbar again.We are trying to reconnect to the network by entering the key.
Using this method does not always lead to a positive result.
The second method is "Network reset"
As far as I remember, this way only available in update Anniversary Update... You click on the network icon and go to "Network Settings". Go to the tab "State" and scroll the window to the very bottom. There will be a button "Network reset"... We press it.

A window will appear in which we are told what will happen when the reset. The computer, by the way, will be rebooted. Then try to reconnect to the network.

Method three - removing the network driver and reinstalling it
The method is somewhat similar to the previous one, but it should not be bypassed either. Go to device Manager, for this we right-click on the Start menu and select this item.

Expand the tab "Network adapters" and the device does not only uninstall the driver.

After that, restart the computer, the device will recover, and you can connect to the network.If it does not help, it is possible that the problem is in the router and already needs to be reset, but this is the topic of another article.
Reading time: 36 min
Wi-Fi connection never ceases to amaze with new variants of malfunctions. In today's brief excursion, we will consider the problem "". Most likely they encountered it when they tried to connect a friend's laptop to the network or after interrupting the connection with the device. There is nothing wrong with that, you just need to correct the network parameters and it will start.
Why can't I connect to Wi-Fi?
Windows was unable to connect to the network for various reasons, usually the problem is the failure itself Wi-Fi router, probably automatic settings out of order or a problem in Windows. Most often, the point is in changing the password on the network or changing the type of encryption, perhaps even without your participation. In any case, there is a fairly effective remedy for this problem, you just need to reconnect to the network, at the same time, like a new device.
Before "going over" the system, you need to try to restart the device, which helps in most cases. Sometimes you have to repeat the procedure two or three times. Then execute:
- Click on the icon in the Wi-Fi connection tray (of course, inactive);
- Expand the full list of settings by clicking on "Network parameters";

- Click the link "Manage Wi-Fi network settings" again;

- Select a network with a problematic connection and click on "Forget";

- Connect to the network again.
Most often, the problem disappears at this stage, but only if the reason is superficial and not related to a failure of the router parameters, otherwise the diagnosis should be continued.
In some cases, a check is launched that detects network requirements, the password window does not even appear, and the check is endless. You will have to perform a hard reboot of the device.
Full reboot of the driver on Wi-Fi
If it still says "Failed to connect to the network", we continue to eliminate the parameters that have been changed and block the connection by reinstalling the drivers. So it follows:
- Click on Start and RMB on "Computer", then "Properties";
- Select "Device Manager";
- Expand the list "Network adapters";
- RMB on the required item and "Delete";

- Remove the device and restart the PC;
- The hardware will be updated automatically and the network can be started.
Quite often, if not always, this method will help you fix computer problems, except in the rare cases described below.
Windows Cannot Connect to Wi-Fi: Setting Up Your Router
Often it is not possible to connect to the Windows 10 network for one simple reason - the router accepts inappropriate parameters for distributing the network, so the router can switch to channel 12 or 13, but it is not always available, so it should be changed. Also, the type of encryption and key can prevent the connection.
First of all, you should restart the router, or better several times and check, maybe everything will work on its own.
Otherwise, you must change the channel manually or reset the settings to factory defaults. We will not consider resetting the settings, since there is already a fairly complete instruction.
Choosing a channel is not an easy procedure, especially in the apartment buildings where the majority live. A decent load is created on the channels, because of this, they are clogged and the coverage weakens. You can poke through the channels and check for a result, or use special programs- WiFiInfoView or inSSIDer which provide necessary information... After determining the free channel, it remains only to replace it:
- Go to 192.168.1.1 in your browser;
- Then click on "Wireless";
- Select "Wireless Settings";
- Remove the "Auto" value by replacing it with manual selection;

- In the drop-down list "Chanel" select the appropriate option.
The instruction is based on the example of TP-link, but it is suitable for most models, as a last resort, the menu is intuitive, you will not get lost. Usually the first 6 channels are installed, because of this they are quite loaded, it is optimal to set from 8 to 11.

Additional ways to solve the problem
Some users note that even all the above tips did not help fix the problem until they turned off the antivirus. Sometimes this happens due to filtering the Internet connection, but this is not a desirable procedure now.
First, you should check if this is so by clicking on the antivirus and selecting "Pause protection", then try to connect again. Sometimes you have to restart your PC. If this is your problem, you need to either disable connection filtering, or stop it altogether, you can also add the network to the exception.

In addition, it should be noted that updating the configuration helps some users. This button is located in the "Device Manager" and looks like a monitor.
Using one or more of the described approaches, you can completely eliminate the error that Windows or the router triggered. Also, when you change the channel, you can notice a significant increase in the speed and distance of the network coverage.
If you still have questions on the topic "What to do if the error" Cannot connect to this network "occurs?", You can ask them in the comments
In this article, we will look at the situation faced by many users. You click on the wireless network icon in the lower right corner of the desktop, select the desired network from the list, click Connect, but instead of accessing the Internet, an error appears: "Windows could not connect to ...".
There may be several reasons why this window may appear. We will consider some of them in this article, and we will figure out why Wi-Fi may not connect on a laptop.
Network diagnostics
Let's start with the settings in the operating system.
Let's perform network diagnostics. Click on the wireless network icon in the tray, select the desired one and click "Connect". Enter the password if it is protected.

When a window with an error appears, click on the button in it Troubleshooting... Windows will search for problems and suggest solutions. Just follow the guidelines. In some cases, this helps and the laptop connects to Wi-Fi successfully.
If the diagnostics display the message:, read in a separate article how you can solve the problem.

New network connection
If the laptop still does not connect to Wi-Fi, then delete the network we want to connect to and reconnect. This can help if you or someone else is new. Other settings are saved on the laptop that do not match the current ones, so it does not connect to Wi-Fi. By the way, it arises for the same reason.
Right-click on the network icon and select "Network and Sharing Center".


In the list, select the network to which the laptop cannot connect, right-click on it and select "Delete network".
You can read about how to forget the network on Windows 10 in the article:.

After that, again click on the network icon in the tray and connect to desired network Wi-Fi. You may need to find out and enter the current password from her. After that, Internet access should appear.

Changing router settings
Let's go to the router settings. They could have gotten off, for whatever reason, or someone else changed them. Since you do not have access to the network on your laptop, open your favorite browser on a computer that is connected to the same router using a cable, and enter the IP address in the address bar: 192.168.1.1 or 192.168.0.1.
Data cleansing
route -f
ipconfig / flushdns
netsh int ip reset
netsh int ipv4 reset
netsh int tcp reset
netsh winsock reset
After each press "Enter". This will help clear the data in DNS and Winsock, reset the parameters of routes and network adapter.
That's all. I hope at least one of the described methods helped you. And now you will know what to do if the laptop sees a Wi-Fi network, but cannot connect to it, as a result of which an error window appears.
Rate article: