To create an image of a CD, DVD or bootable disc in Alcohol 120, you need to click "Create images". A window will open in which you need to select the disk drive in which the disk from which the image will be made is located.
Alcohol 120 image creation
When the disc is read by the program, the "Start" button will become active. Before clicking this button, you need to click "Reading Options" and specify in which format we will create the image and where the finished image will be stored. Now you can press the "Start" button and wait until the Alcohol 120 disk image is completed.
Alcohol 120 how to create an image from files
To create an image from the selected files from a computer or disk, you need to click "Image mastering". A welcome window will open in which click the "Next" button. Now you need to choose from which files you need to make an image for this, press the button "Add file (s)."
 Alcohol 120 instructions for collecting files for an image
 A window will open in which you are looking for the desired file and when you find the file, click on it (the name of this file should appear in the file name field), and now click "Open". Thus, we collect all the necessary files. Now when all the files are collected, press the "Next" button.
 Set the ISO Alcohol 120 parameter
 In a new window, select the place where the image will be stored, indicate the format of the image and in the "Image name" field write the name of the image. By clicking the "Start" button, the image will be created and will be located in the location you specified.
How to open an image of Alcohol 120
First, you need to create a virtual disk using the Alcohol 120 program, for this we press "Service" - "Settings".
 Settings in Alcohol 120
 In the left column, click on "Virtual disk", and in the right window, indicate the number of virtual drives and click "OK". Now we go into the explorer, click on "This computer", find the virtual floppy drive and click on it with the right mouse button.
 How to mount an image on a floppy drive in Alcohol 120
 In the context menu that appears, select "Mount Image" - "Open". Find the image, click on it with the left mouse button and press the "Open" button. So you can mount the image through alcohol 120 and now you can view the contents of the disc.
How to burn an Alcohol 120 image to disk
To write an image to a disc, you must click "Burn images to discs".
 How to burn an Alcohol 120 disc
 In the window that opens, click the "Browse" button and look for the image file that we need to write to disk. You can put a check mark next to the item "Delete image file after recording" if you no longer need this file in the future. Press the "Next" button, another window will open in which you need to click "Start" and start writing to the disk (at this moment it is better not to do anything on the computer so that there is no failure due to which the disk may be damaged).
Driver error
Sometimes after installing the program, when you start it, an error appears loading Alcohol 120 drivers, which means that this version does not fit your system. To fix this error, you will need to uninstall this version and install a different one.
If you have a CD / DVD disc image, then in the event of a disc failure, you can easily and quickly recover disc data using the Alcohol 120% program. You no longer have to waste time collecting bit by bit the lost data that was stored on your disks.
To start burning the image file to a CD, open the main program window. Add an image file using the "Search for images" function or drag it into the program window by grabbing it with the left mouse button .. As an example, consider the recording of an image file of the Windows operating system.
Select the image file to be burned. In the menu of basic operations, click on the link "Burn images to discs". The Burn discs from images wizard will appear.

If you check the "Delete image file after recording" checkbox, then after successful recording the image file will be deleted. If the image capture fails, the image file will not be deleted and will remain on the hard disk.
Click the Next button to continue.

I have a rewritable CD-RW disc in my drive. I press the "No" button.

If you have more than one drive installed in your computer, select the desired DVD / CD recorder to burn from the list. I recommend choosing the slowest write speed, because the number of possible defects will be much less than at a high write speed.
Recording method. The default is DAO / SAO. Most CD / DVD drives support DAO / SAO writing, but not every CD / DVD drive supports RAW writing. The DAO / SAO recording mode is used when backing up these image files of regular CD / DVD discs. RAW recording mode is used when backing up raw data from CD / DVD discs in special CD / DVD formats.
Select the number of copies you want to burn.
Record / Simulate. If you select only the "Simulate" option, the program will simulate writing to disk. If you check two options at once, then the recording will be simulated first, and then the disc will be recorded.
Buffer underrun error protection. This feature will help you avoid buffer underruns due to slow data transfer rates from the hard drive.
Do not close the last session on the current disc. Closing the last disc session means that you will not be able to write any more data to that disc after the burning process is finished. If you enable this option, you can still write data if there is free space on the disk.
EFM error workaround. This function is designed to make sure to copy some of the image files to a CD / DVD disc.
Data type leave the default (Custom). Press the "Start" button to start writing data to disk.

At the end of the recording, you will see a success message.

Click OK.

Click the Finish button. The drive will open with a ready-to-use disc. Press the drive button to check the recorded data.

The image file was successfully written to disk, and you can start a clean installation of the operating system.
Run the program Alcohol 120%... Select the section from the menu on the left side "Image mastering"(Image wizard), or use the main menu File => Image Mastering, or the keyboard shortcut Ctrl + P (English Pi).
Then a window will appear XTRA Alcohol Master... Click on "Delee".

Use buttons "Add files" and "Add folder" to add files to the generated disk image. You can add files and folders by dragging and dropping them ( Drag "n" Drop) from Conductor into the wizard window, in most cases it will be more convenient and faster than using the buttons.
Also, if desired, you can change volume label(name) disc (see at the top of the wizard window).

After the necessary files are added, click on the button "Further".

Specify the name of the image file, select the folder where it will be written. You can also choose the format of the image. Default Alcohol uses its own format - mdf, however, it is not universal and may not be supported by other programs, unlike iso... It is recommended to choose "ISO Image (* .iso)".
Click on the button "Start" to start creating the disk image.

It will take a few minutes to create the image, depending on the amount of data and the power of your computer. The disk image file will be automatically added to the list of images Alcohol and it can be immediately used for mounting in virtual drives, or for writing to physical disks.
Creating an image (exact copy) of a CD / DVD disc with Alcohol 120% is a simple process, and the created image will help you recover lost data.
To start the CD / DVD image creation procedure, insert the source disc into your CD - ROM drive and launch the program, for example from the desktop, by clicking on the program shortcut.
In the main operations menu, click on the "Create images" link. The Imaging Wizard will open.

If you have more than one drive installed in your computer, select the drive you want from the list of DVD / CD drives. Next, click "Reading Options".

Specify a local drive to place the image.To create a folder for the created image, click on the "New folder" button.

Enter a name for the folder and click OK.

Select the format of the created image. The Media Descriptor image format (* .mds) is used by default. Attention: when creating an image .mds two files are created, both files are needed for the image to work properly.

Enter the name of the created image file or leave the name suggested by the program by default. Then you can rename.
Skipping read errors This option is enabled by default as the original CD / DVD may be damaged on the work surface. I advise you to always choose this option, especially if you will be creating an * .mds image file.
Fast skipping of erroneous blocks (not for every drive) This option is used for special CD formats to speed up the imaging process.
Advanced Sector Scanning (A.S.S.)... This option allows large error blocks to be skipped, thereby increasing read speed.
Read subchannel data from the current disc This option is for special CD formats where some data is stored in a subchannel of the disc.
Measuring positioning data.New protections SecuROM 4.8x install irregular data on the spiral track of the CD. The data positioning measurement option is only used with the following data types: "Securom * NEW (4.x / 5.x)", "StarForce 1/2/3" and "VOB ProtectCD V5". The best results are obtained when the DPM read speed is kept as low as possible.
Data type.Some CDs are copy-protected. For example, StarForce is a copy protection family tied to the physical structure of a CD's spiral track. New versions of StarForce block the operation of the file system while checking the key disk and make sure that no protected data is read from the hard disk, moreover, special protective components make sure that after decryption no one can take a dump. The Alcohol 120% program can bypass these hurdles. However, sometimes the created image cannot be written to a disc and will be intended only for the emulator.
If you do not know what data type your source CD / DVD is, leave the default data type (Custom).
Press the "Start" button to start the image creation procedure.

The image file will be ready when the progress bar reaches 100%. After completing the image creation, the main window of the Alcohol 120% program will open. You will see the created image.

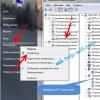
To mount the created image to a virtual drive, right-click on it. Select "Mount to device" from the context menu.

If you have created more than one virtual drives, indicate on which drive the program should mount the image.
To unmount the image, in the "My Computer" folder (Computer, This computer), right-click on the virtual drive.

Select "Unmount Image" from the context menu.
Open ISO, MDS, CDI, BWT, BIN / CUE, ISZ, B5T, B6T, BWI, BWA, CCD, BWS images files, and you can also turn original games on discs into images, and then using only these images to start the game or burn the game on your disk by first mounting them on virtual disks. However, the Alcohol 120 will not be able to write the image to the USB flash drive.
How to create an image in Alcohol 120
To create a disk image in Alcohol 120, you need to click Creation of images or click on the panel File — Creation of images.
Alcohol 120 how to use when creating an image
A window will open in which you select the drive with the disk from which you will make the image and go to the tab Reading options... On this tab, you specify where the image you created will be located, you can change the name of the image, select the format in which the image will be created.
 How to set up a virtual disk in Alcohol 120
 Having finished with all the listed settings, press the button Start and immediately the disk image will begin to be created on the computer that you will find in the folder you specified.
How to mount an image in Alcohol 120
To burn an image you created earlier on a CD or DVD disc or open an image to play or run a game, you need to mount the disk image in Alcohol 120 on a virtual disk that is created by the Alcohol 120 program. During the installation of the program, one Alcohol 120 virtual disk is automatically created on the computer, and if desired, you can create from 1 to 31 virtual disks. To create a virtual disk, you need to click Service — Settings.
 Alcohol 120 instructions for changing the number of virtual disks
 In the settings choose Virtual disk, set the required number of virtual disks from the list and click OK. After a few seconds, virtual disks will be created and each disk will be assigned its own letter.
After that, you can mount the previously created image in Alcohol 120. To do this, at the bottom of the program, select the virtual drive, move the cursor over it and press the right mouse button to select the item from the context menu that opens Mount image.
 How to edit a game in Alcohol 120
 A window will open in which you will need to find and open the image you previously created. When you manage to mount the disk in Alcohol 120, the system will ask you what to do for this disk. After that, you can run the image in Alcohol 120 or view the files in it.
How to burn an image to disk in Alcohol 120
If you need to burn the disc image you previously created using Alcohol 120 to your CD or DVD disc, you will need to press Burning images to discs.
 Alcohol 120 how to burn a disc
 A window will open in which you will need to click the button Overview and in the window that opens, find and select an image. After selecting the image, press the button Further... A window will open in which you will need to set the parameters for recording a disc.
 How to burn a disc via Alcohol 120
 Check the box next to Imitation so as not to damage the recordable disc if the image suddenly turns out to be damaged. By pressing the button Start the disc will start recording. When recording a disc, it is advisable not to perform any other actions on the computer in order to avoid a failure, since the failure will damage the recorded disc.