Greetings, dear reader! In this article, we will look at the common problems of Wi-Fi modules - why the computer does not see the Wi-Fi adapter, why the adapter itself does not see the network, why everything does not work at all. If this is about you, read the article further.
Some points in the article may not be disclosed and forgotten - after all, you cannot keep track of everything at once. If you have any additions, wishes, questions - welcome to the comments.
Instead of introducing
There are many adapters from different manufacturers, while they are still separately divided into external (USB) and internal. Of course, there are some nuances, but basically all the problems on them are the same, and the solutions for them are also the same.
So we read consistently, look for our problem, ask questions - together we will surely find a solution to any complex problem. Begin!
For almost every adapter model, we have a separate setup instructions on our website. Just search our site if you have a setup problem.
2 main problems
In my experience there are only 2 main problems with adapters:
- There is no driver.
- The problem is in Windows services.
On the built-in adapters, you could still look for whether it is enabled in the settings of network adapters, but here, as a rule, with a physical connection, everything should already be enabled. So if none of the following works, you can suspect a hardware failure.
Before diagnosing a hardware failure, be sure to check the adapter on another PC or laptop. There were cases when the problem was deeply embedded in the operating system and had to be updated (the modern "dozen" usually cope with the new hardware better, but not for everything old now you can find fully working drivers).
No driver
Some adapters do not want to start without a driver. Especially on older operating systems. Moreover, some old adapters do not want to start on new systems for the same reason. the manufacturer did not take care of releasing an updated driver.
In any case, the procedure for fixing the problem is as follows:
- We connect the adapter - there must be at least some kind of connection sound in the speakers, or it can be visually highlighted.
- We are waiting - maybe the system will install the driver itself.
- If nothing happened, maybe there was a disk with a driver included in the kit (it is already rare, but it happens) or the address for downloading special utilities for working with the adapter was written on the pieces of paper in the kit?
- If nothing comes out, go to drp.su, download the program to check the drivers and try to update with it (do not load unnecessary junk software with it, we are only interested in installing the drivers).
At the output in Device Manager, you should see a normal detected wireless device, something like this:
If you don't have any wireless adapter in Device Manager, then the problem should definitely be looked for at the driver level or hardware failure. Do not forget to test the work on another device!
If the adapter is quietly located here, but there is no way to search for wireless networks, we begin to dig in the direction of the operating system settings.
Operating system problems
These problems can manifest themselves in different ways:
- The message "Not Connected: No available connections" appears.
- Special utilities that come with the adapter (if any) stop connecting to networks.
All the salt of these problems - the adapter seems to be working, but for some reason refuses to search for the network at all. And usually it's all about the wireless network service. All you need to do is turn on the WLAN autoconfiguration service. For some, it is for some reason initially turned off, and this complicates the normal operation of the adapters. How do you turn it on?
The interface of Windows 7 and Windows 10 diverges here, but I found a general option to enable service settings:
- We right-click on My Computer (or on the desktop, or in the Start menu). Here we select Control:

- Services and Applications - Services. On the right, we are looking for "WLAN auto-configuration service" and check its work status. If it is turned off, you can immediately turn it on (and also set it to turn on automatically when the operating system starts):

If nothing works after applying the settings, try rebooting.
Sometimes the utility itself causes a conflict in the services, even if the service itself works fine. The recommendation for this case is to uninstall the utility, reboot, try to install clean drivers from the official website of the adapter manufacturer.
A fairly large number of Wi-Fi network users face a similar problem. This is not surprising, because now almost everyone in the house or apartment has a Wi-Fi router, which allows you to wirelessly connect various gadgets to the Internet, be it laptops, smartphones or TVs.
It is worth noting that the problem when a certain network is not visible in the list of available Wi-Fi networks can be encountered not only on a laptop, but also on any other device with the ability to connect to the Internet wirelessly.
Reasons for the lack of the desired Wi-Fi network in the selection list
Immediately, we denote that everything written below applies only to cases when at least one Wi-Fi network is visible. If the laptop does not see any Wi-Fi networks at all, then you.
So, the main reasons are:
- Long distance between router and laptop;
- Incorrectly exposed.
The first reason should be clear. To check it, just go to your router as close as possible and see if the network you need is visible on the device.
As for the second reason (the most probable), you need to check it. To do this, you need to have a device already connected to your router via Wi-Fi or wire.
We wrote in detail how to enter the settings of the router in.
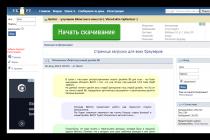
After you have entered the router settings, you need to go to the section related to the Wi-Fi settings. Depending on the router model, it may look like this.
Options for the location of the setting responsible for changing the Wi-Fi channel on Tp-Link routers


Channel or Channel is what you need. The value of this option is usually Auto or 12 (13).
The fact is that 12 and 13 channels are border channels, with which many Wi-Fi modules installed in smartphones and laptops simply cannot work. You need to set the “Channel” option to any value from 1 to 11. After that, save the changes made and reboot the router.
Conclusion
Most often, a laptop or smartphone does not see some Wi-Fi networks, due to the installation of a border broadcasting channel on the router. These channels are 12 and 13. To correct this situation, just go to the router settings, change the channel to any of the 1-11 range, save the settings and reboot the router.
(5
votes, average: 4,20
out of 5)

Very often, laptop users run into trouble when turning on or setting up wi-fi. The procedure itself seems to be quite simple, but difficulties and snags often arise due to which the laptop does not connect to wi-fi. What to do if the Internet suddenly stopped working? To answer this question, here are recommendations on how to deal with troubles when your laptop does not see WiFi.
To enable wifi, you need to do two simple steps. And these actions will depend on the manufacturer and model of the laptop. First, here are the inclusion options for the most popular manufacturers.
How to turn on WiFi on a laptop
- If the laptop ASUS does not connect to wifi, you will have to press the FN + F2 key combination.
- Same settings in laptop Packard bell and Acer can be invoked by the keyboard shortcut FN + F3.
- Notebook HP contains a special button with a symbolic antenna. But there are models in which wi-fi is easily turned on by pressing FN + F12. There are also variants of HP laptops, where the usual button with an antenna pattern is provided.
- Chinese manufacturer Lenovo provided an option where the connection is connected by the FN + F5 keyboard shortcut. But, there may be models that have a special switch for wireless networks.
- Depending on the model on your Samsung laptop, you can connect to the wireless network using the FN, F9, or F12 keys.
In order for the laptop to connect to wi-fi, each of the manufacturers came up with their own original ways. To see this procedure in detail, you should use the user manual that came with your laptop. Almost every modern laptop is equipped with an FN button. It allows you to perform a wide variety of functions for connecting the device to other devices. If, for some reason, such a button is absent, then instead of it there is a switch or another special button. All of them are easily recognized by the characteristic antenna pattern.
Reboot the router
Before you start troubleshooting the problem of lack of internet. Reboot the router by turning it off and on. in this case, all the settings of the router are saved.
Checking and configuring drivers
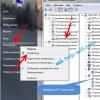
When making settings on a laptop, you need to check whether the drivers necessary for this and their performance are present. Such a check consists in the fact that the drivers must be present and used at the moment. To do this, you will have to enter the "Control Panel" then select the item "Network and Internet" and here open the item "Network and Sharing Center", in the left column select "Change adapter settings"


A window will open showing two items, Wi-Fi and Ethernet. The screenshot below shows that the laptop is connected to the network via WiFi and the network cable is not connected.

If the record is not displayed in the wi-fi adapter, then this is a clear sign of a problem with the drivers. In addition, a yellow exclamation mark icon may indicate a driver problem.
There are times when there is no record about the adapter at all. This means that the drivers are not installed and the system does not see the adapter. Drivers can be installed from the disc that comes with the laptop or found on the manufacturer's website.
If a yellow exclamation mark is displayed, click on it with the mouse and select the "Activate" item in the window that appears.
Also, the reason that wi-fi stopped working may be the power saving mode, which is currently in use. To disable it you need:
- enter the "Control Panel";
- find the item "Power supply";
- select the item "High performance";

Having dealt with all these simple manipulations, you can put things in order with the wi-fi drivers.
Turn on the wi-fi adapter
To connect a wi-fi adapter, we also perform a number of actions. Open the "Control Panel", then select "Network and Internet" and here open the item "Network and Sharing Center", in the left column select "Change adapter settings". There is a "Wireless Network Connection" here, which is a wi-fi adapter. In order to connect to wi-fi, you need to open the dialog box with the right mouse button and here use the "Enable" item.

We connect to the access point
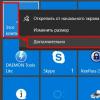
All that's left to do is connect to the hotspot. But, first of all, you should make sure that it is active. In the right corner at the bottom of the screen, you need to find the wi-fi shortcut on the taskbar. If you click on it, a dialog box for managing networks will appear. To connect, you need to select a network, and then click "Connect".
There are times when the system is protected by a password and asks to enter it. The system will not be able to connect to the access point until the password is entered. If there is an open access point, the system connects automatically.
The whole process of setting up wi-fi on a laptop is considered.
Once you have done all these manipulations, you do not have to do them all the time. But there were cases that for some reason wi-fi did not want to connect. Often, solving connection problems boils down to pressing a hotkey and enabling the desired option. Therefore, if the laptop has stopped connecting to the Internet, the first step is to check the inclusion.
A laptop consumes a lot of power to maintain an Internet connection. Therefore, it often happens that wi-fi stopped working due to the use of economy mode.
External obstacles
It is worth remembering that if the Internet suddenly stopped working, the reason may be present not only in the laptop. Wi-fi is dependent on external factors, as the radio signal can be weakened by the external environment. Walls, ceiling, floor, and other obstructions weaken the signal of the AP and the client device. The system always displays the signal level in the form of sticks. The stronger the signal, the more rods there are. The signal in 1-2 short dots is rather weak and often because of this it is not possible to use the Internet. It happens that the system does not see the signal at all.
If the laptop does not see WiFi - do not get upset, often the problem is very minor. By following the above guidelines, you can easily learn how to fix errors. And the laptop will always be securely connected to the Internet.
A fairly common problem in laptops is the situation when it stops seeing the list of Wi-Fi networks. Moreover, this can happen completely spontaneously. Literally yesterday everything worked, and today he says that there are no available connections. In this article, we will take a closer look at this situation, and also give some tips on how to get the laptop to start seeing Wi-Fi again.
Possible Reasons Why Laptop Can't See WiFi
We will now provide a list of the most common reasons why your laptop might have problems displaying WiFi networks.
- The Wi-Fi adapter is disabled by a special key combination or a special lever.
- There are problems with the drivers on the Wi-Fi card.
- Errors and conflicts in the operating system.
- Malfunction of the Wi-Fi card.
We have described the main causes of this problem in order of their prevalence.
Now we will take a closer look at each option, and also give you the correct sequence of actions that you need to take in case of problems with Wi-Fi on your laptop.
Eliminating the problem
The first thing to do in such a situation is to determine what the problem is - with a laptop or. To do this, you need to try to connect to your Wi-Fi, for example from a phone or tablet.
If at the same time WiFi is normally seen and works with other devices, then the problem is in the laptop. If there is no Wi-FI on other devices, then you need to check the router settings.
Now that it has become clear that the problem is on the laptop, we will try to solve it.
Checking the inclusion of the Wi-Fi adapter
First, check the condition of the special lever on the sides of your laptop. It is present in laptop models from about 2000-2010 years of production.
It looks something like this:
Wifi switch on laptop

Wifi button on laptop

Wifi button on laptop
If it is, try switching it to the opposite state by moving it to the side.
If there is no wifi switch on the laptop case, then try turning it on with a key combination on the keyboard. These are usually buttons FN + F2.

Keyboard shortcut to turn on Wi-Fi
But instead of F2, there can be any other F button in the top row of the keyboard with the antenna image. Try pressing it separately, as well as in conjunction with the FN button.
If your operating system is Windows 8.1 or Windows 10, then please note that the “ In the airplane" was turned off.

Airplane mode
Trying to rearrange the Wi-Fi driver
To do this, go to the device manager and find in the section “ Network adapters”Your wifi card. It can be called in different ways, but the name must necessarily contain the words “ Wireless" or " Wi-FI“.

Reinstalling the Wi-fi card driver
Click on it with the right mouse button and you select “ Delete“.
After that, click on the update hardware configuration icon in the top bar of the device manager.

Update hardware configuration button
This will reinstall the drivers on the Wi-Fi card.
Operating system problems
Quite rare, but still possible cases when Wi-Fi does not work due to problems in the operating system. This could be due to an unsuccessful update or malware getting on the laptop.
In this case, you should try using System Restore, if, of course, it is enabled and there are restore points.

System Restore
The most effective method in this case is to reinstall Windows.
WiFi adapter problems
If none of the above options helped you, then most likely your Wi-Fi adapter came out of standing and you need to replace it.

It looks like a wi-fi card in a laptop
By the way, there is now a very large selection of USB Wi-Fi adapters on the same Aliexpress for a couple of dollars.

External usb wifi card
A router (router) is a kind of network "computer" designed to transfer data between devices with different interfaces and protocols.
If the PC is unable to access the Internet or go to the router settings page, you need to perform a number of operations with the router and PC.
Most often, the problem with the connection with the router is identified by the messages "The network cable is not connected" or "No Internet access" in the form of a crossed-out image or an exclamation mark in the notification area on the taskbar.

Step 1. The first thing to do in this case is to check if the connectors of the network (LAN, Ethernet) cables are correctly connected to the ports (connectors) of the router.
The router port labeled "INTERNET" or "WAN" is used to connect the cable coming from the ISP. This port is usually colored differently on the router and is sometimes located some distance from other ports.

The PC and the router, in turn, are connected by an Ethernet cable, one end of which is connected to the RJ-45 connector on the PC, and the other to one of the LAN ports of the router.

Step 2. Reboot the router, because it is characterized by "". To do this, press the "On / Off" or "Power" button on the device. The router lights should go out. After 15 seconds, press the power button of the router to turn it on.
Reference! If there is no power button on the router, disconnect it from the 220V network for a short time and turn it on again after 30 seconds.

Step 3. Test Internet access. If the connection with the router does not appear, this may be due to a failure in the network settings. To eliminate them, you need to perform connection diagnostics.
- Press the combination "Win + R" on the keyboard ("Win" is to the left of "Alt").

- In the window that opens, type "control" and click "OK".

- The "Control Panel" will start. If sorted, click on "View network status ...". If icons are displayed, select "Network and Sharing Center ...".


- Left-click "Change adapter settings".

- Right-click on the network icon, and left-click on "Diagnose" ("Fix").

Windows will analyze the network status and troubleshoot problems by reporting troubleshooting or identified issues.
Step 4. Reconnect to the network. If the result is negative, replace, if damaged, the LAN cables connecting the PC and the router. Cables can be damaged by kinking or clips from furniture.

Step 5. Reconnect. If there is no connection, there is probably a problem with the PC's network card. It is recommended to reinstall its driver or replace in case of malfunction. This is especially true if the Wi-Fi connection works.
Windows will find and update the driver for the board.

Step 6. If there is no connection, connect the provider's cable directly to the PC connector and configure the Internet according to the recommendations specified in the agreement with the provider. This will ensure that the Ethernet port on the PC is working properly.

Note! It is also possible that the access problem occurs on the side of the provider.
If the Internet appears, then the malfunction is localized in the router and it needs to be reset to the default settings.
Resetting the router to factory settings
Let's look at such a reset using the Linksys WRT160NL router as an example. Please note that the name, password and IP address of the router are unique to this device.
Reference! To find out the name, password and IP-address of the router, you need to refer to its documentation (including its label) or find out these data via the Internet.
Step 1. Disconnect the computer and router from the 220V network.

Step 2. Disconnect all wires from the router.

Step 3. Turn it on and wait 1-2 minutes until it is fully loaded.

Step 4. Press with a thin object (for example, an unclenched paper clip) and hold the reset button for about 5 seconds. The router's reset button is located on the bottom right of the product label (marked in red). Release the button and wait 2-3 minutes for the router to restart and start.

Step 5. Turn off the router.

Step 6. Connect one PC to the router. To do this, insert one end of the LAN cable into the connector on the PC, and the other into port 1 of the router. Turn on the router and wait until it boots up for 1-2 minutes.

Step 7. Turn on the PC. Disable WI-Fi if enabled on your computer. Usually, to enable or disable Wi-Fi, you need to press one of the "F1" - "F12" buttons, which has an "antenna" icon, sometimes in conjunction with the "Fn" button, or slide a special switch.
After resetting the router to factory settings, to check its connection with the PC, you must execute the "ping" command.
Step 8. Press "Win + R" on the keyboard and type "cmd" in the launched menu by clicking "OK".

Step 9. Enter "ping 192.168.1.1" in the opened window and press the "Enter" key. You will see 3 or 4 lines starting with either "Reply from" or "Request timed out". If the line says "Reply from", then the computer sees the router.

Reference! If you receive the message "Request timeout exceeded" and the network card and the LAN cable connecting the PC to the router are working properly, this means that the router is defective and needs repair.
Step 10. Open a browser and type the IP of the router 192.168.1.1, press the "Enter" button.

Step 11. In the login menu, leave the "Username" blank, and in the "Password" field, enter admin. Click "Login".

The settings interface will open.

Step 12. Try to configure the router using the installation CD or manually according to the provider's instructions and see if it can work normally.

Step 13. Exit the browser during normal router operation. The router is working properly.
Reference! If you receive a "Reply From", but the login menu and the router setup page do not open, this means either the router is faulty or its firmware is faulty.
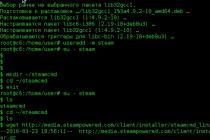
In this case, you must use the Linksys tftp.exe program to start the router with the latest firmware update.
Important! After updating the firmware, repeat the above steps, starting with “ Step 1".
Video - What to do if the laptop does not see the Wi-Fi network
Updating the router firmware


Step 2. Click on the found equipment on the left.

Step 3. Click Downloads \ Firmware.


Step 5. Click “Agree”. Downloading the firmware file will start.


Step 7. After loading the page, click on the word with the download link “here” in the line “i. TFTP Utility - To download the TFTP utility, click here ".
Note! The downloaded file can be opened in the "Settings" - "Downloads" options.

Step 8. Run the Tftp.exe installation file by clicking the left mouse button on the "Open" option.

Step 9. Enter 192.168.1.1 for "Server" and admin for "Password".

Step 10. Press the selection button (with three dots) in the "File" line, click on the downloaded firmware file in the menu, then "Open".

Step 11. Click “Update”.

The Firmware Upgrade Indicator appears and a success message when completed.
Step 12. Enter 192.168.1.1 in the browser search, click "Enter". The login menu appears. Leave the "Username" blank, and enter admin in the "Password" field. Click "Login".
The router settings page should open and access to it should be restored.
Wired network router setup process
ISPs use several protocols for user connection:
- (issued) IP address (DHCP);
- fixed user IP;
- PPTP (point-to-point connection);
- L2TP (Layer 2 Tunnel);
- PPPoE (link layer).
Before connecting, you need to find out which protocol the provider uses, as well as (if available) the username and password. Usually this information is given in the contract concluded with the provider.
If DHCP is used, which happens in most cases, then the Internet should work immediately after connecting the router with a cable from the provider, because routers are configured for DHCP by default. If another protocol is used, you need to register it in the router.
Let's consider the use of the PPPoE protocol on the example of a TP-LINK router.
Step 1. Connect the router to the PC and the provider's cable. Switch on both devices.

Step 2. Right-click on the connection icon by selecting "Network and Sharing Center ...".

Step 3. Click on the "Ethernet" option.

Step 4. Right-click on the "Connection ..." shortcut, left-click on the "Properties" line.

Right-click on the "Connection ..." icon, left-click on the "Properties" line
Step 5. Left-click on the line "TCP / IPv4" (in Win XP - "TCP / IP"). Click Properties.

Step 6. Left-click on the lines “Obtain an IP address automatically”, “Obtain DNS server address automatically”. Click OK.

Step 7. Launch your browser, enter 192.168.0.1, press Enter. In "Name ..." and "Password" enter admin. Click Login.

We enter 192.168.0.1 in the browser search field, press "Enter", in the login window, type admin in both lines, press "Login"
Step 8. Select "Network" - "WAN" on the left.

Step 9. In the drop-down list on the right, select the “PPPoE / Russia PPPoE” type in the “WAN Connection Type” line. Enter (mark) the rest of the data shown in the photo below. Click “Save”.

Step 10. Click on the "Status" section on the left and write down the Mac address of the router, which, if necessary, you need to share with your provider.

Wi-Fi setup process
Step 1. Click on the "Wireless" - "Wireless Settings" section on the left.

Step 2. In the “Wireless Name” line, set the name of the network that will be displayed by the router for connecting to Wi-Fi. Enter (mark) the rest of the data shown in the photo below. Click “Save”.

Step 3. Click on the "Wireless Security" subsection on the left.

Step 4. Scroll down the page and enter (mark) the data shown in the photo. Enter the password for the Wi-Fi connection in the “PSK Password” line. Click “Save”.

The router is now connected to the Internet.
Does your computer slow down terribly?
Many people are familiar with the annoying situation when the operating system slows down and slows down, sometimes so much that it loses important data due to the impossibility of saving it. There are ways to get rid of these problems, but it's best not to get caught up in them.
Helpful steps in this case:
- Scan your computer for viruses. If your PC is constantly slowing down, it most likely contains malware, adware, or a virus. Scanning will identify the problem and usually fix it.

- Get rid of unused programs. It is better to remove unnecessary software along with entries that can slow down your computer.

- Clear the registry. This can have a big effect, and it is better to do the cleaning with specialized software, because manual cleaning requires special knowledge.

- Defragment your hard drive. This will allow you to collect files "scattered" on the disk together, which will speed up the OS access to them.

- Don't multitask too much. The user can be productive with only a few programs, and the likelihood that the PC will slow down is greatly reduced.

- Upgrade equipment. Computers are on average designed to last up to 5 years as technology advances very quickly.

- Reinstall the operating system. This is a last resort, but sometimes the only one that brings back the "old fast" PC.

As you can see, all that usually needs to be done if the computer "slows down and freezes" is to pay a little attention to it from time to time, which takes only a few minutes to find.
Video - Why the Internet does not work on the computer