V recent times smartphones and tablets running on the Android operating system are very popular. And this is obvious: high system performance, the ability to synchronize various devices, many games and applications.
That is why more and more computer users are interested in the question of how you can install the android operating system on a computer.
If you want to use only the android operating system on a laptop or computer, format the hard drive on which the old operating system is installed and install android on this section. If you want to use android along with the operating system installed on your computer, you need to create a new hard disk partition and install android on this partition.
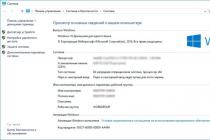
I have an operating room installed on my laptop. Windows system 7, so in this article I will describe in detail what needs to be done to install Android next to the main operating system.
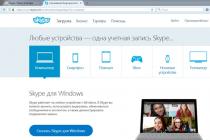
To download the android operating system for a computer, you need to go to the official website of the developers of the Android-x86 project:
http://www.android-x86.org/download
Here select the version of Android you want to install and click on the "View" button. After that, the download of the image will begin.
Creating a new partition on disk
The site already has an article on how to partition a hard drive in Windows 7. Therefore, below I will just give screenshots with a short description.
We go to "Start" - right-click "Computer" - "Management".
In the next window, select "Disk Management".

You will see a window with information about the installed hard drives. I have one, divided into sections C: and D:. Select the partition from which part of the memory will be taken to create a new one, right-click on it and click "Shrink Volume".

Now you need to wait a bit.

Then select the required amount of memory for the new partition. It all depends on how you plan to use the Android OS. If you are going to install a lot of games, choose more, the main thing is not to exceed the available memory. For example, I have enough memory on my phone, so I enter 5 GB. Click Compress.

A new section has appeared.

Click on it with the right mouse button and select Create Simple Volume.

Here we set the maximum value for the volume size and click "Next".

Now assign an unused drive letter and click Next.

We format the section, you can give it a name, click "Next".

Click Finish to complete the creation of the new volume.

In the list of sections hard disk you should have another one with the given name and memory size.

Creating a bootable USB drive
Please note that the selected flash drive will be formatted and all data from it will be erased. To avoid loss important information, copy all required files from it to the computer.
You can create a bootable USB flash drive using special programs. I will be using the free Rufus program. We insert the USB flash drive into the port of a laptop or computer and launch the Rufus program. We choose desired device and the FAT32 file system. To create a bootable USB drive, click on the disk icon and select the downloaded image on your computer. Press the "Start" button.

If you see the following window, select the desired item and click "OK". First, I put a marker in paragraph "Burn to ISO image mode", but failed to boot from under the flash drive. Then I again created a bootable USB flash drive, chose "Write in DD image mode" and everything worked out.

Immediately like bootable USB drive with Android OS will be created, the following window will appear, in it click "Close".

Boot Priority
Here I will tell you briefly: we restart the computer and go into the BIOS - press F2 or Del; go to the "Boot" section; put the flash drive in the first place in the list; save the settings and exit the BIOS.
Installing a new OS
After you exit the BIOS, the computer will boot from the USB stick. The following window will appear. In it you will choose Install Android-x86 to harddisk- Installing Android OS on your hard drive. Press Enter.
You can move between different points using the arrows, if you need to select an item, press "Enter" on it.

Next, you need to select a hard disk partition for installation operating system: sda1, sda2 ... I was afraid to make a mistake, so I chose "Create / Modify partitions" and clicked "OK".

The following menu opens. All devices connected to the laptop are shown here: sda - installed hard drive, sdb - connected flash drives, mmcblk0 - memory card. I am interested in the hard drive, so I select "Harddisk" and press "Enter".


In the next window, we look at the name of the hard disk partition that we just created. I set the amount of memory 5 GB, it corresponds to a disk partition named sda6. To exit this menu, use the Right Arrow to select Quit and press Enter.

The already familiar window will open, in it boldly select the desired partition of the hard disk - for me it is sda6.
Next, you need to select the type file system... It is recommended to select ext3 or ext2 to install Android OS, data will not be saved in fat32, and ntfs is not supported.

Now we confirm the formatting of the selected hard disk partition into the desired file system - click "Yes".

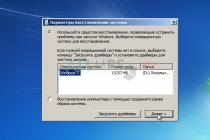
In the next window, you will be prompted to install the GRUB bootloader, since without it Android simply will not start on the computer, click "Yes".

So that when you turn on the computer, you can choose which operating system to load: Android or Windows, click "Yes".

Now you need to install another bootloader, click "Yes".
In terms of the quality of iron and assembly, Chinese manufacturers are already keeping pace with the world's giants. Yes, sometimes plastic is cheaper, the design is not impressive at all, but the crumbling panels are gone, as well as there are no millimeter gaps between the body parts and terrible backlashes. But the software is still not always well-developed. Even the pure Android that manufacturers install is sometimes a little crooked. In such a situation, the question of how to install Android firmware on a smartphone without turning the device into a brick becomes very relevant.
Why you may need to install Android on a smartphone from scratch
Before you start installing Android on a smartphone from scratch, you need to decide for yourself why you need it. If none of the reasons on the list fit, then better not. Practice shows that the lion's share of problems in topics on specialized forums comes from those who just like that, out of interest or out of boredom, decided to "pick" the firmware. If you want to experiment, you need to be aware that the consequences can be very different. So, in what cases you may need to reinstall Android:
What you need to install Android
Before you start installing Android on a smartphone, you need to have a theoretical minimum of knowledge and basic inventory for this. Otherwise, it is possible to "distort" the device to such an extent that it is not reanimated in the SC (for example, accidentally demolishing a low-level bootloader). If you are determined, then check out the list items below.
- The firmware requires a stable working PC or laptop on Windows based(preferably x64).
- To connect to a PC you need good usb cable, the contacts of which most likely will not come off during the process.
- To correctly connect your smartphone for installation Android firmware, you need to download and install the driver for it on your computer. Find out what chipset your smartphone has and download a driver for it.
- There is no one-size-fits-all installation guide for Android on all smartphones. Depending on the manufacturer of the device, as well as the model of the chipset, the programs for the firmware are different. For MediaTek chips, this is SP Flash Tool, for Sony - just Flashtool, for Samsung - Odin, Xiaomi - XiaoMi Flash. Check which program is needed for your model on a profile resource (like XDA or 4PDA).
- If you need to install an alternative firmware assembly on your smartphone, make sure on the specialized forums that one exists at all. Not all devices have high-quality alternative Android version.
- Make, if possible, a full backup ( backup) the entire contents of the system memory of the smartphone (completely copy the current version of Android). How to do this through a computer depends on specific model... There is no universal advice here either.
- Think again: are you willing to take risks? After all, suddenly arising problems will have to be solved by yourself, and it is impossible to foresee all the unsuccessful turns of events.
Universal way: installing Android on a smartphone using TWRP
TWRP Recovery is a special add-on over the OS bootloader that replaces the standard service menu recovery. After installing it, functions such as backup firmware (copy current version Android), reset the system to the factory state, delete the application cache, install patches and full Android assemblies. There are two ways to install TWRP:
1. Through native Recovery
To do this, you need to download the TWRP assembly for your smartphone model, save it to the device's memory or to a MicroSD flash drive. After that, you need to turn off the device, and turn it on by simultaneously holding down the "power" and "volume +" keys to call recovery menu(depending on the smartphone model, sometimes you also need to hold down the "volume -" or the "home" key under the screen). A menu of several items should appear on the screen. Using the "volume +" and "volume -" buttons, you need to select the "install" item and select the saved archive file with TWRP in memory. The selection is made by pressing the power button.

In this menu, you must select the "instal zip from sdcard" item after dropping the installation file archive into the root folder of the memory card
When the installation of the patch is completed - when turned on with the "volume +" pressed, the TWRP menu with convenient touch control will open.
Not all smartphones have a recovery menu that looks like this. There are such options:

In this case, instead of "instal", the word "update"
Well, a similar case:

2. Through the TWRP Manager program
To install the recovery using the program, you need the phone to meet two conditions: it turns on normally and has Root access. Root rights for each smartphone model open in its own way individually. After downloading TWRP Manager from PlayMarket, you need to launch the program, give it root rights and select the name of the smartphone (device name). In the proposed list, you should find your model and download the TVRP for it. Then you need to click Install recovery. Then you can work with patches and firmware, as well as make backups, directly from the program interface.
Unfortunately, both options are not truly universal. Smartphones with a locked bootloader (for example, all Xiaomi released in 2016) do not have native recovery for protection. They can only be installed official firmware and patches. To unlock the bootloader, you need to submit an application on the manufacturer's website and wait until you are allowed to do this. In some cases (for example, on Samsung Galaxy S7) - you just need to enable OEM unlocking in the "for developer" menu.
The use of TWRP is also limited on smartphones with Android OS 6 or newer. Many of the manufacturers use memory encryption to protect data. In such cases, the TVRP will not be able to read the data for removing the backup, which increases the risk of getting a brick if the firmware is unsuccessful (there will be nothing to roll back, or very difficult). All that is possible in such conditions is only to install Android entirely, at your own peril and risk.
In order to install Android on a smartphone in TWRP, you need to download a compatible firmware to a USB flash drive, turn it off and turn it on by holding down "power" and "volume +" at the same time. In the selected menu, you need to find the item "install" or "install", select it, confirm the seriousness of your intentions and wait for the end of the process. Sometimes, before installing Android, you need to select the "wipe cache and data" item. After installation, the smartphone can be rebooted and it will start with the new firmware. 
Today, installing Android on a laptop is as easy as installing Ubuntu or any other Linux-based OS. Depending on your needs, you can make Android the main system on your computer, or install it in a virtual machine. Both methods have their own advantages and are not difficult to implement.
Android as the main OS of the laptop
Now everyone can download the version of the Android OS, which is specially adapted for Intel processors and AMD. You can download an absolutely legal ISO installation image for free on the official website of the Android-x86 project. After that, you need to perform the following sequence of actions:
- Write the contents of the image to a USB flash drive or disk using special program such as UltraISO or Rufus.
- Restart the computer and boot from an external device (if the boot did not go through automatically, then you need to change the priority of boot devices through the BIOS settings).
- If necessary, in the installation menu, you can partition the hard drive into partitions, highlighting the part for Android installation. If Windows is already installed on the laptop, you can save it, and when you turn on the computer, you can select the desired system.
- Format the selected partition in ext3 format and continue with the installation.
- If another OS is installed on the computer, then you must agree to install the GRUB boot loader.
- After that, an automatic installation process will follow, after which it will be possible to immediately launch the installed Android OS.
If on a laptop touch screen, then Android installation will help to unleash its full potential. In addition, this system works great on low-power computers, and is also not exposed to the risk of virus infection.
Installing Android on a virtual machine
There are times when the presence of an Android system on a laptop is required only for certain tests.
A virtual machine will allow you to test applications without having a real device. You can also get screenshots with it. engineering menu and loading screens.
To create a virtual machine, you need special application and the operating system image.
One of best apps to implement a virtual machine is Genymotion. This program allows you to emulate most modern smartphones and tablets. To launch a virtual Android device, you need to do the following:

After completing the above steps, you can use the virtual device as a real smartphone. There is the ability to install applications, change settings and perform many other actions. To install the program, you need to transfer the apk-file to the screen of the virtual device using the mouse. It is worth noting that most games will not work through an emulator; for these purposes, it is better to use Android as a laptop OS.
Before installing Android on a laptop, you need to make sure that the characteristics of the computer allow you to run virtual machine... Full emulation requires a processor with virtualization support and at least 3 GB of RAM.
Installing the android operating system on a netbook is a completely logical and reasonable decision in a development environment cloud technologies and the corresponding trends. The very idea inexpensive device, the main purpose of which is to provide access to the Internet, defines its key characteristics:
- no hard disk drive in its traditional form, the device external memory implemented either on external memory cards, or on solid state drives data;
- lack of an optical drive, a device for reading data from CD or DVD discs;
- small screen size (within 12 inches);
- light weight and low power consumption in comparison with similar devices;
- relatively low price.
Based on the purpose of modern gadgets, Android Inc has developed a specific operating system based on the UNXI kernel. Subsequently Google purchased this solution and is currently supporting it on different platforms. The open source operating system has proven to be very successful and adaptable to the needs of smartphones, tablet computers, televisions and other consumer and industrial devices. It was the openness of the source code and the special libraries created by Google that made it possible in a short time to create a huge number of all kinds of user and system programs for android devices.
At the end of last year, 90% of gadgets sold were running this operating system.
Cloud technologies
An important factor in the popularization of android as an operating system was the development of the company Google services, largely replacing Microsoft programs Office. Now the user does not need to have applications on his device that allow you to create and edit texts, work with spreadsheets, databases. It is possible to process and catalog images, to conduct correspondence and exchange of data of an arbitrary nature in on-line mode; for this, your computer needs only a modern Internet browser. By the way, Google takes responsibility for keeping your data safe.
The development of cloud technologies and services implies an increase in the bandwidth of access channels in global network, but this is facilitated by the popularization of wifi access and the development of 3G / 4G technologies. Thus, the netbook, originally created exclusively for web surfing, with the development of cloud technologies turns into a full-fledged personal computer. 
Installing android on a netbook is completely logical and justified. Android as an operating system is completely free software product, and this factor may be decisive when choosing software netbook.
Installing the OS on a netbook
Let's take a closer look at how to install android on a netbook. First you need to understand whether this operating system will work on the selected device at all. If so, then we perform the actions in the following sequence:
- Installing android begins by choosing the most appropriate version for the target device on a dedicated site. File iso format is the way boot disk operating system.
- Since the netbook does not have an optical drive, it is necessary to emulate it by placing the operating system image on a USB flash drive. The size of the image is about 500 MB, that is, you need a drive of the appropriate size. Let's format this USB stick using standard applications netbook.
- Let's make USB stick bootable and transfer to it the image of the android operating system, which was copied from the project site. For this, the UNetbootin program or similar is suitable.
- After the bootable USB drive has been created, you must tell the netbook that it will boot from USB devices... This is done with the appropriate BIOS settings.
- We reboot the netbook, if everything went well, then we will get into boot menu, which will offer to either install the system on the selected disk partition, or boot without installation (trial mode).
We start using the trial mode by setting up the device. It is important to remember that due to the fact that the download took place from an external drive, all settings made will not be saved after turning off the device. You will need to do:
- setting the system language;
- customizing the keyboard (the mechanism for switching between Russian and English layouts differs from the traditional one);
- setting up network access, you will need to specify the settings for connecting to the Internet via wifi (encryption method, network name, password);
- registration in cloud storage Google, if there is no corresponding account, you will have to go through the registration process;
- the final stage of the trial setup is to install an application from the Play Market.
If everything went smoothly in the trial mode, the system works stably, you have full access to your Google account, all required applications start up and work, you can proceed to the full installation of the android operating system on the device. The procedure is the same as starting trial system: reboot the netbook, select Installation (Install Android-x86 to harddisk). It is very important here to correctly determine the physical device on which the android system will be installed.
The most flexible solution is to create a multiboot disk that allows you to use a netbook under different operating systems depending on the situation.
The popularity of the Android operating system is growing every day, due to the availability of access to unique content from Google play, a lot interesting applications, games, high system performance and a minimum number of malicious objects that are written specifically for this OS. Therefore, users often ask the question: how to install an android on a PC without losing the data of the second system?
Preparing your computer for Android OS installation
Before you can install android on your computer, you need to create a boot disk. To do this, download any suitable software from this section, for example, Alcohol 120%, DAEMON Tools or UltraISO and install it on your PC.
Now we download any version of the Android OS that you want to install.
After downloading the installation file, run the software to create a bootable disk. V this example will be the UltraISO used. Launch the program, click "File", "New", "CD / DVD image with data." Add the file and click save.
If the PC has one HDD, you need to create a separate partition on the HDD. To do this, you can use Acronis Disc Director Suite or download the MiniTool Partition Wizard.
Launch Acronis Disc Director Suite, select the disk on which the new OS will be installed and click "Create Partition".

A new window will open. Enter the name of the section, then select "File system", click "Create as" logical drive, indicate the size of the disk and click "OK".

The section has been created.
Installing Android OS on a computer
Reboot the PC and go to BIOS by clicking F2 or Del a couple of times. Go to the Boot section and select Boot Device Priority. A list appears with options for choosing boot devices. Select your drive.

In the next dialog box, the system will prompt you to select a partition to boot. This will usually be sda1 and sda2. We choose the first one if you made a partition on the C drive.
Now you need to select the type of file system. For Android, ext2 and ext3 are acceptable. A type such as NTFS is not supported by the OS, and FAT32 is not recommended.

After choosing the file system type, you need to adopt a custom bootloader. Without which the android will not boot. Click "Yes" and click "Enter".

After OS determine installed version systems, and will also offer to integrate the universal bootloader of both OS. We press "Yes", as this operation is very important. With its help, at the start of the computer, it will be possible to select the desired system.

The system installation process will begin.

Upon completion, the system will offer to launch anroid on your PC.

If all actions are performed correctly, there should be no problems with system performance.