Virtual disk devices have become indispensable in the conditions of stress testing new features of the latest operating systems, special encryption (for example, using the BitLocker algorithm) and studying new features and features of operating systems. It is important to understand that all of the above must function in an isolated environment in order to avoid damage to the OS settings, malfunctions in the registry settings, and violation of the integrity of the OS. All this becomes possible thanks to the virtual drives created in the Windows 10 operating environment.
What is a virtual HDD? This is an isolated disk device, which in its external structure is no different from a standard drive, on which you can install additional OS, software, DBMS and other files. This is a standard VHD file, which, thanks to the mounting procedure (that is, installation or attachment to the file structure of disk drives - this operation is carried out without the help of any additional software) looks like a regular auxiliary disk partition in the explorer.
In essence, the algorithm for mounting a virtual device can be similar to the method of connecting an ISO image to the system. But the main difference here is the ability to record and use other methods of operation. Keep in mind that the virtual hard HDD- this is just a regular external file stored on a disk drive, you can easily move it to another PC and use it there.
How to Create a Virtual Hard Disk
The principle of creating a virtual disk drive has not changed a bit since Windows 7 and 8. The only difference is that in the G8 you have the ability to install a VHD file in the system by simply double-clicking on it: after clicking it, it will instantly be connected as an HDD and it will be associated with a certain letter. To launch the disk drive manager in the system, as always, we will use the key combination Win+R and team diskmgmt.msc.
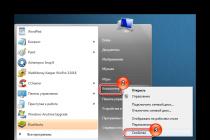
An alternative option is to right-click on the Start button (or the Win + X sequence) and select the Disk Management option from the context menu.

The snap-in for managing disk drives is launched. It is here that all actions are performed to create and manage virtual devices, as well as to mount and install them.
To create a virtual partition, select the logical device on the basis of which the virtual disk drive will be created. Next, turn to the top menu by selecting the option "Action" -> "Create virtual HDD"(Please note, here, very close, is the option "Connect virtual disk drive"; it will come in handy if you want to move the VHD from one PC to another).

As a result of such simple manipulations, the main form of the wizard will appear on the screen for creating virtual disks th drives. Here you need to specify the location of the VHD file, its size (for this parameter, its value must be at least 3 MB) and one of the formats provided to choose from: fixed size or dynamically expanding. To make it clearer, here are a few words about the differences between the formats: with a fixed size, the storage capacity is always static, that is, unchanged; even if the partition itself is empty, on the hard drive it will strictly occupy a clearly specified volume. A dynamic device, in turn, is more flexible, and will occupy the volume on the drive that corresponds to the size of the files written to it.

When all the preliminary settings are set, and you click OK to confirm your choice, a new device will appear in the disk space structure. If necessary, the Microsoft Virtual Disk Drive HBA driver will also be installed.

As a next step, we need to initialize the HDD we created by right-clicking on the new virtual disk and selecting "Initialize Disk".

During the initialization of the disk device, we will actually have to specify the partition style used when marking the disk space: MBR or GPT. In operating systems of the Windows family, it would be more appropriate to specify the MBR style, since it is it that is used in all environments above the indicated generation.

The final step towards creating a virtual disk in Windows 10 is to generate a simple disk volume that will be attached to the virtual device. To create a volume, a special step-by-step wizard is used, which will complete the entire procedure for creating a virtual disk. First, we will be prompted to specify the volume size, which is based on the value we set earlier at the stage of allocating disk space to the virtual device. It is logical to specify the same size as the first time, since otherwise not all of the disk space you allocated will be used for its immediate tasks.

One of the most important actions in the wizard is the association of a virtual drive with a logical device, that is, in fact, a letter that will act as a drive name.

The next iteration is formatting the disk partition. If you do not want to format right now, you can do it later, already in the explorer. Nevertheless, it is quite advisable to prepare the entire disk for work, so we choose file system and volume label.

This brings the whole process to an end. The work of the wizard is also over, and now we can work with the virtual disk, as with a regular disk drive: write files to it, store information, install operating systems, form a RAID array, and everything else that comes into your head.
How to delete a virtual disk in Windows 10?
If testing by you new utility already finished, you may want to remove the device from the environment. How to do it? First of all, let's delete the volume corresponding to the new virtual device. Before performing this operation, make sure that all necessary information copied to a safe place, and when you delete the volume, you will not lose any valuable data.
Right-click on the virtual volume and select the "Delete Volume" option.

Now we see that the disk layout is missing, and we can detach the disk device. We perform a right click on the designation of the disk itself and select the item "Disconnect virtual HDD" from the menu.

We confirm the operation on the next dialog mini-form and disconnect the virtual drive from the hard drive structure.

Now the virtual device is detached, but it is still stored at the address you specified when creating the disk. We go to file explorer to the folder we need, find our virtual disk there, and delete the corresponding VHD file completely manually - everything is as usual.

How to install Windows 10 on a virtual drive?
After virtual HDD is created, you have the right to do whatever you want with it: install any programs, test services, set an audit and local policy, and, of course, install a new operating system (even Windows 10). How to do it, you ask? Yes, just like installing an OS on a regular hard drive. When installing the distribution from a disk or flash drive before copying system files you will be prompted to choose logical partition, to which this copying will be carried out. Among all other devices on the hard drive, our newly created disk will also be available, and you can install the OS directly on it without changing anything else in the parameters and settings of the virtual HDD. If desired, its volume can also be expanded by resorting to the services of the same Disk Management snap-in.
If you prefer to use third-party software for such operations, we recommend using emulators such as Oracle VM VirtualBox or Microsoft's Virtual PC to create virtual disks. All these software products have an expanded arsenal for working with virtual disks, and working with them here is as easy as in the standard Windows shell.
Hello admin! My computer has one hard drive divided into two volumes. Windows 8.1 is installed on the first partition (C :), and on the second partition (D :) I want to install Windows 10, but not just like that, but on a VHD virtual disk. Please explain how to do this quickly and easily? I read on the Internet that on a simple hard disk you can place a dozen virtual disks and you can actually install an operating system on each of them!
How to install Windows 10 on a virtual drive using the program WinNTSetup
Hello friends!
First, I’ll tell you what a VHD virtual hard disk is and why our reader wants to install Windows 10 on it.
Secondly, I will introduce another hero of today's article, this is a utility WinNTSetup, which can create virtual VHDs and install operating systems on them.
Virtual Hard Disk (VHD) is a file format that has the same structure as a hard disk. In simple words, the operating system perceives virtual diskVHD is like a regular hard drive, but the disk VHD has several advantages, the most important of which allows several operating systems to simultaneously reside on the same partition of a conventional hard disk!
For example, we have a hard disk installed in our computer, in order to install five operating systems on this hard drive, it must first be divided into five partitions, but this is not at all necessary when using virtual disks. We will simply take and create five virtual disks on any partition of the hard disk VHD and install different Windows on them. We can do all this without leaving the operating system!
I propose to move from theory to practice and create a virtual VHD disk using the utility WinNTSetup, then the same utility will install Windows 10 directly to our virtual hard disk, everything is quick and easy.
- Note: If you like to solve various computer puzzles, then WinNTSetup will come in handy more than once, I suggest that you read the descriptions of the work of the program.
- Another article for you on this topic.
Preparation for work
See Disk Management of my computer.
The hard drive is divided into three sections.
one . Hidden partition System Reserved (Reserved by the system, 350 MB) containing files Windows boot 8.1.
2. Drive (C:) with installed Windows 8.1 (on the desktop is ISO Win image dows 10).
3 . New volume(E:) - file trash. On it, we will create a virtual VHD disk, on which Windows 10 will be installed.
Note: Before work, be sure to createbackup boot storage (BCD), in case you decide to delete it after using Windows 10, because after uninstalling the system, the choice of operating systems ( Windows 8.1 or Windows 10) will remain on boot.

Editboot storage (BCD) and removing the unnecessary entry is very simple, but it's even easier to deploy a backup. In the details of this issue, be sure to read it.
Windows 10 ISO image
Before starting the WinNTSetup program, we find an ISO image with Windows 10 on the disk (C :) and copy all the distribution files to some folder or double-click on the ISO image by connecting it to a virtual drive (if you are working in Windows 8.1).
I have a Win 10 image right on my desktop.

Windows 10 ISO image connected to virtual drive (D:)

It's WinNTSetup's turn
Download WinNTSetup you can on my Yandex.Disk at the linkhttps://yadi.sk/d/xLGkpAOzhXCPcor on the official website
http://www.winntsetup.com/?page_id=5

Unzip and run the executable file of the program WinNTSetup_x64.exe (if you are running a 64-bit version of Windows).


In the main WinNTSetup window, specify the install.wim file located in the D:\sources folder Windows distribution 10.
Click Select.

Select the file with the left mouse install.wim and click Open.

The Windows 10 bootloader is automatically selected by the program - Z: (the first partition, System Reserved, is 350 MB, hidden and has no letter).
We create a VHD file on which Windows 10 will be installed. Click the VHD button.


If we create a dynamically expandable the size of the VHD virtual disk, then after Windows installation its size will be small (several megabytes), but in the course of work it can grow to gigantic sizes and when data is deleted from it, the size will not decrease, this is a little inconvenient. It is worth choosing this type in case you do not plan to work for a long time in a system installed on a VHD disk, but just want to experiment.
If you create a fixed size of the VHD virtual disk and select its size of 50 GB, then a virtual disk of exactly this size of 50 GB will be created, when filled with files, its space will be filled, and when deleted, it will be freed, that is, everything is the same as in the case of a simple hard disk. I will choose this option.
I indicate the size created file VHD and click on the View button.

In the Explorer window that appears, I specify the location of the created virtual disk on the partition (E :), also give it the name Windows 10.vhd and click Save.


The process of creating a virtual hard disk VHD on volume (E:) begins and ends successfully


Disk Management


In the WinNTSetup program, click on the Install button.


The process of installing Windows 10 on a virtual disk VHD begins

and finishes successfully, click OK.

To continue installation, restart your computer.
After the reboot, a window for selecting operating systems appears (Windows 8.1 or Windows 10).
Choosing Windows 10

and we enter the final stage of installing Windows 10, familiar to you from our previous articles about the WinNTSetup program (I will not repeat it).

I think everything worked out for you and Windows 10 booted successfully.

In Disk Management, you can see that Windows 10 takes our VHD virtual disk as a regular hard disk with one partition under the letter C: (the operating system is installed on it).
However, the virtual disk itself is on the (E:) partition.


Virtual properties Windows disk 10.vhd

Device Manager

In the same way, you can create several more virtual disks on the disk (E:) and install operating systems on them. When the computer boots up, a boot menu will appear in which you can select the Windows you need to work with.
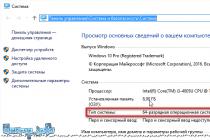
If your computer is running Windows 10 Pro or Enterprise, you may not know that this operating system has built-in support for Hyper-V virtual machines. Those. everything you need to install Windows (and not only) in a virtual machine is already on the computer. If you have a home Windows version, You can .
Regular user may not know what a virtual machine is and why it can come in handy, I will try to explain it. A "virtual machine" is a kind of programmatically running separate computer, if even more simply - Windows, Linux or other OS running in a window, with its own virtual hard drive, system files, and more.
How to do it:
- In Hyper-V Manager, on the left side of the list, select the second item (your computer name).
- Right-click on it (or "Action" menu item) - Virtual Switch Manager.
- In the Virtual Switch Manager, select "Create a virtual network switch, "External" (if Internet is needed) and click the "Create" button.
- In the next window, in most cases you do not need to change anything (unless you are an expert), except that you can set your own network name and, if you have and wifi adapter and LAN card, select in the "External network" item the network adapter that is used to access the Internet.
- Click OK and wait until the virtual is created and configured. network adapter. During this time, the Internet connection may be lost.

Done, you can proceed to create a virtual machine and install Windows into it (you can also install Linux, but according to my observations, in Hyper-V its performance leaves much to be desired, I recommend Virtual Box for these purposes).
Create a Hyper-V virtual machine
Also, as in the previous step, right-click on the name of your computer in the list on the left or click the "Action" menu item, select "Create" - "Virtual Machine".
At the first stage, you will need to specify the name of the future virtual machine (at your discretion), you can also specify your own location for the virtual machine files on the computer instead of the default one.

The next step allows you to select the generation of the virtual machine (introduced in Windows 10, this step was not in 8.1). Read the description of the two options carefully. Basically, generation 2 is a virtual machine with UEFI. If you plan to experiment a lot with booting a virtual machine from different images and installing different operating systems, I recommend leaving the 1st generation (2nd generation virtual machines do not boot from all boot images, UEFI only).

The third step is selection random access memory for the virtual machine. Use the size that is required for the OS you are planning to install, and even more is better, bearing in mind that this memory will not be available in your main OS while the virtual machine is running. I usually uncheck "Use dynamic memory" (I like predictability).


The virtual hard disk is connected or created in the next step. Specify the desired location on the disk, the file name of the virtual hard drive, and also set the size, which will be sufficient for your purposes.

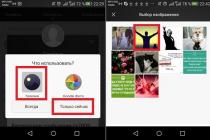
After clicking "Next", you can set the installation options. For example, if you select "Install an operating system from a bootable CD or DVD", you can specify physical disk in the drive or the ISO image file with the distribution. In this case, when you first turn on the virtual machine, it will boot from this drive and you can immediately install the system. You can also do this later.

That's all: you will be shown a set of virtual machine, and when you click Finish, it will be created and appear in the list of virtual machines in Hyper-V Manager.

Starting the virtual machine
In order to start the created virtual machine, you can simply double-click on it in the Hyper-V Manager list, and in the window for connecting to the virtual machine, click the "Enable" button.

If, when creating it, you specified iso image or the drive you want to boot from, this will happen on first run and you can install an OS such as Windows 7 in the same way as installing on a normal computer. If you did not specify an image, then you can do this in the "Media" menu item of the connection to the virtual machine.
Usually, after installation, the boot of the virtual machine is automatically installed from the virtual hard disk. But, if this does not happen, you can adjust the boot order by right-clicking on the virtual machine in the Hyper-V Manager list, selecting the "Settings" item and then the "BIOS" settings item.

Also in the settings you can change the size of RAM, the number of virtual processors, add a new virtual hard disk and change other parameters of the virtual machine.
Finally
Of course, this instruction is only a superficial description of creating Hyper-V virtual machines in Windows 10, all the nuances cannot fit here. Additionally, you should pay attention to the possibility of creating checkpoints, connecting physical drives to the OS installed in a virtual machine, advanced settings, etc.
But, I think, as a first acquaintance for a novice user, it is quite suitable. With many things in Hyper-V, you can figure it out on your own if you wish. Fortunately, everything is in Russian, well explained, and, if necessary, searched on the Internet. And if you suddenly have questions during the experiments - ask them, I will be happy to answer.
Each user can create a virtual drive if desired. But what if you no longer need it? It is about how to correctly remove such a drive in Windows 10 that we will describe further.
In total, it is worth highlighting two methods that will allow you to correctly remove the drive. You need to select the one that corresponds to the preliminary process of creating a virtual hard disk. In practice, everything does not look as difficult as it seems at first glance.
Method 1: "Disk Management"
This method is suitable for you if the virtual drive was created through the specified tool.
Remember that before performing the steps described below, you should copy all the necessary information from the disk being deleted, because after the final uninstallation you will not be able to restore it.
To remove a disk, do the following:

On this this method completed.
Method 2: "Command line"
If you created a virtual drive through « command line» , then you should use the method described below. You need to perform the following operations:

By resorting to one of the methods described above, you special efforts you can delete the virtual hard disk. Remember that these steps do not allow you to delete the physical partitions of the hard drive. To do this, it is better to use other methods that we talked about earlier in a separate lesson.
What is a virtual HDD? This is an isolated disk device, which in its external structure is no different from a standard drive, on which you can install additional operating systems, software, DBMS and other files. This is a standard VHD file, which, thanks to the mounting procedure (that is, installation or attachment to the file structure of disk drives - this operation is carried out without the help of any additional software) looks like a regular auxiliary disk partition in the explorer.
In essence, the algorithm for mounting a virtual device can be similar to the method of connecting an ISO image to the system. But the main difference here is the ability to record and use other methods of operation. Keeping in mind that a virtual hard drive is just an external file stored on a disk drive, you can easily move it to another PC and use it there.
How to Create a Virtual Hard Disk
The principle of creating a virtual disk drive has not changed a bit since Windows 7 and 8. The only difference is that in the G8 you have the ability to install a VHD file in the system by simply double-clicking on it: after clicking it, it will instantly be connected as an HDD and it will be associated with a certain letter. To launch the disk drive manager in the system, as always, we will use the key combination Win+R and team diskmgmt.msc.
An alternative option is to right-click on the Start button (or the Win + X sequence) and select the Disk Management option from the context menu.

The snap-in for managing disk drives is launched. It is here that all actions are performed to create and manage virtual devices, as well as to mount and install them.
To create a virtual partition, select the logical device on the basis of which the virtual disk drive will be created. Next, turn to the top menu by selecting the option "Action" -> "Create virtual HDD"(Please note, here, very close, is the option "Connect virtual disk drive"; it will come in handy if you want to move the VHD from one PC to another).

As a result of such simple manipulations, the main form of the wizard for creating virtual disk drives will appear on the screen. Here you need to specify the location of the VHD file, its size (for this parameter, its value must be at least 3 MB) and one of the formats provided to choose from: fixed size or dynamically expanding. To make it clearer, here are a few words about the differences between the formats: with a fixed size, the storage capacity is always static, that is, unchanged; even if the partition itself is empty, on the hard drive it will strictly occupy a clearly specified volume. A dynamic device, in turn, is more flexible, and will occupy the volume on the drive that corresponds to the size of the files written to it.

When all the preliminary settings are set, and you click OK to confirm your choice, a new device will appear in the disk space structure. If necessary, the Microsoft Virtual Disk Drive HBA driver will also be installed.

As a next step, we need to initialize the HDD we created by right-clicking on the new virtual disk and selecting "Initialize Disk".

During the initialization of the disk device, we will actually have to specify the partition style used when marking the disk space: MBR or GPT. In operating systems of the Windows family, it would be more appropriate to specify the MBR style, since it is it that is used in all environments above the indicated generation.

The last step towards creating a virtual disk in Windows 10 is to generate a simple disk volume that will be attached to the virtual device. To create a volume, a special step-by-step wizard is used, which will complete the entire procedure for creating a virtual disk. First, we will be prompted to specify the volume size, which is based on the value we set earlier at the stage of allocating disk space to the virtual device. It is logical to specify the same size as the first time, since otherwise not all of the disk space you allocated will be used for its immediate tasks.

One of the most important actions in the wizard is the association of a virtual drive with a logical device, that is, in fact, a letter that will act as a drive name.

The next iteration is formatting the disk partition. If you do not want to format right now, you can do it later, already in the explorer. However, it's a good idea to prepare the entire disk for use, so choose the file system and volume label.

This brings the whole process to an end. The work of the wizard is also over, and now we can work with the virtual disk, as with a regular disk drive: write files to it, store information, install operating systems, form a RAID array, and everything else that comes into your head.
How to delete a virtual disk in Windows 10?
If you've already finished testing the new utility, you may want to remove the device from the environment. How to do it? First of all, let's delete the volume corresponding to the new virtual device. Before performing this operation, make sure that all the necessary information is copied to a safe place, so that when you delete the volume, you will not lose any valuable data.
Right-click on the virtual volume and select the "Delete Volume" option.

Now we see that the disk layout is missing, and we can detach the disk device. We perform a right click on the designation of the disk itself and select the item "Disconnect virtual HDD" from the menu.

We confirm the operation on the next dialog mini-form and disconnect the virtual drive from the hard drive structure.

Now the virtual device is detached, but it is still stored at the address you specified when creating the disk. We go in the file explorer to the folder we need, find our virtual disk there, and delete the corresponding VHD file completely manually - everything is as usual.

How to install Windows 10 on a virtual drive?
After the virtual hard disk is created, you have the right to do whatever you want with it: install any programs, test services, set audit and local policy, and, of course, install a new operating system (even Windows 10).
How to do it, you ask?
Yes, just like installing an OS on a regular hard drive. When installing the distribution kit from a disk or flash drive, before the procedure for copying system files, you will be prompted to select the logical partition to which this very copying will be carried out. Among all other devices on the hard drive, our newly created disk will also be available, and you can install the OS directly on it without changing anything else in the parameters and settings of the virtual HDD. If desired, its volume can also be expanded by resorting to the services of the same equipment. "Disk Management".
If you prefer to use third-party software for such operations, we recommend using emulators such as VMWare Workstation , Oracle VM VirtualBox or Virtual PC from Microsoft.
All these software products have an expanded arsenal for working with virtual disks, and working with them here is as easy as in the standard Windows shell.