By using VMware Workstation virtual machine you can install a virtual operating system on your computer.
It turns out completely new computers, only virtual ones, and you can create an infinite number of such computers. This program will be needed if your computer is banned by hardware on any site. In our case, bookmakers ( I mean those who earn money or are just going to join our ranks and become financially independent person). When working with surebets, there comes a time when any registered account is almost instantly cut, and some of the offices (not included in the list), in principle, prohibit the registration of several accounts from one computer and can even block it along with the money. And if you still want to work with such bookmakers, then you definitely cannot do without VMware Workstation virtual machine.
Virtual machine vmware paid you can download it on the official site vmware.com. But on the Internet it is quite easy to download its free version. I cannot say that this is correct, since it violates the developer's copyright, but this is a fact, and since this is not an advertising article but a general educational one, I cannot but highlight this aspect - for this it is enough to enter into any search engine “ vmware workstation torrent "and voila, choose what you like ... The only thing if you decide to go this way, be careful in choosing a source.
Virtual machine VMware Workstation 11 rus 64 bit
Installation for windows 7
Installing a virtual machine vmware should not cause difficulties even for the most inexperienced PC user. But just in case, I decided to post screenshots of most of the stages of installing the program. Moreover, without this, the article seemed incomplete to me, and I do not like unfinished work ... Vmware workstation 12 is installed in exactly the same way and an earlier version (10) too.


Configuring VMware Workstation and installing windows 64bit on it
Here we will linger and consider everything in great detail, at least to the extent that any person could do it. The possibilities of the program are very wide and we will not consider all of them, but we will dwell on those that we need to be stable And so without further ado, let's start ...
Run the installed VMware Workstation for example, I decided to take version 10, it does not differ in any way from 11 and 12 in terms of settings, I think the next versions will correspond, since publishers are distinguished by stable conservatism in terms of design and functionality (and this pleases !!!). In addition, I use this version myself, it is already installed and ready for demonstration.
1. VMware Workstation after the first launch, it immediately opens the main tab.
Find in the middle "create a new virtual machine" and click.

2. In the window that opens, leave normal mode create a virtual machine and click Further.

3. At this stage, you need to specify from which media we will install windows. Either it will installation disk as shown in the example, or ISO installation image file... The latter option is more convenient, since it is convenient to store the image on a computer or on a USB flash drive, it will not get worn out or scratched, plus the installation speed will be faster. But for this, you first need to create it in special program, I personally used UltraISO.

4. Here it is important for us to indicate the name of the computer, try not to repeat ourselves, since the uniqueness of all the facts individually determines whether or not the beech insurgents and their bots will calculate you.
You do not need to enter the product key and passwords, you can choose the version of Windows if you want. Click further.

5. You need to specify the name of the virtual machine, this is not the name of the computer, but the name solely for your convenience, it will be displayed in the column on the left.
At the same stage, you can specify the location where the files of this virtual machine will be located on your computer.

6. We choose the size of the disk. Windows will be installed on it and all programs can be divided, but I do not advise this, and developers, by the way, too. The default is 60 GB, you can leave this figure. But if your computer has enough memory, I advise you to increase it to 80 GB.

7. Here we press - equipment setup.

8. In the window that opens, go to the memory section and by dragging the pointer or manually specifying, select the size random access memory future virtual computer. Please note that the size of the RAM depends on the configuration of your computer and the recommended sizes are indicated on the right. In any case, try to set a little less than the recommended size in order to avoid "brakes".

9. In the same window, go to the section CPU and on the right in the drop-down menu, select the number of processors and cores inside them. There are never many of these 🙂 bet as much as you will allow ...

10. We remain in the same window and go to the tab network adapter , then click additionally and in the window that opens, we generate a new MAC address (this must be done every time, since it is on it in the first place that the hardware on the Internet is monitored, at least this is what many experts say, we will not dispute ...)
We press OK and close the window " equipment«.


11. Be sure to leave a check mark and click Further.

12. This completes the configuration, it remains to wait until the installation of Windows is completed and VERY IMPORTANT when the network location setup window appears, select HOME NETWORK.


When everything is installed and configured, I want to draw your attention to two useful functions:
- Expand to full screen ( blue marker, fig. below) - I think everything is clear here.
- Single mode (red marker, fig. below) - This function allows you to display browsers and that's it open programs and folders to your main computer. It will feel as if the browser is not running on a virtual machine, but directly on your computer, and this without losing privacy. If the power of your computer allows, you can simultaneously run several virtual machines and open all browsers from them in a single mode.

If you started the machine and these functions do not work, do not despair, this sometimes happens and is usually solved as follows:
Open the tab “ Virtual machine" and press install VMware tools ...(picture below)

Now VMware Workstation virtual machine completely ready to work with, I remind you that the functionality of this program is much wider than described in this article, you can study them at your discretion. But since my site is aimed at teaching you, this information is enough!
P.S. Thank you for visiting my site. Enjoy your income !!!
Vmware Workstation - software, which is most often used to create virtual machines with various operating systems. The capabilities of this program are quite large.
Today we will look at the process of creating a virtual machine with the Windows operating system. A big plus of the Vmware Workstation program is the ability to run and work simultaneously with several virtual machines. The number of simultaneously running virtual machines is limited only by the hardware of your computer and by the settings for allocating computer resources for these machines.
The program itself is not demanding on the hardware of your computer. 2 is enough for you nuclear processor and 2 GB of RAM, but if you are going to work with several virtual machines at the same time, you should consider improving these parameters.
Download and Install Vmware Workstation
First, we need to download and install the software.
You can download from the official website https://www.vmware.com/products/workstation-pro/workstation-pro-evaluation.html
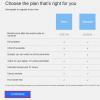
When you go to the download page, you can choose which operating system you will use this software for.
After downloading, install. 
After installation, we launch the program. 
Now we can start installing and configuring our virtual machine.
Creating and configuring a virtual machine
First, we need to prepare an image of the desired operating system that we want to install.
To create a virtual machine, click on the "File" menu button and select "New virtual machine ...". 
This will open a window for creating and configuring a new virtual machine. In the window that opens, select "Custom (optional)" and click the "Next>" button. 
The next window prompts you to select a version for hardware compatibility. This is necessary for the installation of continuous tools and programs, and the selection of the necessary parameters. We do not need this, so we do not select anything and click the "Next" button. 
The next step is to select the source (image) of our operating system.
If you want to install the operating system from the disk that you have, in this case, select the "Installation disk" item.
In the event that you have an image of the operating system, then select the "Installation image file" item and click on the "Browse" button. In the window that opens, select the image you need and click the "Open" button. The image file must be in .iso extension. In our example, we will produce Windows installation XP.
To install operating Windows systems 7/8 / 8.1 / 10 it is necessary to activate the option of hardware virtualization (Virtualization Technology) in the BIOS. This option is available for AMD and Intel based computers. Without activating this technology, these operating systems will not run.
After choosing the method we need, press the "Next" button. 
If you know the product key, then enter it in the window that opens in the line "Windows Product Key", if you do not know it, then simply fill in the fields we need (If you do not need a password, just leave this field blank). After filling in the required fields, press the "Next" button.
If the product key was not entered, then during the easy installation, the system itself will ask you to enter it. 
In the next window, set the name of our virtual machine, which will be displayed in the list of virtual machines. And select the directory where the virtual machine files will be located.
After the done actions, we proceed to the next step. 
The next window will be Processor Configuration.
Here you can select the required parameters of your processor resources that will be used by the running virtual machine.
By default, the program automatically selects optimal parameters processor, but if they do not meet your requirements, you can determine them yourself by selecting the desired configuration manually.
After determining the required parameters, go to the next step, press the "Next" button.
It is worth noting that the more resources you give to a virtual machine, the less they will be left for each virtual machine or your operating system to work while it is active.
In the Network Type window, you can configure the network settings for your virtual machine.
Vmware Workstatio allows you to fine-tune network access for a virtual machine.
- If you want to provide access to your machine from the Internet, you should select the first item "Use a network bridge". When using this parameter, you will need to set the external (white) IP address for your virtual machine.
- In order to use a virtual machine inside the network and provide it with access to the Internet, you must select the second item "Use broadcast network addresses(NAT) ".
- In the event that you want to restrict access to the Internet and use the virtual machine exclusively in the internal network, you should select the third option "Use only the host network".
- And the last option is to refuse to use a network connection, when you select this item, your virtual machine will not have access to any network.
We need to choose the second option for normal work. After selecting the desired parameter, proceed to the next step. 
In the window for selecting the type of controllers, select the driver for the SCSI controller.
To configure these parameters, you must first activate support for SCIS controllers in the BIOS, if it is not activated.
We will be provided with 3 types of drivers to choose from:
- BusLogic
- LSI Logic
- LSI Logic SAS
If you have knowledge of these drivers, then you should choose the one supported by your operating system. In the event that you are not familiar with them, then we simply do nothing, the Vmware Workstatio program automatically selects the controller driver suitable for your operating system.
After selecting the driver, proceed to the next step. 
In the next window, you need to select the type of virtual disk.
The system will automatically detect the type of disk suitable for your virtual machine and its operating system, but I recommend choosing SATA, since today this type of disk is the fastest in comparison with others.
It is worth noting that some types of operating systems (quite old) will not be able to work on a SATA disk, in this case, you should choose a different type of virtual disk that suits your OS, or simply trust the program, as it will automatically detect the required type.
After selecting the desired type, proceed to the next step. 
In this window, we will be able to choose which disk to use to install our virtual machine.
- Create a new virtual disk - when you select this option, you can specify the folder and its size where and install the operating system of your virtual machine.
- Use an existing virtual disk - if you have already created a virtual machine and want to repeat its virtual disk parameters or simply reinstall, then you can select this option and set the folder for your old virtual machine.
- Use physical disk - this option is worth choosing if you want to use a separate local one HDD for your virtual machine.
In our case, we select the first parameter and move on to the next step. 
In the next window, you must specify the size of the virtual hard disk.
The program will automatically indicate the appropriate size for your type of operating system, but if you need more or less, then we indicate the size we need in the "Maximum disk size" field.
Keep in mind that the amount of free space on your disk will decrease exactly by the amount that you specify to reserve for the virtual machine. Make sure that you have enough free space for comfortable work with programs and for correct work operating system.
After determining the size, proceed to the next step. 
Specifying the dick file. We select where the file of our virtual disk for the virtual machine will be located. Press the "Browse ..." button and specify the folder or create it. 
Now we have moved on to the final stage of setting up our virtual machine and its operating system.
In this window, we can once again view the list of all the parameters we have selected and, in case of correction, use the button "Equipment settings ...".
In the "Hardware setup ..." section, you can fine-tune the hardware parameters for your virtual machine or, if necessary, change the previously set ones.
After installation, the system will start itself.
Now we have a virtual machine for working with the Windows XP operating system. You can install other versions of Windows in the same way.
All installed virtual machines you can observe and launch in the left part of the program under the names that you gave them during installation. 
To go to configuring the parameters of an already installed virtual machine and its operating system Right-click on the virtual machine and select "Options ..." in the drop-down menu.
This will open the options window. 
Removing a virtual machine
First of all, for that. To delete a virtual machine, you need to end the guest session.
To do this, right-click on the virtual machine, and in the drop-down menu, hover over the "Power" item, then select "Shut down the guest OS" in the drop-down menu. The OS will shutdown, after which we right-click on the virtual machine again and select the "Delete" item, agree with all the pop-up windows.
Thus, you have completely deleted the virtual machine and all its files from your computer.
Problems with starting the virtual machine
In the event that your virtual machine does not start, you should do the following.
- BIOS Settings Check (Enable Virtualization Technology and SCSI Controller Support)
- Reinstalling the operating system.
- Installing the system from another image or disk.
- Checking the parameters of the virtual machine (some parameters may not be compatible with your OS).
- Checking the hard disk for integrity.
- Diagnostics of the computer for the load of the operating system.
- Disable Firewall.
- Check for malware.
If none of the methods helped you, then you should carefully read the error that appears when starting the machine and understand what the problem is. After you understand what the problem is, you can solve it by following the instructions described in the error.
Conclusion
By following the instructions described in the article, you can easily install, configure and run your virtual machine with the desired operating system.
The main thing during installation is to strictly follow the instructions in order to avoid errors when starting and running the virtual machine in the future.
Also, do not forget to make preliminary settings in the BIOS for the correct operation of the Vmware Workstation program.
We will consider the option of creating a virtual machine using the popular virtualization system VMware Workstation Pro 14, and also consider its parameters.
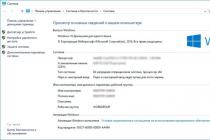
Before us is the main window of the program. (Fig. 1)
Fig. 1 - The main window of the program.
We press "File" -> "New virtual machine".(Fig. 2)
 Fig.2 - Menu "File".
 In most cases, it is suitable "Normal" type, select it and click "Next>".
 Fig. 3 - Selecting the type of configuration.
 A virtual machine is like physical computer for which you also need to install the OS. How do I install the OS?
And three options are offered: (Fig. 4)
- Install from disk using CD-ROMa. (Naturally, we immediately discard the first option .. It's 2018 .. and the CD-ROM was left somewhere in 2005.)
- Select an image file.
- Install the system later.
We will consider the option "Install the system later" since if you insert iso image right away, then at the next step he will ask you to enter personalization (Accounting / Login / Password) for the future guest OS, but I want to enter it myself. (Personally, I like it better.)
 Fig. 4 - Selecting the method for installing the guest OS.
 Lists are very likely 99,9% that you will find the OS you need here.
We will show with an example - Linux Ubuntu Server 18.04 LTS 64-Bit therefore we choose:
- Operating system - Linux.
- Version - Ubuntu 64-bit.
 Fig. 5 - Selecting an operating system.
 Next, you need to specify "The name of the virtual machine."(Fig. 6) - This name will be used for your convenience, and will be displayed in the list of virtual machines. (K hostname has nothing to do with it.)
We also indicate "Location:" virtual machine on your hard drive. Personally, I changed to a more convenient path for me.
 Fig. 6 - Specifying the name of the virtual machine of its location.
 How big should I create a disc?- The hard disk of a virtual machine is stored as one or more files on a physical disk. This file will be created small and grow as applications, files, and data are added to the virtual machine.
We must indicate Maximum size virtual hard disk... I leave the recommended size for Ubuntu: 20GB. (Fig. 7)
 Fig. 7 - Note maximum size virtual hard disk.
 Everything is ready to create a virtual machine.
We see a window with the parameters of the created virtual machine. (Fig. 8) If you are satisfied with these parameters, then click "Ready"... Personally, I am a little uncomfortable, so I will press "Equipment setup"
 Fig. 8 - Virtual machine parameters.
 Here you can highlight RAM size for our virtual machine. (Fig. 9)
I leave 1 GB.
 Fig. 9 - Allocating the amount of RAM.
 You can ask "Number of processors" and "Number of cores per processor"... (Fig. 10)
I'll leave one at a time. This is enough for Ubuntu Server.
 Fig. 10 - Processor configuration.
 Here we leave a check mark "Connect at power on"... And choose the iso-image of our Ubuntu Server... In order to install it.
 Fig. 11 - CD / DVD-ROM parametersa.
 Go to parameters "Network adapter". (Fig. 12) By default set "NAT", but since I want mine virtual machine had access to my test network and saw not only mine physical machine but also all other machines on the network. I'm in the section "Connecting to the network" choose "Bridge" and put a tick "Replicating the state of a physical network connection".
We have considered all the main parameters. We press "Close".
 Fig. 12 - Network adapter parameters.
 But now all the parameters suit me, we press "Ready". (Fig. 13)
 Fig. 13 - Virtual machine parameters.
 Go to the main program window (Fig. 14)
There is a list of virtual machines on the left. Our new VM Ubuntu added to it.
We press "Turn on virtual machine".
 Fig. 14 - We start our virtual machine.
 Errors in the system, its failure, the introduction of viruses and spyware - all this and other troubles in working with a computer can be avoided if you study and experiment with third-party software and system settings in a virtual environment - a virtual operating system installed on a virtual machine. These are created with the help of a special type of programs - which are able to create a virtual one on a physical computer, some of the hardware components emulating it from a real computer, and some - allowing you to configure it manually using the necessary parameters. VMware Workstation 10- one of such programs for system virtualization. She will be discussed in this article.
1. About the program
With VMware Workstation, you can test various operating systems, implement your own settings, and program codes, investigate various software (up to assemblies of dubious authorship or even deliberately malicious). In general, you will be able to do everything that you cannot afford to do with your main (physical) computer, fearing unknown consequences.
VMware Workstation is a major competitor to Oracle's popular operating system virtualization software. The latest VMware Workstation is inferior in less support for the main operating systems - only Windows and Linux, while VirtualBox can also be installed on Mac OS and Solaris. VirtualBox is completely free, and VMware Workstation is paid, but it has a number of advantages:
- more options to support 3D graphics of virtual operating systems;
- availability of a universal print driver;
- creating snapshots (virtual machine snapshots) at regular intervals (while in VirtualBox all this is done manually);
- compression of virtual disks to save computer space;
- many other features that advanced users will appreciate.
VMware Workstation 10 can create virtual machines based on various operating systems - Windows, Linux, Solaris, and even a tablet version of Android.

Version 10 of the program provides support for working with virtual Windows 8.1 operating systems and, including the ability to convert a physical computer based on this system into its virtual clone. Recall that earlier versions of VMware Workstation supported only Windows 8. In version 10, an improved interface for using multiple virtual machines and a simplified setup for working with multiple monitors.
2. System requirements
The developers promise the highest performance in the 10th version of VMware Workstation - however, this program in earlier versions was stable and relatively fast in work even on low-power PCs. Nevertheless, here is the minimum required for the full functioning of VMware Workstation 10:
- processor with clock frequency not less than 1.3 GHz;
- RAM at least 2 GB;
- operating system Windows or Linux.
For the operation of virtual systems Windows 7, 8, 8.1, a larger amount of RAM is desirable than the specified one, for the simple reason that when creating a virtual machine, it cannot be given more than half of the RAM that a physical computer has. And Windows 7, 8, 8.1 have long "grown" from 1 GB of "RAM", which Microsoft specifies as an option.
VMware Workstation 10 will only welcome a high-speed hard drive - SSD or HDD with SATA interface 3 without bothering you with waiting while writing and reading data.
3. Installation
The distribution kit of the VMware Workstation 10 program can be downloaded from the official website of the developer. Run the installer as administrator.

Following the step-by-step installation wizard, we go through a simple procedure for installing the program.


Enter the product key and click " Enter", Or press" Skip" for use trial version... Then we press " Finish»To complete the installation.


If necessary, we also install the VMware Workstation 10 crack. You can take, for example,.

After all the steps to install the program, you can run it.
4. Creating a virtual machine
In the main window of the program, we see the option “ Create a new virtual machine". We press it.

The same option is available as a separate command in the program menu "" File» – « New virtual machine».

The virtual machine creation wizard will start with a predefined choice of its usual configuration. In most cases, particularly if this is your first time installing a virtual operating system using VMware Workstation 10, you shouldn't change anything. We press " Further».

In the next window of the wizard, you will be prompted to select an installation source. Option " I will install the system later»You may need to test Live SD and bootable disks with software, for example, to reanimate the system. If the installation disk of the operating system that you want to install as virtual is in the drive, select the desired drive and click " Further". If you want to install an operating system from an image installation disk, set the active option “ Image installation file"And specify the path to this image using the browse button. We press " Further».

Then the wizard will ask you to specify the operating system and its version. As mentioned, VMware Workstation 10 supports Windows 8.1, but only Windows 8 is listed in the list of versions. This should be selected if you are installing Windows 8.1. We press " Further».

In the next window of the installation wizard, set the name of the operating system - as it will be convenient for you to distinguish it from other virtual operating systems. Using the browse button, you can change the folder where the virtual machine file will be saved. You can, for example, create for virtual machines special folder on a non-system drive to avoid losing data when reinstalling the primary operating system. We press " Further».

In the window for creating a virtual machine disk, specify the size of the hard disk. For example, for Windows 8.1, VMware Workstation 10 offers 60GB by default. If you are not constrained by space on a real computer, you can leave this figure, because 60 GB is enough for the needs of the system, and for experiments with third-party software. For a quick look at the features Windows assemblies 7, 8, 8.1, in principle, 20-25 GB is enough.
For small virtual hard disks, set the option “ Save disk in one file". We press " Further».

In the next window, the wizard will complete the creation of the virtual machine and provide information about its parameters. If your physical computer has only 2 GB of RAM, you can leave these parameters unchanged and press the " Ready". But in this case, the physical computer has more than 2 GB of RAM, so we'll be generous and give the virtual machine a little more than the pre-installed 1 GB. We will also make some other changes. We press the button " Equipment setup».

The hardware settings window will open just on the RAM tab. Here you can drag the slider from 1 GB to a larger amount of RAM, without going beyond the blue mark of the maximum recommended. Also, the amount of RAM given to the virtual machine can be entered manually in the input field.

After changes with the indicator of RAM, go to the tab " Display". We set the active option " Maximum resolution of any monitor»And select the most suitable screen resolution from the list provided.

You can also make other changes to the hardware of the virtual machine.

Upon completion of all settings, click " Close", then - " Ready"In the virtual machine settings window. After that, VMware Workstation 10 will go to the main menu, where both in the library (area on the left) and in the center of the program window you will see the newly created virtual machine. We press the green button to turn it on.

5. Installing an operating system on a virtual machine
In the same way as when installing the operating system on a physical computer, the installation process from the boot disk will start.

At the bottom of the window, you will see a request from VMware Workstation 10 to press the button “ Installation completed»After the system is installed. Do this after the installation is complete.

Installing an operating system on a virtual machine will be slightly faster than on a physical computer, especially if you have a good high-speed hard drive. This is because the computer does not need to fiddle with reading data from the drive.
Very soon, the first signs of an already installed operating system will appear in the VMware Workstation 10 window. The final stage of the settings is setting the screen resolution inside the virtual operating system. To correctly display the virtual system in the full-screen mode of VMware Workstation 10, set the screen resolution inside it that your monitor supports.

Switch to full screen mode, and you will hardly notice the difference - the virtual system will unfold on the screen as if it were the main one. And the VMware Workstation 10 pop-up button bar at the top will allow you to have access to all the necessary commands of the virtual machine, including exiting full screen mode.

Did this article help you?
When switching to the next version of the operating system of the Windows line, some users are faced with the lack of support for their favorite applications in the new OS. Or it's even more complicated - you have, for example, OS X, and you need applications that are compatible only with Windows.
At the moment, there are a large number of "virtual machines" that can resolve these inconveniences. For example, paid Parallel Desktop and VMWare Workstation, or free options like Microsoft VirtualPC or VirtualBox from Oracle.
We have already talked about VirtualBox in the articles:
- Creating a virtual computer and installing Windows on it using VirtualBox;
Today I will talk about working with.
The process of installing a virtual machine is no different from the process of installing regular programs, so you can skip it. After installation and reboot, the main program window will appear.
In this emulator, everything is easily customizable. On the left side are the virtual machines that you have installed. On the right is the "invitation" window of the program. With it, you can create or open an existing virtual machine, connect to remote server and much more. Above are several panels that contain controls.
Creating a virtual machine
VMWare Workstation provides several options for creating a virtual machine. To describe all possible functions, we will choose a selective method of creating a machine.

In the next window, you must specify the compatibility with previous versions programs.

This is usually used for teamwork on different configurations. The products compatible with this machine are displayed on the left side of the window, and the restrictions imposed on this configuration are displayed on the right. It doesn't matter now, so we leave everything as it is.
The next step is to install the system on a virtual machine.

In this case, you can specify how a real drive hard drives and virtual image... Alternatively, you can select the installation media later, right when the virtual machine starts up.
Then you need to select the operating system that you are going to install.

In accordance with your choice, the program will offer the optimal set of settings for a specific system. Next, you need to come up with a name for the virtual machine, as well as the folder in which it will be located.
Most modern computers the processor has more than one core. The program can also set the number of cores that you want to use in the guest system.
Note: Do not give too many physical resources to the virtual machine. The computer will become slower, and you will not get a big increase in the performance of the guest system.
At the next step, you need to specify the amount of RAM that will be given to the virtual operating system. The program will also warn you about the minimum amount of memory at which the system will function, and will also indicate the limit above which you should not go. In this case, it is recommended to leave the value that the emulator program specified initially.
The next step is to specify the type of network you want to use.

In this case, if you do not understand network technologies, you do not need to change anything. After installation, the virtual machine will have a network and you do not have to configure it separately.
At the next step, you are asked to select the disk on which the system will be stored.

You can create a new virtual disk, or use an existing one. You can also set aside a portion of the physical disk for system operation. In the first two cases, virtual hard disk in the form of a specific file or a group of files. Then the configurator will prompt you to select the type of virtual disk. Since SCSI on older systems is either not supported or does not work confidently, it is advisable to choose an IDE interface.
Next, you need to specify the size of the future disk. In this case, you can specify the space slightly larger than what we need. In this case, you can allocate all the disk space at once, or you can fill it up gradually so that the empty space on the virtual disk does not take up real gigabytes. For convenience, the program will offer you to split the disk into several files, or save everything in one.

In conclusion, it is worth familiarizing yourself with the parameters of the created VMWare Workstation virtual machine. If everything is in order, then press the "Finish" button, otherwise - you can go back and change any parameter.
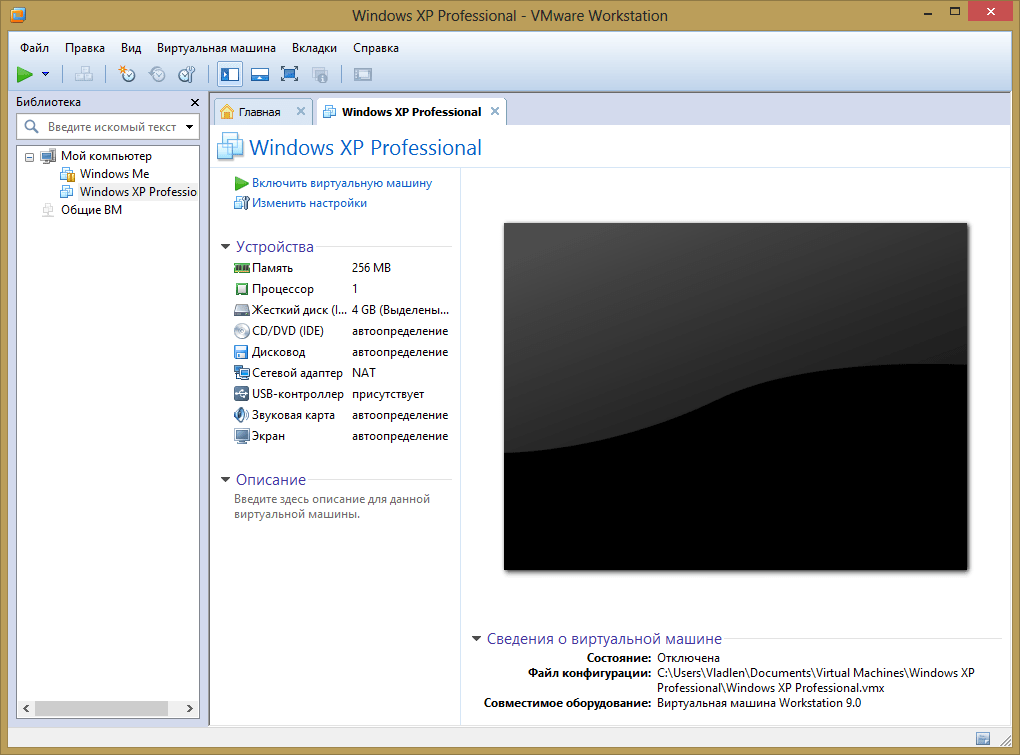
A black screen is now displayed on the right side of the program, indicating that the virtual machine is disabled, as well as information about the hardware of the virtual machine. The process of installing the system on a virtual machine should be skipped as it is no different from installing a real operating system.
Procedure for starting a virtual machine, suspending and shutting down
So now everything is ready to run. If there is already a system on the virtual machine (VM), then it is enough just to start it. Or put the system on a freshly created machine.
There are two options:
- If there is a VM, then in the window on the main tab, select "Open" and select the VM (file with the .vnw resolution).
- After adding (or after creating a new one), you need to start the VM by clicking on the start button located at the top of the window under the Edit menu, or by selecting the Virtual Machine - Power-> Resume menu item, or by pressing the Ctrl + B key combination.
It is worth noting that the virtual machine can be paused. At the same time, its full state at the time of shutdown will remain and the virtualizer program can be closed. After you resume work, all windows, open programs and even processes in memory will remain in the same state in which you left them. This is the most convenient way to use a virtual machine. you don't have to wait for it to load. There are three ways to pause a VM:
- Press the "Pause" button at the top of the window, under the "Edit" menu
- Select the menu item Virtual Machine - Power - Suspend
- Press the keyboard shortcut Ctrl + Z
There is also a less convenient way of shutting down the virtual machine and the virtualizer program - shutting down the guest operating system as if you were shutting it down on a regular computer. Moreover, if you turn off the machine through the capabilities of VMWare, then the system will automatically shutdown, as if you pressed Power button on the system unit.
You can turn off the virtual machine in the following ways:
- Press the "Stop Virtual Machine" button, which is located under the "Edit" menu
- Select the menu item Virtual Machine - Power - Power Off
- Press the keyboard shortcut Ctrl + R
It is worth noting that sooner or later you will have to turn off / reboot the VM. garbage will accumulate in the guest operating system, which will disappear only after a reboot. It will gradually accumulate and, as a result, will make the machine work slow.
Everything is good: the guest system is up and running, but it may not release the mouse outside of its working window. In this case, if you want to leave the virtual system, you need to press the Ctrl + Alt key combination. However, there is a set of drivers that you do not have to install after installing them. The system is integrated into the host machine and you can switch between them without any problems.
You can do this as follows: go to the Virtual Machine - Install / Reinstall VMWare Tools package.

The VMWare Tools package installs drivers for sound cards, video adapters and other equipment.
An important fact is that VMWare Tools can work with several guest systems at the same time. Moreover, each system will work independently of the others. The number of simultaneously running systems is limited only by the physical capabilities of your computer. And you, as a user, can switch between them using tabs.
There is a problem: let's say that the system has become unstable and you need to press the key combination Ctrl + Alt + Delete, but the host system's task manager is called. You can send a similar combination to the guest system using the Virtual Machine menu - send the Ctrl + Alt + Delete command.
Everything is fine: the guest system is functioning and you are satisfied with almost everything, but there is one problem: the system screen is too small and this makes the work inconvenient. There are several ways to fix this problem:
1. If you have a monitor large diagonal then you can simply increase the screen resolution.
2. There is also a more elegant approach: you can enable "single mode". This is the mode of integrating the guest operating system into the main operating system. At the same time, you can work in parallel with applications of both the host and the guest system. Its useful to note. That the entire screen will be involved and the resolution of the guest system will be the same as that of the host. In order to switch to this mode, you must click on the "Single mode" button, which is located in the menu under the "Tabs" menu, or go to the View menu - Single mode
3. It is possible to expand the operating system in full screen, completely covering the main workspace. This can be done by clicking on the button " Full screen mode", Which is located between the Virtual Machine and Tabs menu, or go to the View - Full Screen menu. You can also use the keyboard shortcut Ctrl + Alt + Enter. In this case, the VMWare Tools panel will appear at the top of the system, which will automatically hide if you do not hover over it.
So now we have working system... It is necessary to add network folders to it - in this case, we will give the system access to the physical hard disk. To do this, you need to turn off the virtual machine.
The system on the virtual machine is the same as on the real one. Accordingly, you need to turn it off just like a regular system.
After shutdown, you must press the "Change settings" button and go to the "Parameters" tab.

In it you need to find the "Shared folders" parameter, put the switch in the "Always on" position and select the necessary shared folders for your system. You can specify either an individual folder or an entire hard disk partition.
Apply the changes and boot the virtual machine. Externally, the machine has a network, but internally, a disk must be connected to the system. The easiest way to do this: open "My Computer" and select "Map network drive". Everything! The virtual system has access to real data.
There is another, simpler way to transfer files and folders: to transfer data inside a virtual machine, you just need to drag the file from the real system into it with the mouse.
Connecting removable devices to a virtual machine
Sometimes the question arises: "What to do?" If you want to connect a flash card, printer and other devices directly to the machine. In this case, the developers have provided a number of operations that can connect external USB devices.
You can view the list of devices available to the machine in the Virtual Machine - Devices menu. There you can also see a list of the currently connected equipment. By checking the box next to the required device, you connect it in the guest system, unchecking it - disconnect it. It's that simple!
For example, if you want to connect a drive to a virtual machine, you need to do the following:
- Connect the flash card to your computer and after a few moments it will appear in the "Devices" menu;
- Check the box next to the device and after a while you will find a system message that the device is connected.
Conclusion
Another important point: suppose that you reinstalled the operating system, but you still have the VMWare Workstation virtual machine. To start it, you must open it in the program: Home - Open a virtual machine. After that, at startup, a window will appear.

In this case it is necessary to press the "I copied it" button. And the virtual machine will be loaded. Running virtual machine:

In conclusion, it should be noted that a virtual system is a very useful and, at times, irreplaceable device. The undoubted advantages of a virtual machine are such features as:
- If desired, you can virtualize any operating system and, accordingly, if the system is old, then old programs that are not able to run on modern hardware will work with it;
- Each system is independent, which allows you to conduct experiments without fear of "killing" the OS;
- You can create almost any hardware configuration and test the system performance on it.
However, the medal also has a downside - the VMWare Workstation program is paid and costs 8,300 rubles. Buy it or use analogues - it's up to you.