Webmoney is an international payment system. Founded in 1998. Designed for making payments and doing business on the Internet. Today WebMoney is used by over 30 million people around the globe.
Using an electronic Webmoney wallet, you can exchange payment funds, replenish your phone account, make purchases in online stores, pay for various services.
A WebMoney member is given the opportunity to open a wallet with any Guarantor under a single WMID (identifier). That is, open accounts equivalent to various monetary units that are supported in the system: WMZ - dollars, WME - euros, WMR - Russian rubles, WMU - Ukrainian hryvnias, etc.
This guide will tell you how to register with Webmoney, as well as acquaint you with some of the nuances of using this payment system.
registration
1. Open the official website of the service in your browser - http://www.webmoney.ru/ (for residents of Ukraine - http://webmoney.ua/).
2. Click the "Register" button.
3. Enter your phone number with an international code (+7 - for Rossssi, +380 - for Ukraine). Click Continue.

4. In the "Personal data" form, set the date of birth, country of residence.
5. Enter your work email address (do not use fictitious addresses, temporary mailbox services! Email is required to verify and restore access to your account).

6. Select Security Question in the drop-down menu, and then in the next column type the answer to it.

Attention! Come up with an original 2-3 word answer to your security question so it's hard to predict. Remember that the question / answer is one of the means of protection against unauthorized access to the WebMoney wallet by unauthorized persons.
7. Click the mouse to check the box at the beginning of the words "I give my consent ... to the processing of data ...".

8. Click Continue.
9. Check if your personal data is correct. If an error is found, click "Return" and edit the fields. If the questionnaire is filled in correctly, click "Continue" again.

10. After proceeding to the third step of registration, the service will automatically send you an SMS-message with a verification code. Enter it in the "Enter the code ..." field. Click Continue.

12. Come up with a complex password 15-20 characters long from upper and lower case English letters and numbers. Enter it 2 times in the fields under the login.

13. Print the character combination (captcha) shown in the picture. Click "OK".
14. Next, the system will prompt you to create a wallet. If you register without a passport (that is, without presenting your passport data and their verification), you can open only the dollar equivalent (WMZ) in the system. The profile is assigned the "Alias certificate" status.
Without changing the value of the "Currency:" field (by default, it is set to "WMZ - USD equivalent"), check the box in "I accept the terms ...". Click "Create".

15. Go to email, open the letter from WebMoney and click on the activation link in it to confirm the specified email address.
Obtaining a formal certificate
A user with a formal passport is provided in the system with additional features... In particular, he can create wallets WMR, WMU, WMG, WME and make various payment transactions in them (for example, replenish and withdraw funds by bank transfer).
The formal passport is issued free of charge. To get it, you first need to make electronic color (required!) Copies of your passport (1, 2 pages and a sheet with registration) using a high-quality digital camera or scanner. Save a copy of each sheet in a separate file with the extension .JPEG. The size of each file should not exceed 2MB.
Having prepared copies of the pages of the passport, proceed to the registration of the certificate:
2. In the right upper corner click on your WMID to go to profile options.
3. Next to your initials, click on the "gear" icon.

4. In the "Certificate" section, in the panel with the message, click the "Send an application ..." link.

5. In the form that opens, indicate all the required passport data (name, date of birth, series and number). Click OK. Then follow the instructions of the service.


Attention! Upload copies of pages to the WebMoney server one by one (separately).
After a while, the administrator of the service will send you an email about the results of checking passport copies. If everything is in order with them, your profile will automatically be assigned a formal passport.
Creating wallets
1. In the profile settings, in the "Finance" column, click "plus".

2. In the submenu that appears, select "Create wallet".
3. Click the drop-down menu "Currency" (adjacent panel), select the required currency equivalent.

4. Check the box next to “I accept ...”. Click "Create".
Where can I download the WebMoney Keeper application?
Webmoney Keeper - special application providing convenient management of wallets on personal computer... After you have successfully registered in the payment system, download it, run it and log in (login and password are the same as for entering the site).
1. On home page offsite, open the section "About the system".

2. Go to Keeper WinPro (Classic).

Financial well-being to you!
Anyone who is going to work on the Internet is simply obliged to create WebMoney wallet ... Why and how to do this, I will show in this post.
WebMoney- this is payment system, the largest and most popular among all similar systems in Russia and the CIS. There are others, but they are not so popular, although in some of them you will also need to register, if only because some customers find it more convenient to pay in these systems.
So, WebMoney Is something like Sberbank, only on the Internet, and a wallet is your personal account with this bank. You need to start a wallet, you will then give its number to the customer so that he can transfer the payment to him. Then you can spend money from your wallet in online stores, top up your balance on your mobile phone, withdraw it to a plastic card, etc.
I'll tell you right away that upon registration WebMoney wallet you will need to enter a lot of personal information. So - enter it correctly and accurately, as in a real bank, because later, when you are going to link your bank account or plastic card to your wallet in order to withdraw cash, you will not be able to do this due to mistakes. I remember how I suffered, sending scans of my passport for verification and every time I was refused, but the only thing was that I incorrectly indicated the date of issue of the passport. One number - and a lot of wasted nerves! Of course, then you can fix everything, but it's better to do everything right at once, than then look for mistakes.
So, let's begin registration in WebMoney... We go to. Here we are asked to enter a phone number or log in with some social network... We will do everything right, because in the social. networks, even the names are often not true. Why you need to specify the phone number is written on this page. In short, you need to enter it, so write boldly, here you will not be deceived and money will not be withdrawn. Have you written? Press the button " Proceed».
On the next page, personal information is entered. You can come up with a pseudonym, write the rest exactly as in your passport. Residence address - by registration in the passport. You should already have mail (e-mail). If you do not have it, read how to register it in the post “How to register mailbox”. We fill out the form, everything is clear there, and again we press “ Proceed».

The next page will show all your entered data so that you can double check it. Especially the phone number. After that, a letter will be sent to the e-mail you specified, in which there will be a link to continue registration. When you go through it, an SMS with a digital code will be sent to the number you specified, which must be entered on the page that opens. This checks the seriousness of your registration intentions, as well as the accuracy of the entered numbers and e-mail.
The last step is to complete the registration. You will need to come up with and enter a password twice, the numbers from the picture in a separate field, and press the button " OK". This completes the registration of the WebMoney wallet. And in fact, it is going faster than it seems.

It's your WMID, or personal identifier in the system WebMoney... Some people confuse it with a wallet, but it is not. Number WMID you have one - this is your account, and in this WMID you can create many different wallets.

We will get to the page where you need to select the type of wallet from the list. Choose to start WMR- ruble wallet. Check the box below and press the button " Create»

After successfully creating the wallet WMR you will be taken to your personal page again. There you can see a long number with a letter R at the beginning. This is your wallet account number in WebMoney... You will give it to transfer money to it. But that's not all - except for the ruble one, you also need to have a dollar wallet - WMZ... Some people just prefer to pay in dollars. Of course, they can transfer dollars to your ruble wallet - they will be exchanged at the current exchange rate, but it is better to have such a wallet, you never know why it will come in handy. When registering on some exchanges and sites, somewhere you need to indicate a ruble wallet, and somewhere a dollar one - everywhere its own rules. Click on the plus sign to add another wallet.

There will be the same wallet creation page again, just now select WMZ, put a tick at the bottom and click the "Create" button again
As you can see, there are now two wallets:
You can create another wallet in euros - WME, but I don’t know why it might be needed at all. There are other strange currencies, but two wallets will be enough for you - WMR and WMZ... If you ever need others, you can always go to the site and create them, so you don't have to bother about this.
Registering a Webmoney wallet was successful, we created not even one, but two wallets, and now we can receive money for them. But that's not all you need to know about the WebMoney system. So far, you have the so-called formal certificate in this system - that is, the lowest. You are limited in what you can do. To attach a bank account to a wallet, you need to confirm certificate documents. In addition, you need to install the program on your computer WebMoney Keeper Classic, with which you will accept money, pay for something on the Internet, withdraw it to the bank, etc. This will be your personal wallet on your computer.
How to do all this, I will describe in future posts and, in order not to miss anything, I advise you subscribe to new articles by simply entering your e-mail in the form at the bottom of the page or in the sidebar of the site.
WMZ purse is designed to work with title units of type Z, which are equivalent to the US dollar (USD). The wallet is also one of the international services that can be used in any country where the Webmoney system works.
The WMZ wallet is available to all members of the system, including holders of pseudonym passports. Citizens of the Russian Federation, along with a WMR wallet, can create one WMZ wallet without requiring a passport.
First user actions
The procedure for creating a WMZ wallet will depend on whether the user has other wallets at this point or not. If the user is not a member of the system, then to create a WMZ purse, you will need to register with Webmoney. To obtain a pseudonym passport, you will need to perform the following steps:
- Go to the official Webmoney website.
- On title page click on the "Register" button.
- Provide personal and contact information.
- Assign a password and get keys for the first login.
- Log in to Webmoney Keeper Standart and familiarize yourself with general information on the work of the system.
Acquaintance with the rules of the system is available in the section " For individuals". The information is available until a pseudonym passport is received. After registration is complete, the credentials are verified by the system within 1-3 days. If the fact of re-registration is not revealed, then the user is issued a pseudonym certificate - First level identification in the system, which does not provide opportunities for full-fledged work.
After receiving a pseudonym certificate, the user can start creating a WMZ wallet. It is recommended to immediately start obtaining a certificate for more high level... For those who are already registered in the system, the process of creating a wallet of this type will be similar.
All wallets available to the user are displayed at the top start page... For one WMID (individual identifier), multiple wallets can be issued simultaneously. The main wallet must correspond to the currency of the country in which the system participant permanently resides. For the Russian Federation, the main type of wallets is WMR wallets.
Step-by-step instructions for creating a wallet
Before creating a WMZ purse, the user checks its presence in the list of already created purses. This can be done in the "My wallets" section. With one passport, a user can open several wallets with different currencies, but without duplication. Two WMR wallets (or wallets with a different currency) cannot be opened.
- Log in to the system using the keys obtained during registration. Login is carried out via SMS confirmation, which is not disabled even if the owner of the WMID wishes.
- All currently open wallets should be displayed at the top of the screen. To create a WMZ purse, the user clicks on the "empty" icon and selects the "Create a new Webmoney purse" option.
- The drop-down list displays wallets with currencies available for opening for the used WMID. In this case, "WMZ wallet" is selected.
- The system will offer the user to familiarize himself with the rules for creating and using a WMZ purse. After reviewing this information, the system participant puts a tick under the description of the rules, thereby agreeing with them.
This completes the procedure for creating and opening a WMZ purse. The system will automatically assign a wallet number, at the beginning of which there is a prefix Z. Participants cannot independently select wallet numbers, since the system cannot use two identical numbers. After logging into the WebMoney system, the user will see the balance on the open WMZ purse.
Rules for using WMZ purses
Optional differences in rules of use WMZ wallets from other types of wallets - no. Daily, weekly and monthly limits are set depending on the level of the certificate. The commission for all transactions made is 0.8%. This type of wallet has one peculiarity - regardless of the name of the operation, the maximum commission amount will not exceed 50 WMZ. Therefore, when using a "dollar" wallet, it is profitable to make transactions for large amounts, since there is a limitation on the commission charged.
After opening the wallet, the system member is assigned a WMZ certificate, on the basis of which the wallet is fixed in the system. The official platform for the expanded circulation of WMZ currency is MegaStock. ru. The cost of one WMZ depends on the current exchange rate of the national currency against the US dollar. Therefore, registering a new WebMoney purse will help not only to save the funds of the owner of the WMID, but also to increase them.
WebMoney is a popular electronic money system in many countries. This essay will consider in detail the question of how to create a WebMoney wallet in Ukraine and the features of the withdrawal of electronic currency.
Features of using WebMoney in Ukraine
It is very easy to use an e-wallet in Ukraine. However, registration is required first. This is done this way:

It is also possible to register WebMoney in Ukraine with a formal passport. To create such a wallet, you need to perform a number of simple steps:
- Log into your account in the system.
- Go to the service certification center.
- Carefully fill in all the fields, if you make at least one mistake in the name, surname or place of residence, you will need to write to the support service with a request to change the information.
- Next, make a bank card if you don't have one yet (you need it for withdrawal, which we'll talk about a little later).
- The penultimate stage is to download scanned copies of the first pages of the passport and bank card... After a while, the document will be received.
After registering and creating a formal passport, many system capabilities will become available.
Payment systems of Ukraine: Video
How to display WebMoney title units
Now let's look at some of the most common ways to withdraw money using your account in the system.
The first way is to top up your mobile. Suitable only for users with a small amount of cash. To do this, you need to go to your wallet control panel. Next, go to the "Payment" tab, select one of the telecom operators, enter the amount and phone number.
After that, the replenishment will be made. The advantage of this method is low commission (0.5 percent) and instant funds transfer. You can replenish your mobile only with WMU - an intra-system analogue of the Ukrainian currency UAH.
The second way is to withdraw banknotes to an account or card of PrivatBank.
The third way is to use one of the exchangers. This method requires a certificate of at least formal. We have already described how to do it above. Now step by step the entire withdrawal process:

Other services work in a similar way. You can also buy WebMoney yourself, all methods can be found on the official website

So, today I propose to talk about the Webmoney system. In this article, I will show you how to create an electronic Webmoney wallet (as usual with detailed instructions), as well as the benefits of this service. I have been using WebMoney for many years, because, in my opinion, it is one of the most convenient payment tools for. The instruction will be long, since WebMoney has a lot of services and opportunities. If you are serious about using this system, I recommend to set aside a day to study everything (with the "day" I embellished, of course, but you never know who wants to study everything as thoroughly as possible).
pros
Profit withdrawal
So, let me first tell you why the Webmoney wallet is so good for a binary options trader. The first is this. All traders know that it is possible to withdraw to the card only that part, which is equal to the size of the initial deposit. And everything beyond that goes either by bank transfer or to various Internet wallets. And, of course, there can be "troubles" with a bank transfer. If you constantly receive a certain amount received from a financial trading company (from an offshore company) to your account, questions may arise. The amount can be frozen in the account, the bank has the right to demand explanations from you, as well as refuse to service your account (especially our beloved Sberbank is famous for such "charms").
Tax
Well, and, of course, for traders is relevant and. If banks can transfer information about the receipt of funds to your account to the tax authorities for further proceedings, then electronic systems such as WebMoney, of course, do not transmit anything anywhere.
How to create a Webmoney wallet
First, let me tell you how to create a Webmoney wallet, and let's move on to passports and account types a little later. So, to register, you first need to go to the official Webmoney website:

Further, as it is not difficult to guess, you need to click on the "Register" button. It is important to understand that the data must be kept real during registration, nevertheless, you are going to work for WebMoney with real money, and the discrepancy between the data is "punished" by big problems. But back to registration, it is as simple and straightforward as possible. At the first step, enter your phone number:

We continue our registration at Webmoney. On the next page you need to enter:
- Date of birth;
- Country of residence;
- Mail;
- Security question (in case you forget your password, etc.);
- And the answer to it.


After sending SMS, we receive special code, which we enter in the field below:


After that, we move on to choosing the currency of our WebMoney wallet. One account can have several wallets with different currencies. The most popular ones are:
- WMR (ruble wallet),
- WMZ (dollar wallet).
You can replenish your WMZ purse with dollars, and WMR - with rubles. Or simply exchange currency within the system, that is, for example, after replenishing the ruble wallet with rubles, exchange them for dollars. So we will continue to register on WebMoney and select the currency for the wallet:

That's all. Our Webmoney wallet has been successfully created:

As you can see, creating a WebMoney wallet is very simple and, moreover, completely free. Next, do not forget to look at the mail that you indicated when registering with WebMoney and confirm your email address:


Webmoney passports
Actually, there are three WebMoney certificates:
- Alias certificate,
- Formal passport,
- Personal.
You already have the first one, but it is almost impossible to work with it (solid restrictions). For an ordinary trader, I would recommend obtaining a formal passport, especially since it only requires uploading your passport data. But for personal passport you will have to "stamp out" the office of the registrar and pay a little money (albeit a small one). So, to get a formal passport, click here:

Click "send an application for a formal certificate." Next, enter the details of your passport:

How to top up a Webmoney wallet
Actually, there are enough ways to replenish the Webmoney wallet, all of them are listed at the link:

WebMoney withdrawal methods
Also, the methods of possible withdrawal of money from Webmoney are listed on the official website of the service:

Exchangers
Please note that different deposit and withdrawal methods have different fees. Actually, Webmoney is “fed” at the expense of this commission. It is somewhat more profitable to change Webmoney money through exchangers. You can receive money immediately in cash, but you can money order, internet banking and so on. Let's take, for example, the most famous exchange, Best Change.

In the column on the left, select the currency that we want to change, and in the column on the right, respectively, the one that we want to receive. There are also all kinds of filters, reviews. But the system itself shows the best options at the beginning.
When withdrawing money to a card, first this card must be attached in the Webmoney account. This is very easy to do:
- Instructions for various payment systems;
- Service for attaching cards.
Since September of this year, WebMoney has changed the procedure for attaching cards for the safety of users. Namely, each card is tied for only an hour (after that, the action can be repeated). How long this event will last - only WebMoney employees know (yes, and then, they know). But security is security.
Map from WebMoney
Also, the Webmoney service provides the ability to create an international card. Actually, after registration, you will receive the card itself by mail and you will be able to withdraw your dollars or euros to it:

Webmoney access programs
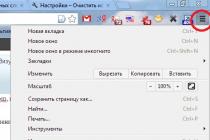
In general, there are two services, so to speak, convenient access to WebMoney. One is "browser-based", the other is a phone application. Browser is a WM Keeper WebPro program:
- Link to the program;
- Instructions for installing and working with the program from the Webmoney service.

Conclusion
In fact, the WebMoney service is much broader than it seems at first glance. With it, you can make purchases on the Internet, pay for utilities, and mobile phone and much more. It is simply impossible to describe all this within the framework of one article. There is even a whole WebMoney wikipedia. So I recommend that you at least familiarize yourself with this service. Hope you find this article helpful.