Greetings, dear friends! If you are reading my blog, it means only one thing - you are actively looking for new types of earnings on the net. It is possible that you already have your own successful projects based on social networks, or you've learned how to make money from referral programs. Regardless of what are the sources of your income, it is very important learn how to withdraw your earnings, be able to use them. That is why, it seems to me, it would be most logical to devote today's review to the creation of electronic wallets, with the help of which you can pay for various services or store the funds earned on the Internet.
Since earlier I have already talked about such payment systems as PerfectMoney , PayPal, Qiwi, Skrill , Okpay , it is obvious that Webmoney will be on the agenda today. Despite the fact that many of you most likely already have accounts in certain payment systems, I simply cannot help but tell you about how to register in WebMoney and not give you the right to choose the most convenient and profitable payment method.
Service history
By tradition, I want to start the article with a small theoretical insight, which will help us get to know the WebMoney payment system better. First of all, I would like to note the fact that it is Webmoney that is recognized the most popular e-wallet in the CIS countries. The peculiarity of the payment is that you can work with it both in all browsers and directly on your computer, having previously installed the webmoney keeper program on it. Each registered user can open a wallet in one of the following currencies - dollars, euros, rubles, hryvnias and even bitcoins. If necessary, wallets can be created in all available currencies at once, this function is completely free and only takes a couple of seconds to complete. 
It is quite simple to deposit or, conversely, withdraw money from the wallet. We will talk about the methods of input and output a little later. In the meantime, I want to note why it is the electronic wallets of WebMoney that can be considered the most convenient and functional. This is due to the fact that work with them is supported by a huge number of companies and online stores. In addition, electronic money stored in the system can be used to pay for utilities, top up a mobile phone or pay for the Internet.
System of certificates
Convenience and practicality of the wallet literally has no equal... However, in order to remove the restrictions of use existing on it, you need to take care of getting a certain webmoney certificate... Immediately after registration in the system, you are assigned a pseudonym passport by default, which you can later change to a formal passport, initial or personal. By and large, passports are a kind of identity check. The higher the level of the certificate, the more confidence the system has in you. 
I honestly admit that webmoney was my first payment system, and when I registered with it, it seemed to me that I would go crazy. A lot of points were unclear, it was necessary to save the keys in order to be able to restore the wallet, send a scan of my passport to the certification center, and so on. The system pays a lot of attention to the issue of safety, which, on the one hand, is very correct and healthy. But on the other hand, this creates difficulties for beginners when registering, forcing them to spend on opening an account. a lot of time and effort.
To simplify the work with the wallet, I strongly recommend that you immediately install the Webmoney application on your smartphone. But for now, let's figure out how we register in the system and create a webmoney wallet.
Step-by-step instructions for registering and creating wallets
Since the Webmoney system does not require any money from you for the creation and maintenance of an electronic wallet, you can easily register it just in case, even if you do not plan to actively use it in the near future. In order to get an account in the system, you will have to spend a little more time than when registering an electronic qiwi wallet, for example. But do not rush to get scared, nothing super complicated will be required from you. If you follow my instructions, the wallet will be registered. easy and relatively fast.
Filling in your data

Keeper installation and configuration
- After you confirm the validity of your cell phone number and e-mail, the system will offer you to download and install Webmoney Keeper on your PC. If you are using operating system Windows, then it is better to choose Keeper Classic, since it is the most convenient and functional to use;
- When you first meet a keeper, you will need “ Register with Webmoney"And confirm your intention by pressing the button" OK»;
- After that, the program will ask you enter activation code, consisting of 32 characters, which you have already received in the letter;
- As soon as the code is verified by the system, you will be prompted to come up with for your account password... It must be at least 6 characters long;
- Now you will need to generate unique access key... To do this, it is enough to perform several chaotic movements against the background of the dialog box that opens, thereby filling the generation scale.
WMID
- At the end of the key creation event, WebMoney will assign you a personal number WMID which will consist of 12 digits... Despite the fact that the WMID number does not carry any secrecy and is available for viewing to all users who have registered in the system, I still advise you to rewrite it, since it is this combination of numbers that will be used as login when you want to log into Keeper;
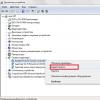
- After generating the code, a window will open in the program in which you will need to set additional password to access the file with your keys. I draw your attention to the fact that this password must be much more reliable what you asked Keeper. The program will automatically prompt you to save the keys on the C drive, but you can change the specified path at your discretion by sending the file to a more reliable location
Activation code and wallet creation

Go to registration
Obtaining certificates (verification)
After you successfully register in the system, you will need to obtain a certificate. If all the passport data specified during registration were correct, then the system will process your request quickly.
Formal attestation
All that is required of you is to send copy your passport, having previously scanned it, and wait a little while the service assigns your passport the status “ Formal". To do this, you must:
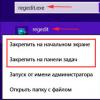
- Go to the profile tab or " Security"And select the item" Get a formal passport"Or go to the tab for individuals and select the item" Get a certificate". Further - " Control Panel»;
- After that, the system will take you to a page where you will need to fill out the form required to obtain a formal passport;
- First of all, you enter your personal data, while not forgetting to put a check mark next to each field “ Do not show". This precaution is necessary in order to protect your passport data from public view;
- After that, load to the form scanned copies pages of your passport and send it all for system check.
Personally, I have been using it for many years, and it is quite enough for me. But if suddenly you decide to get a certificate more high level, then let's figure out how to do it.
Obtaining high-level certificates

Commission and limits
Each time you make a transaction in the Webmoney Transfer system, you will have to pay the service a certain commission, which is debited from your account for the provision of information and technological interaction between you and another participant in the calculation. The commission is only 0.8% of the transaction amount, moreover, it is always rounded up to round to 0.01. It should be noted right away that commission cannot be less than 0.01 wm.
Maximum commissions
 As for the maximum commissions, there are also restrictions here, depending on the currency in which the transaction takes place:
- For dollar transfers the maximum commission is 50 WMZ;
- For transfers to Euro, the commission is limited to the amount in 50 WME;
- If you commit ruble transfer, then WebMoney will not be able to withdraw from you more 1500 WMR for processing the operation;
- In case of hryvnia transfers, the upper limit of the commission is 250 WMU;
- For Belarusian rubles limitation is 100 WMB;
- Transfers in Kazakh tenge can be levied with commissions not more than 9000 WMK;
- If you are working with gold equivalent and perform operations in this unit of account, then the maximum transaction commission cannot exceed 2 WMG;
- For those who work with, maximum dimensions webmoney commissions can be 50 WMX.
Commission-free transactions
There are several cases in which the system does not charge a transaction fee in principle. Such operations include:
- transfers between wallets with the same wm-identifier;
- transfers that are made by participants with an initial or personal passport, between the same type of wallets that belong to the same passport.
Limits
As for the limits, the maximum amounts of funds that can be stored in the wallets of users with a verified phone number and the option to confirm transactions via SMS messages are enabled are limited in accordance with the status of the passport assigned to them:

In order to get acquainted with the limits and statistics of spending funds on your wallets, just click on the icon with three vertical dots located in the lower right corner of the “ Wallets". In the drop-down list that opens, select the category " Limits”, And the system will automatically show you the information you are interested in.
Input / output methods
Input
Well, now let's figure out how replenish our new wallet. In principle, given how wide a range of methods WebMoney supports for depositing money into an electronic wallet account, there should be no problems with replenishment. For example, if you want to put money on a WMR wallet, you can do this in several ways:
- With help bank card in online mode;
- Across self-service terminal;
- Bank transaction;
- By exchanging others electronic currencies;
- In cash at WebMoney exchange offices, bank branches and ATMs.
So that you have an idea of all the available options, you can choose the most optimal for you in terms of terms and commissions, I suggest that you familiarize yourself with the following list:

In order to fund your electronic account, you need to know your wallet number... For those who are lost on how to find out the wallet number, I advise you to go to Personal Area WebMoney and go to the " Wallets". In the specified list of your wallets, opposite each of them will be indicated by a capital letter indicating the currency of the account, and a set of numbers. It is these numbers that are the wallet number.
If you decide to replenish your wallet with money that is on your bank card or using electronic money of alternative payment systems, you need to use the help online exchangers... Considering the fact that each of these services sets its own exchange rate, it is simply unrealistic to find the lowest and most profitable one manually for a person.
Use Bestchange services
Output
For those who decide how to withdraw money from a webmoney account and withdraw it, for example, to bank card or to an electronic wallet in another payment system, again you will have to use exchange services... In principle, you can cash out your electronic money in other ways, but in my opinion, it is online exchangers that are the most versatile, modern and convenient by receiving funds. If this option does not suit you, then the following alternative ways of solving this problem are available to you:

Summary
Perhaps this is our today's excursion into the world payment system Webmoney can be considered complete. A little later, I will definitely return to this topic and tell you how to use webmoney.
Official site of the system
In the meantime, I ask you to leave your impressions and feedback from working with the system in the comments under this post. Tell us what attracts you to this payment system and what not, what systems do you prefer, and what methods of depositing and withdrawing funds do you find most convenient. Do not forget to subscribe to blog updates and follow the latest news. See you soon!
If you find an error in the text, please select a piece of text and press Ctrl + Enter... Thanks for helping my blog get better!
In this article, I will tell you in detail how to register correctly in the Webmoney payment system, and how to create an electronic wallet in it. Please note that registration is simple and will take you no more than 5-10 minutes of your time. Well, let's get started:
1.
First, we need to go to the website webmoney.ru, on the left we find the green button "Register" and click on it, it looks like this: ![]()
2.
After clicking on the "Register" button, you see the following window: 
3. Now you need to enter your number mobile phone, the entered number will be needed in the future to carry out operations within your account in the Webmomey system. After entering the phone number, click "Continue", and we see the following form to fill out:

4. Fill in all the fields with your real data, I filled in the picture with mine for an example. After all the fields have been filled in, we press the "Continue" button, thereby moving on to the next window:

5.
Here we are offered to check the correctness of the entered data, if everything is correct, we press the "Continue" button, and move on to the next stage of registration: 
6. Here we have to confirm our mail, which we indicated during registration. Go to your mail, which you indicated, and from the letter that came to it from Webmoney, copy the code and paste it into the appropriate field, as shown in the picture above, then click the "Continue" button, thereby moving on to the next step:

7. Now an SMS message should come to your mobile number, which you indicated during registration, and it will contain a code that you need to enter in the field as shown in the picture above. After entering the code, again click on the "Continue" button, and we get to filling out the following form:
 8.
In this form you need to enter a password. Think of it yourself, and I do not advise using the same password as for mail. Then you need to enter the characters from the picture and click on the "OK" button, thereby we complete the registration, and we are transferred to our Webmoney account, it looks like this:
8.
In this form you need to enter a password. Think of it yourself, and I do not advise using the same password as for mail. Then you need to enter the characters from the picture and click on the "OK" button, thereby we complete the registration, and we are transferred to our Webmoney account, it looks like this:

9. That's all, registration is over. Now we just need to create a wallet. In the picture above, we see the following field:
10. We press "you can create", and create a WMR wallet and put a tick, thereby confirming that you accept the terms of this agreement, this is a formality. Now the field "Wallets" will look like this:
11. After the WMR purse is created, we still need to create a WMZ purse, for this we press the [+] button, which is located to the right of the WMR purse you created, and create a WMZ purse, the procedure for creating is the same. Now the field "Wallets" will look like this.
Instructions
First you need to go to the official website of the WebMoney payment system, click the "Register" button (it is located in the right upper corner) and fill in the "Mobile phone number" field (an SMS message with a digital code will be sent to the specified number in the future).
The next step is filling out the questionnaire. All personal data specified by you in the questionnaire must be reliable, otherwise in the future you may have problems with withdrawing funds to your bank card.
After completing these actions, a letter with a digital activation code should be sent to your e-mail, which must be entered into a special field on the registration website.
After confirming the number cell phone and addresses Email you will be prompted to download and install the WebMoney Keeper program (Classic, Light or Mobile) on your computer. For the Windows operating system, the WM Keeper Classic application is considered the most convenient and functional version, therefore it is recommended to install it.
On first launch installed program a window appears in which you need to select the action "Register in WebMoney" and confirm it by pressing the "OK" button.
After checking the activation code, you will be asked to come up with a password (it must contain at least 6 characters, consist of letters of the Latin alphabet and numbers), which will subsequently be used each time you enter the program.
The next step is to generate a unique access key. To do this, against the background of the opened window, you should make chaotic movements with the mouse until the generation scale is filled to the end.
After completing the procedure for creating keys, the payment system assigns you a personal WMID number (WM-identifier), consisting of 12 digits. Although the WMID number is not some kind of secret information and is visible to other users of the WebMoney system, it is still better to rewrite it, since this digital combination will be your login when you enter the WM Keeper Classic program. After you have saved your personal WMID number in a safe place, click the "Next" button.
In the window that appears, you should specify one more additional password, which will serve as an access code for the file with your keys (this password must be different from the password created earlier for entering WM Keeper). By default, the program suggests storing keys on drive A, but if you wish, you can change this path and save the keys in a more secure place.
How to register with WebMoney? Many have heard about the WebMoney system from their friends and acquaintances and would like to receive a comprehensive answer to this question. To get started, we recommend reading a short description, from which you can find out, and the principles of operation of this system.
WebMoney is a well-known settlement system that has gained great popularity and is effectively used for business on the Internet. At the same time, the owners of WebMoney categorically deny that the system has anything in common with payment systems and even with electronic money. That is why the terminology in this settlement system is built around property rights.
There are three concepts at the heart of WebMoney:
- WM wallet.
- WM identifier.
- Certificate.
In the system, property rights to funds are transferred between wallets. The WebMoney wallet number begins with a letter denoting the currency (for example, WMZ for wallets that store certificates in US dollars), followed by a 12-digit wallet number. The reasons for such complications are of a legal nature. Users, on the other hand, have long realized that there is money in the wallet.
Any wallet has an owner; to establish a connection between the wallet and its owner (WebMoney user), the wallets are attached to WM identifiers (WMID). ? This is a unique 12-digit number given to the user during his registration in the WebMoney system.
Each WebMoney member has a certificate of one type or another. Depending on the type of the user certificate, certain system capabilities are available to him. The most common is the Alias Passport.
The user receives this type of Certificate upon registration and this gives him the opportunity to carry out basic operations sufficient for almost any newcomer to the system.
Registration in WebMoney, step by step instructions
For individuals registration in WebMoney consists of six steps:
1. On the main screen of the WebMoney site, press the "Register" button. The following screen will appear:
![]()
2. In the next step, you can enter a mobile phone number or register via a social network.
When working with WebMoney, a phone is used to send an SMS to it with a transaction confirmation code, which is required to ensure the safety of all payments. By the phone number, you can find the WMID and, accordingly, quickly restore access to your account in WebMoney, for example, if you lose your password.
On the other hand, it is very convenient to register using an existing account in a particular social network by clicking on the corresponding icon.
3. The third step is entering personal data. You only need to enter reliable data about yourself, this is necessary for certain functions (for example, working with plastic cards), in addition, if data is inaccurate, there is a risk of losing access to the system in the future.
Entering personal data when registering through a social network leads to the display of personal data received from this account.
If registration is performed by phone number, then a form for entering personal data will be displayed at this step.

There are many fields to fill in this form during registration. We recommend that you treat this process with all possible care, since the incorrect filling of some of the fields does not differ from the provision of inaccurate information (the consequences of this have already been mentioned above). Not all fields can be easily corrected after registration. So fill out and check your details as carefully as possible.
Funds in wallets are the same money and therefore registration in WebMoney is no less responsible than registration when opening a bank account.
4. At this step, the e-mail is confirmed. A letter comes to the mail from WebMoney with a registration code and a description of what needs to be done with it.
6. At this stage, a password for the wallet is created. You can use letters (uppercase and lowercase), numbers (0-9) and special characters in the password. As always, caution must be made against very simple passwords and the “bad practice” of keeping the recorded password in an easily accessible place.
For legal entities, registration in WebMoney actually consists in drawing up an application for registration. Legal registration process faces are more complex and largely takes place in the real world.
On the corresponding page of the WebMoney website, the following are briefly described (depending on the country and currency) legal entities connection options:
- Payment acceptance processing.
- Payment processing.
- Payment machine.
- Capitaller.
- Service of agency payments.
- Service "Acceptance to the account".
- A simplified version for Russian individual entrepreneurs.
- A simplified version for Ukrainian individual entrepreneurs.
After completing all the steps described above during registration, you become a member of the WebMoney system. But since your Passport is the lowest level, you are a member with restrictions for WMID. The main limitations are as follows:
on wallets, the total cannot be more than the equivalent of 15,000 WMR;
restrictions (limits) on expense transactions are equivalent to: 15,000 WMR per day, 45,000 WMR per week, 90,000 WMR per month.
Increasing the limit is possible only by obtaining a higher level certificate.
Using the WebMoney system
You can use the WebMoney system, for this you need to have funds in your WM purse. ? There are two ways here:
- or receive the earned funds to your WM-purse;
- or put money on WebMoney yourself (you can make a transfer from an account or card, through a terminal or even from a mobile phone account).
Funds on your WM purses can be spent on payment for goods and / or services, exchanged for funds in other purses (if you need another “currency”), or withdrawn from the WebMoney system.
Withdrawing money from WebMoney
How to withdraw money from WebMoney? To a bank card or account, by transfer by mail in Russia, in special exchangers and in a number of other ways. Withdrawal methods are very different from each other in the size of the commission.
Members can manage wallets using the site Keeper Standard (Mini) ... Works with all browsers. Another site - Keeper WebPro (Ligth) - has advanced features and is preferred by advanced users of the WebMoney system. There is a program for MS Windows Keeper WinPro (Classic).
Due to the growth of traffic mobile internet(i.e. the ubiquitous use of smartphones and tablets) a simple and straightforward mobile app Keeper Mobile... Well, the rise in popularity of social networks has led to the fact that for the main social networks there are simple and easy-to-use clients.
Conclusion
This article discusses the basic concepts of the WebMoney system. The question of how to register with WebMoney will be discussed in more detail. Given step-by-step instruction for the registration of individuals. After reading this article, any beginner can easily start using the capabilities of the WebMoney system.
Listen
Webmoney is an interactive system that allows you to electronically store, exchange, use cash carrying out business transactions. Money is stored in electronic wallets tied to a specific type of currency.
Registration in the system - how to register a WebMoney wallet
In order to become a member of the Webmoney system, you need:
1. On the website https://www.webmoney.ru/rus/ select the "Registration" menu
Enter your phone number (in the format 79ХХХХХХХХ) or use "login through social networks"

2. Fill in the questionnaire that appears manually (or the data will be unloaded - if you use the login via social networks). Check if the data is correct.

3. Check your mailbox(folders "inbox", "spam") - you will receive a letter with a registration code. You need to enter it in the appropriate field or follow the direct link from the registration letter.

An SMS with a code will be sent to the phone number indicated in the first step, which must be entered into the phone number confirmation window.

4. Come up with a password that is convenient for you. It is advisable to use letters and numbers, since the simpler your password, the more likely you are to be unprotected from fraudulent activities.
User registration in the Webmoney system is completed.
Authorization in the Webmoney system - how to enter Webmoney

Webmoney keeper
WebMoney Keeper (WM keeper) - electronic system data about the user's wallets and transactions, services of the WebMoney payment system. The use of WebMoney Keeper is free of charge.
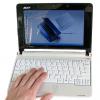
Depending on what device you are using - laptop, tablet, phone, netbook - you can choose a convenient application / program to use.
Webmoney keeper is presented in various interfaces: from an application to a web browser, to a separate program, independent.

The WM keeper interface quite simply allows you to receive information about the status of settlements, wallet balances, and update data (see the figure).
WebMoney Keeper allows you to be more mobile, simplify your work in the WebMoney system.
The main functions of WM keeper (similar for system users in Russia, Belarus, Ukraine):
- Authorization in the WM system by login and password;
- Authorization in the WM system through social networks;
- Working in the webmoney system not only behind the computer screen, but also with the help of other devices (phone, tablet, netbook);
- Updating data on the amount on accounts;
- Balance replenishment with webmoney cards;
- Money transfers;
- Billing and billing operations;
- Statements on the last performed transactions;
- Payment for services;
- Overdraft of funds from and back;
- Conducting correspondence.
Using WebMoney Keeper Classic
WebMoney Keeper Classic is a program installed on a computer to conduct instant online transactions in the WebMoney system using money in currencies such as ruble, euro, hryvnia, etc.
The main functionality of this program - see above. WebMoney Keeper Classic is installed on computers with an operating room Windows system of all generations, starting from XP.
For additional protection a secret key (ENUM confirmation) is used.
Using WebMoney Keeper Light
WebMoney Keeper Light is a lightweight version of WebMoney Keeper Classic, which allows you to access WebMoney from any computer or mobile phone.
One of the advantages of WebMoney Light is that you do not need to install the program on your computer, since it uses a secure connection. The light version allows you to work on any platform, any browser.
An account registered in WM Keeper WebPro (Light) cannot be used with the WM Keeper WinPro (Classic) client, and vice versa. Can be used in conjunction with Keeper Standard (Mini) and Keeper Mobile.
Using WebMoney Keeper MINI
The fastest, easiest and mobile way using webmoney wallets (not necessarily all, you can connect only a few specific ones) - with the establishment of maximum amounts for transactions per day (limits).
WebMoney Keeper Mini is especially suitable for a novice user, as it is the least intimidating with password / key / confirmation files, etc.
It is important that an account registered with WebMoney Keeper Mini allows you to work with WebMoney Keeper Light users and vice versa.