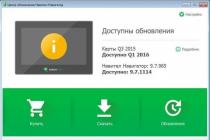
Microphone check is easy without using special programs or software for sound recording. Everything is made much easier thanks to free online services. In this article, we have selected several such sites where any user can check the functionality of their microphone.
Services of various types can help the user to check his recorder. Everyone chooses a site specifically for themselves in order to evaluate the quality of the recording or just make sure that the microphone is working properly. Let's take a look at a few online services.
Method 1: Mictest
First, let's look at Mictest, a simple online service that provides only basic information about the status of a microphone. Checking the device is very simple:

The disadvantage of this service is the impossibility to record and listen to sound in order to make sure of the sound quality even better.
Method 2: SpeechPad
There are services that provide the function of converting voice to text. Sites like these are another good way to test your microphone. Let's take SpeechPad as an example. On the home page the main controls are described above and the principle of working with the service is explained. Therefore, with the process voice dialing even an inexperienced user can understand the text.

Method 3: WebCamMic Test
WebCamMic Test is implemented as a real-time sound check. You speak the words into the microphone and at the same time hear the sound from it. This method is perfect for determining the quality of the connected device. Using this service is very simple, and the test is carried out in just a few simple steps:

Method 4: Online Voice Recorder
The last on our list will be an online voice recorder, which allows you to record sound from a microphone, listen to it and, if necessary, trim it and save it in MP3 format. Recording and verification is performed in several steps:

This list could include many more online voice recorders, microphone testing services and sites that convert voice to text. We have selected one of the best representatives of each direction. These sites and applications are ideal for those who need to evaluate not only the performance of the device, but also the quality of sound recording.
So, you bought a computer (or laptop) and decided to use the microphone on the computer for one purpose or another. You were able to determine the model of the headset, connected it, but there is no sound. Now we will talk about how to test a microphone on a computer.
Checking the connection
The most common, albeit fairly commonplace reason the failure of the microphone to work is precisely its connection.
More precisely, its absence. So if the microphone on your computer doesn't work, first check to see if you plugged it in. If so, see if there is. Very often people just confuse the microphone and headphone jacks. As a result, none of the connected equipment works. If earlier you successfully used the microphone, and then it suddenly stopped working, then let's move on.
Is everything all right?
How to check if a microphone is working on a computer if it suddenly refused to work? As mentioned above, check if the equipment is connected, if any contact has come off somewhere. So, if everything is normal, try to inspect the microphone itself, or rather its cable. Maybe your headset has been damaged, the wire is pinched, the connector is loose, or something else similar. If the microphone suddenly fails, this is the most likely option. Nevertheless, when you are convinced that everything is fine here, you can figure it out further (checking, by the way, will not take you no more than three minutes).
We look at the settings
Before you check the microphone on the computer for operability, you need to configure it (and check the settings if you have successfully used this equipment before). To do this, you need to find the volume control on your "iron friend" (an icon with which you can adjust the volume of headphones and sound in the system in general), which is located in the lower right corner of your workspace, on the taskbar.

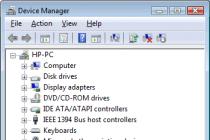
After that, you need to right-click on the icon and select the "Recorders" menu item. All possible types of audio recording devices will be displayed in the "Recording" tab. Double click on the sign of the microphone you want to check. See if it's on (at the bottom of the window that opens). If yes, then go to the "Levels" tab. In it you will see the gain and volume of the microphone. Now set the volume to maximum. It should work. If not, try playing with the gain. If the settings are in perfect order, then you need to think carefully about how to check the operation of the microphone on the computer.
Operating system to help
Operating systems, as a rule, include programs for recording (and in our case, checking) sound in their standard set. So, if your microphone is connected to the computer correctly, working properly and configured, you can easily find out if it is in working order. To do this, you need to go to the "Start" menu. Find "Standard" there. Before you will be a list of auxiliary and useful programs and services. We need "Sound Recording". You will see a sound recording window on your computer.

Click on the corresponding button to start recording sound. Pay attention to the graph of the noise level. If it does not move, it looks like a straight straight line, then we can assume that your microphone is not connected. In other words, it doesn't work for some reason. If the graph makes any "inclinations", then go to the microphone settings and increase the sound.
Also, the usual Skype will help you to find the answer to the question of how to check the microphone on your computer. It is often spoken on with the help of a headset (for which, in principle, it was created). There is a special service in the program, which, one might say, replaces the "Sound Recorder" in the operating system. In Skype settings, select your microphone, set the volume as high as possible and access this service ("call"). Then follow the directions. As a result, you should hear what was said into the microphone. If not, the microphone is not working.
And if via the Internet?
Another good way check the operation of the computer microphone - these are specialized sites. You need to find a resource that has such an opportunity. When you visit it, you just need to click on the check button. After that, a small window will appear in front of you, which will ask you to access the connected equipment. Naturally, you will need to click on "Allow". After that, the check will start. The microphone activity window will most likely appear in front of you.

If it is working properly, then all the sounds and all the words spoken into the headset will be reflected on the graph. Otherwise, you will be disappointed: the microphone does not work. How to fix it? First, you will need to identify the reason for the equipment failure to work. Sometimes it is very difficult to determine the reasons, so if you have any other recording device in your house that you can plug in, check it out on your computer. Maybe the problem lies only in a faulty connector.
So, we have learned how to test a microphone on a computer quickly and easily. Successful checks and proper operation of the equipment!
Do you want to know how to earn 50 thousand monthly on the Internet?
Watch my video interview with Igor Krestinin
=>>
At the moment, there are many different applications and Internet resources with which you can communicate via a computer, laptop and other devices at a distance for free.
At the same time, if everyone, including laptops, has a device that allows you to recognize and transmit your speech - a microphone, then for ordinary personal computer, it must be purchased and installed separately.
Most often, a headset is used for this, that is, headphones with a microphone, since this is much more convenient to communicate with the interlocutor.
Often there are questions about how to check the microphone on Windows 7 headphones, since this operating system, is used by many. This article will discuss the reasons why the headset may not work, as well as how the test is performed.
How the check is done
Having purchased a headset, in order to communicate with someone through a computer, it will need to be installed and tested. This is not difficult to do. First you need to connect everything correctly, that is, in accordance with the color of the wire and line-out on the PC.
Green is responsible for sound, pink is for microphone.
After correct connection, we proceed to setting up the equipment:

Also, to test the microphone, you can use the sound recording of your voice.
This requires:
- Go to the "All Programs" section through "Start";
- Find and open "Standard" and click on "Sound Recorder";
- After that click on "Start recording".
To check the settings, click on "Stop recording" and save the recorded recording, after which you can listen to it.
Test your microphone in Skype
Most in a simple way microphone check is to use Skype programs or any other where it is possible to use video communication or make regular calls.

When using Skype, you are given two options to choose from:
- A quick check, which is carried out through the "Data on the quality of communication" and clicking on the "Check" button. After that, a few seconds are recorded, which you can listen to;
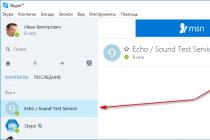
- Making a call using the Internet to the Echo / Soun Test Service. Here the recording lasts a little longer, about 10 seconds.
Installing a dedicated driver
Also, to test the microphone operation, you can download and install a special Realtek HD driver. It is very easy to use, and when you connect a headset to the jack, it will respond to this action, opening a special window where you can check and adjust the device used, if necessary.
Download the Realtek HD program from the official website and after installation, configure it.
This requires:
- Configure the front and rear line outputs in the Analog section. This setting is required for your device to work properly regardless of the connection;
- Check the sound. To do this, select the green socket and click on it 2 times to open the context menu. In it you need to select "Headphones";
- Then we double-click on the pink jack, which is responsible for the operation of the microphone, and in the menu that opens, select "Microphone input" and save.
If you want to have active line inputs on the front rear panels. To do this, in the "Analog" section, click on the icon in the right upper corner as a folder.
Then it remains to uncheck the "Disable front panel socket detection" line. In the "Additional device settings" section, you mark the checkboxes opposite the phrase that says about disconnecting one panel when connecting another.
Also note the union of all the nests. This completes the main part of the driver setup. Everything related to volume and the rest, do at your own discretion.
If you are interested in how to test the microphone on Windows 7 headphones using Realtek HD, then this is done quite simply. Go to this program and select the "Microphone" section. After that, check it and, if necessary, adjust it.
Why might the headset not work?
If you made a check, but it turned out that the microphone does not work, it is worth checking the connection again, at the same time inspect the wire for abrasions and breaks. Also inspect the headphones themselves and the volume control in the headphones.
Also, another reason for the inoperative headset may be its malfunction. To check this, you need to connect it to another computer. If the headphones work, then the problem is in your PC.
Typically, computers have several USB connectors for flash drives and line-out headphone jacks on the back and front panels. Therefore, it is worth trying to connect from the other side. If it works, it means that the line outputs on the other side are out of order.
How to test the microphone on Windows 7 headphones, the bottom line
Now you know how to test a microphone on Windows 7 headphones. Basically, it is not difficult to test a microphone, just follow the advice provided in this article.
P.S. I am attaching screenshots of my earnings in affiliate programs. And I remind you that everyone, even a beginner, can! The main thing is to do it correctly, which means to learn from those who are already earning money, that is, from professionals.
Do you want to know what mistakes beginners make?
99% of newbies make these mistakes and fail in business and making money on the Internet! Take a look so as not to repeat these mistakes - "3 + 1 BEGINNER ERRORS KILLING THE RESULT".Do you urgently need money?
Download for free: " TOP - 5 ways to make money on the Internet". 5 best ways to make money on the Internet, which are guaranteed to bring you results from 1,000 rubles per day or more.Here is a ready-made solution for your business!
And for those who are used to taking ready-made solutions, there is "Project ready-made solutions to start making money on the Internet "... Find out how to start your own business on the Internet, even the greenest newbie, without technical knowledge, and even without expertise.


The microphone is one of the most essential devices for a computer. With its help, you can record sound and communicate on the Internet using voice, which greatly expands the capabilities of the system.
However, many users have problems with microphone setup. Sometimes the sound from the microphone is too quiet or contains a lot of noise. If you also faced similar difficulties, then this material should help you. Learn how to set up a microphone on Windows 7 here.

The second tab for microphone settings on Windows 7 is called Listen. The function "Listen from this device" is available here. If you enable this function, the sound from the microphone will be automatically transmitted to your speakers. In addition, here you can configure how it will work this function when the laptop is running on battery power.

The next tab with microphone settings is called “Levels”. There are two of the most important settings microphone, this is also the microphone gain. If this is your first time setting up your microphone, you can simply set the volume to 100 and the gain to +10 or +20 dB. In the future, these parameters can be reduced if the microphone is too loud.

The next tab is called Enhancements. Depending on the number of settings available here, it may vary. For example, in some cases, you can only disable all improvements here.

And in some cases, on the "Improvements" tab, there are microphone settings that relate to noise and echo suppression.

The last tab for Microphone Settings on Windows 7 is called Advanced. Here you can change the settings for the bit depth and sampling rate, as well as here you can change the settings for the monopole mode of the microphone. If you do not know what bit depth and sampling rate settings you need, then just click on the "Default" button.

After you have gone through all the tabs in the "Microphone Properties" window, you can assume that the microphone setup in Windows 7 is complete. Close all open windows by clicking on the "Ok" button to save the changes.
Setting up a microphone using a sound card driver
In addition to all of the above, there is another way to configure the microphone on Windows 7. This setting is through sound card... The settings that are available through the driver completely duplicate system settings Window 7.
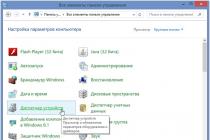
To access the sound card driver settings you need to open the "Control Panel" and go to the "Hardware and Sound" section. Here you can find the control panel for your sound card.

Also, the sound card control panel is usually accessible from the "Taskbar" (lower right corner of the screen).

After opening the sound card control panel, you need to go to the "Microphone" section. The basic microphone settings will be available here: microphone volume, microphone gain, sampling rate and bit depth.

When you change the microphone settings through the sound card control panel, the system microphone settings are automatically changed in Windows 7.
Some computer owners global network replaced the phone. The advantage of communication via the Internet is mainly the fact that it is practically free of charge to communicate with anyone in the world who has a PC or laptop. However, it is not entirely convenient to use only a laptop, and in the case of a stationary computer, you cannot do without headphones with a microphone.
The material below is devoted to the problem when the microphone does not work in windows 7, as well as methods for diagnosing the functionality of these devices.
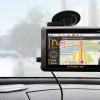
Nuances when connecting to a PC or laptop
What should you check first? A prerequisite is the presence of a workable sound card in a laptop or stationary computer. Often, manufacturers have already fitted laptops and computers with sound cards. The user is only required to check whether the headphones with a microphone are correctly connected, which have two plugs at the same time:
- Green from headphones;
- Pink from the microphone.
In turn, PCs and laptops are equipped with appropriate connectors, which have a number of headphone and microphone drawings.
![]() The user just needs to show attention when connecting and not be too lazy to check the correspondence of the images at the connectors to the colors of the plugs.
The user just needs to show attention when connecting and not be too lazy to check the correspondence of the images at the connectors to the colors of the plugs.
Windows 7 Headphone Microphone Test Procedure
Often this accessory is equipped with a dedicated microphone switch, so make sure it is in the on position first. To check the operability of the device in the Windows 7 environment, you need to follow the following algorithm:

Note: Windows 7 has a very convenient function that you can use in the "Communication" tab. It allows you to automatically reduce the level of all sounds in your laptop and PC when incoming call... This is very comfortable, for example, when the user is watching a movie or listening to a piece of music and at that moment he receives an incoming call.
How to check using Skype?
Skype allows you to diagnose and configure the microphone on your headphones. To do this, you must consistently take the following steps:

During tuning, it is necessary to keep in touch and talk with a friend, so the user can adjust the sound to the ideal state.
Today, a microphone is for many users as indispensable a peripheral device as a conventional one. computer mouse... Today, almost all of humanity has switched to calls via the Internet, and therefore a computer or laptop must be equipped with a high-quality and working microphone. Today we will look at several online services that will allow you to check the performance of the microphone right in the browser window.
Online services for microphone testing
Service 1: Webcam & MicTest
A simple and affordable service for testing a microphone. On the same site, an online check is also carried out. To get started, go to the service page and click on the button "Check microphone" .

As with the following online services, you will need to give the Flash Player plugin access to your microphone. In this regard, if a window does not appear on your screen as in the screenshot below, you will need to check the activity of the plugin or, if necessary,.

As soon as the plug-in receives the necessary permission from you, a live line will be displayed on the screen, which will record the operation of your microphone in real time.

If the microphone detects sound, it will be immediately displayed in the graph. The maximum point in the graph also depends on the strength of the sound.
If the screen shows zero motions, then go down a little on the page to find out the main reasons why your microphone might not work.

Service 2: Online Voice Recorder
The best way to test if your microphone is working is to record your voice on a dictaphone.
The Online Voice Recorder service is an online voice recorder, with which you can create a recording of your voice, listen to evaluate the quality of the microphone, and, if necessary, save it to your computer in MP3 format.

The third online service that combines two functions at once: microphone testing and sound recording.
As soon as you go to the service page and grant access to the plugin Flash Player, the program will record the sound level from your microphone. If the sound indicator is immobilized, this is a reason to think.
To finally verify that the microphone is working, click on center button on the microphone to start recording. You can also listen to the finished recording and, if you wish, save it to your computer.

We've covered three main ways you can use online services to test your microphone for performance. Do not forget, if you just purchased a microphone, and it did not meet your expectations, then you can legally return it back to the store within 15 days (subject to the availability of all the complete set).
We are living in a wonderful time! Today everyone has a computer / laptop, as well as the Internet. And thanks to this, unlimited possibilities open up. For example, you can call any country, and, moreover, it is completely free. To do this, you just need to install the program (Skype or any other) and connect headphones with a microphone.
By the way about that. Often users have problems with the microphone. It does not work correctly, then the phonite, then something else. Therefore, below we will consider all possible ways to check the microphone on a computer and laptop. The instructions are short and uncomplicated, so there shouldn't be any difficulty.
Before you check the performance of the microphone, you must be 100% sure that you have connected it correctly.
First, you must have a properly configured sound card and drivers for it. That is, there must be a sound (). After all, the sound card is also responsible for the microphone.
Secondly, you need to properly connect headphones with a microphone to it. Everything is simple here. The headphones have 2 connectors: one is green and the other is pink. The first is the sound, the second is the microphone. They need to be connected to the rear panel of the system unit in the connectors corresponding in color.
Also on the system unit, these outputs can be on the front panel. But sometimes they are not color coded (i.e. just black). In this case, pay attention to the icons painted above these outputs.
On a laptop, the headphone and microphone jacks are usually on the left (to keep the wires from getting tangled around). They can also be color-coded, so be guided by the icons.

The most important thing is not to mix up the connectors. How can I check this? By the sound. If you connected both connectors, and there is sound in the headphones, then everything is fine.
Checking microphone functionality in Windows
There are 3 ways to test the microphone on your headphones. The simplest one is with the help of Windows tools.
Consider a way to check the microphone on Windows 7 (for Windows 8, 10 and XP, the process is carried out in the same way, except appearance windows will be slightly different):


Be sure to click the "Apply" button to save the settings. Plus, it is recommended to turn down the sound (sometimes there are extraneous noises).
In this way, you can check the operation of the microphone, as well as adjust it - adjust the volume, position it correctly, etc.
Helpful hint: in the previous window (see item 3) go to the "Communication" tab and check the box "reduce the volume of other sounds" (by 50% or 80% - whatever you want). Why is this needed? For example, you are listening to music, and then you got a call on Skype. When you start talking, Windows will immediately screw up all sounds by 50 or 80%, respectively.

Checking with the audio recording function
There is another easy way to test the microphone on your computer. In this case, you need to use the sound recording function.
Choose the following items:
- Start.
- All programs.
- Standard.
- Sound recording.

In the window that appears, click "Start recording", say a couple of phrases, then stop it and save the file to any place (for example, to your desktop).
Verification via Skype
And the last way to test the microphone on headphones in Windows 7 is using Skype. You can also adjust it here. In most cases, all these manipulations are done just in order to communicate with your friends on Skype.
So, to check the performance of the microphone, open Skype and select the items in the menu:
- Tools.
- Settings.
- Sound setting.

Try to say a few words. If the device is working properly, you will see it on the "Volume" scale.

Then you can uncheck the "Allow automatic setup" checkbox to adjust the microphone yourself. In this case, it is best to call a friend or acquaintance and use it to adjust the volume to an appropriate level.
Instead of a conclusion
Actually, that's all. You have tested the microphone operation on a PC or laptop, you have made sure that it works - great! Plus we even adjusted the volume level in Skype. And now you can comfortably communicate with your friends.
By the way, if someone you know has similar problems, help them. After all, you already know how to check a microphone on a laptop or PC and set it up correctly, right?
A laptop differs from a computer in that it has additional devices, such as a web camera, a microphone. Therefore, it is convenient to use it for playing or recording music, speech, video, photo. It is clear that the quality of video and sound recording depends on which camera or microphone comes with the laptop. This article will discuss how to test a microphone in a computer device, namely a laptop.
The simplest check for recording quality is found in the WINDOWS operating system. Go to the "START" menu, open the "All Programs" tab, click on "Standard" and go to "Sound Recorder", when you open it, click on "Start Sound Recording". You can either speak lyrics or just sing to test the microphone. If you are not satisfied with the recording quality, you can change the parameters. Again, click on "Start", "Control Panel", "Sound" or "Sounds and Audio Devices". Then right-click on "MICROPHONE".

The "Properties" window opens. Here you can customize the parameters for yourself. If you wish, you can: set sound effects, increase or decrease the volume, change the recording settings (frequency, bit depth).

Often, when communicating online, acquaintances complain that the sound is not high-quality and very quiet, the owner of such a laptop has a desire to purchase a new microphone. You can connect it with one movement, insert the plug into the connector with the picture, which shows the microphone.

You will also need to install drivers for this microphone to work effectively. And then you need to set up an external microphone. To do this: click on "START", "Settings", click on "Sound", then "Microphone", "Properties" and click on "Levels". The higher the level, the larger the background, because of this, an unpleasant rattle may appear.

In order to add volume, you need to click on "Play" and click on the "Volume" button in the "Taskbar". More details: go to "Devices", click on "Playback" and click on "Speakers". Go to "Speaker Properties", the "Select Tab" window opens, open "LEVELS", "MICROPHONE" and adjust the slider as you need.

If you learn all these tricks, then your microphone can even serve for recording music at the amateur level. For a musician or sound engineer, it is a great replacement for a small recording studio.
We come across various types of microphones in our daily life and therefore often wonder how to test a microphone. Only a specialist can carry out a detailed check of this product, since this requires not only certain equipment, but also special knowledge and experience. But everyone can perform a routine microphone test using simple tests.
How to test a microphone on a computer
If you do not hear a sound when you connect the microphone to the computer, then this does not mean that the microphone is malfunctioning. It is possible that the problem is a misconfigured program on your computer or a wrong connection. Therefore, first of all, you should check which output you have connected the microphone to. The microphone output has a corresponding icon and / or is colored pink.
If the microphone is connected correctly, but there is still no sound, then you should start the mixer program. In the settings of this program, find the display of inputs. Then additionally enable the display of the microphone input and adjust its parameters.
How to check if a microphone is working
Your microphone is absolutely correctly connected to your computer and configured. However, despite this, it does not record sounds. The reason for this may lie both in the malfunction of the microphone itself, and in the malfunction of the sound card or in its incorrect setting. You can check if the microphone is working by connecting it to another computer. If the microphone also does not work on it, then it is faulty and needs to be replaced or repaired. If your microphone will record sounds on another computer, then you should check the health and settings of your computer's sound card.
You can check whether the microphone is working by connecting a 1.5 V battery to it for a few seconds. If the microphone is working properly, then you should hear characteristic clicks, somewhat similar to the crackling of branches.
How to test the microphone on headphones
In order to check the microphone on the headphones, you should first of all pay attention to the correctness of its connection. The microphone plug should be inserted into the pink jack, sometimes there may be a microphone icon (figure) next to it.
Then click the "Start" button and from the menu that opens, select "Control Panel" and then "Sounds and Devices". After that go to the "Audio" tab. Select the "Sound Recording" section. This tab contains the default microphone output of the sound card. If you suddenly find that you have two outputs, then you should choose one of them that suits you (REAR (rear input) or FRONT (front input)).
After that, we will continue to test the microphone. To do this, in the "Sound Recording" tab, click the "Volume" button. Be sure to check the box in the Microphone column. Using the slider, set the volume level to the maximum level (in the future, if necessary, you can always turn down the volume).
Close all tabs and check again how your microphone writes sound. If the sound is still not heard, then check the headphones with microphone on another computer.
How to test your microphone in Skype
It is very easy to check if your microphone is working in Skype. First, connect the microphone to your computer and then launch the program. Select "Echo / Sound Test Service" from the contact list. Make a free test call, during which you will be asked to record your short message after a signal and then listen to it. At correct setting microphone and program, you should hear the message you recorded.