Earlier we talked about how you can encrypt a hard drive in a computer so that no one can access the files and programs stored on it, even if they manage to get it and connect it to another device. Today we will tell you how to use the same encryption method for external storage media, for example, flash drives and portable hard drives.
How to encrypt an external drive using BitLocker:
1. Connect a USB flash drive or other storage device to the USB port of your computer.
2. Open Control Panel and go to BitLocker Drive Encryption.
3. Find the drive you want to encrypt in this section and click Turn on BitLocker.

4. A dialog box will open with a choice of encryption options.
5. Follow the instructions and create a password (complex - with letters in different registers and numbers) and save the key to restore access. This key can be stored in a Microsoft account, a file saved on another medium, or printed on paper. Keep in mind that in order to restore access to the encrypted media if you forget your password, in addition to this key, you will also need to provide a username and password for your Microsoft account.

6. Select which files you want to encrypt - all recorded on the media or only those that will be copied to it in the future. In the second case, only new files will be protected, but encryption will be carried out faster.
7. Select the encryption method: a new one, in which the drive cannot be unlocked at earlier Windows versions or the old one used in Windows 7, 8 and 10.
8. The drive will be encrypted and then you can start using it.

Now, whenever you connect the drive to your computer, you will be prompted for a password. If you are sure that no one but you will use your computer, you can add it to the trusted ones by specifying that the remote password for decrypting data on it is not prompted for. In this case, the password will only be required if your drive will be connected to another device.

You can use the drive on a trusted computer in the same way as if it was not encrypted, because you do not need to enter a password. In this case, the drive will remain protected when connected to other computers. In any case, using BitLocker will not affect the speed of writing and reading files.
You can change the password that is set on the drive through the BitLocker Drive Encryption section in Control Panel.
Hard drive - popular modern device, which allows you to expand the computer memory without opening system unit... Modern external hard drives can fit into any purse, which means that large amounts of information can be always at hand. If you store confidential information on your hard drive, then The best way to protect it is to set a password.
Password - universal remedy to protect information, which is a key that can consist of any number of letters, numbers and symbols. If the user enters the password incorrectly, then, accordingly, access to the data stored on the external hard disk cannot be obtained.
How do I set a password for my external hard drive?
We have already covered on our site before. Moreover, the issue was considered and correct. Below, we will talk about how the password is applied for this device.
Setting a password using built-in Windows tools
Setting a password in this case is successfully used for both conventional USB drives and external hard drives that have large amounts of disk space. The main advantage this method is that you do not need to download and install third-party programs.
Connect external HDD to your computer and then open windows explorer... Specifically, we are interested in the "This computer" section, which displays all connected drives to the computer. Click on the external hard drive with the right mouse button and in the displayed context menu go to the item Enable BitLocker .

The utility will start on the screen. After a moment, a window will appear on the screen in which you need to check the box "Use password to unlock disk" , and on the lines below, specify twice New Password... Click on the button "Further" .

Next, you will be prompted to select the option to save the special recovery key. You have three options to choose from: save to your account Microsoft, save it to a file on your computer, or immediately print the key on a printer. In our opinion, the second option is most preferable, since this file you can upload, for example, to the cloud, and at any time, if the password from an external hard disk will be forgotten, open it.

The next setting item you are asked to configure data encryption. You can choose to encrypt only the occupied disk space or encrypt the entire disk.

Please note that if you have chosen to encrypt the entire disk, you need to be prepared for the fact that the encryption process can take many hours. Therefore, if you do not have a lot of time, as well as open the hard disk, it is supposed to modern computers, we recommend choosing the first encryption option.
The final stage of the configuration, you should select the encryption mode from the two available: new regime encryption and compatibility mode. Considering that we are working with an external hard disk, check the parameter "Compatibility Mode" and then move on.

Actually, this completes the BitLocker configuration process. To start the process of applying the password, you just have to click on the button "Start encryption" and wait for the end of the process.

If after the end of encryption, open Windows Explorer in the "This computer" section, then our external hard drive will be listed with a lock icon. An open icon with a lock indicates that access to the data has been obtained, and a closed icon, as shown in the screenshot below, indicates that a password is required.

Having opened the disk twice, a miniature window will appear on the screen, in which the user will be asked to enter the password for the connected external hard disk.

Setting a password using archiving
Many users do not trust the data encryption process because this way you cannot access the disk as a whole. Therefore, in this way, we will go in a slightly different way - we will place the information saved on an external hard drive in an archive without compression, i.e. an external hard drive, if necessary, can be used without a password, but to access the information stored in it, you will need to enter a security key.
To set a password using archiving information, you will need almost any archiver program. In our case, the popular tool will be used WinRAR , which you can download from the link provided at the end of the article.
Once the archiving program is installed on your computer, open the contents of the external hard drive, select it with a simple keyboard shortcut Ctrl + A, or select certain folders and files in case you need to hide not all information on the external hard drive under a password. After that, right-click on the selection and select the item "Add to archive" .

The screen will display a window in which you need in the block Compression method select parameter "Without compression" and then click on the button "Set password" .

In the window that appears, you will need to enter a password of any length twice. Below, if necessary, you can activate encryption of the data contained in the archive (without activating this item, the names of folders and files will be visible, but access to them will be limited).

When the archive is completed, the root folder of the hard disk, in addition to the files, will contain the archive you created. Now files on the disk, except for the archive, can be deleted.

When you try to open the archive, a window will appear on the screen asking you to enter the password. Until the password for the archive is received, access to the information will be limited.

What is the bottom line
Most effective method storing confidential information - using standard tool BitLocker. This is a wonderful utility, which, perhaps, cannot be found superior in quality. The second method, implying the use of an archiver, can be considered the most preferable, since it does not restrict access to an external hard drive, but only to the information that you wish to password protect.
Of course, if there is still a lot of information encryption programs, but we did not focus on them, since the two methods described in the article are the most optimal for most users.
How to protect your computer from viruses on external HDD?
At some point in time, a real zoo appeared on the computer - a bunch of viruses. As a result, desperate to cure them all, I simply rewrote the information that could not be restored to the external hard drive, and the internal hard drive formatted and rolled the old system image without viruses.
It's time to turn the saved ones back on external drive the documents. However, there are fears that if I connect it, then it will not share with me all those viruses that sit in it. In principle, there is an anti-virus (licensed Dr.Web). I want one hundred percent certainty. How to secure your computer as much as possible while connecting this disk from viruses that almost certainly live on it? Please advise. Thank you in advance.
Alexander | December 14, 2013, 21:56
It is necessary to put this antivirus program to provide comprehensive protection.
xoma | December 14, 2013, 21:24
Viruses should not be there. Connect the disk, enter safe mode (when booting the system, press and hold F8 and select safe mode), open the drive, enable hidden and system files(alt - Tools - Folder Options) make sure there are no extraneous files. You can check the disk with your antivirus.
Vladimir | December 13, 2013 11:32 pm
If there are viruses on the external drive, it will share them. No antivirus will give you a 100% guarantee. There are many examples of this, when some well-known antivirus detects a threat where it does not exist at all, and allows real viruses to enter the system.
It seems to me that if you copied all your documents with viruses onto optical disks (for example, blu-ray), and then restored them to the hard drive of your computer, then viruses would not penetrate from the optical disk, if, of course, you know , where are the documents, and where are the viruses (viruses do not touch). But how much of your documents? An ordinary 465 GB hard disk drive, if copied to DVD discs, will take about 100 pieces. If two or more antiviruses can work in one system, then this significantly increases the security guarantee, but whether this is possible, I have not yet figured out.
seroz | December 13, 2013, 18:42
Basically, an external HDD is something like a big flash drive, thus. and the way of fighting the thief is the same. Weber can be thrown out (a big hole in the system - many viruses and Trojans calmly bypass such protection or simply disable it).
Find a more persistent (better
It's always like this with security. It is worth relaxing and, chatting with a friend, insert his flash drive into your well-oiled computer, and when Kaspersky's question - should we check this flash drive, you carelessly answer - no need to ... And then you get entertainment for the whole weekend ...
And even more often there is another situation - when you have to insert your USB flash drive into someone else's computer. It is not at all necessary a computer of friends-buddies, now you can pick up a virus in a photo printing studio, and even in a tax office ...
In this article I will tell you how to protect your computer and flash drive from viruses without additional programs.
You will find out 3 time-tested quality methods that save in most cases.
Do not go into the registry if you have never done this, and have a bad idea of how a section differs from a parameter, and how parameters are created and their values changed!
1. Protecting your computer from viruses on a USB flash drive. Disable autoload.
Let's start by first protecting our computer from infected flash drives. You never know where we inserted our flash drive ourselves, or who came to us with an unknown flash drive ...
To reliably protect your computer from viruses on USB flash drives, it is enough to disable autorun (autorun) on all drives connected to the computer. To do this, you can use special programs(Anti autorun), or make simple settings.
Anti-autoran is a program for protecting flash drives, memory cards, mp3-4 players and other removable media from viruses.
All further actions are done with administrator rights.
Ways to protect your computer from autostart on flash drives
1. Disable autorun in group policies
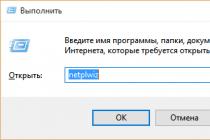
Open the Local Group Policy Editor:
Start - Run (Win + R) - gpedit.msc or in the search bar start typing "group"
Computer Configuration - Administrative Templates - All Options - Disable Autostart

Right click - Change - Enable - All devices - Apply.
2. Disable autorun using the registry editor
You can also completely disable autorun from all disks using the registry editor.
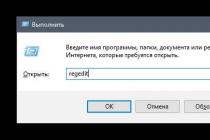
Start Registry Editor (Win + R). Open a branch
HKEY_LOCAL_MACHINE \ Software \ Microsoft \ Windows \ CurrentVersion \ Policies \ Explorer
and in the value of the binary parameter " NoDriveTypeAutoRun", And write" FF "instead of" 95 "(or" 91 ").
Valid key values:
0x1 - disable autorun on drives of unknown types
0x4 - disable autostart of removable devices
0x8 - disable autostart of non-removable devices
0x10 - disable autorun network drives
0x20 - disable autorun CD drives
0x40 - disable autorun RAM disks
0x80 - disable autorun on drives of unknown types
0xFF - disable autostart for all disks in general.
In Windows XP, by default, this key is absent (like the Explorer section itself), so you may need to create the corresponding section (Explorer) and the parameter NoDriveTypeAutoRun, which controls the startup of devices.
All changes to the registry take effect after a reboot.
3. Writing the script to the registry
The following method provides more advanced options for removing potentially dangerous system security holes, including those associated with autorun.
Create an arbitrary reg file (for example named noautorun.reg) and the following content:
Windows Registry Editor Version 5.00
[-HKEY_LOCAL_MACHINE \ SOFTWARE \ Microsoft \ Windows \ CurrentVersion \ Explorer \ AutoplayHandlers \ CancelAutoplay \ Files]
«*.*»=»»
"NoDriveTypeAutoRun" = dword: 000000ff
"NoDriveAutoRun" = dword: 000000ff
"NoFolderOptions" = dword: 00000000
"CheckedValue" = dword: 00000001
@ = "@ SYS: DoesNotExist"
"AutoRun" = dword: 00000000
Then run this file, and answer "Yes" to the system's question about making changes.
You can temporarily disable autorun (for example, if you do not have administrator rights), for the period of connecting the device (flash drive), you can hold down the key Shift... In this case, it is recommended to open the USB flash drive not through "My Computer" (otherwise autorun will work), but through Explorer.
2 Protecting the USB flash drive with autorun.inf
Once upon a time, to protect a USB stick from viruses, it was considered sufficient to create an empty autorun.inf file on it and assign it read-only permissions. In this case, the virus could not create its own startup file there, since such a file already existed and had the appropriate attributes.
The essence of the method is to protect special file who is responsible for automatic start programs when the disk is connected to the system.
The file is called autorun.inf. Viruses love it.
The fact is that if you write a virus to a USB flash drive, and then specify a command to launch it in autorun.inf, then the malicious program will be launched EVERY TIME the disk is connected to the system.
So, to protect your flash drive, do the following:
Step 1... Open up text editor"Notepad" (Start - Standard - Notepad).
Step 2... Copy these lines and paste them into Notepad:
attrib -S -H -R -A autorun. *
del autorun. *
attrib -S -H -R -A recycler
rd "\\? \% ~ d0 \ recycler \" / s / q
attrib -S -H -R -A recycled
rd "\\? \% ~ d0 \ recycled \" / s / q
mkdir "\\? \% ~ d0 \ AUTORUN.INF \ LPT3"
attrib + S + H + R + A% ~ d0 \ AUTORUN.INF / s / d
mkdir "\\? \% ~ d0 \ RECYCLED \ LPT3"
attrib + S + H + R + A% ~ d0 \ RECYCLED / s / d
mkdir "\\? \% ~ d0 \ RECYCLER \ LPT3"
attrib + S + H + R + A% ~ d0 \ RECYCLER / s / dattrib -s -h -r autorun. *
del autorun. *
mkdir% ~ d0AUTORUN.INF
mkdir "?% ~ d0AUTORUN.INF .."
attrib + s + h% ~ d0AUTORUN.INF
You can select the text with the mouse, copy it to the clipboard, then switch to Notepad and execute the paste command.
What do these commands mean? How does it work?
First, we delete files or folders that the virus may have managed to create by removing the security attributes from them.
it different types files named autorun, recycler and recycled folders masquerading as a trash can.
Then, in a special way, we create the Autorun.inf folder containing a folder with the system name LPT3. Since the days of the unforgettable DOS, there are a number of names that cannot be used to name files and folders, with which you cannot carry out any operations. An example of such reserved names: LPT1, LPT2, LPT3, PRN, CONF, con, nul, AUX, COM1…. other. Try to create a folder, say PRN. Nothing will come of it. Conventional Windows tools you cannot create a folder. But there is a way. It is he who is used in this script.
Line
mkdir "\\? \% ~ d0 \ autorun.inf \ LPT3" means:
mkdir- command to create a directory.
\\?\
- this is exactly what helps to create a folder with a reserved system name.
% ~ d0 \- designation of a specific directory.
If you specify f: \ instead, then you can run the script from anywhere, it will create on the f: drive.
autorun.inf and LPT3 are the names of the directories to be created.
By the way, you can delete this folder in the same way, otherwise nothing. If you want to uninstall, run on the command line:
rmdir \\? \ f: \ autorun.inf \,
where f: is the drive from which we delete the "autorun.inf" folder.
One more point: adding attributes to folders is additional protection.
Command attrib adds the following attributes to these folders: system, hidden, read-only, archive.
Step 3... Save the document to a USB flash drive in a file with the bat extension. Necessarily on a USB stick and necessarily with the bat extension. The name can be anything, for example: locker.bat
Step 4... Launch Explorer, go to your USB stick and run the file.
After launch, a folder will be created AUTORUN.INF with attributes that protect it from writing and hide it from prying eyes.
Now, if you insert a USB flash drive into an infected computer, the virus will not be able to change the autorun file. Since instead of a file, we have a folder, and even hidden and write-protected. Nothing will come of it.
But look: a virus can write itself to another location on the disk or change a file.
Therefore, do not hesitate to insert a USB flash drive into your computer and - I strongly recommend - check it for viruses. The time spent on checking is not commensurate with the losses that will occur after the system is infected with a virus.
Please note: our protection only prevents the autorun file from being changed.
To protect another flash drive, vaccinate: copy the locker.bat tablet file onto it and run it in Explorer.
3. Protecting the flash drive from viruses.
The protection is very high quality, in my opinion, the best, it has been tested by time and viruses, it saves in 99% of cases!
A flash drive made in this way, after contact with an infectious laptop, or rather with dozens of laptops, will remain crystal clear. So we do it without hesitation!
1. Check the type of the file system.
We go to "My Computer", find our flash drive, right-click on it, then select " Property"And we see the following picture:

If you have the same NTFS file system as mine, then go to the next item. For those with Fat32, you need to change file system... This can only be done with formatting.
Right-click on the removable disk and select "Format" - NTFS - Quick Format.
I hope you are aware that formatting will delete all data from the flash drive.
2. Create a folder for data.
Create an empty folder on the USB stick. For example - ‘Data’
3. Close access to the USB flash drive.
Again open the properties of the removable disk, the tab .

We see the column "Allow" with check marks. This means that we have full access, we can easily create new files, delete, edit, and so on. Viruses are simply happy from this and skillfully use their freedom.
Since we are categorically not satisfied with this case, we press the mouse on the "Change" button. In the window that appears, remove all the jackdaws, except for " List of folder contents" and " Reading"And click" Ok ".
Thus, we have closed access to the flash drive. Now, if you want to create on it new folder or file (or copy), we get an error. It will not work to execute the function "send to removable disk". But the good news is that the virus will not be able to register on a USB flash drive in this situation.
4. Open the access rights to the created folder
We need to return all rights to the folder that we created in the root of the flash drive, otherwise it will be impossible to work with it not only for viruses, but also for us. To do this, as usual, on the folder, right-click and "Properties" - Change, and set all the boxes in the column " Allow».
After pressing the OK button, the flash drive is protected from viruses.
All data will be stored in this folder and will be fully accessible. You can always delete, create, copy, rename ... or at least do anything with files and folders. But viruses (more precisely, as I immediately said, not all, but 99% for sure) will not be able to do anything, since they automatically climb into the root folder.
Remember that it is much easier to prevent a virus from entering a USB flash drive than to repair the damage later.
Fall into operating system not via the internet or email, and using a regular flash drive. Moreover, most often the owner of this removable media does not even know that his flash media is infected with one or more viruses. But how do you protect your devices from viruses? Is there an optimal antivirus for a flash drive or another reliable way to protect removable media? You will find answers to these questions in the continuation of this article.
First, let's define what exactly we are going to protect. After all, you can find a good antivirus for a USB flash drive that can prevent infection of your removable disk, but which cannot cope with more powerful threats that attack your computer or laptop. Therefore, you need to understand that a home PC in any case should be equipped with a good firewall and high-quality antivirus software, which can become reliable protection against any spyware and virus programs. Antivirus should be written to a USB flash drive only if you use it quite often in public places (in libraries, university various computers may not be properly protected) and fear that you might "infect" your portable device.
One of the best designed to protect removable media is free utility called "Antirun". This program will not only help protect your computer from the penetration of various malicious viruses, but also save your flash drive from getting on it with various "network garbage".
Another popular program for protecting removable drives among advanced users is the USB Disk Security utility (at the time of this writing, its latest version- 5.0.0.76). This software, which occupies only one megabyte, is a compact analogue of a real full-fledged antivirus that can scan removable media and delete infected files from it.
Another option for protecting any removable media connected to a computer using a USB port (this can be not only a USB flash drive, but also a digital camera memory card or mobile phone, MP3-player and other equipment) - prohibit the possibility of recording any data on this medium without the user's confirmation of this action. This option will allow you to completely control what, where and when was recorded on your media in order to avoid being recorded on it, and then you will not need any antivirus for flash drives.
In order to protect your computer from possible threats from removable media, experienced users recommend updating the anti-virus database as often as possible and from time to time completely scan all hard drives and removable media that you regularly use. Antivirus for a USB flash drive should be installed only if the computer or laptop for some reason remained without reliable antivirus protection for some time. If this computer has access to the Internet, then it can be scanned for the presence of third-party and potentially dangerous programs even online - this service is now offered by many leading antivirus vendors for free.
Do not forget that if you carelessly and carelessly handle your computer and removable media, no antivirus for a flash drive or PC will help you from malicious software. If you regularly check the operating system and its resources using specialized programs, the likelihood of your computer being infected is practically zero. The main thing is not to forget to fulfill the simplest requirements for protecting your PC and you will not have to go to repair shops after any breakdowns associated with viruses and other malicious programs.