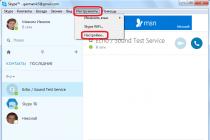
Hello everyone, friends. So, now we would like to tell you about how to open all tuning in NFS Most Wanted 2005... This article is perfect for those who do not want to gradually go through the game, and who want a completely open tuning already at the beginning of the game. We list for you several ways to open all tuning in the legendary game Need For Speed Most Wanted 2005. So let's start right away with the first method.
Open all tuning via cheat codes
As you already understood, the first way is. There are several cheat codes for opening visual and technical tuning, which you will find below. All cheat codes must be entered on English language before entering the main menu, when the message “Click to continue” is displayed on the screen.gimmevisual1- the external tuning of the first level opens.
gimmevisual2- the external tuning of the second level opens.
needperformance1- first level performance tuning opens.
needperformance2- second level performance tuning opens.
needmybestbuy- the cheat code will unlock unique vinyls for you.
Open all tuning through the trainer "Teleporter"
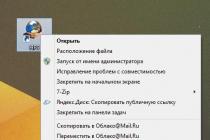
A very convenient and easy way to open all tuning in NFS Most Wanted 2005 is to use. You can download this trainer from our website. The advantage of the trainer is that you can open all tuning at the very beginning of the game on your own profile. Download the trainer and run it, then follow the instructions.
- Run the trainer itself from the archive.
- Press the button "Run The game”, After which our NFS Most Wanted will start.
- Next, we minimize the game through ALT + TAB and put a tick on the function Enable all carparts.
Open all tuning through the trainer "CarTuner 1.3"

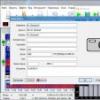
Very cool trainer "CarTuner 1.3" for NFS Most Wanted 2005, with which you can improve the technical part of your car. That is, in fact, only performance tuning will be open to you. You can download from our website, as well as find instructions for adding tuning.
Open all tuning via save
A very simple and uncomplicated way, namely to download the already completed one with fully open tuning. The method is suitable for those who do not want to download various programs or take other actions. The method is very good and really effective. By the way, we have already written on our website, so this shouldn't be a problem. Have a nice game!Network File System NFS, or Network File System, is a popular network file system protocol that allows users to mount remote network directories on their machine and transfer files between servers. You can use disk space on another machine for your files and work with files located on other servers. In fact, it is an alternative to the general Windows access for Linux, unlike Samba, it is implemented at the kernel level and works more stably.
This article will walk you through installing nfs on Ubuntu 16.04. We will walk through the installation of all the necessary components, setting up a shared folder, as well as connecting network folders.
As already mentioned, NFS is a network filesystem. To work, you need a server that will host a shared folder and clients that can mount network folder like a normal disk on the system. Unlike other protocols, NFS provides transparent access to deleted files... Programs will see files as in a normal file system and work with them as with local files, nfs returns only the requested part of the file, instead of the whole file, so this file system will work fine on systems with fast Internet or local network.
Installing NFS Components
Before we can work with NFS, we need to install a few programs. On the machine that will be the server, you need to install the nfs-kernel-server package, which will open nfs shares in ubuntu 16.04. To do this, run:
sudo apt install nfs-kernel-server
Now let's check if the server was installed correctly. The NFS service listens for connections for both TCP and UDP on port 2049. You can see if these ports are actually being used with the command:
rpcinfo -p | grep nfs
It is also important to check if NFS is supported at the kernel level:
cat / proc / filesystems | grep nfs

We see what works, but if not, you need to manually load the nfs kernel module:
Let's add nfs to startup as well:
sudo systemctl enable nfs
On the client computer, you need to install the nfs-common package to be able to work with this file system. You do not need to install the server components, just this package will be enough:
sudo apt install nfs-common
Setting up an NFS server on Ubuntu
We can open NFS access to any folder, but let's create a new one for this purpose:
folder_address client (options)
The folder address is the folder you want to make available over the network. Client - ip address or network address from which this folder can be accessed. But the options are a little more complicated. Let's consider some of them:
- rw- allow reading and writing in this folder
- ro- allow read only
- sync- respond to the following requests only when the data is saved to disk (default)
- async- do not block connections while data is being written to disk
- secure- use only ports below 1024 for connection
- insecure- use any ports
- nohide- do not hide subdirectories when opening access to multiple directories
- root_squash- replace requests from root with anonymous ones
- all_squash- make all requests anonymous
- anonuid and anongid- specifies the uid and gid for the anonymous user.
For example, for our folder, this line might look like this:
/ var / nfs 127.0.0.1 (rw, sync, no_subtree_check)
When everything was set up, it remains to update the NFS export table:
sudo exportfs -a
That's it, opening nfs balls in ubuntu 16.04 is complete. Now let's try to configure the client and try to mount it.
NFS connection
We will not dwell on this issue in detail in today's article. This is a fairly large topic that deserves a separate article. But I will say a few words.
To mount a network folder you don't need any ubuntu nfs client, just use the mount command:
sudo mount 127.0.0.1:/var/nfs/ / mnt /
Now you can try to create a file in the connected directory:
We'll also look at the mounted filesystems with df:
127.0.0.1:/var/nfs 30G 6,7G 22G 24% / mnt
To disable this file system, just use the standard umount:
sudo umount / mnt /
conclusions
This article covered nfs setting ubuntu 16.04, as you can see, everything is done very simply and transparently. Connecting NFS shares is done in a few clicks using standard commands, and opening nfs shares in ubuntu 16.04 is not much more difficult than connecting. If you have any questions, write in the comments!
Related entries:

If you have more than one computer at home (or at work), then a natural desire will be to combine them into a network to use shared resources on computers. Ubuntu allows you to do this in different ways - SMB (Server Message Block) using Samba (I'll write about this next time) and using NFS (network file system). If your network computers run different operating systems (Linux, Windows), then it is more expedient to use Samba. But if all computers run Ubuntu, then it makes sense to install NFS
The benefits of NFS are more even load on the network, less CPU utilization, and displaying shared resources like regular folders on the system.
Installing NFS on Ubuntu consists of two steps: Installing an NFS client and an NFS server. You need a client to access folders on another computer. To provide access to folders on your computer, you need a server. So let's move on to setting up.
Of course, there is a lot of information on nfs on the net, but you have to browse through many sites in search of "pitfalls", so I decided to collect my experience in this article.
Install the necessary packages for the client (nfs-common) and the server (nfs-kernel-server). In the terminal, execute the following command:
sudo apt-get install nfs-kernel-server nfs-common portmap
Setting up an NFS server.
For example, we will provide general access to the / common, / common1 and / common2 folders located in the / user home folder of the user user under whose name we logged on to the computer with the address 192.168.0.1.
Terms of use of folders (for example):
- / common- write / read access for all computers in the local network (from any subnet);
- / common1- read access to the computer with the address 192.168.0.100, the rest are denied access;
- / common2- read / write access to all computers from the 192.168.0.1 - 192.168.0.255 address range, except for the computer with the address 192.168.0.200.
All folder sharing information is stored in the / etc / exports file. We execute the command in the terminal:
sudo gedit / etc / exports
In the editor that appears, write:
/ home / user / common * (rw, async)
/ home / user / common1 192.168.0.100 (ro, async)
/ home / user / common2 192.168.0.1/24(rw,sync) 192.168.0.200 (noaccess)
We save the file.
Note that:
- the full path to the folder for sharing from the very root;
- there are no spaces between the computer address and mount options!
Note on spaces:
/ home / user / common1 192.168.0.100 (rw, async)
In this case, the computer with the address 192.168.0.100 with read / write permissions will gain access to the / home / user / common1 folder, the rest will not get access.
/ home / user / common1 192.168.0.100 (rw, async)
In this case, access to the / home / user / common1 folder will be given to a computer with the address 192.168.0.100 with read permissions, other computers will have read / write access!
Available options:
ro (rw)- Allows only read (read / write) requests.
subtree_check (no_subtree_check)- If a subdirectory of the file system is exported, but not the entire file system, the server checks if the requested file is in the exported subdirectory. Disabling verification decreases security but increases data transfer speed.
sync (async)- indicates that the server should only respond to requests after the changes made by those requests are written to disk. The async option tells the server not to wait for information to be written to disk, which improves performance, but decreases reliability, because loss of information is possible in the event of a disconnected connection or equipment failure.
wdelay (no_wdelay)- Tells the server to delay execution of write requests if a subsequent write request is pending, writing data in larger blocks. This improves performance when sending large write queues. no_wdelay indicates not to postpone the execution of the command for writing, which can be useful if the server receives a large number of commands that are not related to each other.
noaccess- denies access to the specified directory. It can be useful if you have previously set access for all network users to a certain directory, and now you want to restrict access in the subdirectory to only some users.
Restart nfs-kernel-server:
sudo /etc/init.d/nfs-kernel-server restart
mount 192.168.0.1:/data z:
where 192.168.0.1 is the address of the NFS server
/ data - a shared resource on the server
z: - unallocated drive letter in Windows, to which the resource will be mounted
This is in the simplest and fastest case, when NFS without authorization and mounting occurs with the default parameters. For fine tuning, you can read:
mount /?
and the corresponding Windows Help topic
When it comes to computer networks, you can often hear the mention of NFS. What does this acronym mean?
It is a distributed file system protocol originally developed by Sun Microsystems in 1984 that allows a user on a client computer to access files over a network similar to accessing local storage. NFS, like many other protocols, is based on the Open Network Computing Remote Procedure Call (ONC RPC) system.
In other words, what is NFS? It is an open standard, defined in the Request for Comments (RFC), that allows anyone to implement the protocol.
Versions and variations
The inventor used only the first version for his own experimental purposes. When the development team added significant changes to the original NFS and released it outside of Sun's credit, they designated new version as v2 so that you can test interoperability between distributions and create a fallback.

NFS v2
Version 2 originally worked only over the User Datagram Protocol (UDP). Its developers wanted to keep the server side without blocking outside the main protocol.
The virtual file system interface allows for modular implementation reflected in a simple protocol. By February 1986, solutions were demonstrated for operating systems such as System V release 2, DOS, and VAX / VMS using Eunice. NFS v2 only allowed the first 2 GB of a file to be read due to 32-bit limitations.

NFS v3
The first proposal to develop NFS version 3 at Sun Microsystems was announced shortly after the release of the second distribution. The main motivation was to try to mitigate the problem of synchronous write performance. By July 1992, practical improvements had resolved many of the shortcomings of NFS version 2, while leaving only inadequate file support (64-bit file sizes and offsets).
- Support for 64-bit file sizes and offsets for processing data larger than 2 gigabytes (GB);
- support for asynchronous recording on the server to improve performance;
- additional file attributes in many responses to avoid having to retrieve them again;
- a READDIRPLUS operation to get data and attributes along with filenames when scanning a directory;
- many other improvements.
During the introduction of version 3, support for TCP as a transport layer protocol began to increase. The use of TCP as a means of transferring data, performed using NFS over the WAN, began to allow large file sizes to be transferred for viewing and writing. This allowed developers to overcome the 8K limit imposed by the User Datagram Protocol (UDP).
What is NFS v4?
Version 4, influenced by the Andrew File System (AFS) and Server Message Block (SMB, also called CIFS), includes performance improvements, better security, and a conditional protocol.

Version 4 was the first distribution developed by the Internet Engineering Task Force (IETF) after Sun Microsystems outsourced protocol development.
NFS version 4.1 aims to provide protocol support for leveraging clustered server deployments, including the ability to provide scalable concurrent file access across multiple servers (pNFS extension).
The newest file system protocol, NFS 4.2 (RFC 7862), was officially released in November 2016.
Other extensions
With the development of the standard, appropriate tools have appeared for working with it. So, WebNFS, an extension for versions 2 and 3, allows the protocol network access filesystems are easier to integrate into web browsers and enable work through firewalls.

Various third-party protocols have become associated with NFS as well. The most famous of them are:
- Network Lock Manager (NLM) with byte protocol support (added to support UNIX System V file locking API);
- remote quota (RQUOTAD), which allows NFS users to view storage quotas on NFS servers;
- NFS over RDMA - an adaptation of NFS that uses remote direct memory access (RDMA) as the transmission medium;
- NFS-Ganesha is a user-space NFS server that supports CephFS FSAL (Filesystem Abstraction Layer) using libcephfs.
Platforms
The Network File System is often used with Unix operating systems (such as Solaris, AIX, HP-UX), Apple's macOS, and Unix-like operating systems (such as Linux and FreeBSD).
It is also available for platforms such as Acorn RISC OS, OpenVMS, MS-DOS, Microsoft Windows, Novell NetWare, and IBM AS / 400.

Alternative protocols remote access to files include Server Message Block (SMB, also called CIFS), Apple Transfer Protocol (AFP), NetWare Core Protocol (NCP), and OS / 400 Server File System (QFileSvr.400).
This is due to the requirements of NFS, which are oriented mostly towards Unix-like "shells".
At the same time, SMB and NetWare (NCP) protocols are used more often than NFS in systems running Microsoft Windows... AFP is most common on Apple Macintosh platforms, and QFileSvr.400 is most common on OS / 400.
Typical implementation
Assuming a typical Unix-style scenario where one computer (client) needs access to data stored on another (NFS server):
- The server implements Network File System processes, started by default as nfsd, to make its data publicly available to clients. The server administrator determines how to export directory names and options, usually using the / etc / exports configuration file and the exportfs command.
- Administering server security ensures that it can recognize and approve a verified client. Its network configuration ensures that appropriate clients can negotiate with it through any firewall system.
- The client machine requests access to the exported data, usually by issuing the appropriate command. It queries the server (rpcbind) that is using the NFS port and subsequently connects to it.
- If all goes well, users on the client machine will be able to view and interact with the installed file systems on the server within the allowed options.
It should be noted that the automation of the Network File System process can also take place - perhaps using etc / fstab and / or other similar means.
Development to date
By the 21st century, rival protocols DFS and AFS have not achieved any major commercial success over the Network File System. IBM, which previously acquired all commercial rights to the above technologies, donated most of the AFS source code to the free developer community. software in 2000. The Open AFS project still exists today. In early 2005, IBM announced the completion of AFS and DFS sales.
In turn, in January 2010, Panasas introduced NFS v 4.1, a technology that improves concurrent data access capabilities. Network File System v 4.1 protocol defines a method for separating file system metadata from the location of specific files. So it goes beyond simple name / data separation.
What is NFS of this version in practice? The above feature distinguishes it from the traditional protocol, which contains the names of files and their data under the same binding to the server. With Network File System v 4.1, some files can be distributed across multisite servers, but client participation in separating metadata and data is limited.
In the implementation of the fourth distribution kit of the NFS protocol, the server is a set of server resources or components; they are assumed to be controlled by the metadata server.
The client still contacts the same MDS server to crawl or interact with the namespace. When it moves files to and from the server, it can directly interact with the dataset belonging to the NFS group.
The Network File System (NFS) is a file sharing solution for organizations that have mixed Windows and Unix / Linux machine environments. The NFS file system makes it possible to open shared access to files between the specified different platforms with a functioning operating Windows system Server 2012. NFS Services in Windows Server 2012 includes the following features and enhancements.
1. Search in Active Directory. You have the ability to use Windows Active Directory to access files. The Identity Management for Unix schema extension for Active Directory contains the Unix user identifier (UID) and group identifier (GID) fields. This allows Server for NFS services and Client for NFS (Client for NFS) view account mappings Windows users on Unix directly from Active Directory Domain Services. Identity Management for Unix makes it easy to manage the mapping of Windows user accounts to Unix in Active Directory Domain Services.
2. Improved server performance. Services for NFS includes a file filter driver that greatly reduces the overall latency when accessing files on the server.
3. Support for special Unix devices. Services for NFS supports special Unix devices (mknod).
4. Extended Unix support. Services for NFS supports the following versions of Unix: Sun Microsystems Solaris version 9, Red Hat Linux version 9, IBM AIX version 5L 5.2, and Hewlett Packard HP-UX version 11i, as well as many modern Linux distributions.
One of the most common scenarios that creates the need for NFS is to enable Windows users to access a Unix-based enterprise resource planning (ERP) system. While in the ERP system, users can create reports and / or export financial data to Microsoft Excel for further analysis. The NFS file system allows these files to be accessed while still in the Windows environment, which reduces the need for specialized technical skills and reduces the time it takes to export files using a Unix script and then import them into a specific Windows application.
A situation may also arise when you have a Unix system that is used to store files on some kind of storage network (Storage Area Network- SAN). Starting NFS services on Windows machine Server 2012 allows users in an organization to access files stored there without the overhead of Unix-side scripting.
Before installing NFS, you must remove any previously installed NFS components, such as the NFS components that were included with Services for Unix.
NFS Services Components
The following two components of NFS are available.
1. Server for NFS(Server for NFS). Usually, a Unix-based computer cannot access files located on a Windows-based computer. However, a computer that is running Windows Server 2012 R2 and the Server for NFS component can act as a file server for Windows and Unix computers.
2. Client for NFS(Client for NFS). Usually a Windows-based computer cannot access files residing on a Unix-based computer. However, a computer that is running Windows Server 2012 R2 and the Client for NFS component can access files that are stored on a Unix-based NFS server.
Installing Server For NFS Using PowerShell
Let's see how to use PowerShell to install the NFS role on a server and to create an NFS file share.
1. Open windows windows PowerShell via the taskbar as an administrator account.
2. Enter the following commands to install the NFS role on the server:
PS C: \> Import-Module ServerManager PS C: \> Add-WindowsFeature FS-NFS-Services PS C: \> Import-Module NFS
3. Enter the command below to create a new NFS file share:
PS C: \> New-NfsShare -Name "Test" -Path "C: \ Shares \ Test"
4. To view all the new NFS-related PowerShell cmdlets that are available in Windows Server 2012 R2, run the following command:
PS C: \> Get-Command -Module NFS
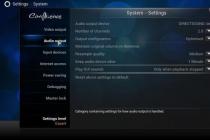
5. Right-click the C: \ Shares \ Test folder, select Properties, then click the NFS Sharing tab. Click on the Manage NFS Sharing button, in the dialog box that appears, you can manage folder permissions, allow anonymous access, configure file encoding settings. You can NFS share a folder using the NFS Advanced Sharing dialog without using PowerShell.
Setting standard permissions
Now we need to open some ports on the firewall for NFS to function. The ports required for NFS to function properly are shown in the table below.