The other day I was presented with an old Compaq nc6120 laptop, an old man of course, but at one time I would give a lot for such a computer. I added RAM to it, reinstalled Windows XP and installed it on it the SEO you want software. I just need this laptop so that I have Windows XP and I can do on it what I cannot do in Linux. But the laptop has a dead keyboard, and it's not very convenient to use two mice. And so I began to decide how to connect to Windows from Linux?
Prior to that, all programs that do not work under Linux I. But the virtual machine consumes a lot of resources and my laptop occasionally freezes because of this. The ideal option now is to remotely connect to Windows and bring its desktop to the main monitor. Then this old laptop can be shoved to hell and connected to it remotely, via wifi, for example.
Several years ago I did such things and now you just need to remember everything. Where do we start?
How do I set up Remote Desktop?
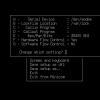
The simplest thing is to use a remote worker connection. Windows desktop... To do this, in here (as in the picture) you must have a check mark and all services are enabled by default. To do this, click on MY COMPUTER with the right mouse button, select PROPERTIES. Then go to the REMOTE SESSIONS tab. And put a tick in front of "Allow remote access to this computer."
After that, we need to make sure that our IP address is static, not dynamic. To do this first. We are looking for the EXECUTE tab in the START menu and give the command cmd... Then, in the terminal that appears, we give the command ipconfig.
My address, as you can see, is 192.168.1.6, so you can make it static. To do this, go to network connections, and right-click on the WIRELESS NETWORK CONNECTION icon. Selecting PROPERTIES. In the window that appears, go to the GENERAL tab and select the TCP / IP protocol. Click on it and press the PROPERTIES button.
Now we remove the DOT from the item GET IP ADDRESS AUTOMATICALLY and rearrange it to USE THE NEXT IP ADDRESS. Next, we prescribe everything, like mine, taking into account only the fact that your main IP address may be slightly different.
If suddenly you do not see:
192.168.1.6 255.255.255.0 192.168.1.1 8.8.8.8 8.8.4.4
One more important point: you need to set a password for the admin user - most likely you have one and you work under it. If the password is already there, then you can skip this item. If not, set a password, I will not describe how to do it, it seems that it will not be difficult.
Everything, with Windows finished, it remains only to install the desired program on Linux. It is possible to install the Vinagre program, although there are others. If it does not suit you, then open Synaptic and enter the word RDP in the search - the protocol of this service. You will find a dozen more programs that do the same.
Well, we will install this program, Vinagre:
Sudo apt-get install vinagre
After installation, go to MENU - INTERNET - VIEW REMOTE DESKTOP. We launch the program and enter everything that is needed: the ip address that we came up with before, the administrator login (admin) and the screen size.
Here, a window appeared, enter the password and get into Windows! Now you can work on two computers at once on one monitor. It is very similar, as when working on virtual machine, only now nothing hangs for me :)
If you have Windows 7 or 8, then you can do the same. But I'm still sure that at microsoft, I don't even want to work with the others for free.
And one more thing: in the program you will notice that besides RDP, there are other protocols through which you can connect to Windows - VNC and. These protocols are better than this one, but to connect via them you need additional software in Windows. I'll even say more: you need to run a VNC or SSH server. I did it before and I know how to implement it. But I'll write about this some other time :)
Hey! Thanks for the site, it's awesome!
Good luck and development!
Thank you, we are trying!
The other day, I finally improved this system: the fact is that the connection sometimes slows down a lot, since everything goes through the wi file (and this is not the best speed) plus through a router. Since the router is far away, the brakes are constant.
I did this: I have a regular router, I bought it for a long time, I connected two laptops to them through the usual network cards... On one put the address 192.168.0.1, and on the other 192.168.0.2 and both here and there the network mask 255.255.255.0
I did not prescribe anything else. Now, in a remote connection, I expose these addresses, the channel is 100 Mbit and everything works like a clock.
In this article, we'll take a look at several ways to remotely connect from Windows to Ubuntu.
Imagine you are in the same room, sitting in front of a Windows computer; the data you need is in another, on a computer running Ubuntu. If both computers are in the same house, no problem; but what if they are in the same office block?
Why remotely connect to Ubuntu from Windows?
There are several reasons why you might want to connect to your Ubuntu computer remotely. You may be at work and need to log into your home computer. Alternatively, you may have an Ubuntu computer in one room, a Windows computer in another, and want to run updates on Ubuntu.
Alternatively, you might be using an Ubuntu server. You may have configured it to control the launch of a game like Counter-Strike or Minecraft. In any case, setting up a remote connection will save you a lot of time and effort.
You have two options for establishing a remote connection to your Ubuntu computer: you can use Remote Desktop (RDP) or Virtual Network Computing (VNC).
Let's take a look at each method in turn.
Find out the IP address of your Ubuntu PC
Before connecting to an Ubuntu device, you need to know the IP address.
The first way is the easiest. Physically go to your Ubuntu device, press Ctrl + Alt + T to open a terminal, and enter the command:
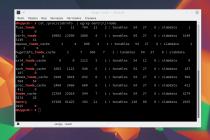
Ifconfig
Look for "inet addr" next to the connection you are currently using. For example, if you use Wi-Fi, look for wlan0... If your computer is connected to a network for Ethernet, look for eth0.
Another way to find the IP address is to find the connection icon in the panel, right click and select Connection details... You will find the IP address here.
Can't open any of these options? You can also connect to the router directly through your computer's browser.
After logging into the admin console of the router, you will be able to see which devices are connected. Just find the name of your Ubuntu device, find the IP address and write it down.
1. Connecting via SSH
Before getting started, you might want to install PuTTY on your computer (or just try the built-in Windows SSH feature). This will allow you to establish an SSH connection which gives you remote access to command line Ubuntu.
To be clear: this is not a remote desktop option as there is no mouse control. But it is helpful to have the tools you will be using for remote installation. However, SSH is often disabled by default, so if it is not installed, you will have to fix that.
In short, it depends on which version of Ubuntu you are using and whether you have used SSH before.
After installing via terminal ( sudo apt install openssh-server) you will be able to establish a remote connection (just using the IP address and Ubuntu username and password) and use the terminal to install the necessary tools for RDP and for VNC.
2. Remote access using Remote Desktop Protocol
The most simple option is using the Remote Desktop Protocol or RDP. Built into Windows, this tool can be used to create a remote desktop connection in your home network... All you need is the IP address of the Ubuntu device.

While necessary software preinstalled on Windows, you will need to install the xrdp tool on Ubuntu. To do this, open a terminal window ( Ctrl + Alt + T) and enter:
Sudo apt install xrdp
Sudo systemctl enable xrdp
Wait for it to install, then launch the Remote Desktop application on Windows using the Start or Search menu. Enter rdp and click on Remote Desktop Connection. When the application is open, enter the IP address in the Computer field.
Then press the button Show options and add Username for Ubuntu PC. You can click Save to save these settings for reuse next time.
Click the button To plug to start connecting and enter your Ubuntu account password when prompted. After that, the connection will be established, which will give you full access to remote computer Ubuntu using mouse and keyboard. If you plan on using this connection frequently, you can create for it config file to save time.
Troubleshooting RDP issues
While RDP is a great option for remotely connecting to an Ubuntu computer, with the arrival of Ubuntu 18.04 LTS, it is less reliable. It looks like there is a problem with establishing a remote connection when the account is already logged in on the Ubuntu machine.
Thus, an easy way to get around this is to simply log out of the user.
If this is not possible, try switching the RDP connection from using the Xorg server to using the X11rdp, wait until it works, and then try Xorg again.
You can also try to establish a connection after rebooting the Linux machine.
3. Remote access via virtual network (VNC)
Another option with full remote desktop functionality is VNC (Virtual Network Computing). This requires a client application on a Windows PC and a server on Ubuntu.
On the remote PC, install the TightVNC Server component after checking for updates:
Sudo apt update
Install the server:
Sudo apt install tightvncserver
And run:
Sudo tightvncserver
At this point, you will be prompted to set a password to connect. You will also be assigned a desktop number, usually: 1. Write it down.

Now that the TightVNC Server is configured on Ubuntu, you will need to install the client on Windows. It can be downloaded from www.tightvnc.com/download.php - make sure you select the correct version as it is available in 32-bit and 64-bit versions.
TightVNC tools are only available as a bundle, so after installation, search for TightVNC Viewer in Windows search.
After launching the viewer, enter the Ubuntu IP address in the host followed by the desktop number. It might look like this:
192.168.0.99:1
Enter your password when prompted and get started on your remote desktop!
Making TightVNC more secure
By default, TightVNC will encrypt your password, but nothing else. This makes it insecure for internet connections. Fortunately, it can be made more secure with SSH and Xming.
To do this, download and install the tool from Sourceforge. After that, find your desktop shortcut, right-click and select Properties.

Look for the Shortcut tab, and in the Target field, enter the following:
"C: \ Program Files (x86) \ Xming \ Xming.exe": 0 -clipboard -multiwindow
Check the box Enable X11 Forwarding then go back to Session at the top of the menu.

Enter the IP address remote device and press the button Open... In a few seconds, a secure connection to the Ubuntu Remote Desktop will be available.
Choosing the Right Remote Access Solution
How you use these methods depends on what you want to get from your remote desktop.
There are three main options available:
- RDP: It uses the Windows Remote Desktop Protocol, via the open source xrdp implementation.
- VNC: Virtual network computing is an alternative to RDP, but less secure.
- VNC over SSH: mixing VNC with SSH improves connection security.
You can also use SSH to control the terminal on your Ubuntu machine.
We have shown you three ways to establish a remote connection to your Ubuntu computer or server from Windows. Each of them has its own advantages and disadvantages. But if you just want a quick dive into Ubuntu, why not try the Windows Subsystem for Linux available in Windows 10?
When trying to access via VNC to a remote desktop Linux Mint 19, I had to face the fact that, compared to previous versions(17, 18), by default this option is not provided. With further steps to organize VNC connectivity to a node running Linux Mint 19, the need to put a number of additional efforts began to resemble an episode from the movie:
- How do you kill you right away or do you want to suffer?
- Better, of course, to suffer.
(from the movie "White Sun of the Desert")
It all started with the fact that in the settings (hereinafter referred to as the XFCE graphical environment) of the "Sessions and Launch" section and the "Autostart" tab, there is no mention of connecting to a remote desktop, although in the previous Linux Mint 18 the inclusion point was located between updating user folders and network.


The vino package is responsible for the implementation of the VNC server in Linux Mint, which is not installed by default in Linux Mint 19. This package needs to be installed and, in principle, can be easily found through Synaptic.


However, this will not be enough. As the study of the issue showed, the vino developers have removed the graphical configuration utility from their product, so the vino will need to be configured through the dconf-editor configurator.
Run the command in the terminal that will install the necessary components and run dconf-editor
Sudo apt install -y vino dconf-editor && sudo dconf-editor
When you start dconf-editor, a warning will be shown that the changes you make are at your own risk and to continue, you must click on the "I" ll be careful "button (I will be careful). check the box "Show this dialog next time".

After starting the graphical system configurator by sequentially moving "gnome - desktop" go to the section "remote-access"


If you plan to connect via the VNC client from Windows, then, as they say, it is advisable to turn off encryption (move the engine in the appropriate line).

Despite the fact that this, as they say, is not a "good", but in local network whom you trust this action permissible.
Do the same with prompt-enabled, otherwise the other computer will have to "approve" a remote connection to it every time.

For the sake of some kind of protection, set a password for the connection by turning off the default setting and entering the password you have invented, for example:
![]()


To fix this change, click on the green button.
![]()
Close the configurator and go to the autorun settings. Add vino software to the list of programs automatically launched at system startup
/ usr / lib / vino / vino-server

The figure is from the XFCE shell. In Cinnamon and MATE, use their existing autorun settings.
Reboot your system.
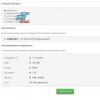
Create the appropriate connection on the computer you will be connecting from. In the figure below, the connection will be from a Linux host, so it is added in the Remmina program.

Please note that you do not need to enter a username, only the password that was specified when configuring vino through the dconf-editor graphical configurator is entered.
The figure shows the H-4.vot node, which corresponds to the fully qualified domain name of the node. In this case, it is assumed that the DNS server of your local network is able to match the issued DHCP IP addresses to the names of the network nodes. MikroTik, for example, can do this through. If DNS server is not available or it does not know how to do this, then assign a static address to the node to which you will remotely connect (or configure the DHCP server to issue it the same address) and connect via IP.
If everything is done correctly, you will have the pleasure of observing the remote desktop of the Linux node to which you are connected, as well as controlling this computer.

At the same time, an icon will be displayed on the panel (usually at the bottom) (with the Mint-Y design theme - blue), which displays the fact of a remote connection to the desktop.
![]()
The speed of response of a remote computer to your commands depends on its hardware capabilities, the degree of system load, as well as the amount of data transmitted via VNC. When considering the issue of the "responsiveness" of a remote system, many publications write about the loss of VNC over RDP, but I personally could not find anything better for remotely connecting to Linux with a GUI. In order to increase the responsiveness of the target system, you can try to play around with the settings for the display quality of the target computer screen in the connection parameters (see the Remmina connection settings window):

An alternative solution is x11vnc ().
One of the useful Windows functions is that you can connect to your desktop from another location to control your computer remotely. Fortunately, the main Linux distributions also offer this feature and Ubuntu is one of them. If you want to connect to your Windows computers from Ubuntu remotely, you can use the default RDP client found in it called Remmina. Here's how to create, configure and establish a Remote Desktop Connection from Ubuntu on Windows.
NOTE. This tutorial was created on Ubuntu 18.04 LTS (Bionic Beaver). However, this works on other Linux versions as well.
Step 1. Enable Remote Desktop Connections on Windows PC
If you want to allow other computers to remotely connect to your Windows PC, you must first configure it to accept Remote Desktop connections.
Step 2. Launch Remmina Remote Desktop Client
By default, Ubuntu comes with a Remote Desktop client application that supports the Remote Desktop Protocol (RDP) used by operating systems Windows for remote connections. You can find it in the list of Ubuntu applications.
If you prefer to search, you can find the default Ubuntu RDP client using the search term RDP.

Step 3. Configure and Install an Ubuntu Windows Remote Desktop Session
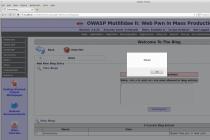
When you open the Remmina Remote Desktop Client, you should see something like this:

Click the Create New Connection Profile button.
Its icon is a green plus sign, which is easy to spot in the upper left corner of the window.

The previous step opens a window called "Remote Desktop". Here you can configure the Ubuntu Remote Desktop Connection to Windows that you are about to set up.

In the Profile section, enter the Name you want to use to connect. It could be anything. Leave the other settings from the Profile section with their default settings.

In the Server field on the Basic tab, enter the IP address of the Windows PC to which you will connect. Enter the username and user password for the user account you want to use on the remote Windows PC. This user account must exist on the Windows PC.
If you are using account Microsoft on Windows PC, then it's okay to fill in your address Email and password. If your Windows PC is part of a domain, enter it in the Domain field, otherwise leave it blank.

Then you can set the resolution and color depth that you want to use for your remote desktop connection. By default, the Remote Desktop Profile is set to Use Client Resolution, which means the connection uses the same permission as Windows computer to which you are connecting. Color depth is also set to the highest quality possible. However, choosing a lower desktop resolution and color depth can improve the performance of a Linux to Windows Remote Desktop session. If you experience lag when connecting to Windows Remote Desktop, try lowering the color depth or resolution.


When you're done setting up all the details, click Save and Connect. This will save your connection profile and then initiate an RDP connection to your Windows PC.

After a few seconds, you should have a working remote desktop connection on your Windows PC.

You can also connect to a remote computer under Windows control without any of the personalization steps discussed earlier. However, this means that you will have to reconfigure the Remote Desktop Connection profile the next time remote control your Windows PC.
July 28
Newer versions of Ubuntu already have a built-in VNC server. We will use it standard means... While I was understanding this issue, I had to read a decent number of forums. So, many users write that in the version of ubuntu 14.04 this trick does not work due to some internal intricacies of the kernel device. I did not go deep into this question ... in any case, if suddenly you are the happy owner of this particular version, you can use the alternative x11vnc server.
It is put quite simply:
Sudo apt-get remove vino sudo apt-get install x11vnc
In the same article, the standard VNC server already included in ubuntu by default will be considered. How to set everything up?
We connect to the remote host.
We connect via ssh to the remote computer to which we want to get graphical access. In this case, we must know his ip and login with the password of the user - whose screen we want to see. In fact, the data of any user with sudo rights will suit us, but then we will have to tweak some points.
So, let's say on the local network we have a computer running ubuntu with an ip address of 10.20.0.30 and user feanor184. We connect to it from the console with the -X key (to run graphic Xs):
Ssh -X [email protected]
we enter the password and get into the console of our remote computer.
Now, we enter in it:
Sudo vino-preferences
and we see the graphics window

Here we check the boxes:
allow other users to view your desktop — we allow to watch the desktop.
allow other users to control your desktop — we allow to control the mouse and keyboard remotely.
require the user to enter this password — be sure to set a password for the connection. You never know who climbs in our network
show notification area icon: always — always display the vnc icon at the top of the screen in the tray.
You can also set your own settings - my settings are described here)
We save the settings and disconnect from the remote host.
To connect to a configured computer, we use any client with vnc support.
For example, Remmina is for Linux.
UltraVNC Viewer - for Windows.
I remind you once again that in order for the described connection settings to work, the ubuntu OS must be installed on the remote computer. Installing ubuntu is a separate topic, which I would not like to focus on here, so we will skip this step. There are many manuals on this topic on the Internet.
What do we end up with?
We were able to connect to a remote computer under ubuntu and perform any operations on it as if we ourselves were sitting at its monitor