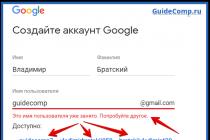
How can I change icons on Android?
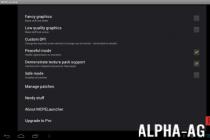
Changing the familiar interface can completely change the usual impressions of working with the system. To do this, we are invited to download an application called Beautiful Icon Styler from Play market. It works with "native" shells of smartphones under Android control– Samsung, LG, HTC and so on. In addition, support for the stock version of the shell is provided.
The disadvantage of this application is the lack of the Russian language. However, he has a very clear and user-friendly interface which anyone can master. After starting the program, we will see four tabs. The very first one contains downloaded icon sets. The second tab will help us select the icons we want to replace. The third contains free icon sets, and the fourth contains paid ones.
If we have downloaded the free version of the program, the second tab is not available to us. In addition, we will not have many icon sets at our disposal. Note that the paid version costs only 30 rubles. By the way, activation full version happens only after two other users install the same application using our link and run it.
So, now we know how to replace icons on android. What other software will help us with this?
Other Ways to Replace Icons on an Android Device
A very good program for this mobile platform is Icon Changer. To replace an icon through it, you just need to select the application and the icon itself (you can take it from a ready-made set or gallery).
What should we do if we cannot find an icon that suits us in any of the collections? You can organize a search through the Tha Icon Ultimate program. In the search process, we also take into account what permission we need. Add that when changing icons system applications may need another launcher.
One more useful program is Xposed Installer. To work with it, our smartphone must be running system version 4.0.3 and higher. In addition, we must have root rights. Download the program at the following address: repo.xposed.info/module/de.robv.android.xposed.installer. We need an apk file. Next, download the Unicon module. Install apk files on mobile device. We launch the application and open root access to it. Now we install it. We add that using this application (as well as opening root access) is very risky, and therefore you should resort to it only in extreme cases. It is much easier and safer to download a program like Beautiful Icon Styler from the Play Market, which we described above.
In contact with
In the first article, we talked about how to change wallpapers and sounds, how to change the lock screen, install a third-party keyboard, and replace the address book. It's time to move on to more complex things.
In this article, we'll take a look at third-party launchers, discuss their advantages and disadvantages, and talk about whether or not to change them at all.
The article will have a lot of pictures. In order not to make the page too heavy, only screenshot thumbnails will be inserted into it. By clicking on the thumbnail, you can see the screenshot in full size. But even so, the page turned out to be quite heavy. Be careful.
Haven't chosen your launcher yet? Then we go to you!
The article will consist of two parts. In the first part, we will look at the main reasons for changing the stock launcher. In the second part, we will consider specific products. Of course. it is impossible to consider all launchers within the framework of one article. Therefore, I tried to choose a few dissimilar to each other. Reviews of many others are not difficult to find on the same site.
Let me remind you that the purpose of this article is to review the possibilities of customizing an Android phone, and not detailed overview specific programs. And even more so, not a direct comparison of different launchers. Therefore, I will try to dwell on the strengths of each launcher in more detail, to show its main features.
Foreword
Launcher is the face of anyone Android smartphone. It is he who primarily affects the user experience that the user will receive. Will it be easy to change the wallpaper and add a new widget? How many shortcuts fit on the desktop? Is it possible to somehow sort dozens of applications in the main menu? How smooth is the phone interface? Are 3D effects used? How much is left free random access memory for applications to work? All this depends primarily on the installed launcher.
Almost all manufacturers strive to provide the user with a ready-made version of the design of the workspace with a minimum possibility of making changes. And it's very good if it suits you. because regular means You will almost never be able to make adjustments. The same is true for "pure" Android. For example, in version 4.0, a built-in search widget appears on every desktop. The widget itself may not be bad, but why should it take up space on every desktop? In fact, a lot of people don't use it at all.
The situation is aggravated by the fact that the adaptation of the branded launcher under different models usually minimal. For example, and on a huge samsung screen Galaxy Note II and on a relatively small (by modern standards) screen samsung galaxy S III mini fits the same number of icons. And, of course, the user has no way to change it somehow.
Not so scary...
As it has already been written many times, customization is one of the strengths of Android. And the launcher can be changed just as easily as anything else. However, among new users Android phones, there are several scary myths about replacing launchers.
Myth one. The launcher is very difficult to replace, it requires special skills and entails the loss of warranty.
Many people confuse launcher replacement and phone flashing. Like any program, the launcher is downloaded from Play.Market and installed in one click. If you don’t like it, then you can also easily return to the “native” version. And, of course, there is no question of any loss of warranty.
Myth two. Third-party launchers are no good, they are just amateur handicrafts, assembled "on the knee".
Many third-party launchers are created by experienced development teams that have long achieved great success in their field. Moreover, some manufacturers even choose them for their devices. Although, of course, low-quality products can also be found among them. Just like any other program.
Myth three. If you put a second launcher on your phone, then there will be almost no free RAM left, the phone will start to slow down a lot.
Only the launcher that is currently running is in RAM. All other launchers are unloaded from memory. Therefore, second brakes can be noticed only at the moment of changing one launcher to another.
Myth four. A third-party launcher will run much less smoothly than a native one. After all, manufacturers have probably adapted the native launcher to the hardware of their phone.
It's hard for me to judge how much time manufacturers spend on optimizing their shells. The fact is that on many phone models they noticeably slow down, and in addition they also “eat up” most of the available resources. And very often, a third-party launcher turns out to be much more attractive in these parameters.
Pros of third party launchers
Because of what they usually put a third-party launcher? What exactly are the benefits it provides? There are quite a few reasons to change the launcher, and everyone can have their own. Let's take a look at some of the more obvious ones.
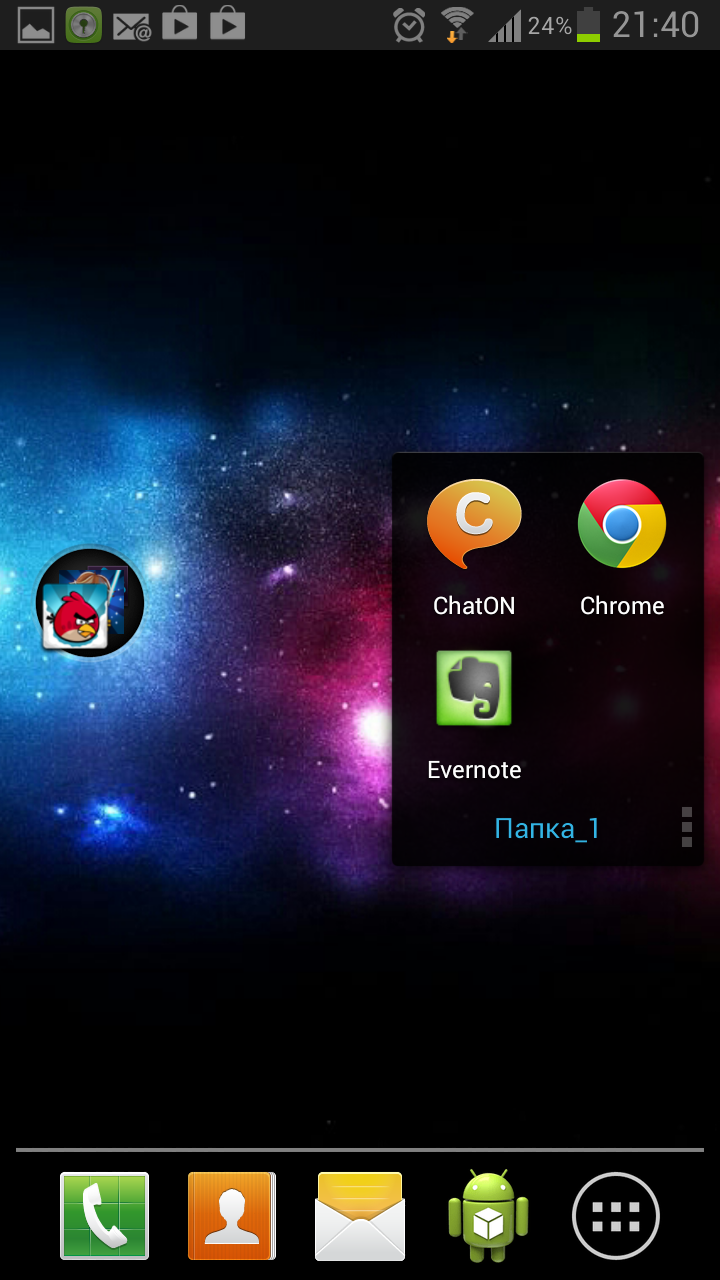
Create folders on the desktop and in the application menu
According to the original idea of Google, users should place all shortcuts to the necessary programs on the desktop. And the main menu with a list of all programs is nothing more than a list of all installed apps. It was assumed that the user would use it very rarely and only in order to bring the necessary shortcut to the desktop.
In practice, not everyone liked the idea of placing all shortcuts on desktops. This is primarily due to the fact that the android time did not know how to create folders on the desktop. Because of this, the desktop very quickly became cluttered with a bunch of badly sorted shortcuts, and it was rather difficult to quickly find the right one. The ability to create folders on the desktop is one of the basic features of almost any third-party launcher.

At the same time, many people are accustomed to opening programs from the application menu, and leaving the desktops themselves under various widgets. After all, many of them, such as mail or RSS feed, take up a lot of space. Unfortunately, Google stubbornly sticks to its original idea and stubbornly does not add normal sorting to the application menu, while many third-party launchers allow you to create folders and separate tabs in it.
Desktop Grid
Why do manufacturers not give the user the opportunity to select the maximum number of icons on the desktop? For me, this is one of the biggest mysteries. And if on small screens this is not very relevant, then on "shovels" a la SGS3, HTC One, or Galaxy Note is quite essential. After all, the fact that exactly the same amount of information is placed on a 5.5 ′ screen as on a 3.5 ′ screen is complete nonsense. Luckily, most launchers allow you to adjust the desktop grid size to your liking.

Appearance
Another common reason for replacing the stock launcher is the desire to change appearance. Everyone has different tastes, and it is quite possible that some branded skins may seem lurid and ugly to some (hey, who said “TouchWiz” now? ..) Perhaps you want to change the icon set, add effects when scrolling desktops, or install horizontal scrolling in the application menu. Or, for example, you just want to try the classic look of Android 4.0. In all cases, third-party launchers are at your service.

New features and fine-tuning
It often happens that at first everything suits you. But after some time, you want to “twist” something, make it a little more convenient or change it a little. Or just add some new features. Alas, many manufacturers consider this a reason to change the phone. In new versions branded shells cool new features are often added, but they won't appear on older phones. Even with an update. For example, similar situation often occurs with HTC Sense.
This is another plus of third-party launchers. There is no need to immediately deal with a bunch of all the possible settings. The main thing is just to remember that if you wish, you can customize a lot for yourself in a couple of clicks. And all new features will appear on your phone immediately. You no longer have to guess whether the next update will come out for him or not. As a result, your phone will always meet your requirements, even if they have changed since you bought the phone.
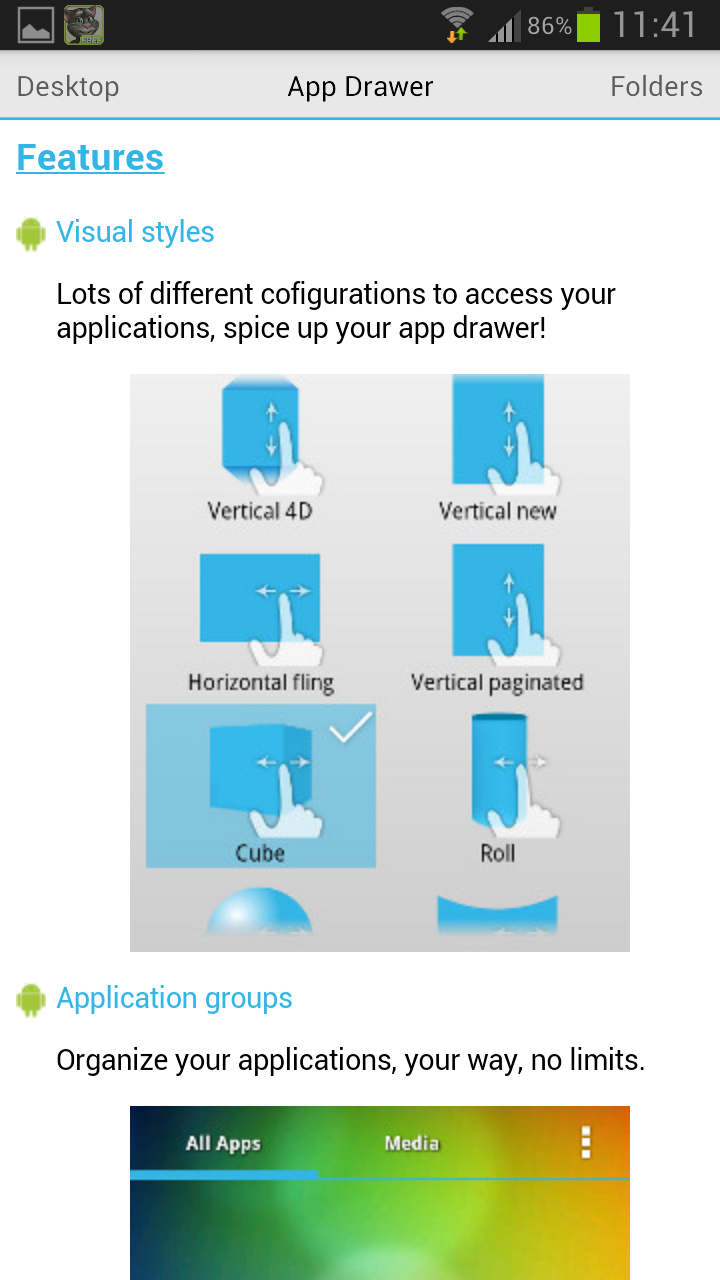
Go Launcher EX
Unlike many competitors, Go Launcher is part of a suite of software from the Go Dev Team. This includes the phone book, keypad, lock screen, a wide variety of widgets and much more. All programs are made in the same style and fit perfectly with each other. In fact, all together they are a whole shell, such as TouchWiz or HTC Sense. That said, Go Launcher isn't bad in and of itself.
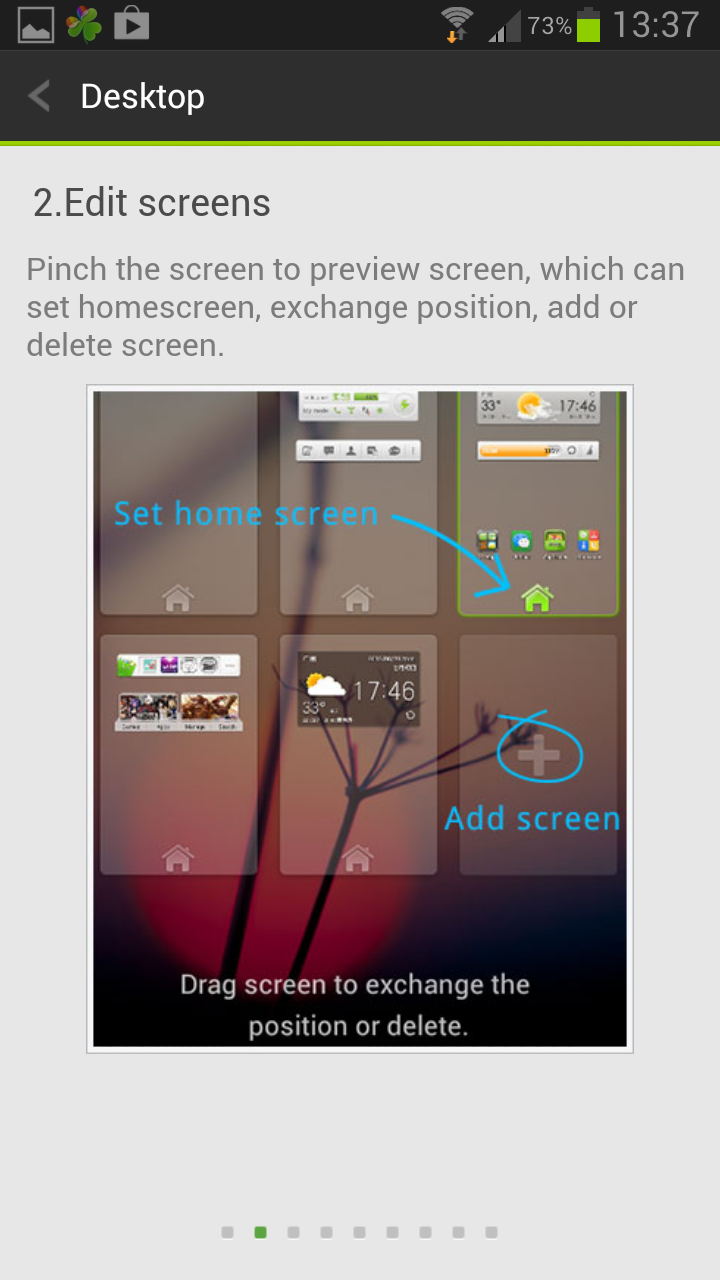
When you launch the launcher for the first time, a short "tutorial" of several slides will be shown.
|
|
|


In addition, there is a special section "Go HandBook", which discusses in great detail all the settings of the launcher. Unfortunately, all text is in English. But thanks a lot detailed screenshots, in any case, it will not be difficult to figure it out.
|
|
|


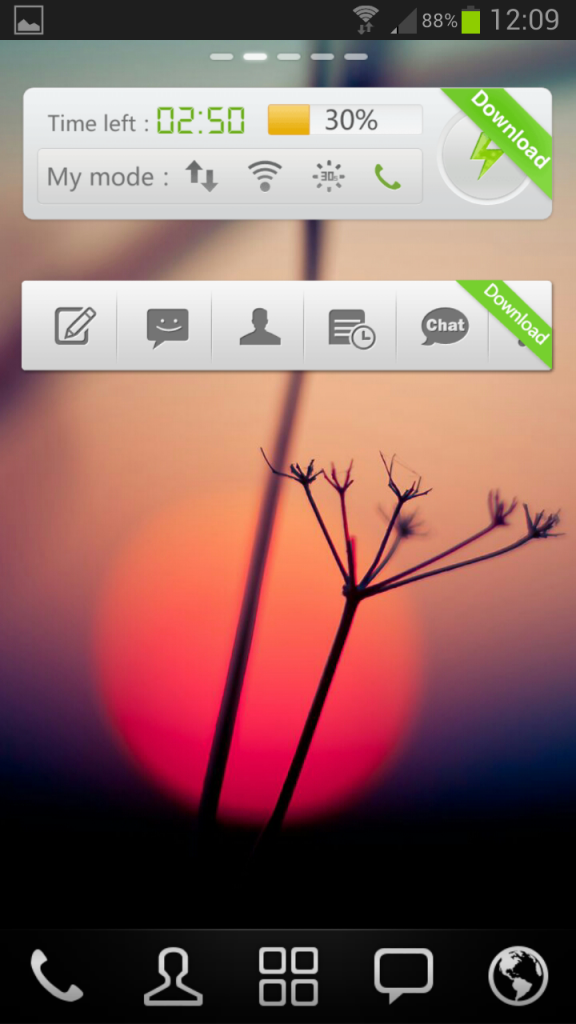
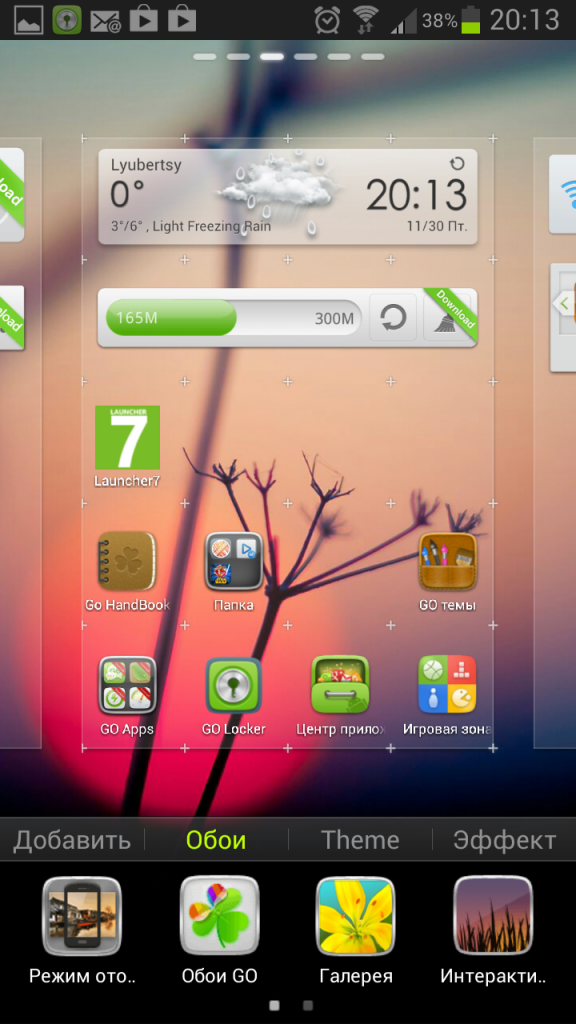
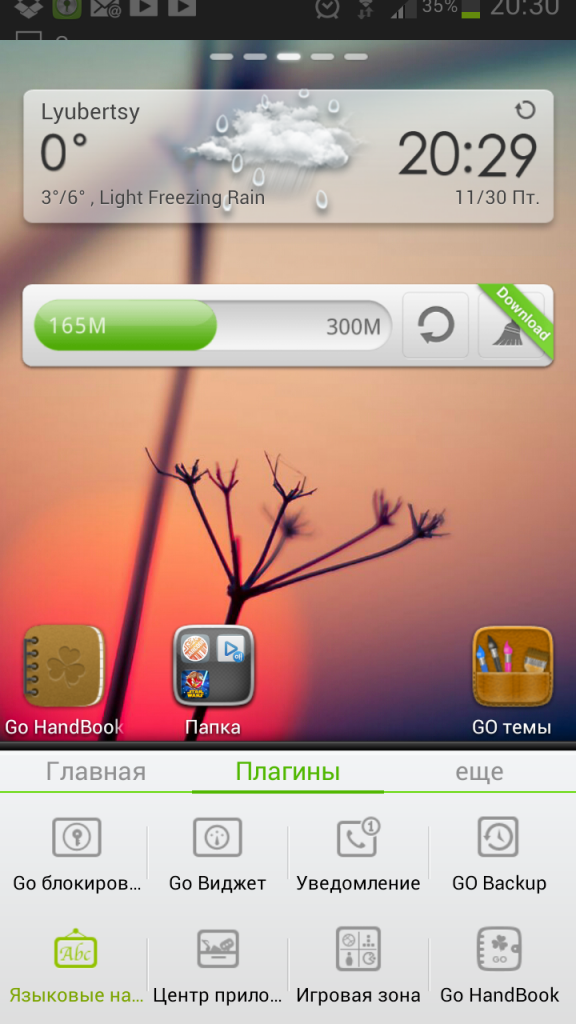
Initially, five desktops are installed in the launcher. Two of them are empty, the rest are widgets. Pay attention to the widgets with the "Download" ribbon. In fact, this is not the widget itself, but just its picture. When you click on it, the Play.Market page will open, where you can download it. By default, no 3D effects are set for desktop scrolling, standard horizontal scrolling is used. Circular scrolling of desktops is disabled.
|
|
|

Initially, support for several gestures works. Swipe up on the screen will open the settings menu, swipe down will reveal the "curtain" of the notification panel, "pinch" allows you to go to the matrix of desktops.
Under the desktop there is a panel with quick access icons (dock): phone, address book, application menu, sms, browser. Like the desktops themselves, you can flip it with a swipe left or right. This will open a second set of icons.
With a long tap on the desktop, a menu will appear to configure it. The menu contains the following options:
— "Add". Using this item, you can bring an application shortcut to the desktop, create a folder, install one of the many widgets specially created for Go Launcher, or install any third-party widget.
Below you can see how application folders are created and look.
|
|
|


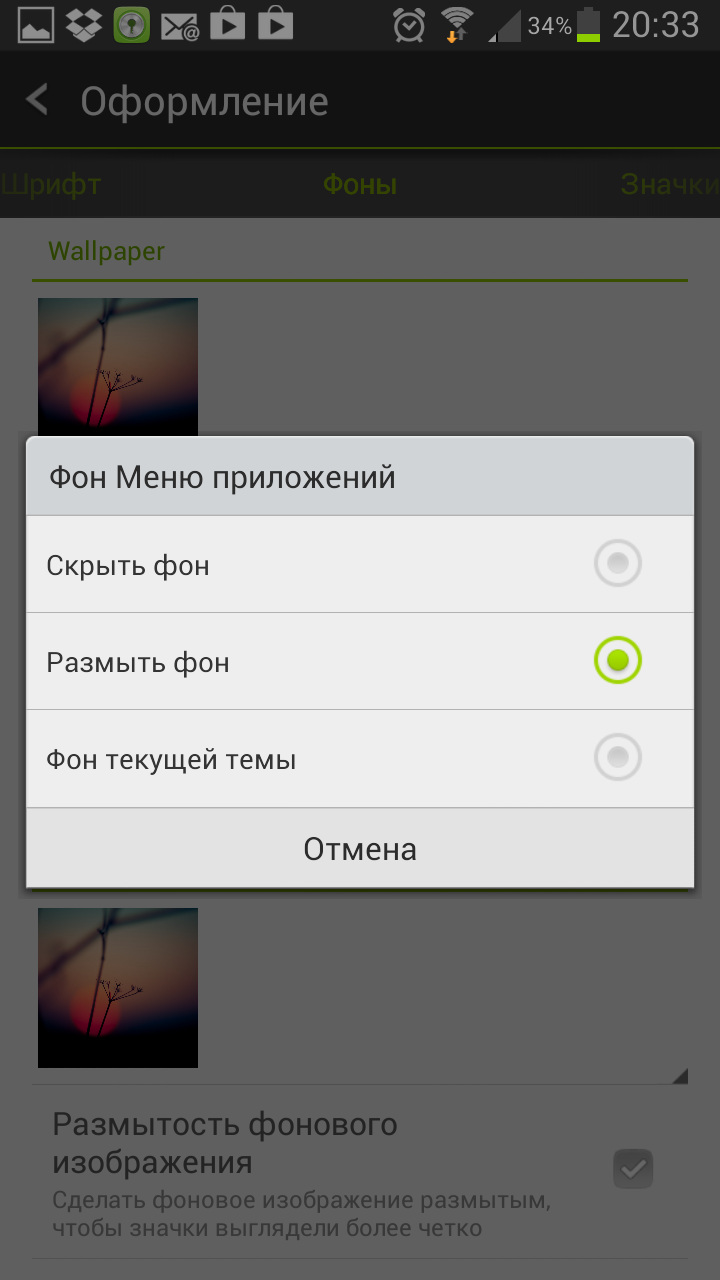
— "Wallpaper". Here we can set the wallpaper display mode (with or without scrolling), set the wallpaper either from a special set for Go Launcher or using any available picture, set up and install interactive (live) wallpapers.
Section "Wallpaper" |
|
|


— Theme. In this section, you can separately select a theme for the launcher and lock screen. From here you can also go to a special store for GoDev products.
Section "Theme" |
|
|


— "Effect". Select animation when scrolling the desktop. There are a lot of options, from unobtrusive to very complex. Everyone will find something to their taste.

Everything is done simply and intuitively, the desktop is easy to set up in just a few clicks. And most importantly, there is no need to dig through a bunch of launcher settings to find the desired function.
Just as simple, but at the same time, the application menu is functionally executed. The menu works horizontal scrolling, the background of the menu is a slightly darkened desktop wallpaper. Circular scrolling enabled. At the top there are three tabs - "All", "Recent" and "Open". The content of the tabs is clear from their name. The "Open" tab also displays the amount of occupied \ free RAM. There is a button to clear it. Here you can edit the list of blocked applications.
At the bottom there are three additional buttons: “Multimedia” (I don’t know how to properly call it, unfortunately), “Home” and “Menu”.
Open Programs tab |
Media menu |
|


Pressing the Media button brings up a pop-up menu that lets you quickly navigate to Gallery, Music, Videos, and Search. Moreover, the search is performed both among applications and among multimedia files. The idea turned out to be very interesting, it is convenient to use this menu, and everything is done very beautifully.
|
|
|


The "Menu" button brings up a pop-up menu with the ability to sort applications, hide unnecessary shortcuts, go to the built-in application center, "game zone" and settings. Separately, I note that the ability to hide icons unnecessary programs I find it very useful. Indeed, on many phones there are a bunch of unnecessary pre-installed applications that cannot be removed in the standard way. A long tap on the icon allows you to remove the program or place it in a folder.
|
|
|

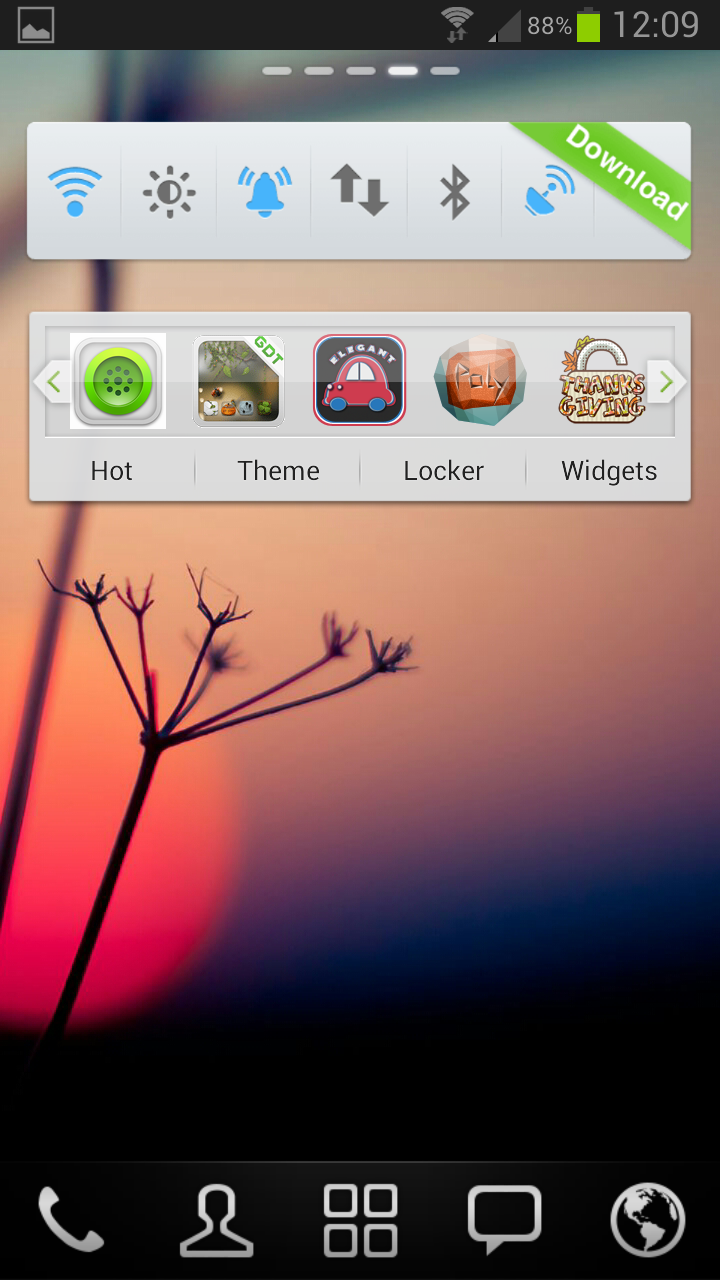
Themes and Widgets
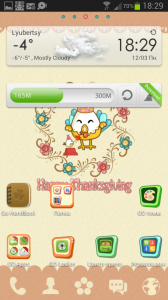
As with all other GoDevTeam products, there are a huge number of quality themes for Go Launcher. Themes are put literally in one click and the appearance of the phone is completely transformed. Below is an example of one of the free themes. In addition, you can separately install one of the many icon packs.
|
|
|


As I mentioned above, Go Launcher has a whole range of high-quality widgets for every taste. Many of them have become real hits and are very often used even outside the launcher itself. For example, a very beautiful weather widget, which was already mentioned in the last article.
Fine tuning
I want to note right away that the settings menu looks very nice and is well structured. This distinguishes Go Launcher from many analogues, where the settings are presented in one long list with a non-obvious breakdown into categories and subcategories. It can be seen that when creating their launcher, GoDevTeam was guided by " ordinary users”, and not just to the “geeks” who are ready to delve into obscure settings for hours.
|
|
|


First section - "Registration" contains several screens between which you can move with a horizontal swipe.
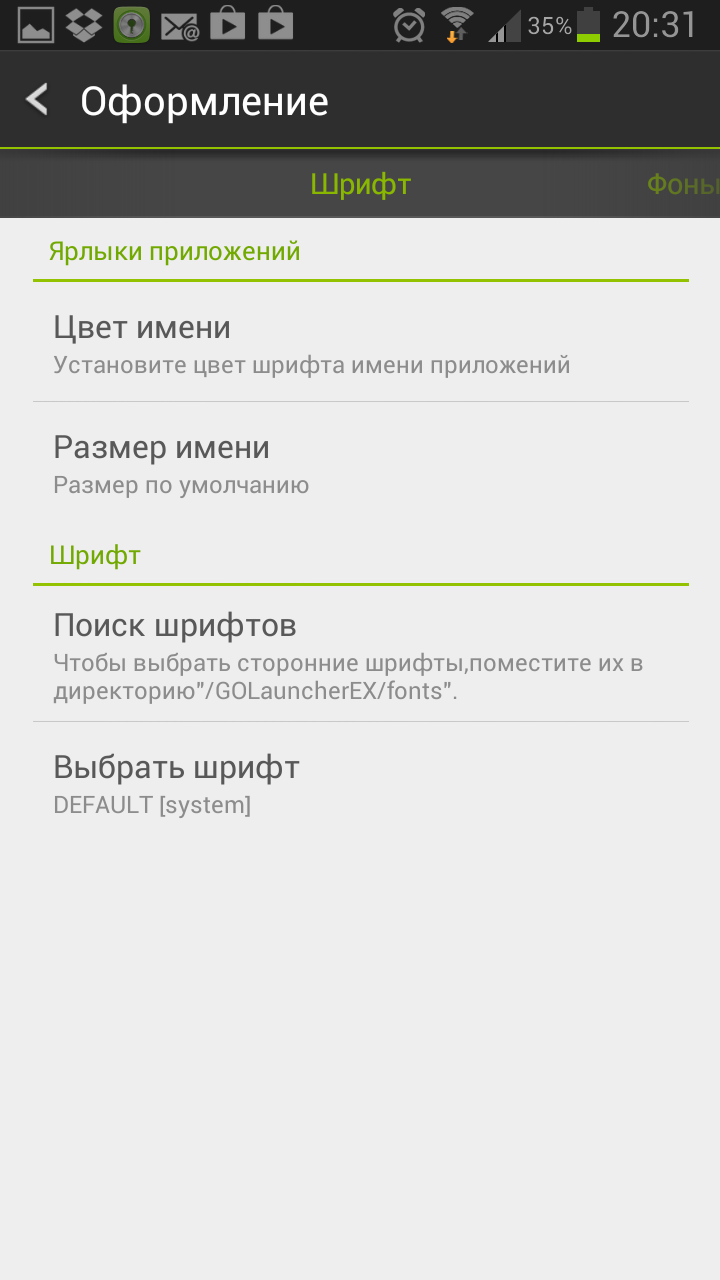
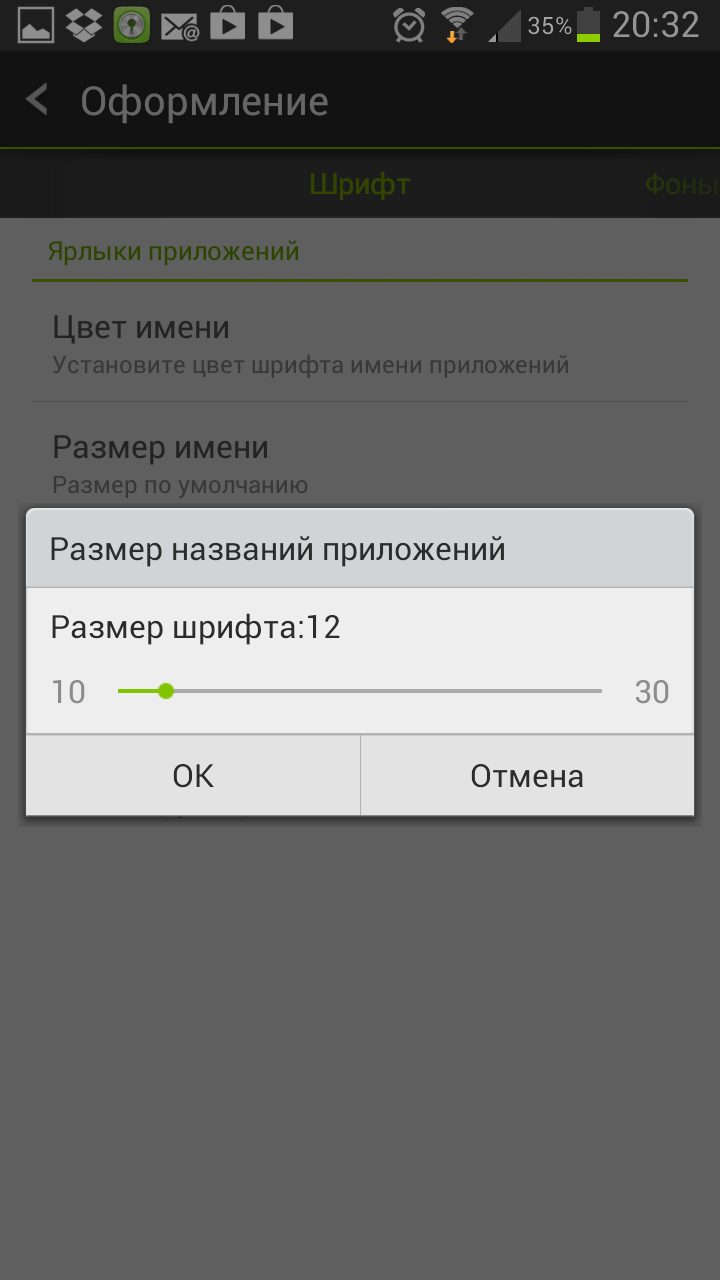
— Fonts Screen allows you to select the font type, adjust its size and color.
Fonts Screen |
|
|

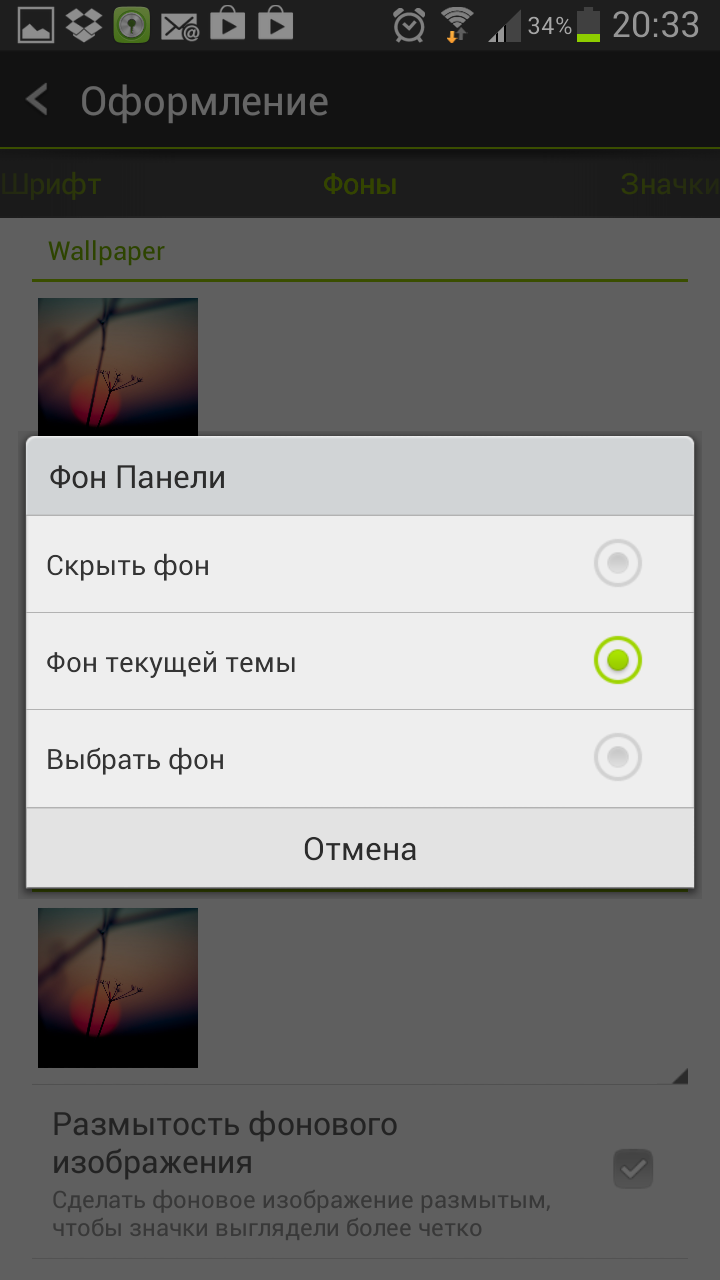
— Backgrounds screen allows you to select wallpaper for the desktop, the background of the panel with shortcut icons, the background of the application menu.
Backgrounds screen |
|
|

— Icons screen allows you to change settings such as icon size (all changes are clearly shown in the picture above), icon theme, panel style, click color, etc.
Icons screen |
|
|


— Screen "Indicator" allows you to customize the appearance and position of the desktop indicator (built-in widget in the form of dots showing the active desktop and their total number)
Screen "Indicator" |
|
|


next section, "Design Settings", allows you to change advanced settings for the dock, icons, and application menus.

Section "Design settings"
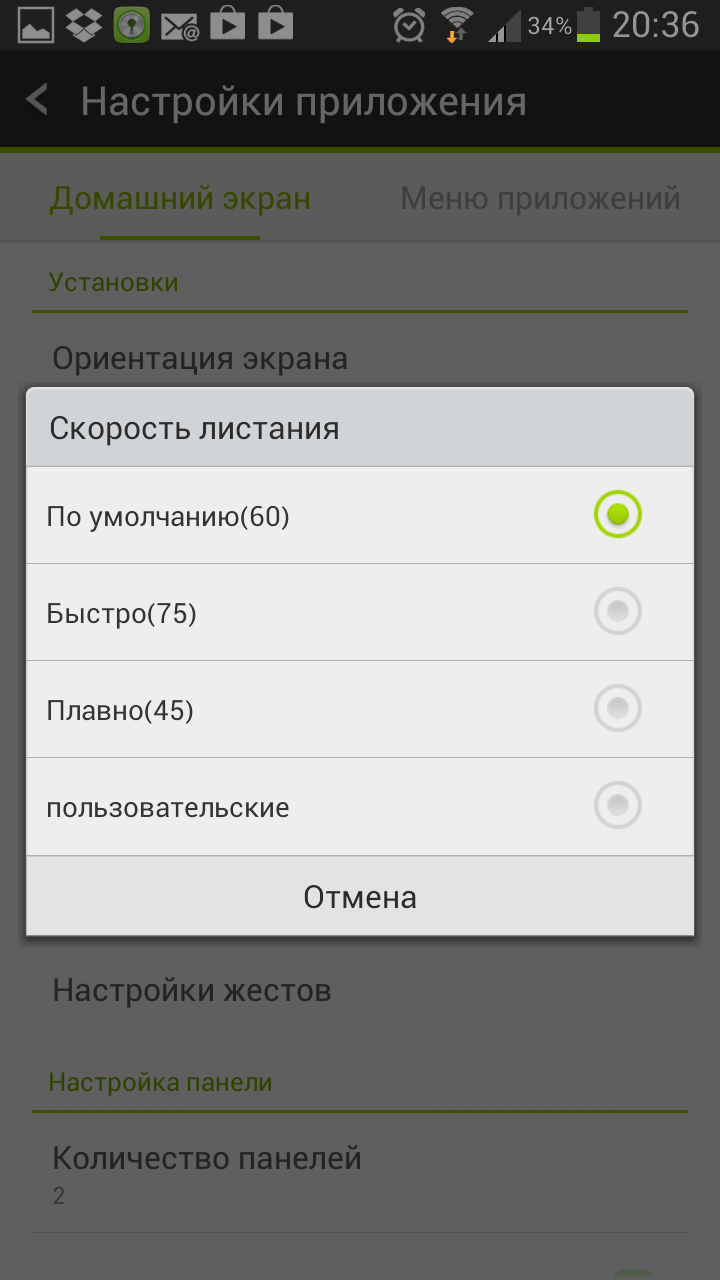
"App Settings" is another section that contains quite a few useful settings. It consists of two screens:
— Home screen allows you to change the screen orientation, change the grid size, turn on circular scrolling of desktops, configure gestures, add additional panels shortcut icons.
Home screen |
|
|

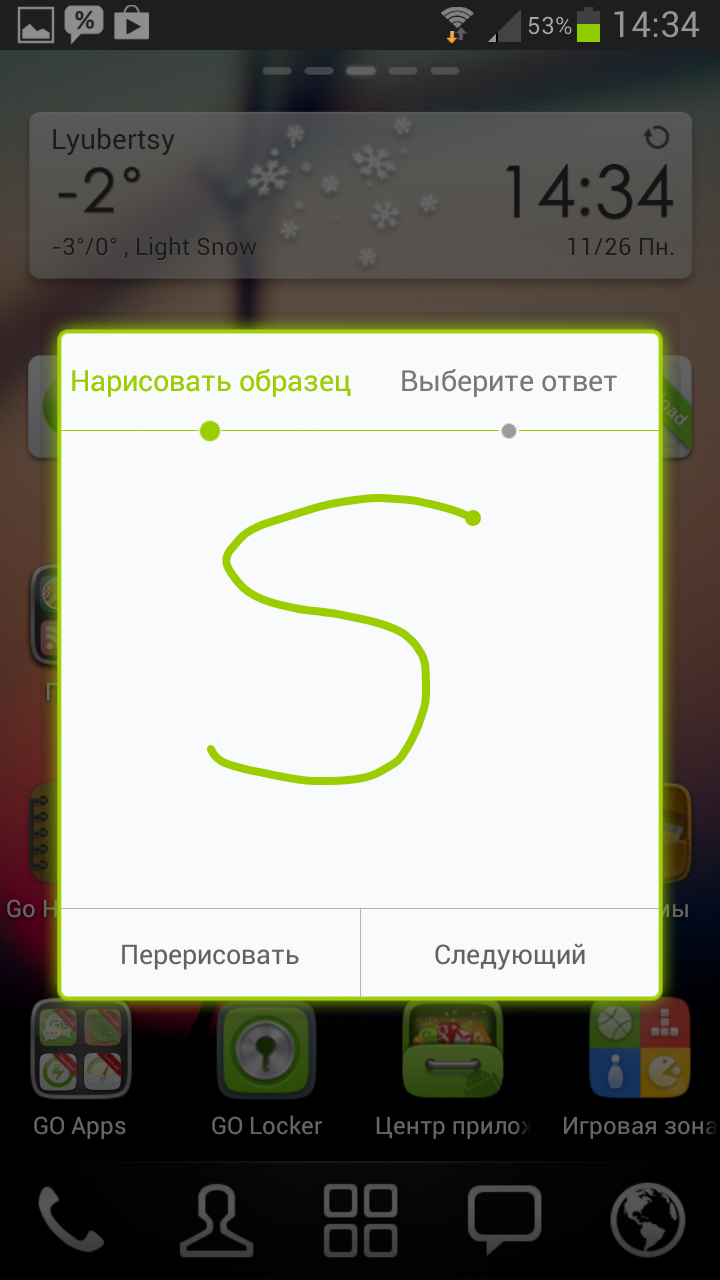
Separately, I will dwell on the “user gesture” function, which by default is assigned to a double tap on the screen. When activated, a special window appears on the screen in which you can draw some arbitrary figure and assign a specific action to it.
|
|
|

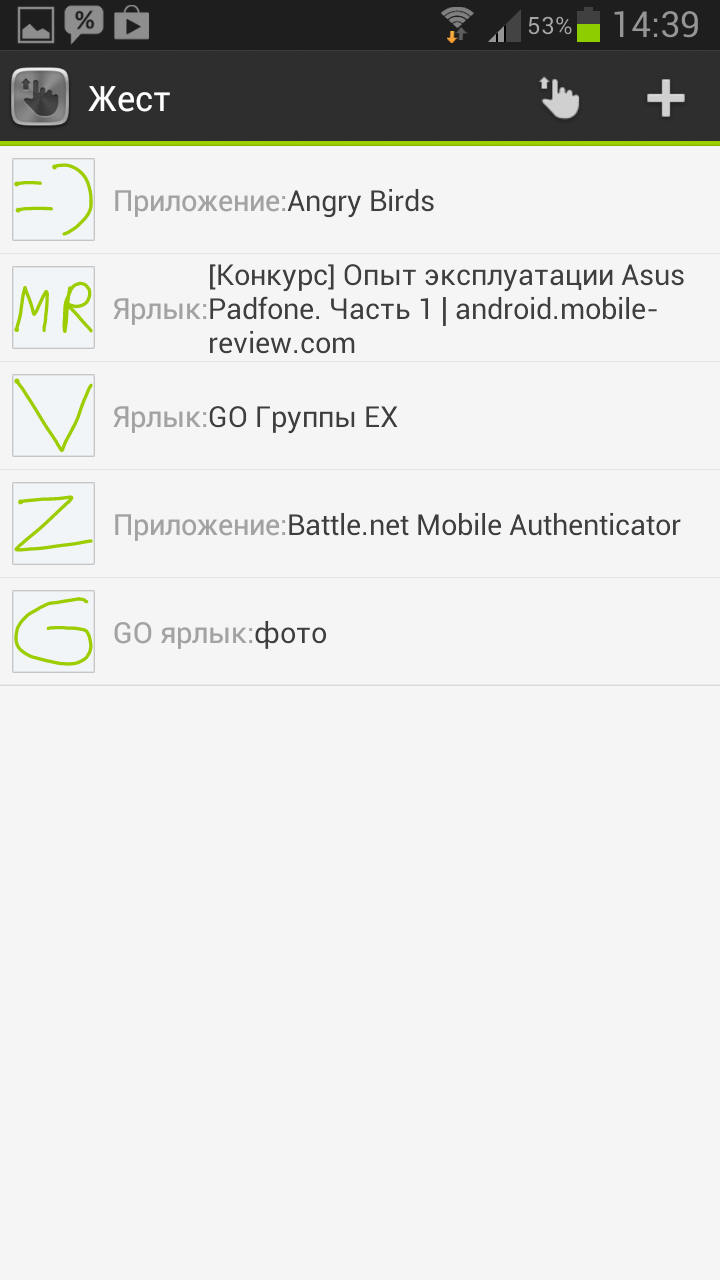
— Application Menu Screen contains similar settings. Here you can choose the direction of scrolling in the application menu, the size of the grid, the type of animation, enable gesture support.
Application Menu screen |
|
|


Outcome
Go Launcher EX can be safely recommended for the first acquaintance with third-party launchers. Well made and aimed at new users. It has a high functionality, but at the same time the most simple and intuitive interface. Quite beautiful even in the "default" form, has a bunch of themes and beautiful effects animations. Allows you to organize applications into folders, customize the desktop grid, has an extended dock and supports gestures. If desired, it is easy to turn it into a full-fledged shell with its own address book, lock screen, unique widgets.
If you are in doubt about whether to change the stock launcher to a third-party one, then try installing Go Launcher EX. In any case, you will not lose anything, except for a couple of minutes of time.
launcher 7
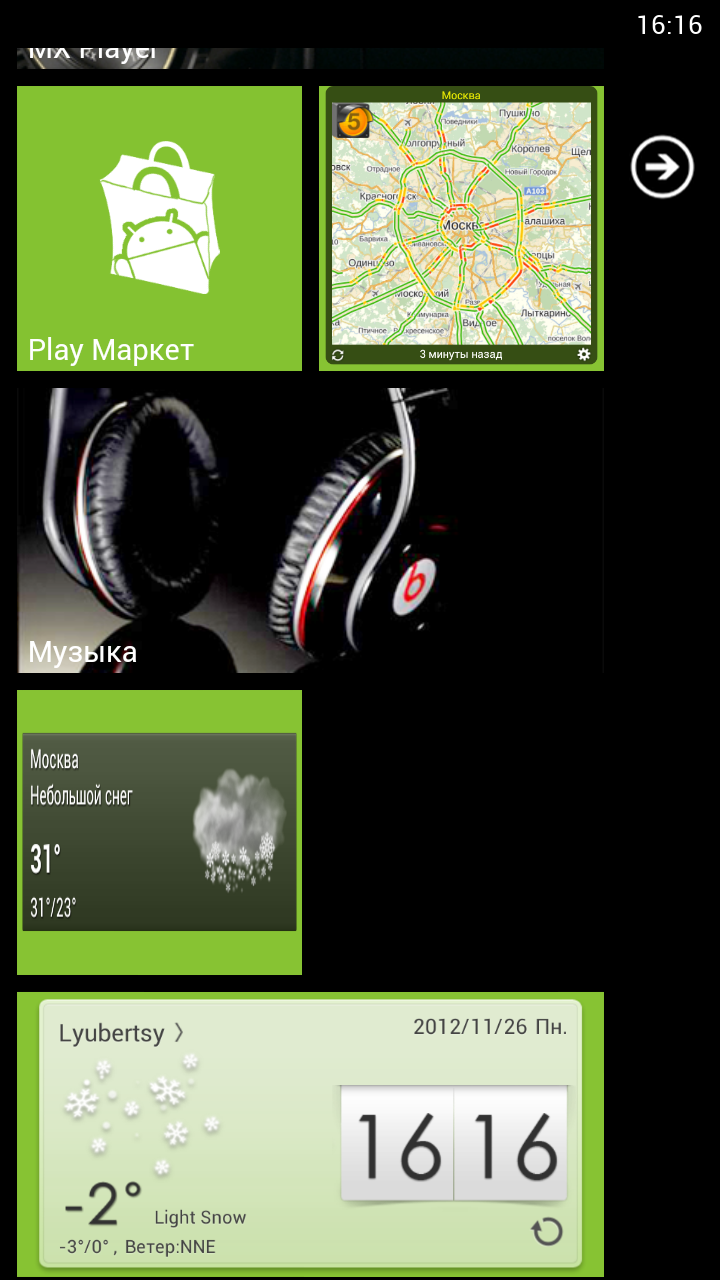
The launcher is made in style Mobile Windows 7. And addressed first (and last) to those who want to try the famous Metro interface.
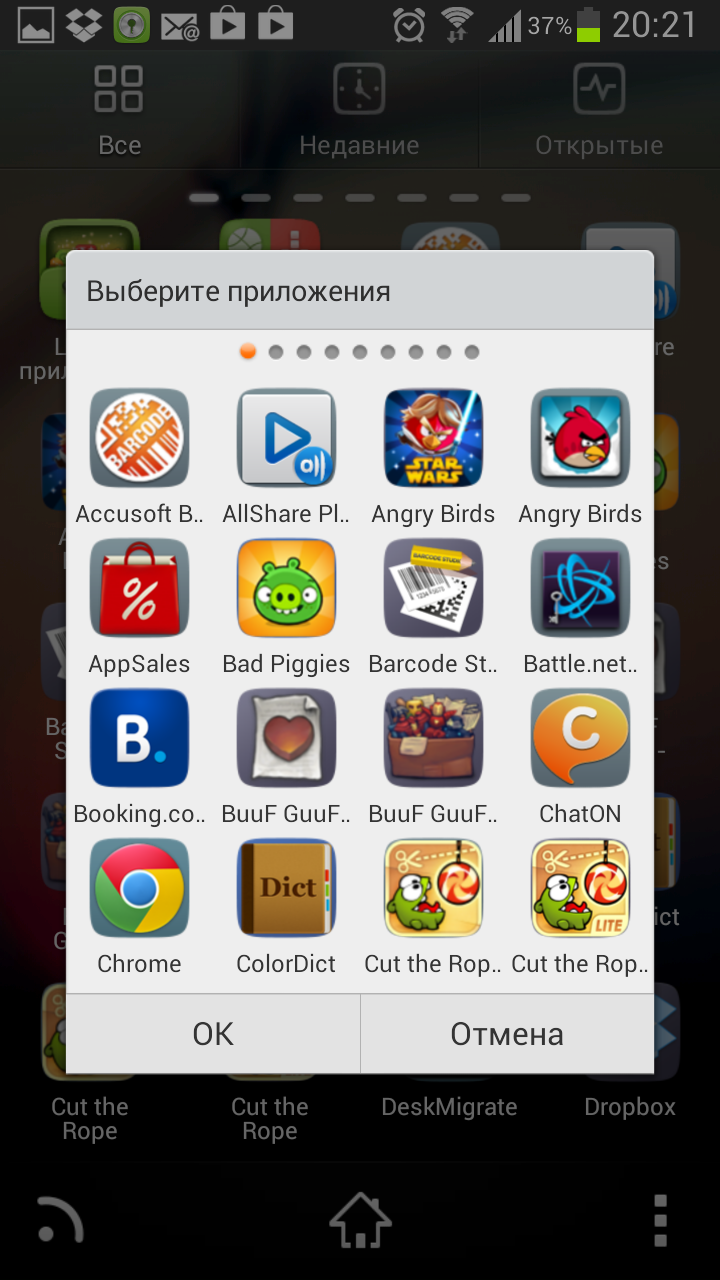
During installation, you will be asked to specify applications for standard tiles (tiles). This includes a dialer, an application for sending SMS, a browser, a market, a phone book, a video and an audio player.

The entire launcher, in fact, consists of only two screens. This is the desktop and application menu. And here and there vertical scrolling works. A long tap on a tile allows you to edit and move it. By pressing the "menu" key of the phone itself, you can call up a pop-up menu with settings and a button to add a new tile. It is possible to set a regular widget as a tile.
|
|
This is how widget support is implemented |


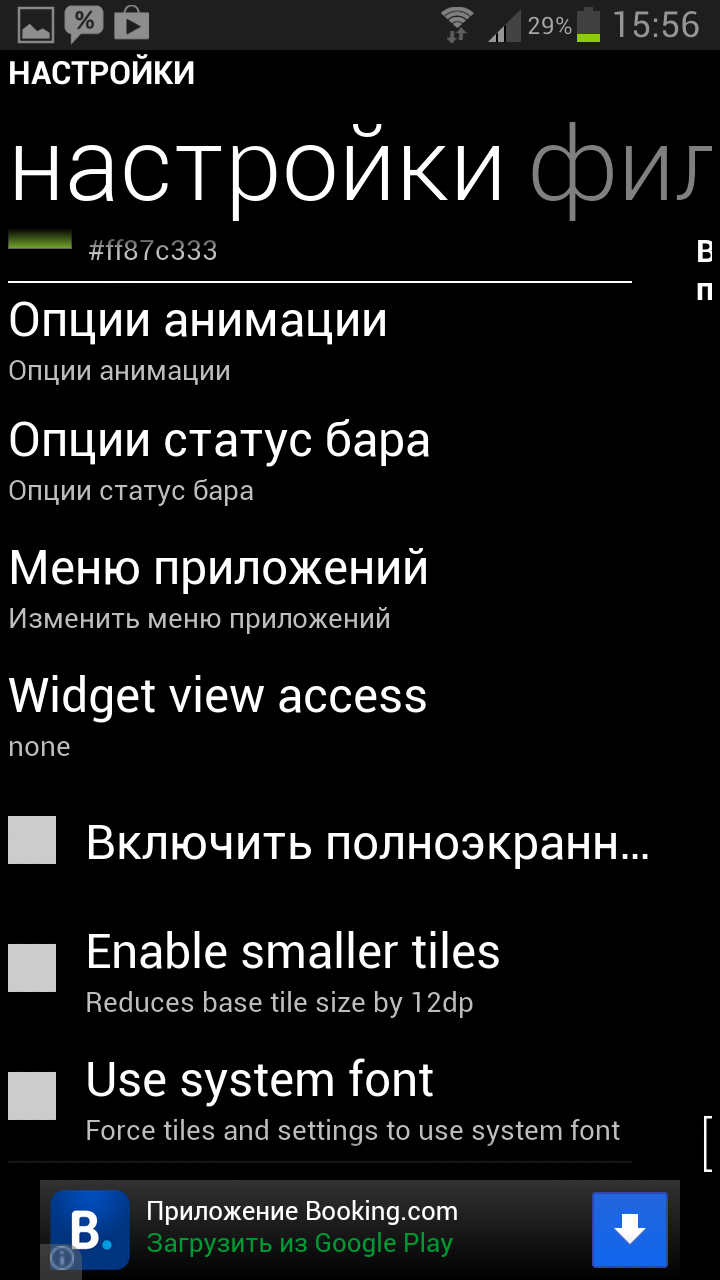
Launcher settings are not rich. Basically, this is setting animation, tile colors and fonts. It is possible to set the wallpaper and enable "Windows 7" style for the status bar.
|
|
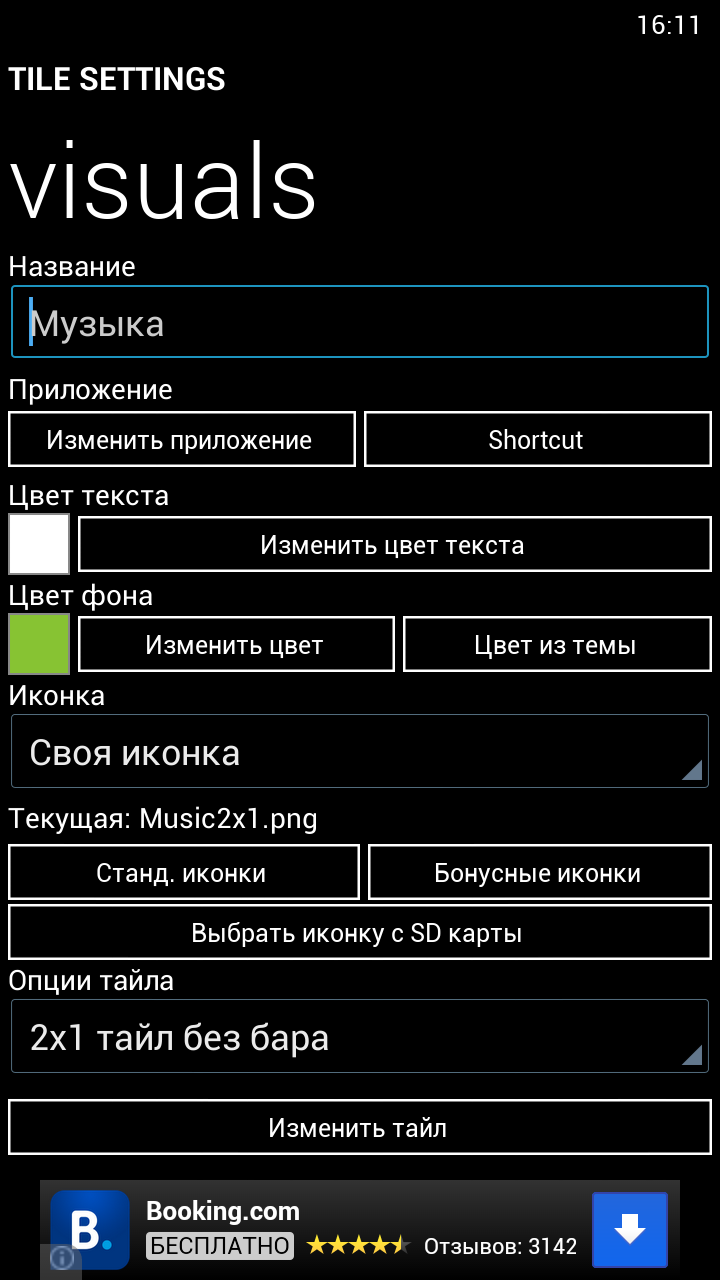
Customize the Music tile |

It's hard to say who might need Launcher 7. I see only one use for it - to surprise friends with a "new smartphone on Windows 7." Use it in real life is, in my opinion, completely impossible. However, there are several million installations on his account. So, for someone, everything may not be so clear. In any case, I definitely do not recommend starting acquaintance with third-party launchers from it.
Nova Launcher
When Android 4.0 came out, a lot of people liked its updated interface. And several different launchers appeared at once, which sought to preserve the feeling of “pure” Android, but at the same time make its settings more flexible, add functions that were missing for many.
If Go Launcher EX, in my opinion, is aimed more at "simple users" who want to try something new, then Nova Launcher is designed for a more experienced audience. After all, without additional settings, the difference with the "naked" Android will be almost imperceptible. But, if you tinker a little, the difference will become very noticeable, since it has a huge number of various settings and interesting features. However, here it is worth considering that “pure” Android, without third-party shells from manufacturers, is not for everyone. And if you are tired of the pre-installed shell and you want something more classic, then Nova Launcher, even out of the box, will be a very successful solution.
I note that I have a paid version of the program. Free, some additional functions may be blocked. In particular, these are features such as the ability to hide the icons of unnecessary programs, create tabs or support for gestures.
What do we get out of the box?
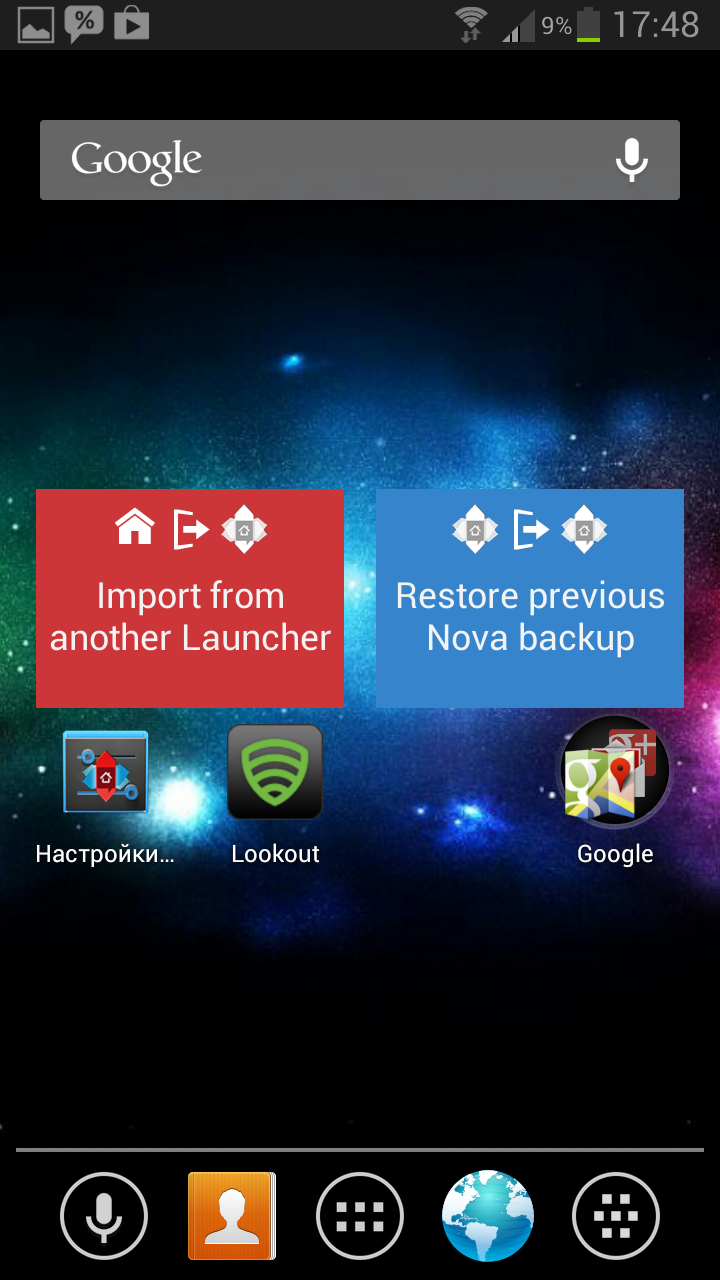
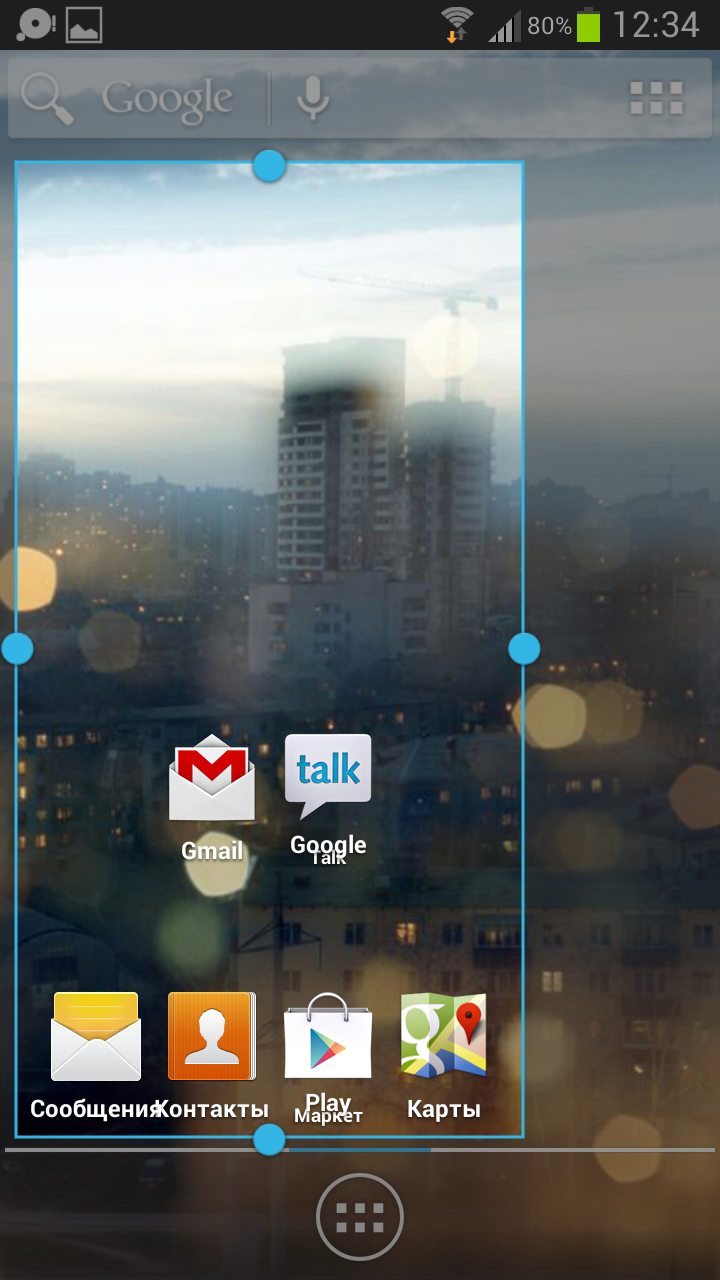
When launching the launcher for the first time, we get to the desktop with two widgets "Import settings from another launcher" and "Restore settings from backup". Clicking on a widget will launch the corresponding dialog.
At the first launch, I chose to import settings from another launcher (in my case, it's TouchWiz). The launcher reported the number of elements found and warned that it would not be able to import widgets on its own. However, all widgets are reserved their place, and adding them manually is no longer difficult. You can see the result of the import in the screenshots below. Please note that the desktop in Nova Launcher initially had a place under additional row icons.
|
|
|


When switching between desktops, the 3D cube effect works. I heard that on Android 4.1 the Nova Launcher animation can be slow. But personally in my case, everything works smoothly and smoothly. Transitions work just as smoothly when opening and scrolling through the list of programs in the main menu. "Pinch" on the desktop allows you to go to the list of desktops. If necessary, you can change their number or swap them.
Animation "Cube" |
Animation "Cube" |
|


Supported quick creation folders, just drag and drop two application icons one on top of the other. The type of folders is configured in detail in the settings of the launcher. Widgets can be swapped by simply dragging them on top of each other. Or you can immediately put one widget directly on the other, if this function is activated in the settings. The launcher has another interesting feature: you can remove not only the application shortcut from the desktop, but also completely remove the program itself. It is also worth noting that you can put several application shortcuts on the desktop at once, and not add them one at a time, as usual.
|
|
|


The menu itself with programs is divided into two tabs: applications and widgets. As in standard Android 4.0, if you scroll through all the screens in the Applications tab, the next screen will be shown from the Widgets tab. The application menu supports the creation of folders and separate tabs, we will talk about this below. To the right of the tabs is a "menu" button, when clicked, a list of several actions appears. It contains three options: launch Play.Market, launch the standard "Application Manager" and go to the launcher settings.
|
|
|


Like Go Launcher EX, a scrollable dock is supported. But this launcher does not offer any of its own widgets.
Fine tuning
It is during the setup that Nova Launcher shows itself in all its glory. Sometimes there is a feeling that you can configure anything and whatever you want in it. Because the possibility of detailed customization is one of the main features of Nova Launcher, so we will dwell on them in a little more detail.

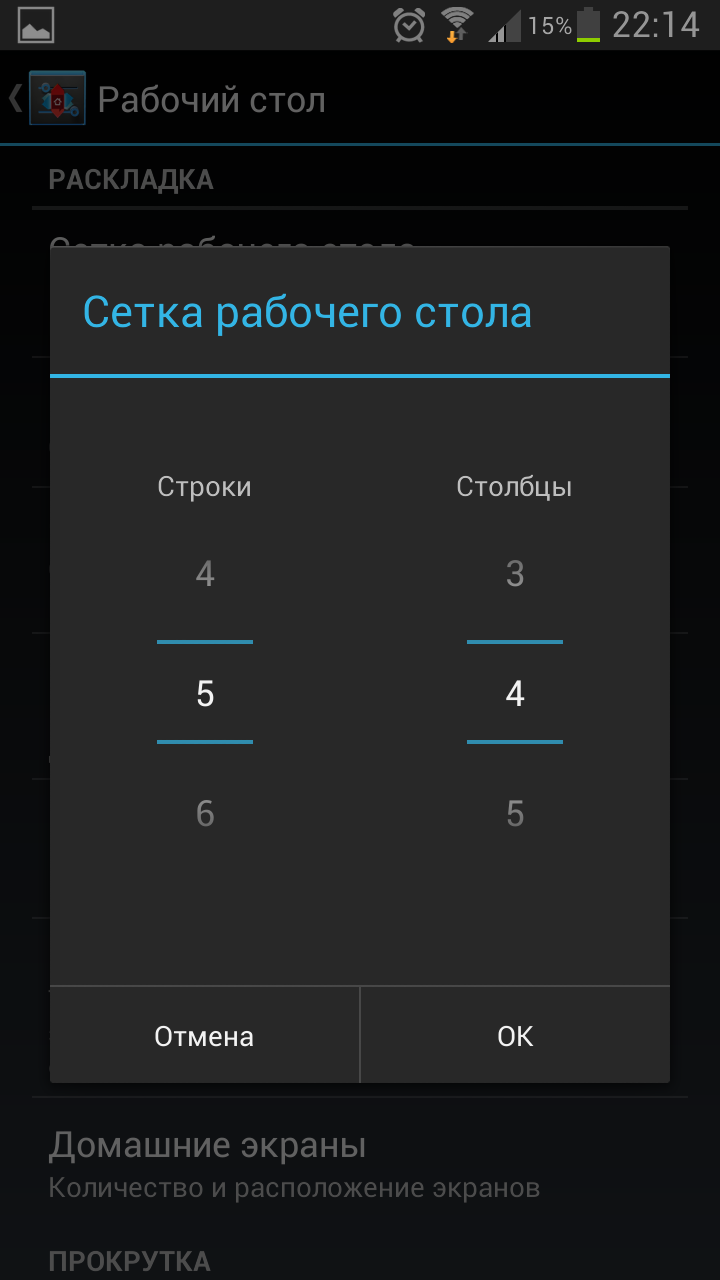
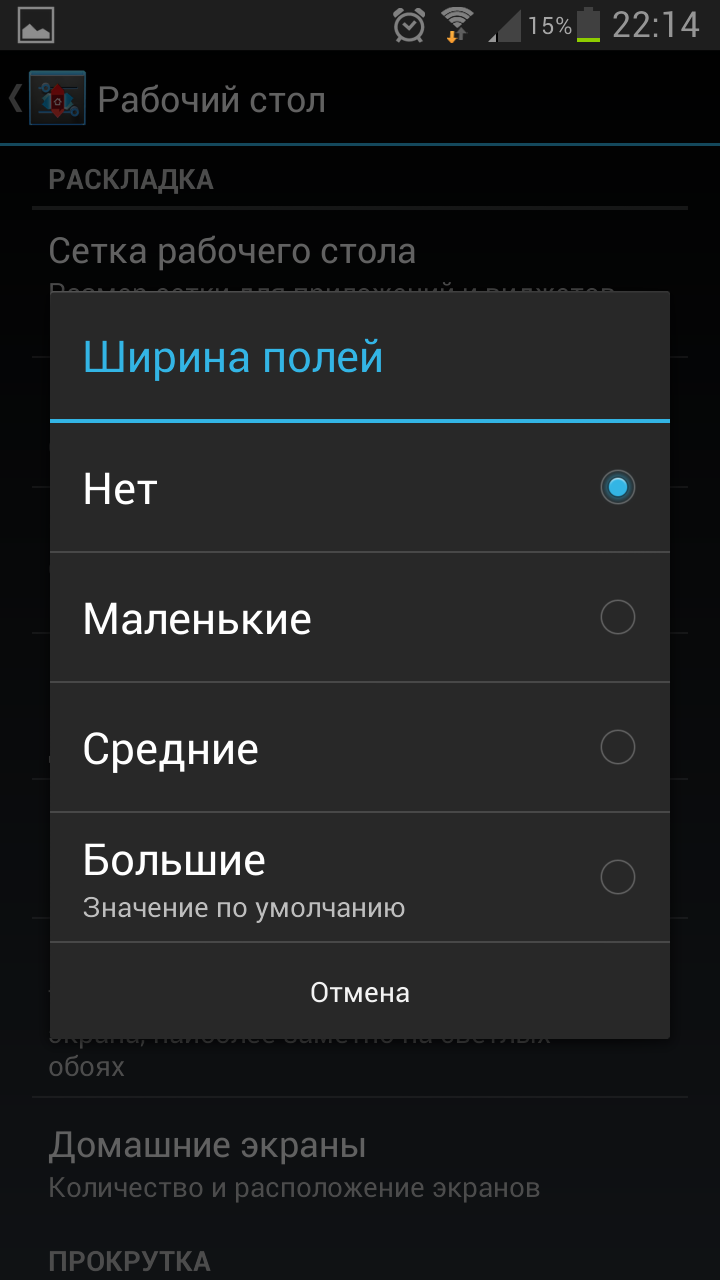
In the first category of this section ( "Layout"), the view of the desktop itself is configured in detail. Of course, you can adjust the size of the grid itself. In addition, the width of the fields and the height of the desktop are adjusted. Here you can also customize the display of the search bar and select its style. Additionally, you can enable or disable shadows, adjust the number and location of desktops.
|
|
|

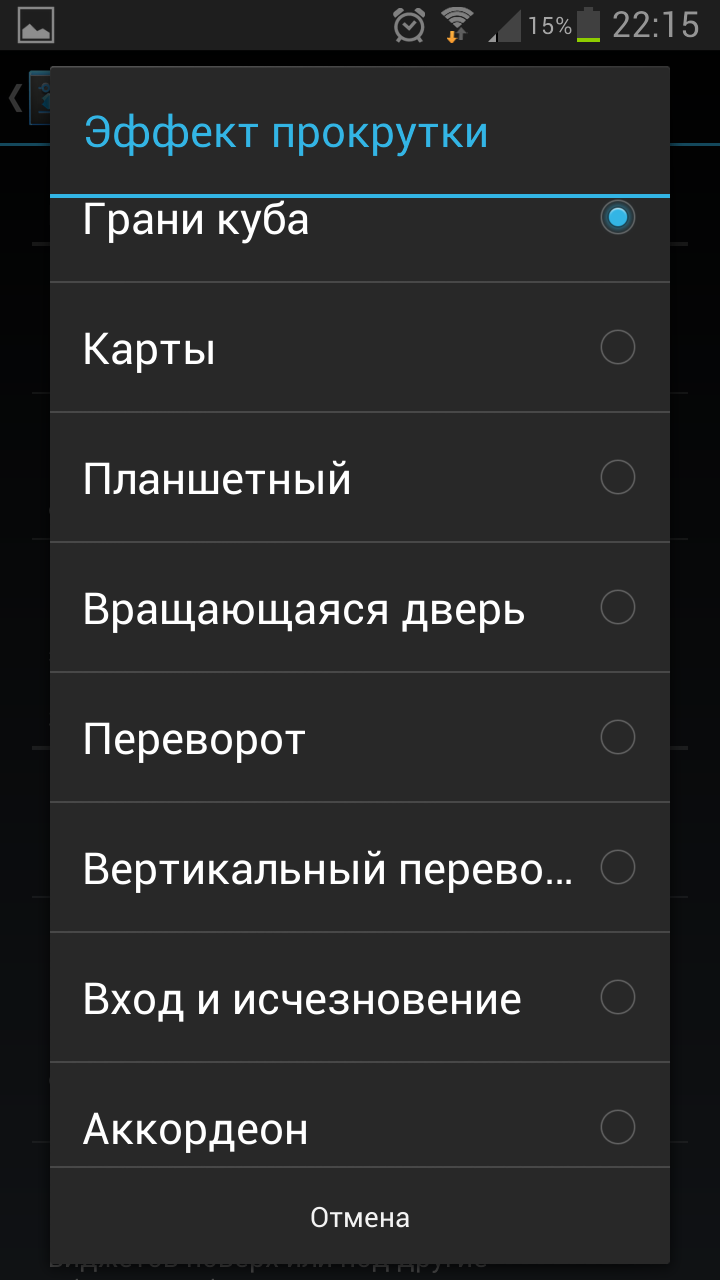
In the second section, "Scroll", effects are configured when flipping desktops, various options for scrolling wallpapers, circular scrolling of desktops is turned on.
Scroll section |
|
|


third section, "Icons and Widgets". In this section, you can not only enable resizing of any widget, but also enable the ability for widgets to overlap each other. In my opinion, this is one of the most interesting features of this launcher. We have already seen something similar in Widgetlocker Lockscreen, but in Nova Launcher it is implemented much more conveniently. In addition, in the same section, you can configure the display of signatures for program icons and block all changes on the desktop
|
|
|


As with the desktop, you can change the grid size for the application menu and select a scrolling animation. You can set the transparency of the background, choose the style of the entire menu (infinite vertical scrolling or horizontal "pages"), customize the display of a list of widgets. In the same menu, you can configure the list hidden apps which will not be displayed in the menu. As I said, in my opinion, this is a very convenient feature.
|
|
|


Another very interesting feature of Nova Launcher is the ability to independently create not only folders in the application menu, but also the tabs themselves. In my opinion, this is extremely convenient. And it is very strange that such a useful and logical function is not in Android itself.
— dock bar
Not deprived of attention and dock with icons quick launch. You can customize the number of its panels, the number of icons on each panel, the width of the margins and the height of the dock. You can customize the display of the scroll indicator (a built-in widget that displays the active desktop and their total number) and a separator between the panel and the desktop. For the dock, you can turn on the "overlay mode", in which it is displayed on top of the desktop itself
|
|
|

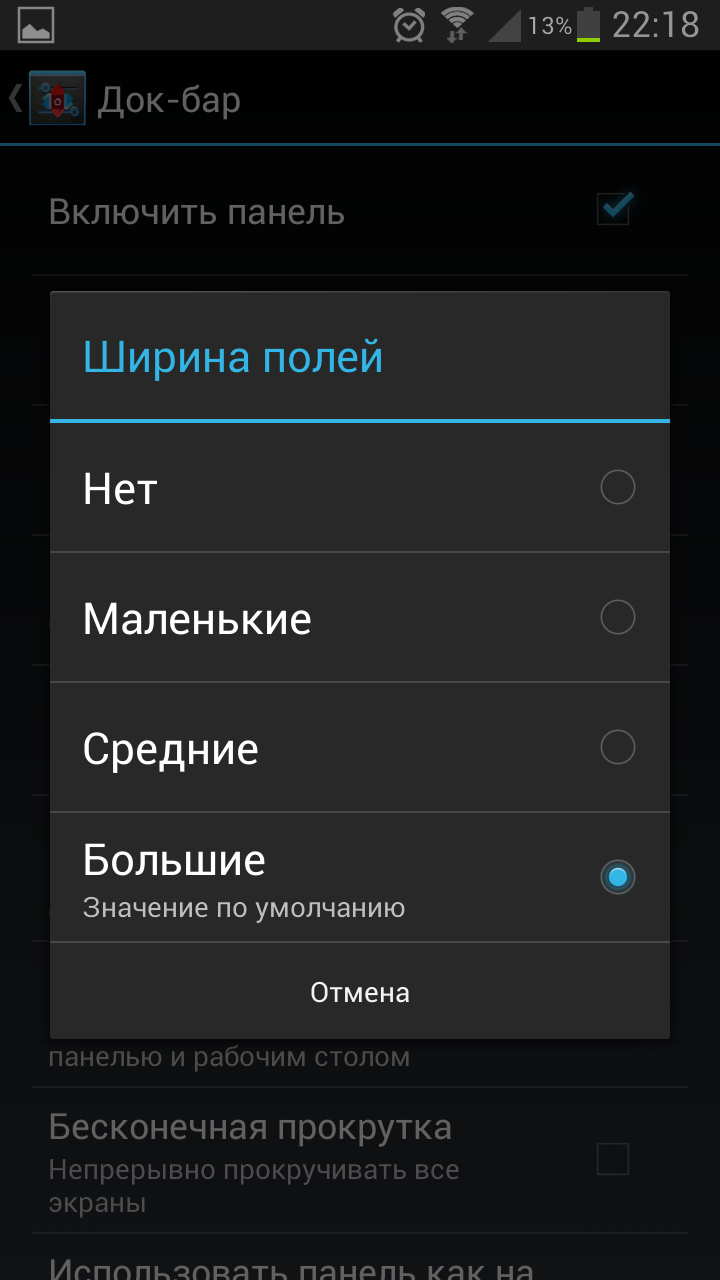
By the way, to save space on the screen, the dock can simply be turned off. It may be interesting for phones with small screens.
— Registration
In the first section, "Registration", you can customize the appearance of the launcher. For example, choose a theme color. Or change the icon set. Here you can fine-tune the animation in detail: the speed of flipping screens, the speed of animation of transitions, and different animation options when opening applications are set separately. You can customize the display of the notification bar.
Section "Design" |
|
|


second section, "Folders", allows you to customize folder previews and backgrounds. Personally, this opportunity pleases me, standard view I don't really like folders in Android 4.0.
|
|


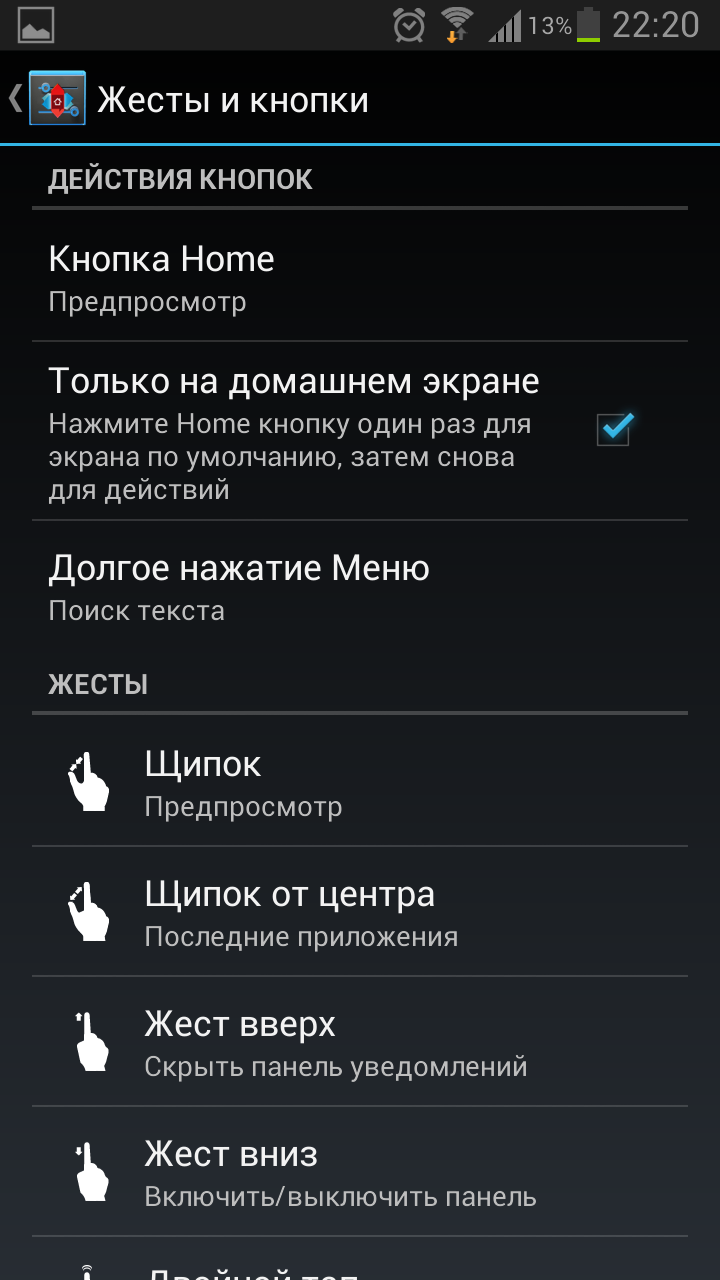
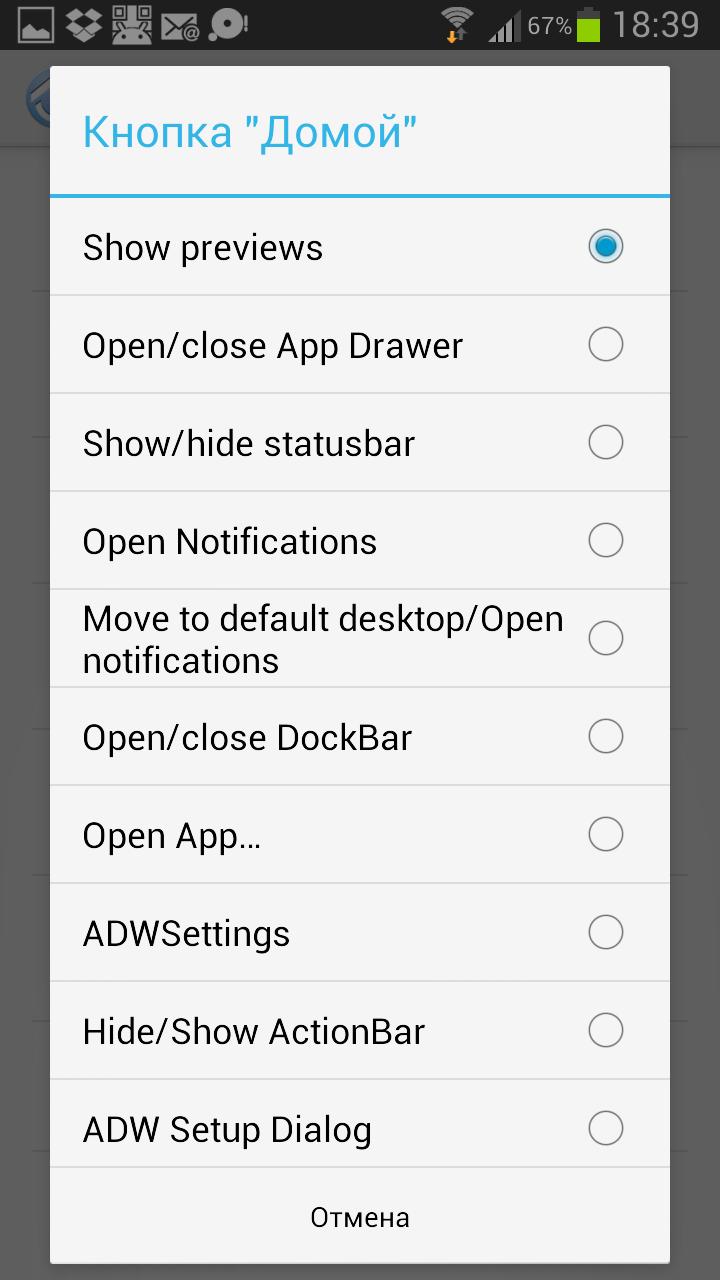
— Gestures and buttons
In chapter "Button Actions" you can choose the behavior and appearance of the "Home" button, assign one of the many actions to a long press of the "menu" button.
"Gestures" looks much more interesting. In it, you can assign actions to various gestures: pinch, swipe with one and two fingers in different directions, double tap, turn clockwise and counterclockwise. Gestures can be assigned to launch certain applications, as well as some system actions. For example, hiding the dock bar or notification bar, calling launcher settings, viewing recent running applications, switch to a specified desktop, and more. Gestures are a flexible tool that anyone can use in their own way.
|
|
|


Among the other settings, it is worth noting the setting of the counter of unread messages (for example, a number with the number of unread messages on the icon mail client), default launcher setting, backup and restore, import settings from a third-party launcher.
As you can see, there are really a lot of settings. And by combining them, you can get a completely different desktop. One of the options is shown in the screenshot below.

The dock bar has been set to "overlay mode" where it draws on top of the desktop instead of taking up the entire bottom bar of the screen. I assigned the up and down gestures to hide the dock and the status bar, so they only appear on the screen when I need them. I took the space vacated on the screen for additional icons and widgets, adding two additional lines to the desktop grid. In addition, I added one more additional column - four rows of icons on a 4.8 ′ screen are clearly not enough. It remains only to change the size of the mail widget so that it takes up not 4, but 5 columns in width.
Results
Many will disagree with me, but I would consider Nova Launcher not so much as a standalone launcher, but as a powerful tool for customizing your workspace. Go Launcher EX, Launcher 7 and many other launchers offer the user their own view of how the workspace on the phone should be arranged. The authors tried to create a completely finished product that has its own face and reflects their views on what an ideal phone interface should be like. As with HTCSense, many of the pure Android features can be reimagined and changed.
In turn, Nova Launcher does not try to offer any unique concept or idea, it simply allows each user to create the ideal workspace for themselves. As a result, it's great for those who don't mind spending the extra time tweaking and experimenting a little. Or those who know in advance what they want to get in the end and are looking for an easy way to do it. If you just want to try something new, and at the same time do not want to delve into the menu items for a long time, then it is better to look towards other options.
Yandex.Shell
Very interesting, and underestimated by many launcher. Yandex.Shell is one of those launchers that you can not only download from Play.Market, but also come pre-installed on some phone models. This launcher is the complete opposite of Nova Launcher. Instead of a standard appearance and a huge number detailed settings it offers an original and concise interface with a minimum of options. To be honest, I myself am not usually a supporter of this approach. But Yandex.Shell suddenly hooked me with something.
What do we get out of the box?
Initially, the launcher involved 6 desktops. A standard 4x4 grid is used. A beautiful, but unobtrusive animation is installed on scrolling through the desktops. Looks like something in between horizontal scroll and "cube". New shortcuts and widgets can be brought to the desktop only through the program menu. To do this through a long tap on the screen or the context menu will not work. The situation is similar with changing wallpapers - they change only through the launcher settings.
|
|
|


With a long tap on a widget, icon or any free space, the editing mode is turned on. In this mode, the active desktop moves away a little, and two adjacent desktops can be seen on either side of it. In principle, such a display is standard for many launchers. But unlike them, in Yandex.Shell, the editing mode is not automatically disabled after the widget or shortcut is moved. The user can safely place all the necessary elements and then return to the standard mode. In my opinion, it is really very convenient. In addition, in edit mode, you can add a new desktop or delete an existing one. It is worth noting that you can only delete an empty desktop that does not have shortcuts or widgets.
|
|
|


Between the desktop space and the dock is the desktops indicator. Ordinary desktops on it are displayed in circles, desktops occupied under the panel - squares. We'll talk more about panels below. The dock itself contains five icons: phone, sms, browser, search, application menu.
"Dialer" (dialer with address book) Yandex.Shell also has its own. I will not describe it in detail, just look at the screenshots. I will only note the ability to search for missing numbers in Yandex and the beautifully designed “favorites” screen.
|
|
|


Everything else is standard, except that the search will be from Yandex and not from Google.
The application menu is divided into three tabs: Applications, Widgets and Panels.
In the tab "Applications" a list of all installed programs is displayed. A long tap on the program icon allows you to place it on the desktop. Below the list of icons are three buttons. The first button, with the image of a house, allows you to choose which shortcuts will be displayed on the desktop. Shortcuts that are already on the desktop are marked with a house icon. If you mark any other icon with this icon, it will also be placed on the desktop. If you remove it, the icon will be removed from the desktop. I really liked this solution. IMHO, this is much more convenient than taking out program shortcuts one by one or turning on automatic removal of a shortcut when installing a program (as in MiUI, Iphone, etc.).
The second button, with a trash can icon, prompts you to select programs to uninstall in the same way. For any new Android user, this looks much more understandable and logical than the standard Android uninstall option.
The last button, "Search", allows you to quickly find necessary program. Moreover, the search results display not only installed programs, but also search queries in Play.Market

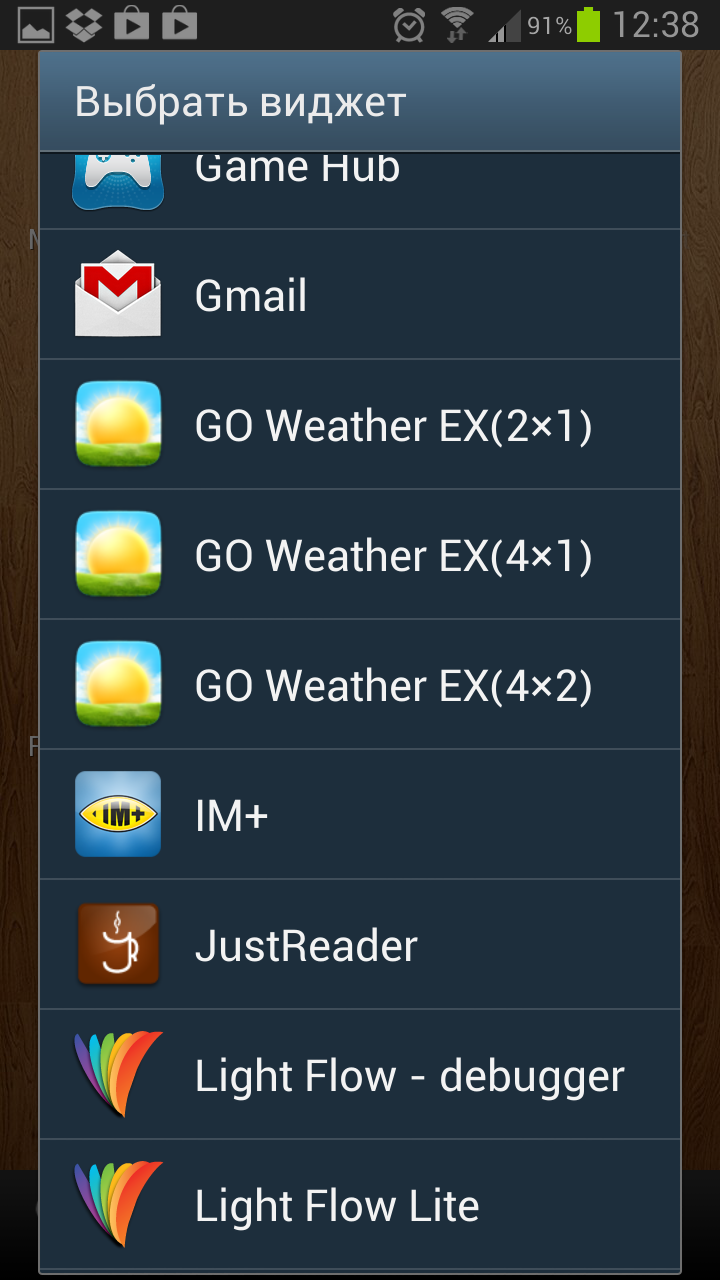
in masonry "Widgets" special widgets from the set for Yandex.Shell are presented. The list looks pretty good. There are a lot of widgets, they are all made in the same style and perfectly fit the launcher. The last item on the list is the "Other Widgets" icon. Clicking on it will open a list of all standard widgets. installed on the phone. They will be shown as a regular list, without thumbnails.
|
|
|


Here it is worth mentioning another interesting point - when you add several widgets or program shortcuts to the desktop, they are automatically distributed between the desktops. If there is no more space on the desktops, a new desktop will be automatically created. Thus, you can select any number of widgets or panels directly from the menu itself, you don’t have to worry about not having enough space for them.
The last tab is called "Panels". Panels are a kind of interactive full-screen widgets. Each panel has its own settings. There are eight panels in total.
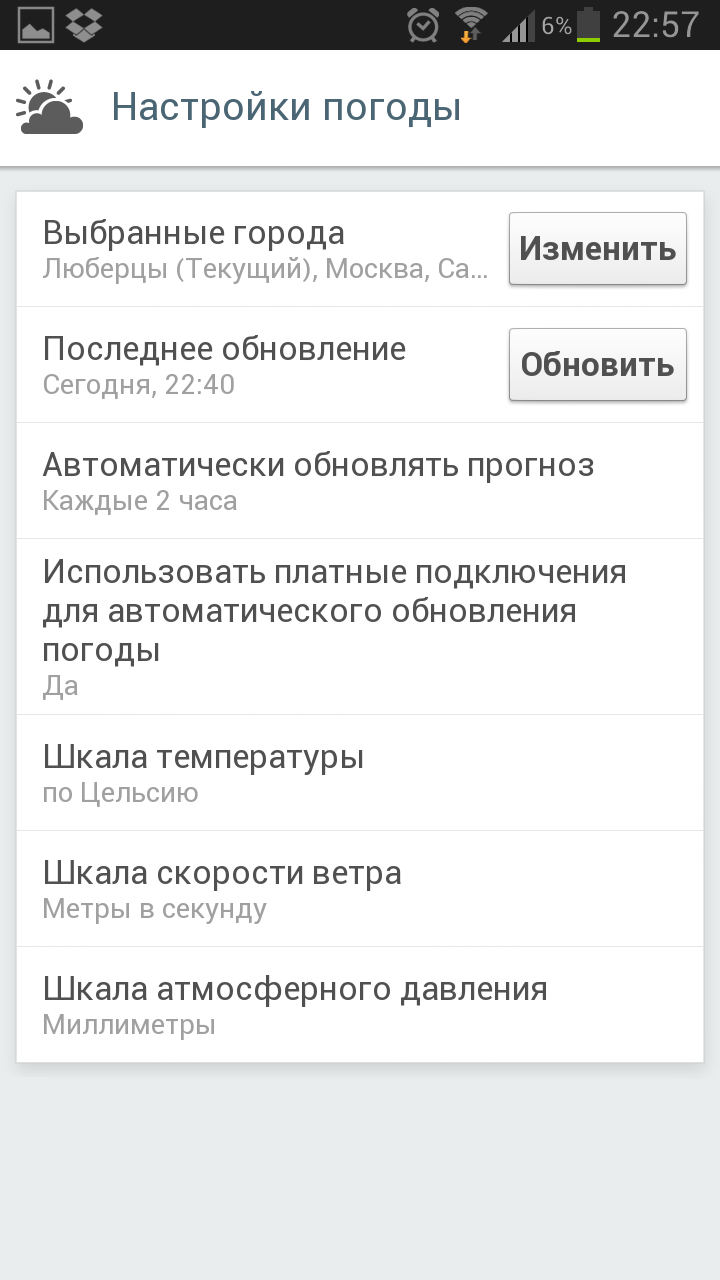
— Weather. In fact, this is a full-screen weather widget. You can watch the weather for several cities for several days ahead. The widget is beautifully animated.
Weather panel |
Weather panel |
|


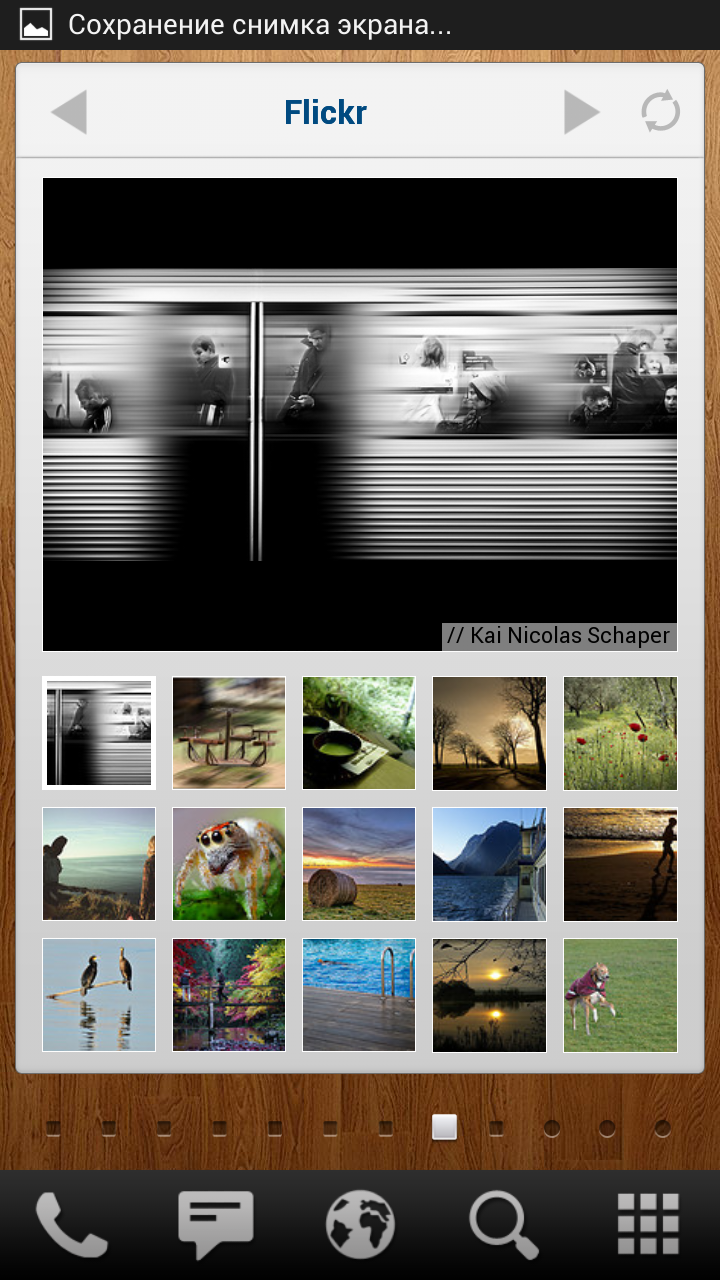
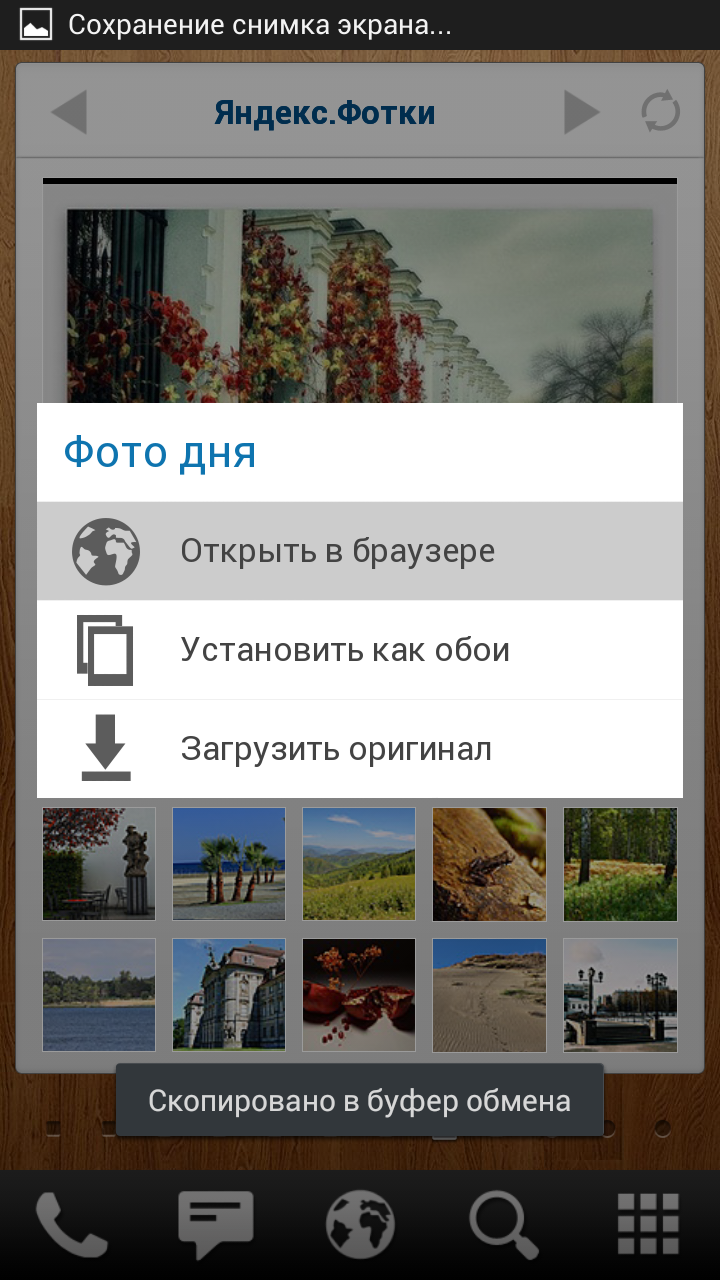
— Photo. Photos from Yandex.Fotki and Flicker services. Any photo you like can be immediately downloaded or installed on your desktop.
Photos Panel |
Photos Panel |
Photos Panel |

— News. Full screen widget with news. Separately, news is displayed for each channel, for example: "In the world", "Moscow", "Nauka", etc. When you click on the news, its description and links to various sources open. In general, the standard format for news.yandex
News panel |
|
|


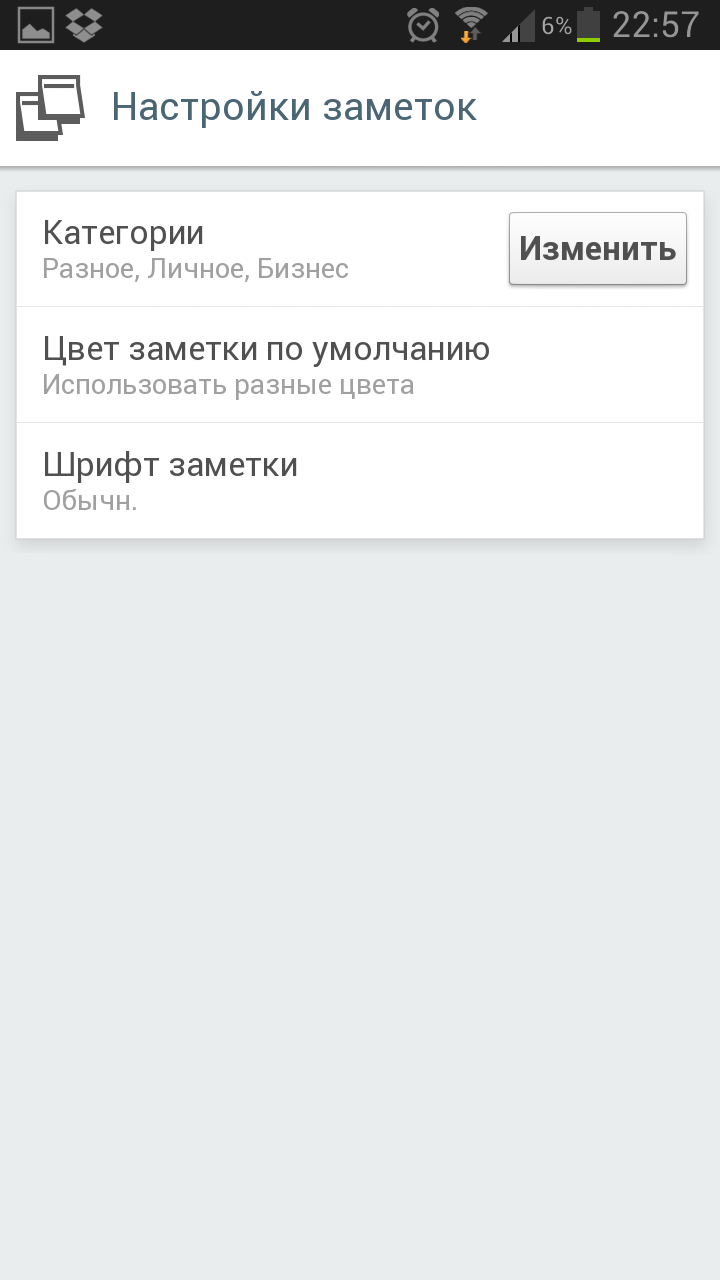
— Notes. Great widget for taking notes. The widget itself is a “board” on which you can stick multi-colored “adhesive sheets” with notes. There is a separate board for each category of notes. The notes themselves can be freely moved around the "board".
Notes panel |
|
|


— Moon phases. I am not fond of either astronomy or astrology; the phrases “Sun in Sagittarius” and “Moon in Cancer” do not mean anything to me personally. Therefore, it is difficult for me to judge what practical use it is (and is there any at all? ...) But it is made very beautifully. First, as with the Weather panel, the widget is nicely animated. Secondly, when you tap on it, a three-dimensional model appears with the moon, sun and zodiac signs. The model can be twisted as you like and viewed from different angles, choose different signs of the zodiac.
Moon Phases Panel |
|
|
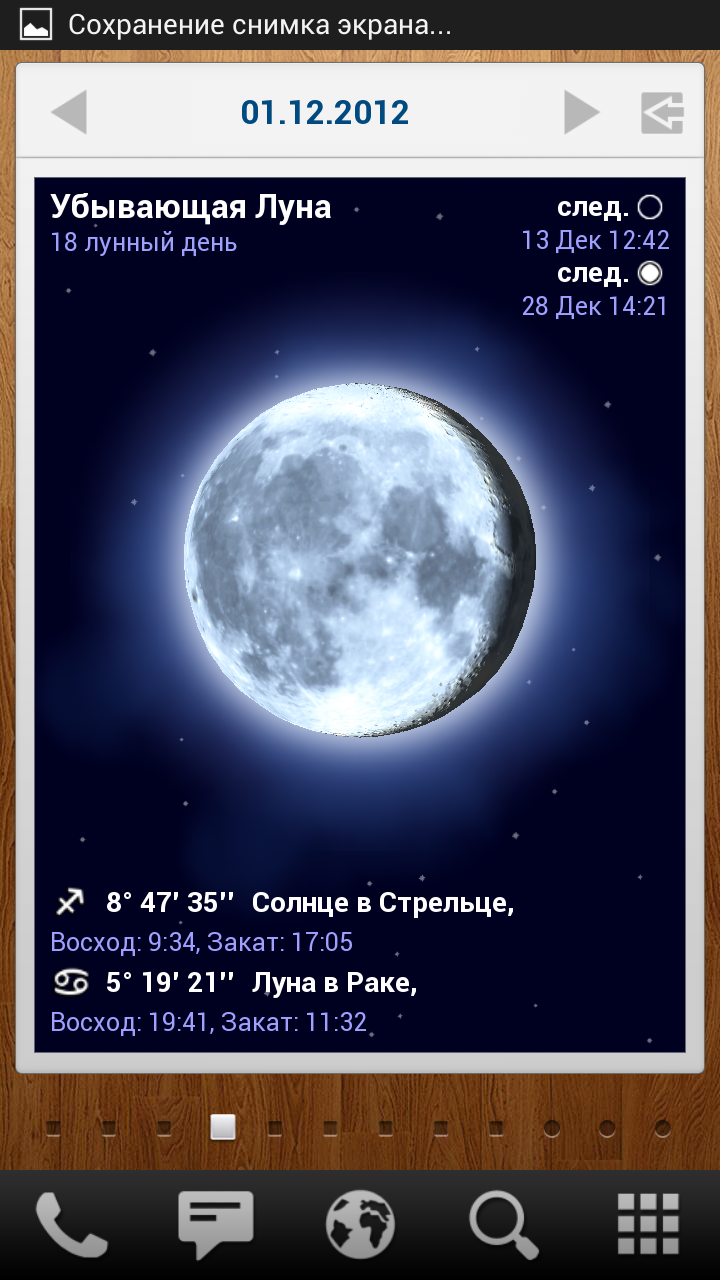


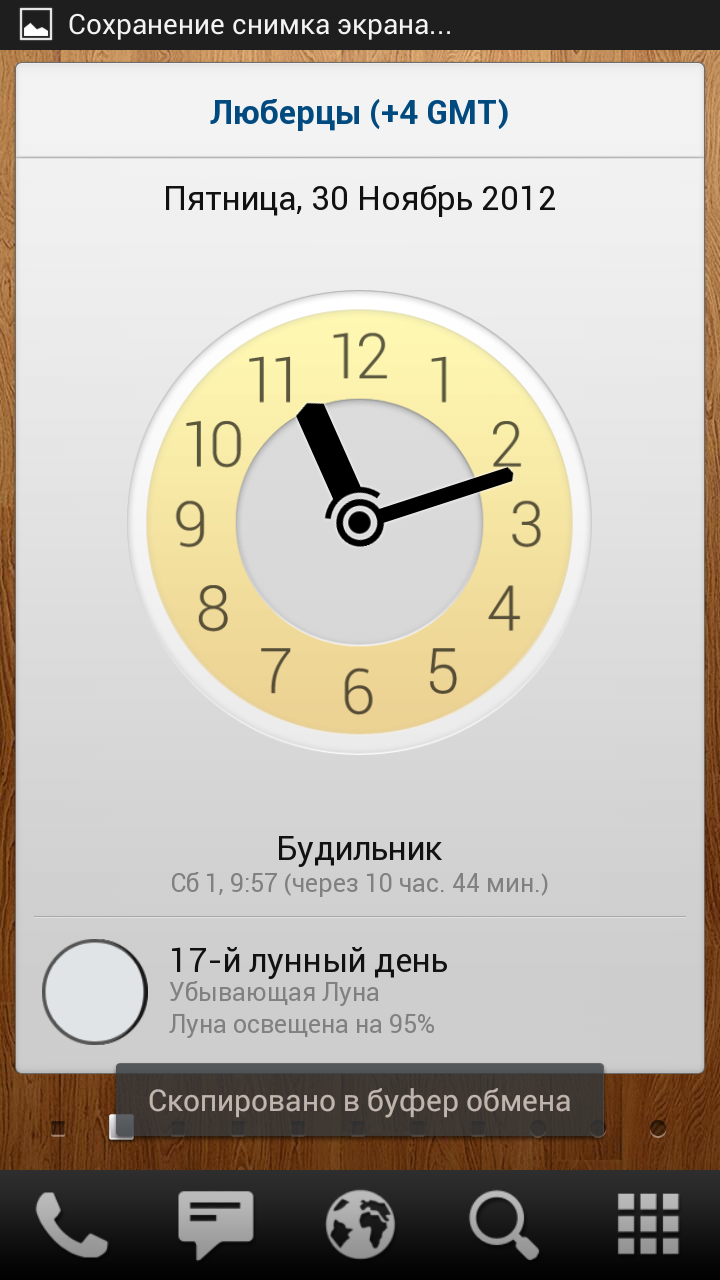
The rest of the panels are more or less standard, an alarm clock (allows you to change the appearance of the clock, watch moon calendar), calendar, calculator.
Alarm Panel |
Calendar Panel |
Calculator panel |


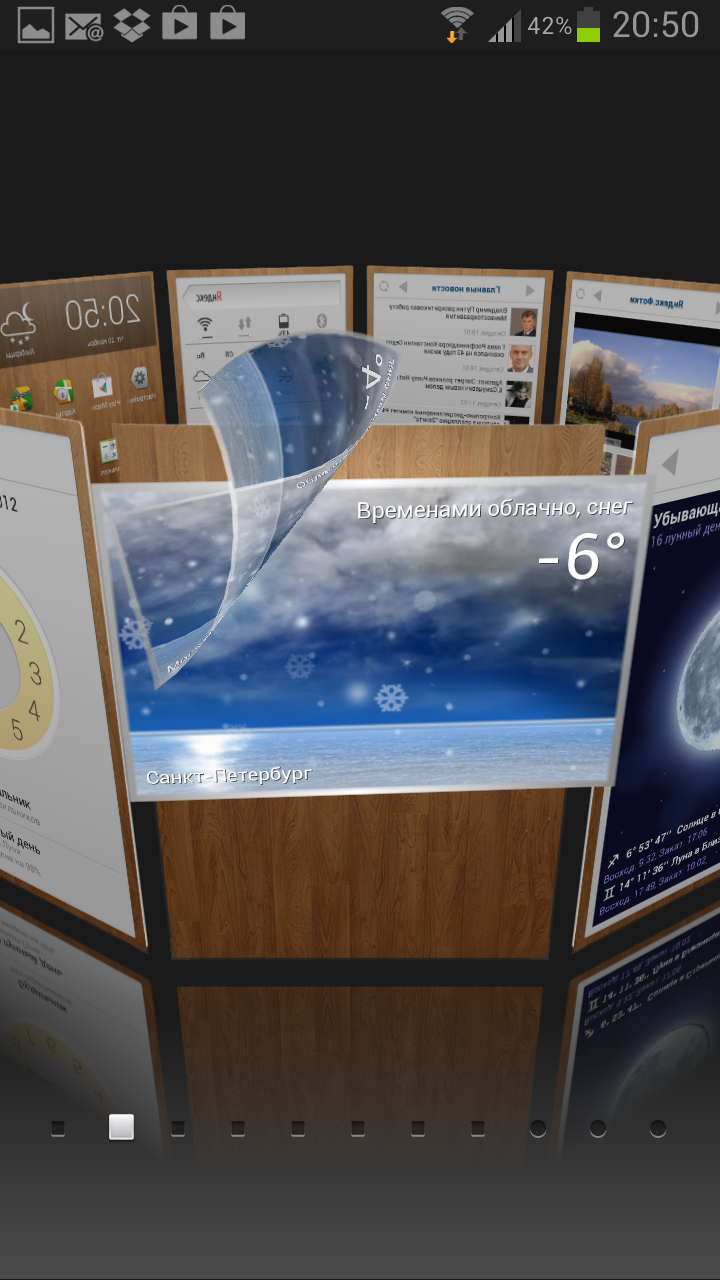
Another interesting feature of Yandex.Shell is the 3D carousel of desktops. To switch to this mode, just make a “pinch” on any desktop. The carousel spins smoothly, lingering on each desktop. At the same time, if a widget-panel is installed on it, a very beautiful 3D animation will work. For example, the news panel will turn into a newspaper with the headline of the current news, which will be revealed to the user. The weather widget panel will show an animated weather forecast for several days ahead. If a folder with programs is installed on the desktop, then it will open for a while, showing the user its contents.
The News panel turns into a newspaper... |
And "Weather" turns into a tear-off calendar |

Fine tuning
The settings in the launcher are the bare minimum, you can change only the most obvious things: set the wallpaper, choose one of the two pre-installed themes, disable the "telephone component" of the launcher. There are also a couple of experimental features, such as changing widgets (although it worked pretty crookedly for me).
Results
Yandex.Shell is a simple but very high quality launcher. On the one hand, the creators of the launcher obviously tried very hard to make it as convenient as possible in everyday use. Many standard for android features have been substantially revised. On the other hand, there is practically no opportunity to customize it for yourself. And if the option that the authors of the launcher offer you does not suit you, then you have to either put up with the inconvenience, or change it to another.
PostScriptum
As I already wrote, Yandex.Shell suddenly hooked me with something. And I would like to add to the review also purely subjective impressions.
Feels like using it, it somehow reminded me of HTCSense. Of course, outwardly they are not much alike. But the creators of Yandex.Shell, like the HTC team, had their own opinion on many points. And, as in HTCSense, many things are implemented very simply, but at the same time very convenient. For example, when adding a widget, you will never get a "no space on desktop" error. And when uninstalling several programs, it's enough just to tick them right in the menu itself, and not delete each one separately, looking for them for a long time in the long list of the application manager.
And, like the HTC team, the creators of Yandex.Shell paid great attention to the little things. For example, remember the weather widget that became the hallmark of HTCSense? After all, in terms of functionality, there is nothing special about it. But even by today's standards, he looked very good. In the same way, at first glance, there is nothing special in the “carousel” of desktops from Yandex.Shell, in which the news widget turns into an unfolded newspaper, folders with programs open to show the contents, and Yandex. Photos fly from their widget to describe the victory lap in front of the user. But after all, in the end, it is not the list of available functions and settings that is important, it is the ease of use and positive emotions. And for many people, laconic, but thought out to the smallest detail, Yandex.Shell will be preferable to the faceless, but much more technically advanced Nova Launcher
Again, these are purely subjective impressions.
ADW Launcher
Finally, consider another very popular launcher - ADW.Launcher
The launcher is quite interesting. To some extent, it combines strengths all considered launchers, but it also has a number of disadvantages. Like NovaLauncher, it has a large number of detailed settings for everything and everything. However, unlike it, it does not require Android 4.0. Like GoLauncher, it tries to be interesting for both beginners and "advanced" users. And, as in Yandex.Shell, some standard functions and android settings it is slightly rethought and changed.
The main disadvantage of the launcher is poor localization. The launcher settings are a hodgepodge of English and Russian names, the training slides are not translated into Russian at all.
What do we get out of the box?
Slides "Tutorials" |
Slides "Tutorials" |
Slides "Tutorials" |


At the first start, a "tutorial" of several slides is shown. It is followed by similar slides, but with the settings themselves. The user immediately has the opportunity to choose the animation he likes, customize the behavior of the dock or indicator without having to look for these functions in the phone settings. Great idea - it's a pity that the entire text, again, is in English.
|
|
|


Initially, only the bare minimum of everything you need is installed in the launcher. Of the five desktops, four are completely empty, the remaining ones contain only 5 program icons. The dock is also almost empty, there is only a button to call the application menu. The indicator is made in the form of a thin white strip and takes up minimal space. The theme is light. Animation when flipping desktops works quickly and smoothly. Perhaps it is precisely because of all these moments that the launcher is perceived as very light and fast.
|
|
|


At the top of every desktop is an ActionBar. Outwardly, it resembles the search bar from Android 4.x, but its capabilities are somewhat wider. In particular, in addition to search and voice search, it also allows you to go to the launcher settings or open the application menu.

If in Yandex.Shell the developers tried to get away from the tradition of assigning all functions for setting up the desktop to a long tap on the screen, then the creators of ADW.Launcher went the exact opposite way. In ADW.Launcher, a long tap on the screen brings up the main menu of the launcher, through which you can not only add content to the desktop, but also change its configuration or go to the settings of the launcher itself.
Like many other points, the appearance of the menu is a bit atypical for Android, but at the same time it is convenient and logical. The menu is divided into two tabs. On the “ADWConfig” tab, the first icons are to go to the phone settings and launcher settings. They are followed by an icon that allows you to lock all changes on the desktop. It is convenient that it is placed in the main menu. In some launchers, this option is hidden in some submenu of one of the phone settings section, which makes it often inconvenient to use it. Here you can turn it on and off at any time.
|
|
|


The next icon allows you to switch to the desktop editing mode. Everything is standard here - you can assign a home desktop, swap tables, add a new one or delete an existing one. The icon following it allows you to change the size of the desktop itself. To do this, simply change the frame size, there is no need to specify the indent from the edge of the screen, set its height, etc. The last item allows you to change the wallpaper on your desktop.
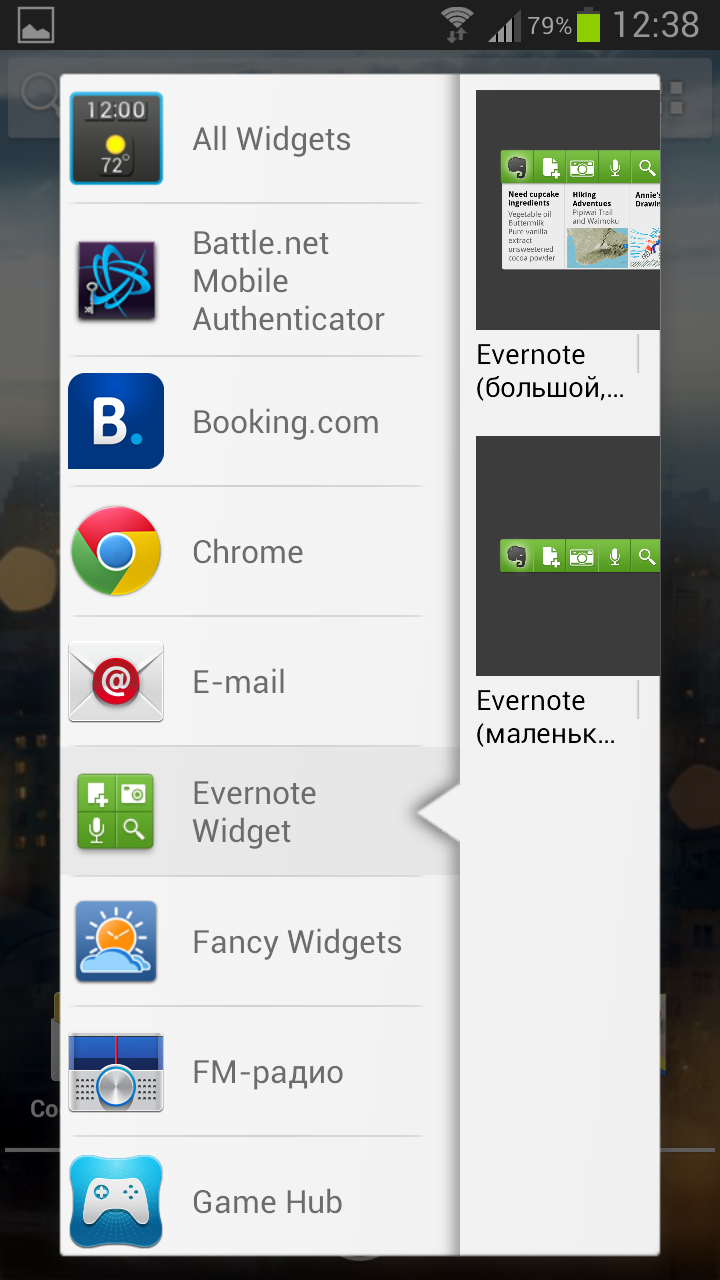
The second tab, "Add", is responsible for adding content to the desktop. You can add several types of content: "ADW Actions" (hide or show the dock, open the "curtain" of the notification panel, display programs from the corresponding category or go to a specified desktop, etc.), a shortcut to the program, or some data (including including, allows you to manually set the icon and name), create a folder, add a widget. In the screenshot below, you can see what the process of adding a widget looks like. As is often the case in ADW.Launcher, everything is done very logically and conveniently, but at the same time it differs markedly from the stock version.
|
|
Adding a shortcut to "Action ADW" |


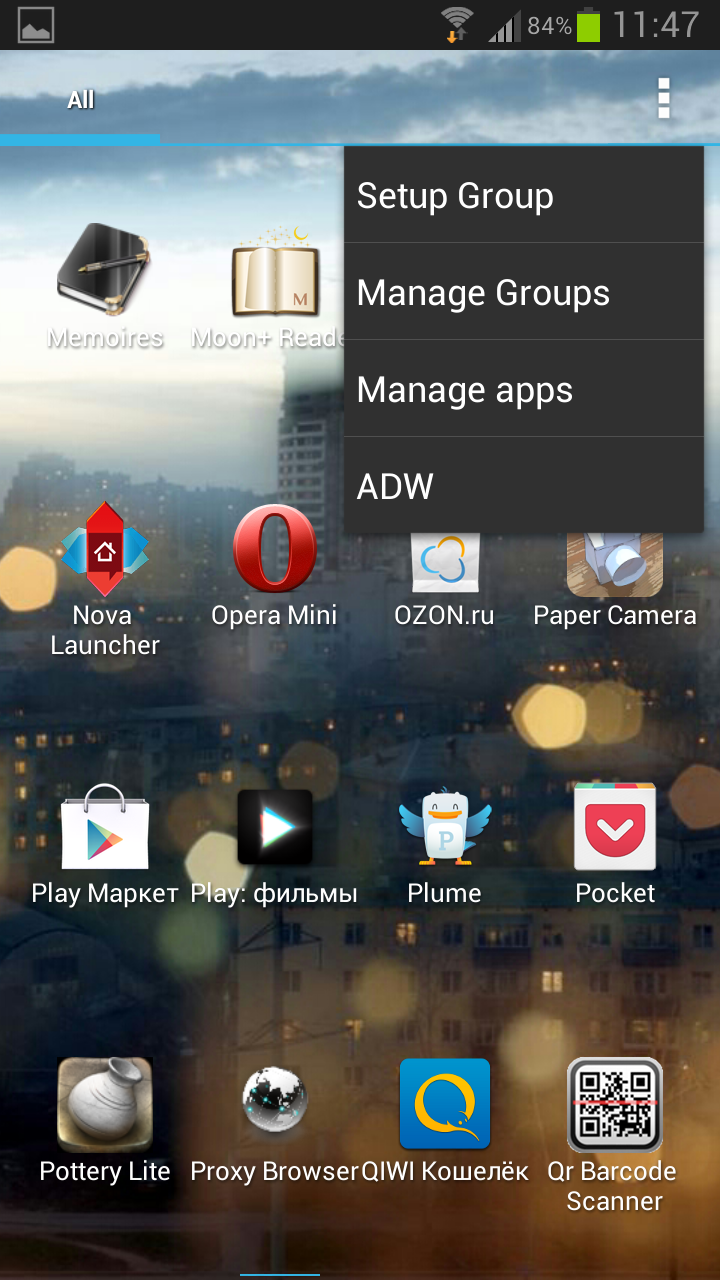
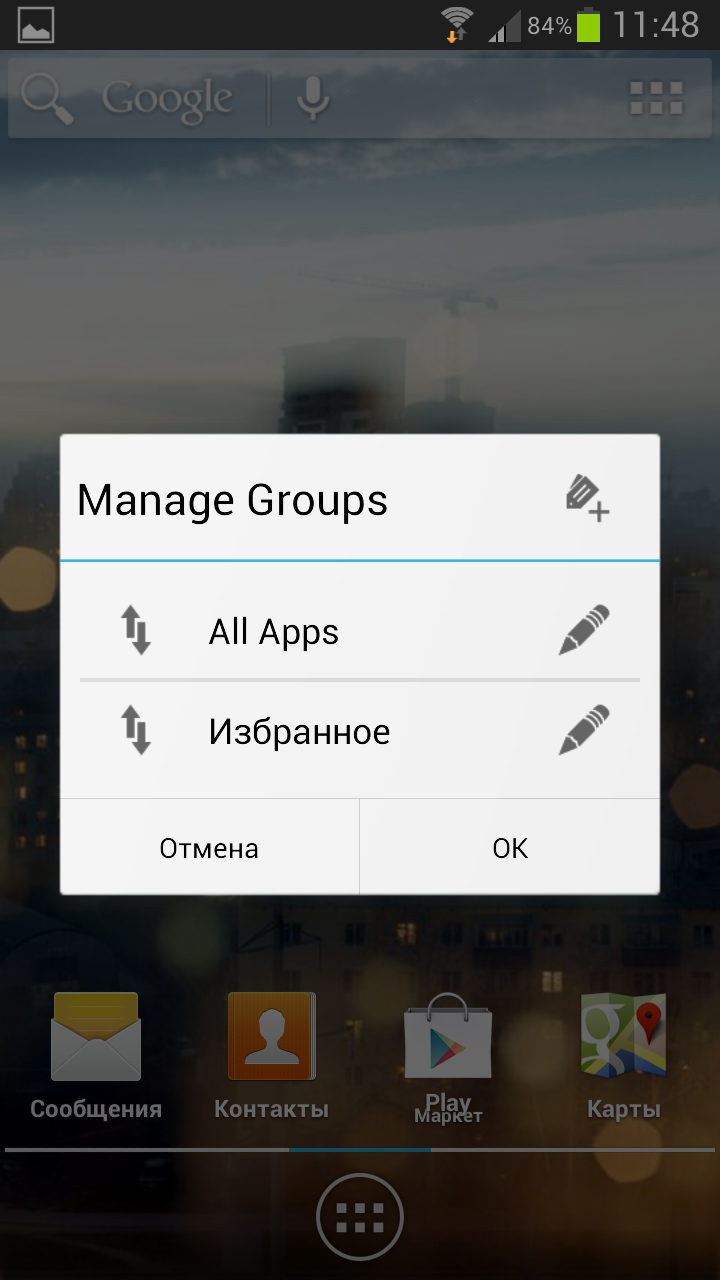
The application menu initially has only one tab - "AllApps". But it is possible to create tabs yourself. Moreover, unlike the same NovaLauncher, for this you do not need to look for this function in the launcher settings. Just click on the menu button at the top of the screen and select ManageGroups. And to add new applications to the group - SetupGroup.
|
Creating a new tab... |
|

The animation when flipping the screen works very interestingly: its speed depends on the speed with which you flipped the screen. Something like kinetic scrolling of lists. Looks pretty original.
Fine tuning
The launcher has a lot of settings. In the screenshot below, you can see what the main menu looks like. I will not describe them in detail, for the most part they repeat the settings of the already considered launchers. Full list You can see the settings in the screenshots.

I used the free version of the launcher, so some of the settings options are blocked for me.
In this section, you can customize the general style of the launcher. Two options are available: Light and Dark. Here you can also customize the appearance and behavior of ActoinBar, change the screen grid, the color of the icon outline. Screen behavior is configured below: circular scrolling, transition animation, desktop scrolling speed, wallpaper scrolling. The last are the screen indicator settings, its auto-hide and style.
Screen Section |
Screen Section |
|


In this menu, you can choose the general style of the application menu. In addition, it is possible to fine-tune the menu manually. For example, set a grid for horizontal and vertical modes, select a menu background color, set up icon captions, set the color and saturation of shadows. You can also customize the behavior of the menu, for example, set the effect when it opens or set up the page turning animation.
Section "Application Menu" |
Section "Application Menu" |
Section "Application Menu" |


— Badges
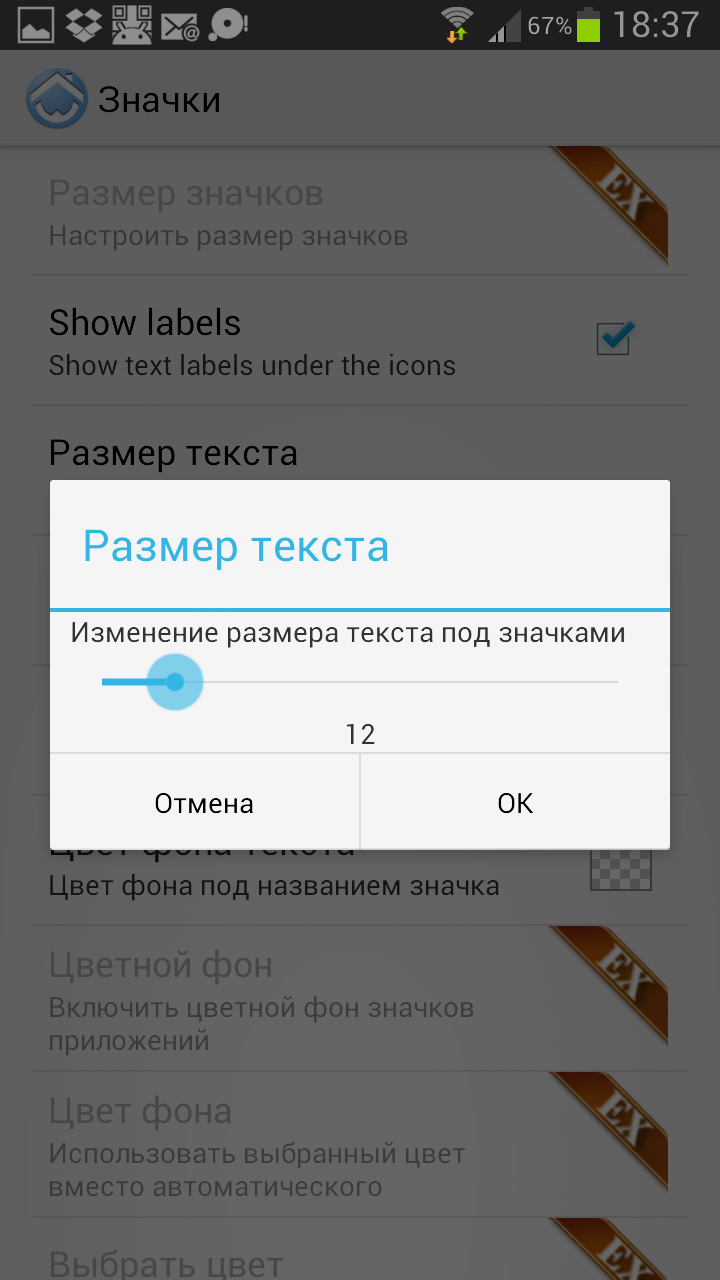
The program icons themselves are no less detailed. Among the settings. available in free version, it is worth noting the choice of text size and color, the choice of color and saturation of the shadow, the choice of background color for text. Paid version The launcher also allows you to customize the icon size, icon background color, "glossy" effect, etc.
Icons section |
|
|


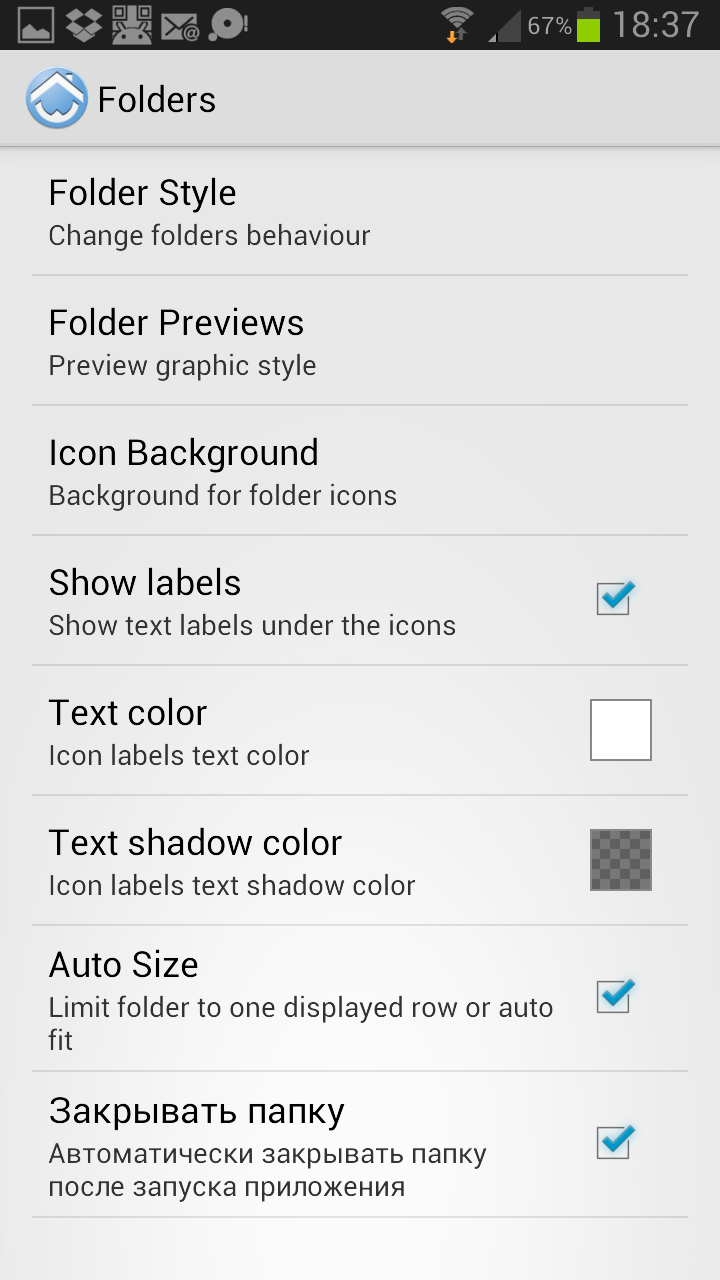
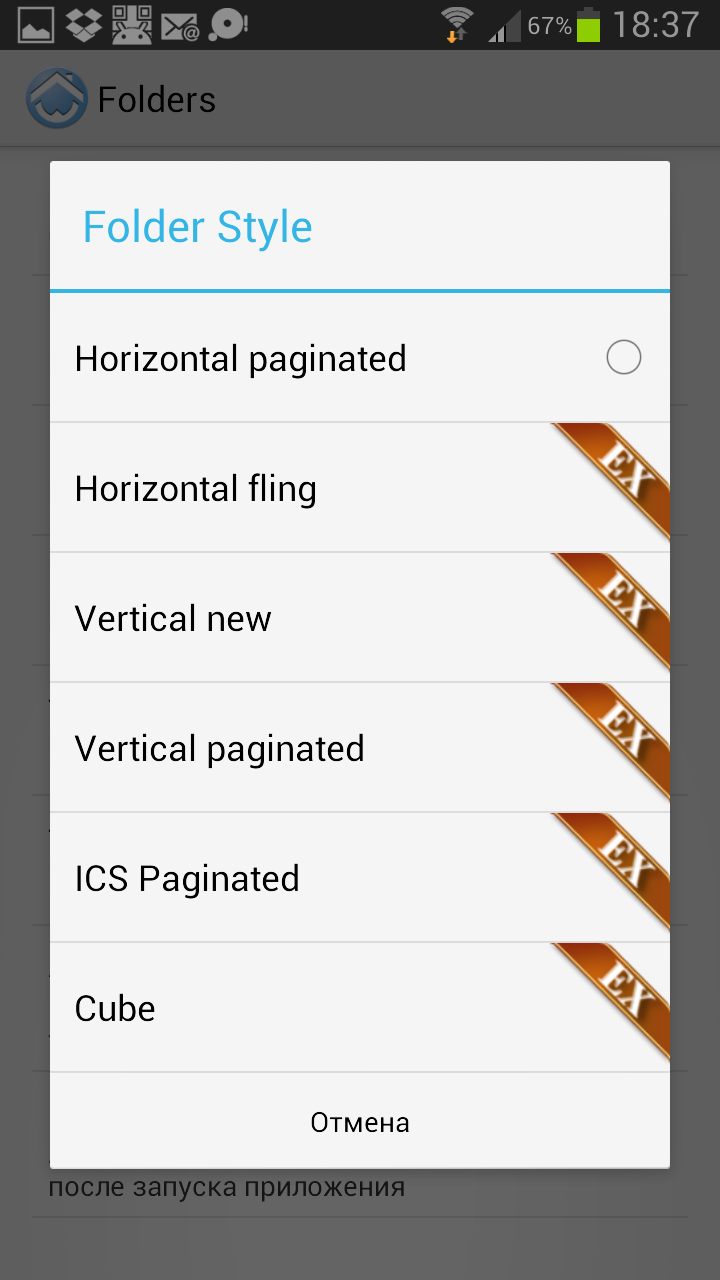
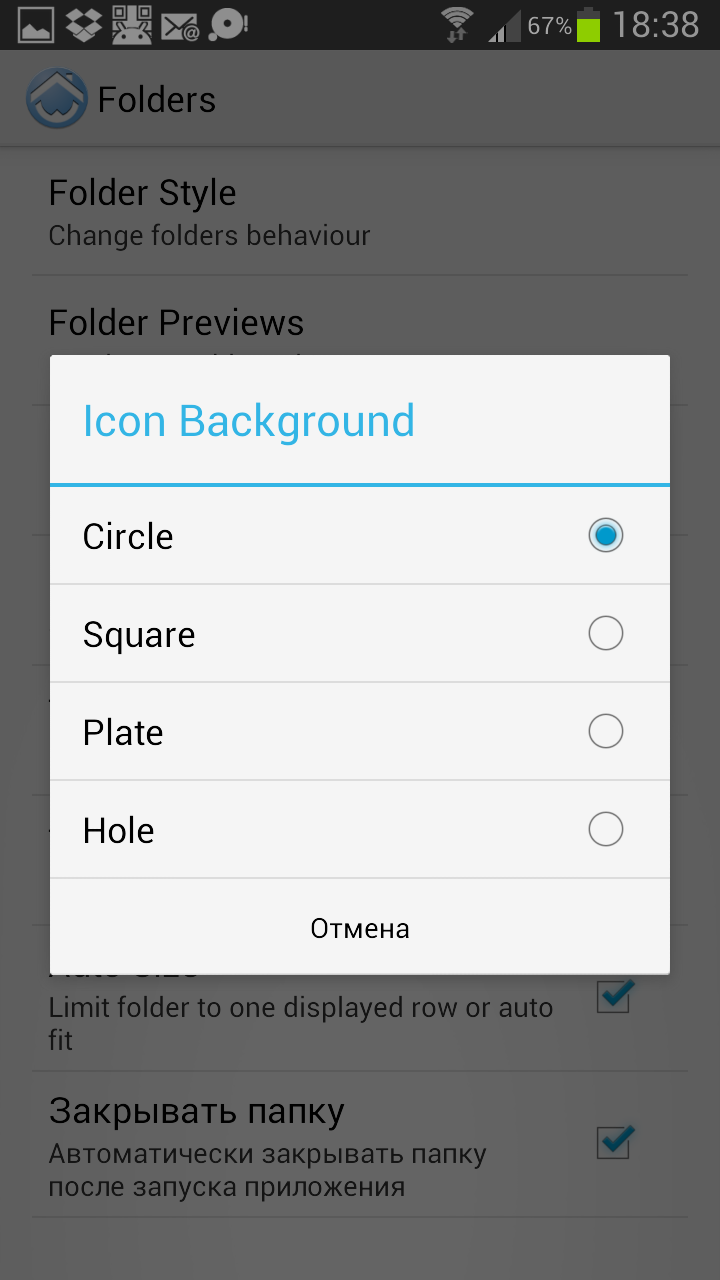
— Folders
Folder settings. As usual, the main style is chosen first. Then - the settings for the preview, background, text color and shadows.
Section "Folders" |
|
|
— The bottom panel
The first is the choice of dock style (telephone, tablet). Next, you can configure dock auto-hide, its size in landscape and portrait screen orientations, customize the display of icons, enable auto-scrolling of the dock, etc.
Bottom Panel Section |
|
|


— Gestures
In this section, you can customize the behavior of the Home button, select and configure gestures, set actions on the swipe of the dock and the application menu.
Section "Gestures" |
|
Customizing the Home Button |

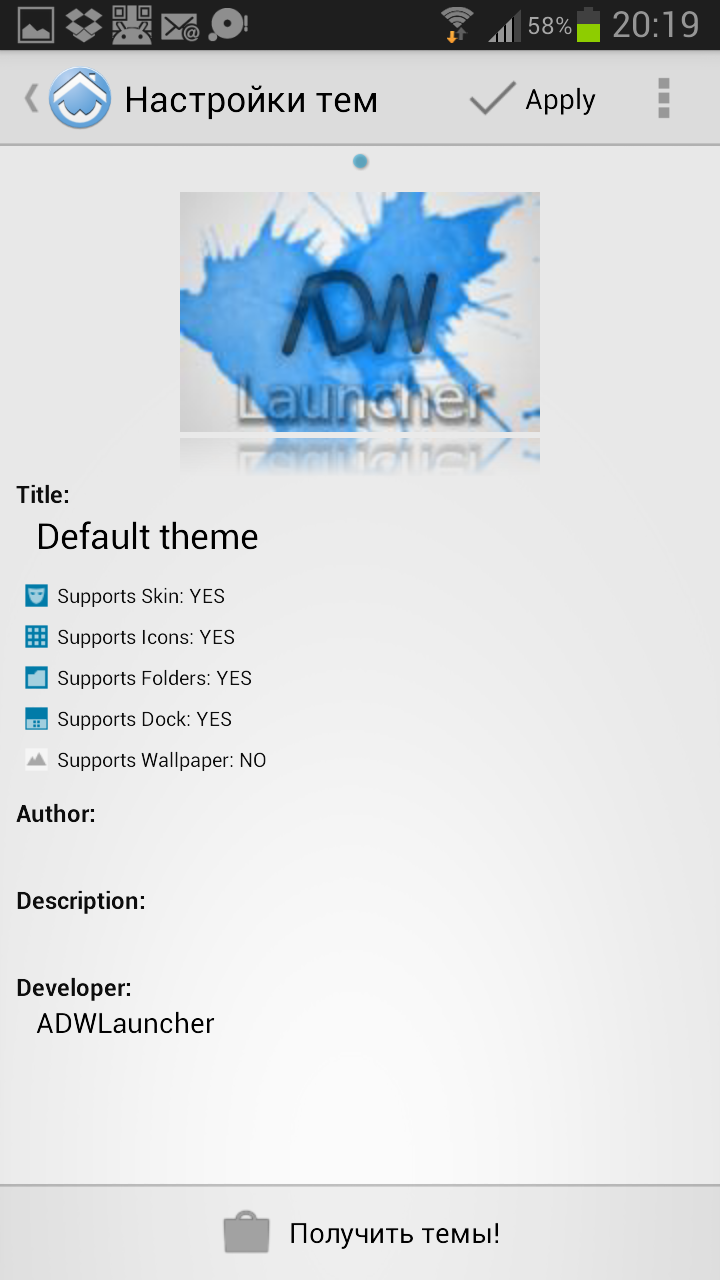
— Theme customization
A very interesting section in which you can manage topics. A huge number of themes are supported, including special themes for ADW.Launcher and icon sets, and themes for GOLauncher ... The launcher is almost omnivorous. =) Under each theme is shown what components it includes. Is there support for skins, do icons change, does it contain desktop wallpapers, etc. There is a "Get Themes" button that will show the results of a search query in Play.Market
Section "Customize themes" |
Section "Customize themes" |
|


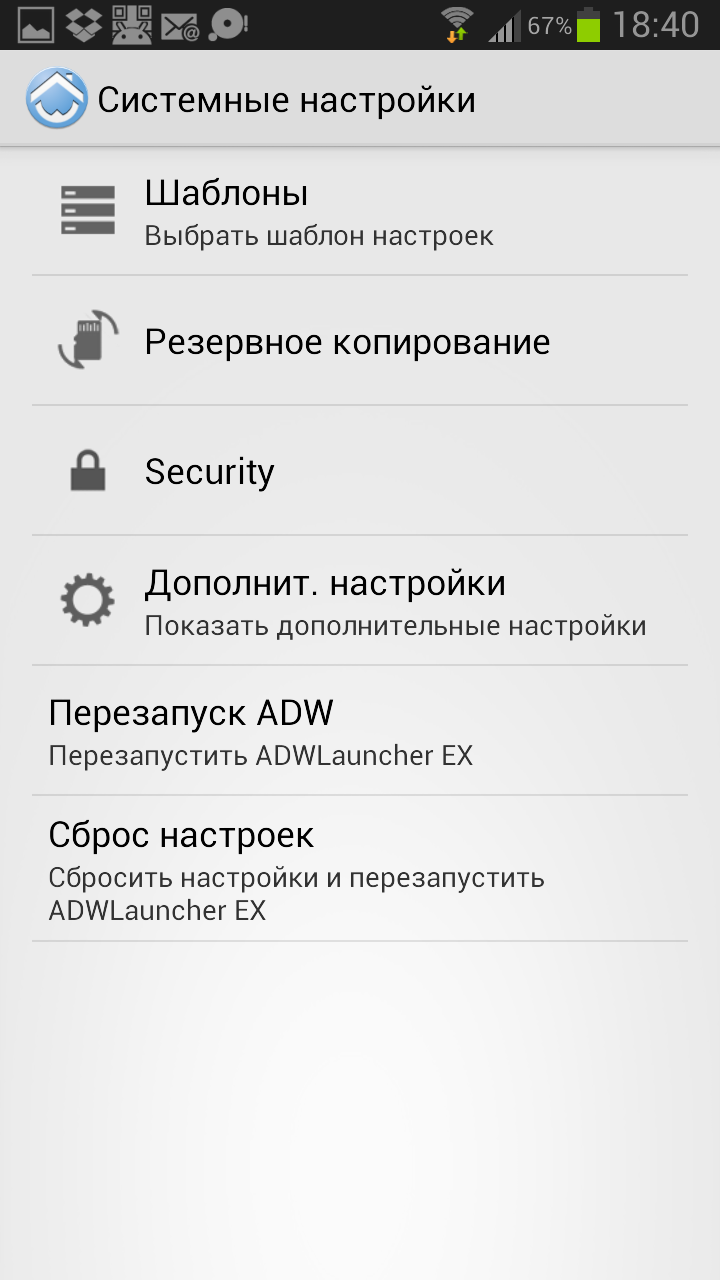
— System settings
The section contains standard system settings such as backup, factory reset, launcher restart. One of the interesting features is the support for settings templates. In addition, it is possible to set a PIN both to unlock the desktop (for some reason it didn’t work for me), or to launch specific programs. The latter feature can sometimes be useful, for example, if someone else has access to your phone.
Section "System settings" |
|
|


Outcome
ADW.Launcher is a great launcher that allows you to look at the classic desktop concept from a slightly different angle. All functions are implemented very conveniently, but often, a little differently than is customary in Android. It is also worth considering that initially the launcher is almost empty, there are not even the usual icons in the dock.
In fact, ADW.Launcher is a kind of compromise between the richness of settings and ease of use. If you find the time to set up the desktop for yourself once and deal with its main features, then the launcher will become your faithful assistant when working with a smartphone. If you don’t want to spend time even on a one-time setup, then it’s better to look towards products that are more convenient out of the box. For example, the same GO Launcher.
Instead of an afterword
Launchers are quite different, they all have their pros and cons. Trying to compare them directly and identify the winner is pointless, everyone will choose according to their taste and color. For some, the abundance of settings is more important, for some the original appearance, and for some, they are just looking for a convenient out-of-the-box launcher. And, of course, someone simply does not see the point in changing something.
I apologize in advance for any inaccuracies. In particular, I sometimes compared the functions of launchers with the capabilities of "pure" Andriod. Unfortunately, the phone with "pure" Android 4.0 managed to turn in the hands of just twenty minutes and maybe I could have missed something. If you have any comments on the content of the article, please write in the comments. Thanks in advance
PostScriptum
In the comments to the last article, many shared the names of interesting programs. And it's very cool. Unfortunately, I, like most other people, simply do not physically have time to try each program. While you can read a short note with a description of the program and a couple of screenshots even from your phone on the way to work.
Therefore, if you know some interesting, but not very well-known program and have 20 minutes of free time, then write a short note about it on Android.MR. Writing a couple of paragraphs of text about a familiar program is usually not difficult at all. And many will be grateful for an interesting tip to you. And the Android.MR blog itself will become much more interesting.
Android's main advantage over other mobile operating systems is its openness. Any user can customize the system "for themselves" even without the knowledge and skills of software development. For example, everyone can install their own icons.
For this you need to get root rights. There are several options: , with , or .
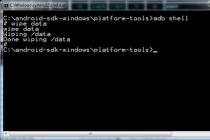
Download the icons you need Google Play- all of them are collected on this page. Now install the Xposed Installer app from the official website, open it and follow the instructions:
1. In the main menu of the program, click on "Framework".
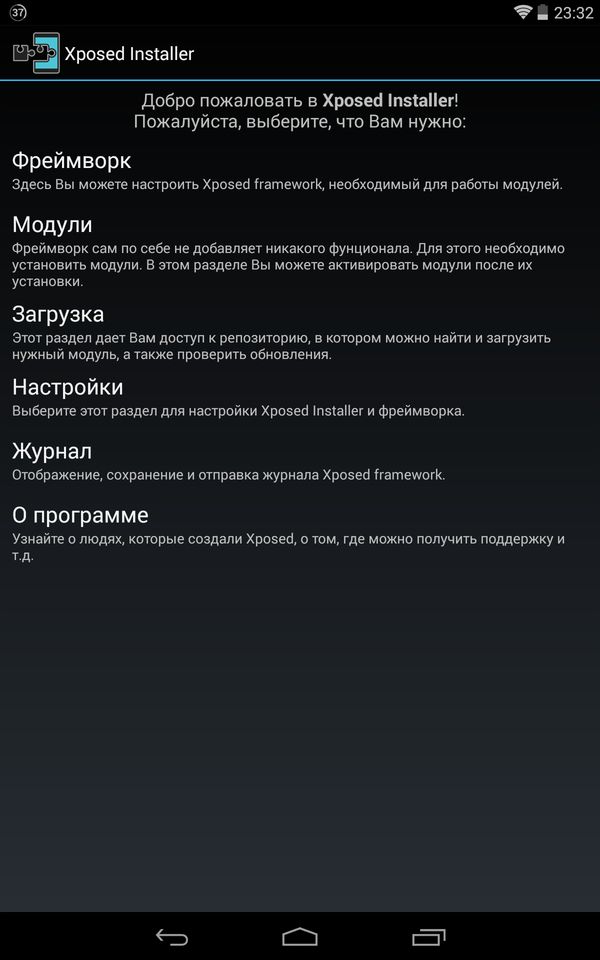
2. Select the "Install / Update" item and agree to reboot the device for the changes to take effect.
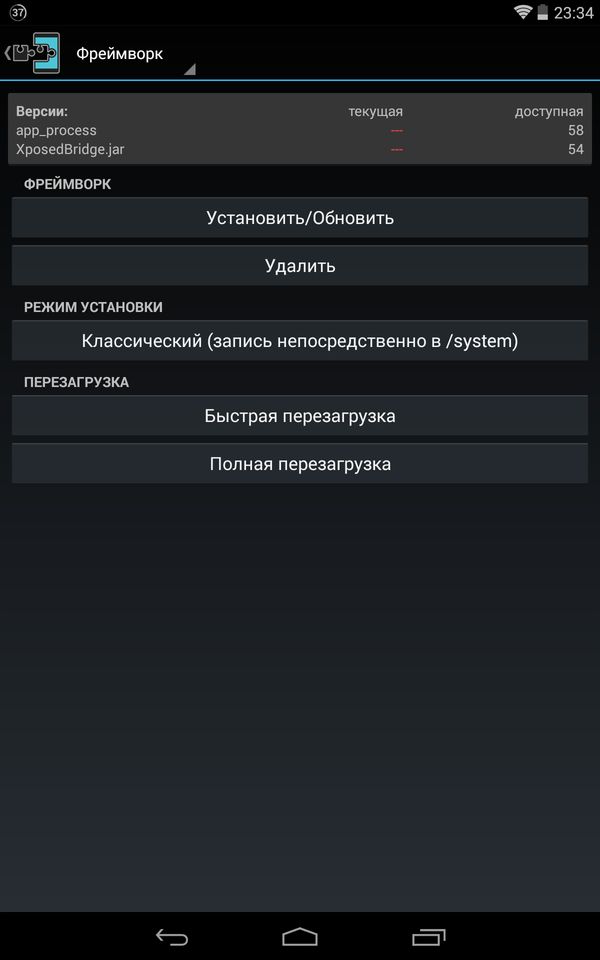
4. Open it. At the first start, give it root rights and in the window that appears, select "Open Xposed Installer".

5. This will open the Xposed Installer. Select "Modules" from the menu and check the box next to Unicon.
![]()
6. Now go to Unicon and select the installed Icon Pack. Click "Apply", after which a notification will appear asking you to restart the device. Click Reboot.

That's all. You can judge for yourself how much cooler the system began to look.
Well, that's how easy it is to install your own stylish icons. If you have any questions, welcome to the comments.
With all the splendor of their graphic design, operating rooms Windows systems and Android do not satisfy the need for users to have exclusive software product. However, it is enough to change the icons in Windows 7 or Android, and the shell will begin to emphasize the individuality of the computer owner. This will also make it more convenient to use. It is much better when, for example, the label of a folder with music is shown as a note, and the label of a text file with passwords is shown as a key.
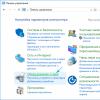
Changing icons in Windows 7
In order to change the icon of a folder or a shortcut to a file (program), you must:
- Hover over it and press the right mouse button;
- Select "Properties" from the menu that appears;
- Go to the "Shortcut" tab in the window that opens;
- Click the "Change Icon" button;
- Choose any other from the collection;
- Click "OK" and "Apply" in sequence.
The gallery contains standard pictures, but their use is not at all necessary. Additional icon packs can be downloaded from the Internet or created by hand in a graphics editor.
To make things even easier, you can download and install a new theme that comes with a different set of icons.
Changing icons in Android OS
Change icons on Android only by yourself operating system impossible. Here you can go two different ways:
- replace the standard launcher with a more advanced one;
- use apps to get root access and change system apps.
The first case is ideal for most users, since when using it, the possibility of a device malfunction is excluded. By installing LauncherPro, GO Launcher, ADW.Launcher, Apex or similar, you can easily change not only folder and application icons, but the entire appearance of the system. Their installation from the Android Market and configuration is not difficult even for inexperienced users.
Replacing icons with Go Launcher
Changing icons in the Android OS using various third-party launchers is almost identical. In Go Launcher, this is done like this:
- the launcher itself;
- Install it on the device;
- The first time you try to go to the desktop, the system will prompt you to choose a standard launcher or a new one - you should check the box next to "Default for this action" and mark Go Launcher;
- We go to the list of installed offers and select "GO themes";
- We install the most liked of those that are offered.
The procedure for installing a specific theme is as follows:
- With a long touch on the free space on the desktop, we enter the launcher settings;
- Select the tab Theme (Themes);
- Press the "Theme" button;
- Choose one of the installed themes.
The icons will automatically change to those that are present in the theme package. In this case, it becomes possible to change them to any images. For this you need:
- Extract the image icon to the desktop;
- Long touch on it to call the submenu;
- Click on the item "Icon";
- Choose another image from those offered or click on the schematic image of the picture (mountains and the sun) in the right upper corner;
- Select "Gallery";
- Mark any image (too large will have to be cropped).
The downside of embellishment using third-party launchers is an increase in power consumption and a decrease in the battery life of the device.
Replacing icons by changing system applications
The second method requires root access to system files to be installed on a tablet or smartphone running Android OS. For its implementation it is necessary:
- Install the Unicon app;
- Install the Xposed app;
- Go to the Xposed menu, where in the "Modules" item select Unicon.
After these manipulations, Unicon will be able to install third-party icon packs into the system.
Here, the downside is that getting root rights and using applications that change system files may cause the device to malfunction. This also serves as a reason for refusing warranty service at most service centers.