The modern smart watch v8 is a smart gadget with a wide range of functions. The device menu is simple and even a child can figure it out. A review of an inexpensive gadget shows that this is a fashionable device that a modern person cannot do without.
Description
The smart watch v8 is made in a round case. The design of the gadget is sporty and bright. Manufacturers create models in several colors: white, gray, black, red, etc. The body of the device is entirely made of metal, and the strap is made of polymer compounds, which make the bracelet flexible.

On the left side, smartwatch v8 has a micro connector for connection charger... The USB input has a rubber cap (temporarily autonomous work it must be protected from dust and debris). On the right side are the buttons. A lithium battery is hidden under the cover on the back of the gadget, which can be replaced at any time. There is also a slot for a SIM card and a micro memory card.
The factory firmware of the gadget assumes 3 dial options. For lovers of the classics, there is an arrow screen with which the gadget looks very stylish. Smart watches smart watch v8 have a convenient and interesting menu. To use one of the functions, you need to connect to your smartphone via bluetooth.
Functionality
The v8 smartwatch has a large number of functions that every modern person needs. These include:

- Making calls and receiving calls. When paired via Bluetooth, the smart watch v8 acts as a headset. In addition, the gadget can be used instead of a smartphone by inserting a sim card into a special slot under the back cover. If you try to make a call without using the phone, then a window with a choice of function will appear in the menu: a call via a smartphone or a call via a watch. The watch uses exclusively a micro SIM card. At incoming call vibration or melody sounds.
- Three interchangeable dials. Depending on your mood, you can set one of the proposed options.
- Own address book. All numbers on the micro-sim card are displayed in hours. You can view the address book of the connected smartphone.
- SMS. Smart watch v8 allows you to send and receive messages, you can connect to your smartphone and exchange SMS with contacts from your smartphone.
- Dictaphone. With this function, you can record a conversation or music at any time.
- Audio player. With it, you can listen to your favorite music or recordings recorded on the voice recorder.
- File storage. The smart watch reads a memory card up to 32 GB. Music can be stored directly in the gadget, without using a smartphone.
- Camera. The gadget is equipped with a camera with a resolution of 0.3 MP. Images captured by the watch can be broadcast to an android smartphone using a special application.
- Calculator. For modern people this function will not be superfluous.
- Movement reminder. For those who spend most of their time in the office, this feature of the gadget, from time to time, will prompt that you need to warm up a little.
- Anti-lost. This function is necessary for those who constantly lose sight of the smartphone. To avoid losing your phone, you need to sync it with your smartwatch. Then you need to choose the distance at which you can stay away from the phone. When the parameters are exceeded even by a centimeter, the smart watch will start making a sound.
- Alarm. Not a single person can do without a morning reminder. And if the alarm clock is built into the watch, then its value increases significantly.
- The calendar. Tracking deadlines and making notes for the work week is an indispensable feature.
- Health tracking. Calorie counter, sleep tracking, step counting are important functions for a modern person.
Read also:
Review of children's smart watches JET Kid Start: functions, settings, reviews
Thanks to its large list of features, the smart watch v8 quad band is considered a useful gadget that can replace any android smartphone.
How to use your watch
Before starting to use, you must read the instructions and put the device on your hand so that the power button is on the right.

Each button in the menu is responsible for a specific function:
- On-off, home: if the watch is in sleep mode, only the time is displayed. You can exit the mode by pressing the power key.
- Confirm-answer: by clicking here, you go to the menu; this button confirms the action in the menu.
- Dial-menu: switch to the phone book in standby mode, if pressed again, switches to the menu. During a call or listening to music, you can change the volume.
- Back-Reset: Sends to the previous menu, the call is dropped.
Touchscreen functions:
- Scrolling through the menu.
- Exits the menu by swiping down from the top of the screen.
To understand all the features of the menu, you will need to devote only a few minutes of free time.
Bluetooth connection / disconnection
You can connect and disconnect bluetooth directly through the smartphone settings. All devices that are available for connection will be displayed on the watch screen.
After the connection is made, a window will appear on the watch asking for permission to read address book and call history. Personal information will also be available for viewing. If you do not click on consent, the synchronization will fail.
For successful operation, the distance between the two devices should not be more than 10 meters. If this rule is not followed, the smart watch v8 and the smartphone will automatically lose communication in a few minutes.
Our goal is to provide you with a quick access to the content of the user manual for Edirol V-8. By using the online browser, you can quickly scroll through the contents and go to the page where you will find the solution to your problem with Edirol V-8.
For your comfort
If looking through the Edirol V-8 user manual directly on this website is not convenient for you, you can use two possible solutions:
- Full-screen view - To conveniently view the instructions (without downloading to your computer), you can use the full-screen view. To start viewing the user manual Edirol V-8 in full screen, use the button Fullscreen.
- Downloading to your computer - You can also download the Edirol V-8 instruction manual to your computer and save it in your archive. If you don't want to take up space on your device, you can always download it from ManualsBase.
Manual Edirol V-8
Advertisement
Advertisement
Print version
Many people prefer to read documents not on the screen, but in the printed version. The option to print instructions is also provided and you can use it by clicking on the link above - Print instructions... You do not need to print the entire Edirol V-8 manual but only some pages. Save your paper.
Summary
Below you will find the application forms which are on the next pages of the user manual for Edirol V-8. If you want to quickly view the contents of the pages that are on the next pages of the manual, you can use them.
V-8_e.book 1 ペ ー ジ 2010 年 4 月 16 日 金曜日 午後 5 時 14 分
Owner's Manual
Before using this unit, carefully read the sections entitled: “USING THE UNIT
SAFELY ”and“ IMPORTANT NOTES ”(p. 6-7; p. 8). These sections provide
important information concerning the proper operation of the unit. Additionally,
in order to feel assured that you have gained a good grasp of every feature
provided by your new unit, Owner's Manual should be read in its entirety. The
manual should be saved and kept on hand as a convenien
V-8_e.book 2 ペ ー ジ 2010 年 4 月 16 日 金曜日 午後 5 時 14 分 Confirm the Contents of the Package The V-8 includes the following items. Please take a moment to confirm that all of these items have been included with the V-8. If you find that any item is missing, contact the nearest authorized EDIROL / Roland distributor in your country. V-8 RCA-BNC adapter plugs (four) Screws for attaching the video fader (four spare screws) Owner's manual (this document) AC adapter / Power cord * The shape of the power cord's plu
V-8_e.book 3 ペ ー ジ 2010 年 4 月 16 日 金曜日 午後 5 時 14 分 Main Features ● Eight channels of video input The V-8 provides video input connectors for eight video (composite) channels and four S-video channels. Of the input channels 1–8, S-video input is available only for channels 5–8. * If S-video and video (composite) are both input to a channel 5-7, the input from the S-video connector will take priority and will be selected automatically. Likewise, if S-video and RGB signals from a
V-8_e.book 4 ペ ー ジ 2010 年 4 月 16 日 金曜日 午後 5 時 14 分 Table of Contents Introduction Confirm the Contents of the Package ..................... .................................................. .................................................. ............. 2 Main Features .................................. .................................................. .................................................. ....................................... 3 USING THE UNIT SAFELY ...... .................
Input / output Introduction Connections Basic operation Switching images Effects BPM sync External devices Video fader Appendices settings V-8_e.book 5 ペ ー ジ 2010 年 4 月 16 日 金曜日 午後 5 時 14 分 Table of Contents (continued) Editing the Input / Output Settings 54 Adjusting the Input Image .............................................. .................................................. .................................................. ..... 54 Adjusting the PC Input Image ..................................
V-8_e.book 6 ペ ー ジ 2010 年 4 月 16 日 金曜日 午後 5 時 14 分 USING THE UNIT SAFELY The symbol alerts the user to important instructions Used for instructions intended to alert or warnings. The specific meaning of the symbol is the user to the risk of death or severe determined by the design contained within the triangle. injury should the unit be used In the case of the symbol at left, it is used for general improperly. cautions, warnings, o
Input / output Introduction Connections Basic operation Switching images Effects BPM sync External devices Video fader Appendices settings V-8_e.book 7 ペ ー ジ 2010 年 4 月 16 日 金曜日 午後 5 時 14 分 USING THE UNIT SAFELY (continued) 014 101b ● Protect the unit from strong impact. ● The unit and the AC adapter should be located so their (Do not drop it!) Location or position does not interfere with their proper ventilation. ..............................
V-8_e.book 8 ペ ー ジ 2010 年 4 月 16 日 金曜日 午後 5 時 14 分 IMPORTANT NOTES Power Supply Additional Precautions 301 *** ● Do not connect this unit to same electrical outlet that is being ● This unit allows you to switch images or turn video effects on / off used by an electrical appliance that is controlled by an inverter at high speed. For some people, viewing such images can cause (such as a refrigerator, washing machine, microwave oven, or air headache,
Input / output Introduction Connections Basic operation Switching images Effects BPM sync External devices Video fader Appendices settings V-8_e.book 9 ペ ー ジ 2010 年 4 月 16 日 金曜日 午後 5 時 14 分 Video Signal Flow You can use the input selector to choose any two of the video signals coming into the eight input jacks. These two video signals are sent to bus A and bus B of the video mixer section. The video signals sent to bus A and bus B are mixed in the video mixer section. The mixed signal then passes
V-8_e.book 10 ペ ー ジ 2010 年 4 月 16 日 金曜日 午後 5 時 14 分 Panel Descriptions Operating Panel fig.top-panel1-e.eps Menu Operation Buttons Knob These are used when working with the menu. ● Use this to edit the BPM value. ☞ “Operating the Menu” (p. 24) ● If you've used the TRANSITION buttons () to select “003: Fam✽” or “005: Nam✽” as the transition effect, this will adjust ● Button the way in which the transition occurs. This button overl
Input / output Introduction Connections Basic operation Switching images Effects BPM sync External devices Video fader Appendices settings V-8_e.book 11 ペ ー ジ 2010 年 4 月 16 日 金曜日 午後 5 時 14 分 Panel Descriptions (continued) Bus A EFFECTS Buttons TRANSITION Buttons These buttons turn effects on / off for the bus A image of the video Here you can select the way in which you will transition between mixer. If an effe
V-8_e.book 12 ペ ー ジ 2010 年 4 月 16 日 金曜日 午後 5 時 14 分 Panel Descriptions (continued) Operating Panel (continued) fig.top-panel2-e.eps Bus B INPUT SELECT Buttons Bus B Fader Use these buttons to select the image that will be input to bus B ● You can use this fader to control the settings of an effect of the video mixer. assigned to the blinking EFFECTS button. fig.inputsel-indicator-e.eps ☞ “Effects that can be controlled by the fad
Input / output Introduction Connections Basic operation Switching images Effects BPM sync External devices Video fader Appendices settings V-8_e.book 13 ペ ー ジ 2010 年 4 月 16 日 金曜日 午後 5 時 14 分 Panel Descriptions (continued) Rear Panel fig.rear-panel- e.eps OUTPUT Connectors PREVIEW OUT Connector ● Composite output connectors This is a BNC connector that outputs the composite signal for the These are BNC connectors that output the final output ima
V-8_e.book 14 ペ ー ジ 2010 年 4 月 16 日 金曜日 午後 5 時 14 分 Connecting Peripheral Devices Basic Connections * To prevent malfunction and / or damage to video monitors or other devices, always turn off the power on all devices before making any connections. * Be sure to use cables and adapter plugs with the proper connectors matching those of the other devices you are using. DVD player, Video tape recorder, DV camera Computer Video device VGA output S-video output Composite output connector connector connector *
Input / output Introduction Connections Basic operation Switching images Effects BPM sync External devices Video fader Appendices settings V-8_e.book 15 ペ ー ジ 2010 年 4 月 16 日 金曜日 午後 5 時 14 分 Connecting Peripheral Devices (continued) ● About the composite connectors and MONITOR OUT connectors The V-8's composite inputs and outputs use BNC connectors. If your connection cables have RCA phono plugs, you’ll need to use the included (or commercially available) RCA-BNC adapter plugs. ● A
V-8_e.book 16 ペ ー ジ 2010 年 4 月 16 日 金曜日 午後 5 時 14 分 Connecting Peripheral Devices (continued) Examples of Using the V-8 Events In events that involve various types of exhibition or video performance, you can use the V -8 to switch between multiple live video sources and the video from a DVD or computer. Input monitor Preview Output video device Multi monitor Preview monitor Computer Composite Composite Final output device Output video device VGA Composite S-video Large display Composite S-vide
Input / output Introduction Connections Basic operation Switching images Effects BPM sync External devices Video fader Appendices settings V-8_e.book 17 ペ ー ジ 2010 年 4 月 16 日 金曜日 午後 5 時 14 分 Connecting Peripheral Devices (continued) Concerts or VJ Performances Images can be projected on a large screen located at the back of the stage to create a video performance that's synchronized to the music. You can mix images from a PR-50/80 or computer (VJ software) with multiple live images. Inpu
V-8_e.book 18 ペ ー ジ 2010 年 4 月 16 日 金曜日 午後 5 時 14 分 Connecting Peripheral Devices (continued) Presentations You can switch between photos or DVD output, or superimpose images or text from your computer. Preview Output video device Preview monitor Computer Composite Final output device Output video device VGA Composite VGA S-video Large display Composite S-video DV camera Projector DVD player ● Advantages of using the V-8 You can use the Picture In Picture effect to show two images simultan
Input / output Introduction Connections Basic operation Switching images Effects BPM sync External devices Video fader Appendices settings V-8_e.book 19 ペ ー ジ 2010 年 4 月 16 日 金曜日 午後 5 時 14 分 Connecting Peripheral Devices (continued) Background Video for a Musical Performance ( Using V-LINK) You can control background video (BGV) simultaneously while playing an instrument. Output video device Preview Preview monitor Computer Output video device Composite VGA Final output device Composite Compo
V-8_e.book 20 ペ ー ジ 2010 年 4 月 16 日 金曜日 午後 5 時 14 分 Basic Operation Turning the Power On / Off Turning the Power On 1 Make sure that the V-8 is correctly connected to your other equipment. 2 Press the switch located on the V-8's rear panel to turn it on. fig.power-on-e.eps On Off V-8 Rear panel Turning the Power Off If you’ve used a menu operation (p. 24) to modify any parameters, close the menu before you turn off the power. If you turn off the power before closing the menu, the changes
Download instructions
| # | Manual | Category | Download |
|---|---|---|---|
| 1 | Edirol 4-CHANNEL V-4 | Music mixer | 41 |
| 2 | Edirol M-16DX | Music mixer | 84 |
| 3 | Sony Music Mixer 2-190-733-11 (1) | Music mixer | 17 |
| 4 | Sony Music Mixer DMBK-R103 | Music mixer | 29 |
| 5 | Sony Music Mixer DMBK-R106 | Music mixer | 38 |
| 6 | Sony RS-232C | Music mixer | 33 |
| 7 | Sony Music Mixer DMBK-R105 | Music mixer | 30 |
Hello everybody. Today there will be a small overview Bluetooth headsets from an unknown manufacturer named v8s.
I bought this headset for my friend, he is a driver and spends a lot of time behind the wheel. I was for a headset from xiaomi, but he wanted the headset to be attached to the ear, well, the owner is a gentleman. Although it somehow reminds me of a hearing aid a little. Anyway.
A parcel arrived within 3 weeks in an ordinary bag with a bunch of pimples. Inside was this modest set. 
As you can see, there is no packaging, just a bag containing the headset itself, a set of replaceable ear pads, a charging cable and a cardboard box with inscriptions in the purest Chinese language, such as a manual. 
What an unknown manufacturer promises us:
Bluetooth version: V4.0 + ERD
Transmitting Power: Class2
Transmission distance: 10m
Talk time: 8-10 hours
Standby time: up to 120 h
Bluetooth Profiles: A2DP v1.2, AVRCP v1.4, HFP v1.6, HSP v1.2
Bluetooth chip :: CSR8615
A2DP multipoint support: Yes
Active noise canceling: Yes
Here is such a set of buns. Plus to this voice recording of events and the ability to listen to music.
Let's take a closer look at the headset. 
More specifically, let's go through the management. 
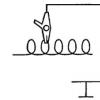
The circle with the image of a tube is a button for accepting and rejecting calls, in the music player mode, it performs the play and pause functions.
The rest of the controls are located on the back, behind the ear of the headset. This is the headset power-on slider, and below it is the LED indicator. And just above the volume slider. At the bottom of the ear-hook there is a micro-usb input for charging the built-in battery. 
In principle, there are no questions about the quality of workmanship, there are no scrapes and traces of stamping, but nevertheless it is clear that plastic is cheap. In short, such a working machine. The only jamb that we found was that the volume slider worked tightly, it seemed they put it crookedly, but then, by a little stirring, I put it in place.
The headset has a plus in that it can be worn on both the right and left sides. Plastic horn with microphone, height adjustable freely. By the way, the manufacturer claims active noise cancellation, and there is even a hole where the second microphone should be. I don’t know if this is so, but it seems from the CSR8615 datasheet, I didn’t see such a function, maybe I looked, if anything, correct it.
I listened to music in it, the sound quality is like that of inexpensive wireless headsets, if you put the ear pads correctly, you can listen if mono sound does not bother you. The headset performs its main function well, they hear me well and I hear well. Despite its enormous appearance, it sits comfortably on the ear and does not cause discomfort, although, to be honest, I walked around in it for only an hour and a half without taking off, then I just lay on the table and played music. During the evening, I did not see any special problems. When connected to a phone, the device's charge level appears on the screen. In general, you can take the headset if you don't mind the size and appearance).
And finally, a photo on my face, to understand how it looks in nature. 
Thank you all for your attention, conclusions to buy or not to buy, everyone makes himself). Until next time.
- Page 1 User Manual ...
Page 3: Introduction
Dual Concentric ™ which allows either vertical or horizontal mounting without affecting sound quality or compromising performance. The V8 comprises one 200mm (8 ”) Dual Concentric driver in which the low frequency (LF) and high frequency (HF) sources are coincidentally aligned to a point source, resulting in a smooth uniform frequency response over a wide area of coverage either as a portable stand alone system or in a multi-cabinet array.Page 5: Amplification & Power Handling
6. Crossovers The V8 is supplied as standard for passive operation via the internal crossover network. If higher peak outputs and additional low frequency output is required then the V8 can be used in conjunction with ...Page 7: Dimensions
9.Dimensions 45deg 30deg 145.0 180.0 275.0 180.0 145.0 280.0 50.8 388.0 107.9 194.0 ...Page 9: Technical Specifications
(3) Unweighted pink noise input, measured at 1m in an anechoic chamber. All Tannoy V Series products can be used with the Tannoy TDX2 Digital Controller for optimum system performance and when being used with various sub bass systems. Please visit our website at www.tannoy.com ...Page 11: Secur - Et V8y Yoke Bracket
The V8Y is a discreet yoke style bracket, available in both black and white, and is used to mount the Tannoy V8 in both portrait and landscape orientations. The Tannoy V8 loudspeaker is fixed to the bracket using the M10 bolts and washers supplied in the accessory pack Only the screws, fasteners, shakeproof and plain washers specified on figure 3.- Page 13 VCB2 Contents of VCB2 Description Quantity Cluster Bar Washer M10 Plain Screw M10x40 Button Head M10 Nyloc Nut Blanking Plug VCB4 Contents of VCB4 Description Quantity Cluster Bar Washer M6 Washer M10 Plain Screw M10x40 Button Head Screw M6 x35 Button Head M6 Nyloc Nut M10 Nyloc Nut Joining Plate ...
Page 15: Secur - Et Vth Pole Mount
Fig 1.12.7 SECUR - ET VPC Pole Clamp The VPC pole clamp can be used along with the V8Y, VCB2 & VCB4 to suspend a Tannoy V8 loudspeakers from an overhead bar, truss or suitable structure. The following items are included with each ...Page 17: System Configuration & Oem Controllers
TX1 & TDX2 as part of a large scale integrated system. The V8 has been designed to need no external equalization to overcome system limitations. If the V8 is to be used alone with additional bass enhancement required and have the frequency response limits ...Page 19: Declaration Of Conformity
16. Declaration of Conformity The following apparatus is / are manufactured in the United Kingdom by Tannoy Ltd of Rosehall Industrial estate, Coatbridge, Scotland, ML5 4TF and conform (s) to the protection requirements of the European Electromagnetic Compatibility Standards and Directives relevant to Domestic Electrical Equipment. The apparatus is designed ... Page 20 Strathclyde, ML5 4TF, SCOTLAND Telephone: +44 (0) 1236 420199 Fax: +44 (0) 1236 428230 Tannoy North America Inc, Suite 1. 335 Gage Avenue, Kitchener, Ontario, CANADA, N2M 5E1 Telephone: (519 ) 745 1158 Fax: (519) 745 2364 Tannoy Nederland BV, Anthonetta Kuijlstraat 19, 3066 GS, Rotterdam THE NETHERLANDS Telephone: (010) 2860554 Fax: (010) 2860431 Issue 1.0 Part No.
Page 2: Table Of Contents
12.5 Secur - ET VTH Pole mount 12.6 Secur - ET VCS Ceiling Saddle 12.7 Secur - ET VPC Pole Clamp 12.8 Secur - ET V8B Wall Mounting Bracket System Configuration & OEM Controllers V8 Recommended Service Parts & Accessories Warranty Declaration of Conformity ...Page 4: Polarity Checking
Cable choice consists mainly of selecting the correct cross sectional area in relation to the cable length and the load impedance. A small cross sectional area would increase the cables series resistance, inducing power loss and response variations (damping factor). Connectors should be wired with a minimum of 2.5 sq.Page 6: Arraying
60deg As shown in the above diagram, one of the V8 cabinets is inverted to allow the optimum splay angle to be achieved. The grill can be simply removed from this cabinet and be replaced in the correct orientation.Page 8: Performance Data
Unprocessed Anechoic Frequency Response, 1 watt @ 1 meter Impedance A comprehensive range of measurements including off axis frequency response curves, octave & third octave polar diagrams (single & two cabinet arrays) and beamwidth plots as well as Ease data can be downloaded http: / /www.tannoy.com/ from ...Page 10: Rigging & Suspension
Tannoy Professional products, or any other devices. Using Tannoy Professional hardware for any purpose other than that indicated in this guide is considered to be improper use. Such use can be very dangerous as overloading, modifying, assembling in anyway other than that clearly stated in the manual, or damaging Tannoy Professional hardware will compromise safety.Page 12: Secur Et- Vcb2 & Vcb4
The VCB2 cluster bar is available in both black and white finishes and provides a platform onto which 2 x Tannoy V8 loudspeakers can be mounted using the V8Y yoke bracket (not supplied in the VCB2 kit). A number of different loudspeaker arrangements can be made depending on the application and the coverage pattern required (see figures 1 & ...Page 14: Secur - Et Veb Eyebolts
12.4 SECUR ET - VEB Eyebolt The Tannoy V8 loudspeaker can be flown with high quality VEB M10 eyebolts with collar to BS4278: 1984. To install the VEB M10 eyebolts remove the original M10 counter sunk screws from the locations you wish to install the VEB M10 eyebolts.Page 16: Secur - Et V8b Wall Mounting Bracket
12.8 SECUR - ET V8B Wall Mounting Bracket The V8 can be wall or ceiling mounted by using the V8B bracket which is designed to offer the maximum flexibility in selecting desired angles. The V8B is supplied with M8 bolts for fixing to the loudspeaker, hinge clips which can be used to alter the angle of the wall fixing plate and an allen key to secure the arm length adjustment as well as the desired angle of 'tilt' .. ...Page 18: Warranty
Work under warranty should only be carried out by a Tannoy Professional dealer or service agent. This warranty in no way affects your statutory rights. For further information please contact your dealer or distributor in your country. If you cannot locate your distributor please contact Customer Services, Tannoy Ltd at the address given below.Estimates - 9, average: 4.1 ()
User manual Motorola Model RAZR2 V8
Fragment of instructions
36). An external touchscreen display allows you to control your phone without opening the lid - play music, view messages and recent calls (see the START HERE guide). Rip your favorite music quickly and easily with Hi-Speed USB 2.0 technology and Microsoft® Windows® Media Player 11 (see START HERE guide). Take pictures with a 2-megapixel camera with continuous shooting mode (p. 55). Capture important moments with your camcorder high resolution and then upload the video to your blog (see the START HERE guide). Access websites as easily as you do on a computer with a full-featured HTML browser (page 54). 1 Check Accounts your personal email (such as Hotmail, Gmail, or Yahoo) on the Internet (see the START HERE guide). In addition, you can read and synchronize your corporate email (Microsoft Outlook) using the MOTOSYNC application (page 68). Additional Information. To view the functionality of your phone, press Main Menu> V Help. Visit the website for instructions and other information about your phone and accessories on the Internet. 2 Introducing the new GSM mobile phone - MOTORAZR2 V8. Followed by short description appearance phone. Battery level indicator light Volume keys Allows you to change the notification profile in the start menu and navigate through the menus. Side selection key Allows you to take pictures with the camera while the flip is closed. Micro USB port Connects to a charger and accessories. Camera lens Bluetooth indicator light Voice command key You can use voice commands to make calls and use basic phone functions. Loudspeaker (on the back of the phone) External display Allows you to view incoming call details, control the music player when the player is on and the flip is closed, and acts as a camera viewfinder when the camera is on and the flip is closed. 3 Home Menu Main Menu Press the center ^ ~ "key" to open the Main Menu. menu. 1 l To turn on the phone, press and hold the power key P until the display backlight comes on. Press the navigation key up / down / left / right to navigate the menu. - © 1) Press the center key to select an item. Note. This is the standard start and main menu structure. Your phone's home menu and home menu may differ. For instructions on changing the home menu labels and the main menu appearance, see the START HERE guide. 4 Some functions mobile phone depend on the capabilities and settings of the operator's network cellular... In addition, certain functions can be disabled by the operator or their functional range can be limited by network settings. Check with your service provider to determine if features are available. All information about the functions, functionality and other product specifications, and the information contained in this user manual are based on the latest ...