Perhaps, no other ZTE model has as many official and custom firmwares as the ZTE Blade. Which one is the best firmware for the ZTE Blade is hard to say, it depends on personal preference.
Before considering any options for the ZTE Blade firmware, be sure to mention that this smartphone comes in two versions: Gen1 and Gen2. You can determine Gen using the Ask Mr Pigfish application, designed specifically for the ZTE Blade. You can download it for free on the Google Market. Gen2 has some advantages over Gen1, for example, better signal strength, HSUPA support, 850mhz band for GSM and 3G, as well as the ability to install new versions of Cyanogenmod in the future.
Instructions for migrating from Gen1 to Gen2
It assumes ClockworkMod Recovery and drivers are already installed.
- We download the firmware or and upload it to the phone's SD card.
- Download and drop the stock on the memory card.
- On the switched off smartphone, hold down the volume "-" and "on" and go to ClockworkMod Recovery, then install the downloaded recovery via CWM as an update. After installing Reboot
- Download the archive with the redistribution of partitions (cache; system; data). In this case, 136 MB are allocated for the system, more than 2 MB for the cache.
- Unpack the archive on a PC
- Turn off the smartphone, then hold down the volume "-" and "on", when the FTM message appears, connect the phone to the PC.
- In the unpacked archive of the redistribution of sections, run download_nochecksGen2.exe, click Start and do not touch anything until the installation completion notification appears. After completion, press ok.
- Go to "advanced" and select "Reboot Recovery".
- CWM will restart, then install SS RLS4b or CyanogenMod from CWM (when installing SS, RLS4b will write your Gen2 device generation).
- We make a Backup of the Channel1.nvm file, which will appear after switching to Gen2, in the folder from which download_nochecksGen2.exe was launched. This is necessary in order to save the IMEI data in case you switch back to Gen1.
If after the transition there were problems when starting CWM, but the firmware was installed, then download and install OneClickRecovery_ver2.apk and run it. You can download the file.
Universal instructions for flashing ZTE Blade using CWM
It is assumed that CWM and firewood are already installed on the phone. It is desirable to install CWM version 3.0.1.4, which is suitable for firmware 2.2 and 2.3.
- Download the required firmware.
- We connect the USB cable.
- We go to Recovery.
- If the firmware does not have a2sd, then continue from the next step, otherwise format / partition the USB flash drive by selecting "advanced" from the menu - "partition sd - ext = 512, swap = 0, fat = the rest will be automatic." With a cheap flash drive, problems can arise. In this case, you need to format the SD card on your computer in fat32, and then install the firmware, then break the USB flash drive and perform a full wipe. If suddenly the firmware becomes crooked, then you need to flash it again.
- We do "wipe data / factory reset", "wipe cache partition", not necessary, but you can also do "wipe battery"
- We copy the firmware to a USB flash drive without unpacking (so that the PC sees the smartphone in CWM, select “mount USB storage” in the “mounts-and storage” menu, when we copy everything we need, press “unmount”).
- Select "install zip from sdcard" in Recovery and install the firmware.
- Finally, select "reboot system now", after which the phone restarts.
This method is also suitable for installing updates on the ZTE Blade.
As for updates, you can easily update the OS of your device to version 2.2 through the settings. You can download the firmware update for ZTE Blade to version FRY_RU_P729VV1.0.0B01 (OS version: Android 2.2). The archive contains instructions for installing the update in Russian.
A significant number of official firmware for the ZTE Blade are presented here.A large number of firmwares can be found for this. firmware. When downloading, do not forget to pay attention to compatibility (TFT or OLED).
You can watch the installation of firmware 2.3 7 on the ZTE Blade in this video.
You can watch a review of the ZTE Blade 4.0.4 firmware, as well as get some information about the installation from this video.
To install the ZTE Blade android 4.0 firmware, a redistribution of partitions is required, however, the author claims that he did not do this, while everything was installed normally. In this case, ICS ColdFusionX CM9 Release 9 was installed. Those. this firmware was installed like any other custom firmware.
Even in modern balanced Android smartphones from well-known manufacturers, sometimes there is a situation that characterizes software developers for the device from a not very good side. Quite often, even a relatively “fresh” smartphone can cause trouble for its owner in the form of a crash of the Android system, which makes it impossible to continue using the device. ZTE Blade A510 is a mid-level device, which, with good technical characteristics, cannot, unfortunately, boast of the stability and reliability of system software from the manufacturer.
Fortunately, the above-described troubles are eliminated by flashing the device, which today is not particularly difficult even for a novice user. The material below describes how to flash a ZTE Blade A510 smartphone - from a simple installation / update of the official version of the system to getting the latest Android 7 in the device.

Please be aware of the following before proceeding with the instructions below.
Sewing procedures are potentially dangerous! Only strict adherence to instructions can predetermine the uninterrupted flow of software installation processes. At the same time, the administration of the resource and the author of the article cannot guarantee the efficiency of the methods for each specific device! The owner performs all manipulations with the device at his own peril and risk, and he bears responsibility for their consequences himself!
Any software installation process is preceded by preparatory procedures. In any case, to be on the safe side, do all of the following before starting overwriting the ZTE Blade A510 memory partitions.

Hardware revisions
The ZTE Blade A510 comes in two versions, the difference between which lies in the type of display used.
For this version of the smartphone there are no restrictions on the use of software versions, you can install any official OS from ZTE.
In this version of the display, only official firmware versions will function properly. RU_B04, RU_B05, BY_B07, BY_B08.
You can find out which display is used in a particular device using the Device Info HW Android application, which is available in the Play Store.

After installing and launching Device Info HW, as well as providing the application with root rights, the display version can be viewed in the line "Display" in the tab "General" main screen of the program.

As you can see, determining the type of display for the ZTE Blade A510 and, accordingly, the hardware revision of the device is a simple procedure, but it requires Superuser rights on the device, and obtaining them requires preliminary installation of a modified recovery, which is done after a number of rather complex manipulations with the software part and will be described below.

Thus, in some situations, you will have to act "blindly", not knowing for certain what type of display is used in the device. Before the revision of the smartphone is found out, you should use only those firmware that works with both revisions, that is RU_B04, RU_B05, BY_B07, BY_B08.
Drivers
As in the case with other Android devices, in order to manipulate the ZTE Blade A510 through Windows applications, you will need drivers installed in the system. The smartphone in question does not stand out in this matter with something special. Install drivers for Mediatek devices by following the instructions from the article:

If you encounter problems or difficulties while installing the drivers, use a specially created script to install the system components required to properly pair your smartphone and PC.

Back up important data
Each intervention in the software part of all Android devices, and the ZTE Blade A510 is no exception here, carries a potential danger and in most cases means clearing the internal memory of the device from the data it contains, including user information. To avoid the loss of personal information, make a backup copy of important information, and in the ideal case, a full backup of the smartphone's memory sections, using the advice from the material:
The most important point to pay attention to is backing up the partition "NVRAM"... Damage to this area during flashing leads to the erasure of IMEI, which in turn leads to the inoperability of SIM cards.

Recovery "NVRAM" It is very difficult without a backup, therefore, in the description of software installation methods No. 2-3, below in the article there are steps that allow you to create a partition dump before interfering with the device's memory.
Firmware
Depending on your goal, you can use one of several methods to overwrite the ZTE Blade A510 software. Method # 1 is most often used to update the official firmware version, Method # 2 is the most universal and radical method of reinstalling the software and restoring the device's working condition, and Method # 3 involves replacing the smartphone's system software with third-party solutions.

Method 1: Factory recovery
Probably the easiest way to reinstall the firmware on a ZTE Blade A510 is to use the capabilities of the device's factory recovery environment. If the smartphone is booted into Android, even a PC is not required to follow the instructions below, and if the device does not work correctly, the steps listed above often help to restore functionality.


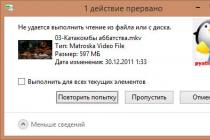
Additionally. In the event that during the installation process any errors occur or you are prompted to reboot, as in the photo below, just repeat the procedure again from step 1, after restarting the recovery.

Method 2: SP Flash Tool
The most effective method for flashing MTK devices is to use the proprietary development of Mediatek programmers, fortunately, programs available to ordinary users. As for the ZTE Blade A510, using the tool, you can not only reinstall the firmware completely or change its version, but also restore the device that does not start, hangs on the boot saver, etc.

Among other things, the ability to work with the SP Flash Tool will be needed to install custom recovery and modified OSs in the ZTE Blade A510, so you will get acquainted with the instructions, and ideally, it is definitely worth it, regardless of the purpose of the firmware. The version of the program from the example below can be downloaded from the link:
The model in question is very sensitive to stitching procedures and quite often during the manipulation various failures occur, as well as damage to the section "NVRAM", therefore, only strict adherence to the instructions below can guarantee the success of the installation!
Before proceeding to the process of installing the system software in the ZTE Blade A510, it is recommended that you read the article at the link below, this will help you more fully understand the picture of what is happening and better navigate in terms.

The example uses firmware RU_BLADE_A510V1.0.0B05, as the most versatile and fresh solution for models and the first and second hardware revisions. The package with the firmware intended for installation via SP FlashTool can be downloaded from the link:
- Run flash_tool.exe from the directory resulting from unpacking the archive.
- Load into the program MT6735M_Android_scatter.txt- this is the file that is present in the directory with the unpacked firmware. To add a file, use the button "Choose" located to the right of the field. By clicking it, determine the location of the file through Explorer and click "Open".
- Now you need to create a dump of the memory area occupied by the section "NVRAM"... Go to the tab "Readback" and press "Add", which will lead to the appearance of a line in the main field of the window.
- Left-clicking on the added line will open the Explorer window, in which you must specify the path where the dump will be saved, as well as its name - "NVRAM"... Next press "Save".
- In the window "Readback block start address", which will appear after the execution of the previous step of the instruction, enter the following values:
- In field "Start Address"- 0x380000;
- In field "Length"- value 0x500000.
And push "OK".
- Push the button "Readback"... Turn off the smartphone completely and connect the USB cable to the device.
- The process of reading information from the device's memory will start automatically and will end very quickly with the appearance of a window "Readback OK".
- Thus, you will have a 5MB backup file for the NVRAM partition, which you will need not only in the next steps of this manual, but also in the future if you need to restore IMEI.
- Disconnect the phone from the YUSB port and go to the tab "Download"... Uncheck the checkbox next to the item "Preloader" and start the process of writing images to memory by pressing "Download".
- Connect the USB cable to your smartphone. Following the definition of the device, the system will automatically start installing the firmware into the device.
- Wait for the window to appear "Download OK" and unplug your ZTE Blade A510 from your computer's USB port.
- Uncheck the checkboxes in front of all sections, and near "Preloader" on the contrary, check the box.
- Go to the tab "Format", turn the formatting switch to "Manual FormatFlash", and then fill in the fields of the bottom area with the following data:
- 0x380000 - in the field "Begin Address";
- 0x500000 - in the field " Format Length ".
- Push "Start", connect the device in the off state to the YUSB port and wait for the window to appear "Format OK".
- Now you need to record a previously saved dump "NVRAM" in memory of ZTE Blade A510. This is done using the tab "Write memory", available only in the "advanced" mode of SP FlashTool. To go to "Advanced Mode" you need to press the combination on the keyboard "Ctrl"+"Alt"+"V"... Then go to the menu "Window" and choose "Write memory".
- Field "Begin Address" in the tab "Write memory" fill in by entering 0x380000, and in the field "File Path" add a file "NVRAM", obtained as a result of performing steps No. 3-7 of this instruction. Push the button "Write memory".
- Turned off ZTE Blade A510 connect to a PC, and then wait for the window to appear "Write Memory OK".

- This completes the OS installation in ZTE Blade A510. Disconnect the device from the PC and turn it on by long pressing the key "Nutrition"... The first time after manipulations through Flashstool, it will take about 10 minutes to wait for the download to Android, be patient.


Method 3: Custom firmware
If the official firmware ZTE Blade A510 does not suit you with its functional content and capabilities, you want to try something new and interesting, then you can use modified solutions. For the model in question, many custom have been created and ported, choose any according to your preferences, but it should be noted that often developers post firmware with non-working hardware components.

The most common "disease" of modified solutions for ZTE Blade A510 is the inability to use a camera with a flash. In addition, one should not forget about the two revisions of the smartphone and carefully read the description of the custom, namely, which hardware version of the A510 it is intended for.

Custom firmware for the A510 is distributed in two forms - for installation through the SP Flash Tool and for installation through a modified recovery. In general, if a decision is made to switch to custom, it is recommended to follow this algorithm. Sew first, get root-rights and figure out the hardware revision exactly. Then install the modified OS via FlashTool without a recovery environment. Subsequently, change the firmware using custom recovery.
Installing TWRP and getting root rights
In order for the ZTE Blade A510 to have a custom recovery environment, use the method of installing a separate image using SP FlashTool.

The image file of the modified recovery can be downloaded from the link:

Installing custom via SP FlashTool
The procedure for installing custom firmware as a whole is no different from the same process when installing an official solution. If you transferred the files of the official firmware using the method number 2 above (and it is highly recommended to do this before installing the modified solution), then you already have a backup "NVRAM", which means that after installing any modified OS, if necessary, you can restore the partition.

As an example, we will install a custom solution in the ZTE Blade A510 Lineage Os 14.1 based on Android 7.1. The disadvantages of the assembly include the periodic freezing of the "Camera" application, if the flash is turned on. Otherwise, this is an excellent and stable solution, besides, it is the newest Android. The package is suitable for both revisions of the device.


Installing custom via TWRP
Installing modified firmware via TWRP is very easy. The detailed procedure is described in the material at the link below, for ZTE Blade A510 there are no significant differences in the process.
One of the interesting solutions for the device in question is the ported OS MIUI 8, which is characterized by a nice interface, a lot of possibilities for fine-tuning the system, stability and access to Xiaomi services.

You can download the package for installation via TWRP from the example below at the link (suitable for both Rev1 and Rev2):


Thus, for ZTE Blade A510, there are several methods for installing the system software, which are used depending on the desired result. If something goes wrong while installing the system on your smartphone, don't worry. If there is a backup, restoring the smartphone to its original state via the SP Flash Tool takes 10-15 minutes.
We connect our phone to a computer using a microUSB cable. If you have Windows 7, we can get the drivers automatically from the update center, which I did.

In this final window, where we received data on the successful installation of the driver, we need to remember the COM port number in which the diagnostic interface was installed. In my case, this is port 25.
Download and install the program BitPim ... We open it.

Go to the menu Edit - Settings

Click on the buttonPhone wizard .

We choose at all pointsOther - Other - Other CDMA phone ... Push the buttonNext .

Here the COM port number, which we memorized at the stage of driver installation, will come in handy. We can also see it from the available ports, in which there is an entryZTE CDMA Handset Diagnostics Interface ... Select it and clickNext .

In the final window, clickFinish .

Push OK .

UPDATE:Many phone usersZTE S325there is a problem at this step. Upon enteringPhone wizard an error is thrownException... What to do in this case? Just close the program by pressingAbort BitPim ... Open it over again and skip the step with the entrance toPhone wizard ... Go straight to the next step, browsing the file system.
We see this line in the status line of the program, then everything is ok. And the program is ready to work with your phone. Now we need to access the phone's file system.

Jam on the menu View - View Filesystem .
A folder will appear in the left folder tree Filesystem ... On the right we see the complete list of folders and the file system of our phone. After a little digging, we will see the folders wallpaper , midi and defaultcallimg ... The first one stores background images, the second melody in the format mid , the third folder contains pictures for contacts.
Further, everything is not difficult, in the folder wallpaper upload pictures in format png size 240 by 320 pixels. These will be our background images. It is better to give names in numbers, so it will be more convenient and the phone will not freeze.
Into the folder midi we post our melodies in the format mid ... It should be noted that the names of the downloaded melodies should be in numbers in the folder. One to ten. It turns out that we will have to replace the standard melodies with our own. As a result, we will be able to replace all 10 standard melodies with our own. Below I will show you a way to change the number of melodies and their standard names to your own.
Find the folder in the file managerini ... The file is located thereringconf.ini , we save this file to our hard drive in a convenient place by pressing the buttonSave and choosing the destination folder.

Open the file with standard notepad and edit it. In line16; we see the number 16, this is the total number of melodies that will be displayed on our phone. Next lines10; and 6; are responsible for the number of melodies displayed when setting up calls and SMS. We change them to our numbers, observing the following rule: in the line16; there must be a figure obtained by adding numbers in lines10; and 6; ... For example, I changed this data to15; 10; and 25; respectively.
5.mid / 6.mid / 7.mid / 8.mid / 9.mid / 10.mid / 11.mid / 12.mid /
13.mid / 14.mid / 15.mid / 16.mid /;
Here are the names of the melodies in the folder, if we added our new melodies, we simply add the names of the songs in numerical order. Those. my line looks like this:
/1.mid/2.mid/3.mid/4.mid/5.mid/6.mid/7.mid/
8.mid / 9.mid / 10.mid / 11.mid / 12.mid / 13.mid / 14.mid /
15.mid / 16.mid / 17.mid / 18.mid / 19.mid / 20.mid / 21.mid /
22.mid / 23.mid / 24.mid / 25.mid / ;
1) / Spring Song / William Tell / I love rock / Alla Turca / Dog Waltz / Four Seasons-Spring / Head banging music / Forget yesterday / Cartoon / Freeman /;
2) / Spring Song / Wilhelm Tell Overture / I Love Rock / Turkish March / Dog Waltz / Four Seasons - Spring / Hit in the Head / Forget Yesterday / Cartoon / Freeman /;
3) / Koktem oni / Wilhelm Tell oni / Men rokty suyemin / Turik marches / Tubetter waltzes / Turt mezgil Basқa Ordy / Keshegini umyt / Cartoon / Freeman /;
If we want to change the names of the songs that will be displayed on the phone, we change the names to our own. That's all. Finish editing, save the file ringconf.ini and upload it back to the folder ini ... This will overwrite the old file.
Into the folder defaultcallimg we post pictures, also interchanging files. Of these, we will later be able to choose a picture for our contacts.
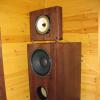
I hope this information will be useful to you. Now you can completely personalize your ZTE phone, which I did. You can see the result below.
We have:
- ZTE Blade;
- boring, old, buggy (underline the necessary) firmware on it;
- a little time;
- a bit of gray matter;
- a drop of money (for immersion in Zen).
Task: completely immersed in Zen (make a candy out of your phone and forget about flashing).
Let's get started!
We turn off the phone.
If ClockWorkMod is not installed (alternative recovery mode) install ClockWorkMod 5.0.2.0, if it is already installed, install it. Quick installation of ClockWorkMod 5.0.2.0 via Bootloader
1) Downloading the archive ZTE Blade (ZTE Libra) - ClockworkMod 5.0.2.0
2) Unpack it into a folder.
3) Load the phone into BootLoader. To do this: Turn off the phone. Clamp and hold down the buttons Home + Volume downand turn on the phone, after 6-8 seconds it shouldfreeze Green Androy (or ZTE logo) and Red button "Back"), release the buttons.
4) Connect USB cableto the phone, after which an unidentified "Android" device appears in the device manager, forcibly install the driver from the folder that was in the archive. (Note: absolutely all drivers for ZTE Blade are in the Windows 7 update center. Therefore, you just need to enable automatic driver search in Windows 7 and have internet.
4) Run from folder"Install ClockWorkMOD 5.0.2.0.bat".
5) After closing the window, disconnect the cable and give the battery.
Create a Backup (backup) of the old firmware
Clamp and hold down the "Volume Down" buttonand turn on the phone - We get into ClockWorkMod 5.0.2.0
Buttons "Sound down" (Volume down),"Sound up" (Volume up), select (Home) go to backup and restore - Backup.We are waiting for the end of the procedure.
Go to mounts and storage - mount USB storage. We connect the phone to the computer, copy the folder from the card to a safe placeclockworkmod, which contains our Backup.
Click on Unmount on your phone. We take out the cable.
Installing new firmware
The best, in my opinion, at the moment firmware based on the sources CyanogenMod 7.2.0-RC1 from a friend BurgerZ(BurgerZ.pro website). download the latest firmware (at the time of writing cm-7.2.0-RC1-Blade-KANG-13APR).
Go to the initial ClockWorkMod 5.0.2.0 menu.
wipe data / factory reset - Yes
wipe cache partition - Yes
advanced - partitioning SD card - 1024 mb (EXT partition) - 0mb (SWAP partition) (I believe that it is not needed with this amount of RAM). We are waiting for the end of the operation.
mounts - mount SD card
We connect the phone to the computer. Unpack the archive (Download from DepositFiles MD5: 807418DE2B7A5276F72867B942AC5ADB) with a modification of the original firmware, where the data section has been increased to 240 Mb. Copy the "image" folder from the "Modified (240 MB free) .rar" archive to the root of the memory card, firmware from BurgerZ, gapps dated 04/08/2012 (gapps-full-20120408-Blade.zip MD5: 2C96C534ECDCABB5027B1DAB8780D411), Darktremorpps2SD -2.7.5.2-1-signed.zip MD5: 8AF9E161B5DE47DD857BEF5638EDFBE8) ( Note: after updating the firmware, the archive must be flashed again).
Unmount
Power off
When loading the android, we take out the battery (as soon as the green android appears).
Insert the battery
We take out the battery
Volume Down + Power (loaded into ClockWorkMod 5.0.2.0)
Install zip from SD card - choose zip from sdcard. We choose in turn: cm-7.2.0-RC1-Blade-KANG-13APR.zip, gapps-full-20120408-Blade.zip, dtapps2sd-2.7.5.2-1-signed.zip.
Power off
Power on
Choosing Launcher
Below I will give the basic settings of the phone, which are comfortable for me. Perhaps you can endure something interesting for yourself.
Settings - language and keyboard - Russian
Settings - Wireless networks - Mobile networks - Data transmission (uncheck)
Open the status bar - CM stats - prohibit collecting statistics Cyanogenmod
Removing all widgets
Settings - Calls - Incoming call in background
Settings - Cyanogenmod Settings - Applications - Allow Moving Applications
Settings - Cyanogenmod Settings - Screen - Screen On Animation
Settings - Cyanogenmod Settings - Interface - Buttons in the notification bar - Hide the scroll bar
Settings - Cyanogenmod settings - Interface - Widget buttons - Widget buttons (add: 2G / 3G, data transfer, backlight; remove: sound) - Network modes (2G / 3G + 2G) - Network modes automatically (2G / 3G) - On. With this, with one data transfer button in the status bar, I switch between the states of the phone: (3G + 2G + Internet) / (only 2G + no Internet). That. save battery and time.
Open the notification panel, press 2G / 3G (to switch to only 2G mode)
Settings - Cyanogenmod Settings - Interface - Redrawing after enlargement
Settings - Location and protection - GPS satellites (remove)
Settings - Location & Security - GPS Source - Use built-in GPS
Settings - Location and protection - Configure screen lock - Pattern key (set your own key)
Settings - CyanogenMod Settings - Lock Screen - Widgets - Battery Status
Settings - CyanogenMod Settings - Lock Screen - Unlock - Skip when protecting your device
Settings - CyanogenMod Settings - Lock Screen - Unlock - Menu Unlock
Settings - CyanogenMod settings - Lock screen - Delays and timeouts - Delay on auto shutdown - 10 sec.
Settings - CyanogenMod Settings - Performance - CPU Settings - Set at boot
Settings - CyanogenMod Settings - Performance - CPU Settings - Maximum frequency - select at your discretion no more than 748 (I have 710)
Settings - CyanogenMod Settings - Performance - Off loading animation (phone boot time is reduced)
Settings - CyanogenMod Settings - Sound - Silence State
Settings - CyanogenMod Settings - Sound - Quiet Hours - Enable Quiet Hours (Disable notification sound, select response, mute trackball). We customize the beginning and end at our discretion (I have 00:00 - 6:00)
Settings - Cyanogenmod - Sound - Mute the camera
Settings - Device settings - Calibrate proximity sensor (perform in light, there should be no objects in front of the screen including you closer than 2 meters for 15 seconds). Without this procedure, the proximity sensor will not work.
Settings - Sound - Sound of keys (remove)
Settings - Applications - Unknown sources
Settings - Language and keyboard - Android keyboard - Input languages - English (US) + Russian
Application Menu - Spare Parts - End Button Behavior - Sleep (should reduce battery drain)
Application Menu - Spare Parts - Intermediate Animations - Fast
We connect Wifi or 3G
Setting up a Google account
Install Superuser from Google Play
We drop on the card applications that you usually install not from Google Play.
Install from Google Play:
- Go Launcher EX (Russian) (optional)
- Go Сontacts EX (optional)
- Go SMS Pro (optional)
- A2SDGUI (required) - needed to link the EXT section of the card and transfer programs there.
Go to Titanium Backup delete (the "Backups" tab, a short tap on the application, first delete the data, and then the program itself):
- Cmstats (CMStats.apk);
- Google One Time Init (OneTimeInItializer.apk);
- Launcher;
- Launcher Pro (optional, I use Go Launcher);
- Gallery (instead of it it is better to put QuickPic);
- Music;
- News and Weather (GenieWdget.apk);
- Screen management tips (Protips.apk);
- Cyanogenmod update notifications (CMUpdateNotify.apk);
- File manager (FileManager.apk).
- Latin Input Method Tutorial (LatinImeTutorial.apk);
- Setup Wizard (setupwizard.apk).
Google Play - Updating Maps and Street View in Google Maps.
We are integrating the Google Play update (you can also integrate the rest of Google applications that will be updated in the future):
Titanium Backup - long tap on the application - Integrate updates into ROM.
We also integrate (to save space for the data section):
- Cards
- Street View on Google Maps
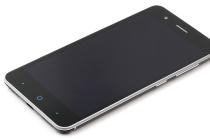
Released in early 2015, a 5-inch smartphone from ZTE immediately took a confident place in the market of budget gadgets. A bright IPS-matrix, 8 GB of internal memory and a sensitive 8-megapixel camera with autofocus have become a clear advantage of the new product among competing devices from the same price category.
Since Chinese brands only occasionally provide full support for the latest Android versions for their gadgets, the ZTE Blade L3 firmware is fully on the shoulders of the users themselves.
Firmware (revision 1): |
https://yadi.sk/d/wGvdDFa03KnEzM |
|
Firmware (revision 2): |
https://yadi.sk/d/pc6lnxM83KnF23 |
|
European version: |
https://yadi.sk/d/diG31g383KnF2m |
|
ADB Driver: |
https://yadi.sk/d/NnyocaGU3KnF46 |
|
SP Flash Tool: |
https://yadi.sk/d/MIXVS_wM3KnF54 |
First of all, you have to determine the revision of your smartphone, for which remove the cover of the device and take a look at the bottom of the battery. In the middle of the letter set, it will read:
- "V1.0" - the first revision;
- "V2.0" is the second revision.
However, there is also a European revision (monosymbol), which can be determined by the display resolution: in this version it is 854 by 480 pixels. You can check the value in any benchmark application.
ZTE Blade L3 firmware via SP Flash Tool
Install ADB drivers on your PC, and download and run the SP Flash Tool. After downloading the archive for installing the new firmware, unpack it and:
- in the main menu of the utility, in the "Scatter-loading File" item, specify the path to the "Android_scatter" file located inside the ".7z" archive;
- check all the items on the list except for "Preloader";

- Connect your smartphone to a PC using a USB cable;
- Click Download.

At the end of the firmware process, restart your phone.
Additional materials
The following describes the process of installing a new recovery and the procedure for flashing the ZTE Blade L3 smartphone through this engineering menu. It is not necessary to perform these operations, this is an alternative option for updating the built-in world program without using third-party programs.
Revision 1: |
https://cloud.mail.ru/public/FeCG/jbydUsbKx |
|
Revision 2: |
https://cloud.mail.ru/public/aVCT/R1Br9f3xj |
|
Recovery all: |
https://w3bsit3-dns.com/forum/index.php?showtopic=682926&st=4660#entry47981582 |
Download the required recovery version for your revision.

After installing the bootloader, restart your smartphone.
Updating Android Firmware on Your Phone
After downloading the firmware file (consider the example of the latest official version of Cyanogen 13 for the first, second and European revisions), move the downloaded ".zip" archive to the root of the phone's memory or SD-card.