Situations when you need to connect a computer to a laptop are common. Here is one of them - a person goes on a long business trip, bought a laptop and wants to transfer a large amount of data (movies, music, documents) from one device to another.
To transfer a large amount of information from a computer to a laptop, a flash drive is hardly suitable, the only, simplest, solution to this problem can be a portable storage device with a volume of 300 to 1000 GB.

But not every PC user has such a device, and no one will buy it separately only to solve one problem situation.
Yes, in principle, it is not necessary, you can go the other way, just connect the computer to the laptop using a network cable, thus creating a small local area network.
Certainly, ideal solution it will be if it is installed at home and data can be transferred and played in a network game and a local printer, scanner, etc.
Network cable
As you already understood, the main "players" in solving our problem will be a network cable, a network card, a router (if possible).
Let's figure out where you can get them and how to prepare them for work.
On the network card will not stop for a long time, it is difficult to imagine not even modern computer or a laptop without this device.
In 99.9 cases, it is present in a computer and especially in a laptop.

First, decide how long the network cable you need. If you use it only for temporary connection of a laptop to a computer and only for data transfer, then a length of 2 meters will be sufficient. This is quite enough for a comfortable work.
But if most of the time the laptop will be connected to the computer, and even more so if it is in another room, then measure the distance from the laptop to the computer and increase the resulting length by 1.5, this will protect you from unaccounted for distance (corners, bends etc.).
The type of network cable is twisted pair, it is not difficult to purchase it, but you can simply order it via the Internet.

But pay attention to the category, it must be at least Cat 5.
A computer to a laptop using a network cable is connected through special RJ45 connectors, the correct name is 8P8C.
To do this, the 8P8C connector must be connected to the network cable according to the diagram using a special crimp.

But, as a rule, there is no such crimping at home, and this business requires skill, so we recommend that you immediately purchase a network cable with connectors connected to it.
What a crimp looks like.

In many stores, they will not even charge you money for this service, and if they do, then not much.
Also already on sale ready-made solutions- patch cords. These are ready-made network cables with all the connectors indicated above, having a length of 50 cm to 15 meters.

This perfect solution for people who travel a lot around the world and go on frequent business trips.
Setting up a local network
So, you have a network cable with connectors connected to it. Next, you need to connect it through the 8P8C connectors to the network cards of the laptop and computer by inserting them into the RJ45 connectors, as shown in the photo.

The physical local area network has been created, now it needs to be configured correctly.
Let's assume you have Windows 7 operating system.


If you have already connected a computer to a laptop, then in this section there should be an icon network connection, for example, as in the photo below.

Hover the mouse over this network connection and right-click the menu.

Select the section "Internet Protocol Version 4 (ТСР / IPv4)" and double-click on it.
- "IP address" - 192.168.1.1;
- "Subnet mask" - 255.255.255.0.

We do not change anything else, he presses the "ok" button.
Now we do the same manipulations with the laptop, only where the IP address is indicated, we set 192.168.1.2 and save everything by clicking "ok".

That's it, the connection of the computer with the laptop is done, now you need to check if it works.
Checking the connection is working
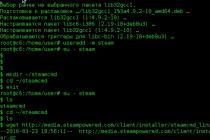
The result of our work can be checked using command line and the special PING command.
Do not be alarmed, there is nothing wrong with that.
We go to the device on which the IP address 192.168.1.1 was set, it can be both a computer and a laptop, depending on how you made the settings.
By pressing the hot keys " Windows + R"(Windows is to the left of Alt), we call the" Run "window.

You will see such a window.

As shown in the photo below, enter the command "PING 192.168.1.2" and see what the system "tells" us.

And the system tells us that 4 packets were sent, 4 were also received, which means that the connection is established and the computer is connected to the laptop.
Do not forget to share the drives and files with which you will be working on the network.

Conclusion
If you already have a prepared network cable, then connecting a computer to a laptop via a local network will take you no more than 5 minutes, at first glance everything is complicated.
In fact, the eyes are afraid, and the pens will do everything, do not worry. Good luck.
Computer and laptop are convenient elements for creating a full-fledged local home network... If you have WiFi, you can connect them to each other without using cables.
To connect a laptop to a computer via WiFi, you can use a WiFi router, or directly, through the built-in WiFi modules. Before starting the connection, you need to make sure that the WiFi sharing devices are configured properly, and the computer and laptop are accessing the same network.
Fast navigation through the article
Computer settings
Before setting up a “direct” connection (without using a router), you need to turn on WiFi. Next, you need to do the following:
- Press the "Start" button and select "Control Panel";
- Go to the "Network and Internet" menu;
- In the tab that opens, select "Network Control Center and general access»;
- In the menu that appears, click Change adapter settings.
Then, by right-clicking on "Properties", you must enter the following network parameters:
- Internet Protocol version 4;
- IP address (192.168.0.1);
To save the settings, press "OK" and exit the menu.
Setting up your laptop
To connect a laptop to a computer using WiFi, you need to go into changing the adapter parameters in the same way as in the main computer. In the network parameters you need to enter:
- Internet Protocol version 4;
- IP address (192.168.0.2);
- Subnet mask (255.255.255.0).
The rest of the parameters do not need to be changed.
Connecting devices
To connect a laptop to a computer, you need to create a Computer-to-Computer connection type. You need to do the following:
- In the "Control Panel" select the item "Network and Internet";
- Click on "View network status and tasks" and select "Set up a new connection or network";
- In the connection settings, select the "Computer-to-computer" type and double-click on the "Next" button;
- Set the name of the local network and the password to access it;
- Check the box "Save settings on this computer" and click "Next";
- In the process of setting, check the box "Allow access to the connection for other devices";
- Wait for the completion of the setting and exit the menu;
- In the control panel "Network and Internet" select "Change Extra options Sharing "and click on" Enable Network Neighborhood ".
Thus, the computer and laptop will be connected to each other via WiFi.
Checking the connection
To make sure the computer and laptop are properly connected to each other, you need to do the following on the laptop:
- Click on the "Start" button and select "Run";
- In the line that appears, enter the combination of letters "cmd" and press "Enter";
- A black window will open, where you need to enter "ipconfig" and press enter;
- The window will display information where you need to find the item "Local area network connection - wireless adapter";
- Find the IP address of the laptop;
- Perform the same operations on the computer and find its IP address.
If the addresses of the laptop and the computer differ by one digit with a difference of one, then the devices are connected correctly. You can also run the command: ping 192.168.0.1 from a laptop (or ping 192.168.0.2 from a computer) to check the connection status.
Many users face the problem of transferring data between laptop and computer. As a rule, data weighs many gigabytes, and it is very inconvenient to transfer it using a flash drive. For a more elegant solution to this problem, the laptop must be connected to the computer using a network cable, thus creating a small local area network of two computers. Now we will tell you how to connect a laptop to a computer via a network cable.
In order to connect your laptop to your computer, you need a crimped network cable. Under the compressed network cable need to understand twisted pair Category 5 or higher (Cat 5) with 8P8C connectors (most often mistakenly referred to as RJ45) installed on both ends of the cable. The method of crimping in our situation does not matter, either a straight cable or a crossover cable is suitable. You can buy the cable and connectors separately and crimp it yourself. You can read about this in our article "". But, the easiest way is to buy a crimped cable right away. Such a cable can be found in stores that sell small electronics, various cables and adapters.
In order to connect a laptop to a computer it is necessary to connect the network ports on the laptop and the computer as well. Setting up a local network will not be difficult, even for an inexperienced user.
First you need to go to the network connection settings on your computer. We go to the Control Panel, and then go along the path: Network and Internet - Network and Sharing Center - Change adapter settings. Here you need to find the network connection and call its properties. To do this, right-click on the connection icon and select "Properties".

After that, a window should open in front of you in which you can enter.

For the computer, we indicate the following settings:
- "IP address" - 192.168.1.1
After we have completed the computer setup, the same steps must be repeated on the laptop. otherwise, you will not be able to connect the laptop to the computer.
On the laptop, open the Control Panel and go along the path: Network and Internet - Network and Sharing Center - Change adapter settings. Next, open the properties of the network connection and properties for "Internet Protocol version 4". In the window that opens, enter the IP addresses for the laptop.
For a laptop, we indicate the following settings:
- "IP address" - 192.168.1.2
- "Subnet mask" - 255.255.255.0
Leave the rest of the fields blank. Save the result of the setting by clicking on the "OK" button. As you can see, the process of setting up a laptop is exactly the same. Only the IP address is different. For a computer, we indicated 192.168.1.1, and for a laptop, 192.168.1.2.
After we have connected the laptop to the computer and configured the local network, we can check its operability using the PING command. To do this, on a computer or laptop. In the window that opens, you need to enter PING command and the IP address of the second computer.

For example, if the IP address of the computer is 192.168.1.1, and the laptop is 192.168.1.2, then to check the network operation on the computer, you need to enter the command "PING 192.168.1.2". Thus, we "ping" the laptop from the computer. If the network is working, then you should see responses coming from your laptop.
Has your laptop stopped working and are you going to get rid of the non-working "junk"? Take your time. Component parts that are still usable can always be sold or made into something interesting. For example, you can use a laptop screen as a monitor for a personal computer. Interesting, isn't it? But how do you connect a laptop screen to a computer? We will talk about this today.
Modern "hand-made"
Nobody is immune from unforeseen breakdowns, right? Devices household appliances are also no exception. But did you know that technical problems can be made to work for you? It sounds pretty strange, but it is. Here we have a broken laptop, and at home is waiting for us Personal Computer without a working monitor. Why not turn your laptop display into new monitor? Why waste money?
This will require the presence of the laptop itself and, of course, desire. How to connect laptop monitor to PC? Let's take a look at this interesting procedure together, paying attention to the most important nuances.
What methods can be used to connect?
Here we have on hand a device that once did its job properly. Its presence is enough for a very creative way out of an awkward situation. In order to start implementing this interesting plan, you need to prepare a little. First, you need to familiarize yourself with the most common methods for pairing two devices.
Patching with a cable
For the first case, you will need a connection cable, with which the whole thing will be turned. Most likely, a VGA cable will suffice, but no one forbids you to use its counterparts. One of these representatives is a DVI cable. Also, this option will require an installed operating room Windows systems on the personal computer used.
Important! But there are exceptions here as well. Owners of devices based on operating system Mac will need an HDMI cable.
- Insert one end of the wire into the laptop connector, and the other end to the computer.
- Start the laptop, wait until it is fully turned on.
- Right-click on an empty space on the desktop.
- A context menu will open in front of you, in which you need to find and open the "Properties" tab.
- Now you need to select the "Display Properties" item and go to the "Parameters" section.
- You will see a picture in front of you, which indicates the screens with numbering. Select the second screen and set the position that corresponds to the actual position of the laptop.
- Next, mark the required item for displaying visual information with a checkmark. To select the primary monitor, you need to check the box “Use this device as primary”.
Important! You can always get everything back by doing the same steps.
Everything is simple and clear here, but how to connect a laptop monitor to a PC for owners of "Apple devices"? You need to do the following if you have already established a connection between devices via a cable:
- Go to the section “ System settings”And find the“ Monitors ”tab there.
- The layout of the display devices will appear in the same way that users of Microsoft operating systems might have noticed.
- Do the same manipulations for the position of the screens.
- Save your settings and get to work.
The devices are ready to use!
Remote access via software
And if you do not want to use wires, having the "apple technique" available, you can use special application called “Air Display”. You will need to install this software on a working laptop. This program is in free access on the official Apple website.
This method is as simple as possible, because for pairing, you need to launch the program after installing it and follow the instructions that the developer has carefully equipped this software with.
Important! With “Air Display” you can not only switch monitors, but also use them together. The work is carried out according to the principle of a remote connection.
If both of your devices work on the basis of the Windows operating system, then no one bothers you to install software to work with products from Microsoft. The programs do not cause any difficulties due to their ease of use. We recommend using this particular connection method if your devices are working properly and meet the system requirements.
Important! Do not forget that when using any computer software, it is advisable to use security programs. We invite you to read about.

Pairing devices using Wi-Fi wireless transmission
The wireless Internet has long ceased to be a rare phenomenon. So why not use it for this case too? Synchronization can be done by doing the following:
- Install a program called “MaxiVista”. The software developer didn't care about creating free version, so you have to fork out a little or use the trial version of the program.
Important! Functional trial version differs from the full functionality! Read the product description carefully.
- After installation, you need to use special modules and configure them according to the instructions from the publisher.
- If you did everything correctly, then there will be an excellent opportunity to control the screens remotely using Wi-Fi.
Important! If you spend a lot of time working with your PC, you probably get bored from time to time with the screen design and want to change it. So that you have room for imagination, we suggest that you save to your bookmarks useful tips and instructions:
Laptops can not only act as laptop for work. By connecting your laptop to your TV, you can turn it into a media center, stream videos from your favorite services, including YouTube, or play files stored on your laptop's drive. You can play games on big screen or edit documents without straining your eyes. Read this guide to learn how to connect your laptop to your TV.
Steps
Part 1
Determine the type of connection- The VGA connector is a rectangle with rounded corners, with 15 pins - 3 rows of 5. It connects the laptop to the docking station.
- The S-video connector is round with 4 or 7 pins.
- Composite video connector - Round RCA plug, usually yellow.
- DVI port - square, 24-pin, 3 rows of 8 pins. It is designed to transmit a signal high resolution.
- The HDMI port resembles USB port but thinner and longer. It has been installed in laptops since 2008 and is also designed for high-definition signal.
-
Check what video inputs your TV uses. It depends on whether your TV is standard or high definition. Typically, the video input connectors are located on the back of the TV, but they can also be installed on the side.
Find the right cable to connect your laptop to your TV. If there are several connection options (for example, VGA, S-video and HDMI), use the one that gives the most high quality... HDMI is a standard port in all new laptops and TVs, it provides a high quality signal and requires a minimum of settings.
Purchase an audio cable if necessary. Some computers and TVs can be connected to transmit audio and video with a single cable, but most will require video / audio connections using separate cables.
Part 2
We connect the laptop to the TV-
Turn off your laptop. If you are connecting using one of the older connector types, it is recommended that you turn off the laptop when connecting to the TV. There is no need to turn off the laptop when connecting via HDMI.
Connect the video cable to the corresponding connectors on your laptop and TV.
Set the TV to the correct source. Most of the inputs on the TV are labeled. Select from the TV menu the input to which your laptop is connected. If necessary, look at the instructions for the TV.
- The TV must be turned on for the computer to recognize it as a monitor.
-
Turn on your laptop. From now on, setting up your TV as a monitor will differ depending on the operating system used on your computer. Sometimes the picture on the TV will be displayed immediately, or the image on the monitor and TV will be duplicated. In some cases, there will be no picture on the TV yet.
Set up your TV as a monitor. Many notebook computers have a dedicated Display button that can be accessed by pressing the Fn key. With this key you can toggle all the available options for displaying the image on the monitors. You can expand the image on both screens, duplicate the image on both screens, or turn on only one of your monitors (either laptop or TV).
- Windows 7 and 8 users can press the Windows + P key to bring up the Projector menu, which also selects from the above display options.
- If, for one reason or another, you cannot use any of the these options, right-click on the desktop and select Properties / Screen Resolution. Use the "Multiple Screens" menu to choose how the picture should be displayed on the TV.
-
Set the screen resolution if necessary. Often, the resolution on the screen and the TV is different, especially for older TVs. Right click on your desktop, click Properties / Screen Resolution and select the screen you want to change the resolution for.
- Most high definition televisions (HDTVs) can display at resolutions up to 1920 x 1080, but some are limited to 1280 x 720 (1366 x 768). All of these resolutions have an aspect ratio of 16: 9 (widescreen).
- If the image is far from normal, you can temporarily turn off the laptop and set the resolution before reconnecting to the TV. If you select the Duplicate Image on Both Screens option, the monitor resolution must be the same as the TV resolution.
-
Adjust the scaling of the TV. Some TVs will correct for differing aspect ratios by scaling the picture. If you see that the image on the TV is "cropped" at the edges - make sure that this setting is disabled.
- If you have connected your laptop to a high definition TV (HDTV), it may be certain elements will only appear on the HDTV screen and not on the laptop display. This is fine. To see these elements again on the laptop screen, turn off the TV.
- If you have difficulty connecting all these cables - purchase a device to wireless transmission signal. It's easy to use, and you don't have to pull cables.
-
Determine what type of connector your laptop uses. Exists different types video outputs, in addition, your laptop may have several of them. The video output is usually located on the side or rear edge of the laptop. If you want to connect to your MacBook TV - check out this article.