Setting up the Vive for the first time
Before you can start using the Vive, you need to complete the setup process, which includes identifying your playground. To get started, download and install the Steam app http://store.steampowered.com/about/ . You need to create a Steam account. After Steam is installed and you have logged into it under your account, go to Library>Tools to install the SteamVR app. When you do this, the SteamVR app will launch and the setup screen will open. SteamVR complements your Vive. Its main window reports the status of the VR system, helps diagnose problems, and provides access to SteamVR settings.
What is a play area?
The play area sets the virtual boundaries of the Vive. Your interaction with virtual reality objects takes place within the playground.
Play area selection
- Find a place that will be your play area. For best results, follow these steps:
- Clear the play area of furniture and other things (including pets) that may interfere with your free movement.
- Remove or cover large mirrors and reflective surfaces.
- Close windows or other sources of direct sunlight.
- Place your computer outside the play area. The Vive headset cable will allow you to move up to 5 meters from your computer.
Play area connection
After setting up the equipment and installing software Steam, you need to set up a game zone. Before choosing your installation, make sure you agree to the following space requirements:
Room Space Required: Minimum Play Area 1.5 x 2 Meters Sitting or Standing: No minimum space requirement, but space requirements vary based on VR content.
When tracking the play area, make sure the floor is clean. The play area boundary does not track the space occupied by things (table, chair, etc.) and this can cause you to stumble while in VR.
Setting the size of the play area
Choose a play area setting to enjoy moving around in the virtual space
- Choose Run Room Setup>Room-scale
- Watch the prompts and follow the instructions on the screen to complete the process

Setting up the Playground for Standing Only Play
Select this option if you only want to experience virtual reality in a standing or sitting position.
- On your computer, open the SteamVR app
- Choose Run Room Setup>Standing only
- Watch the prompts and follow the instructions on the screen to complete the process.

Exploring the Vive
Once you've completed the Vive setup process, you can put on your headset and grab your controllers.

When you are in the gaming area, the Vive headset and controllers must be within 5 meters of the base station. This will ensure that these devices will be properly tracked within the 120 degree field of view of the base stations.
For health and safety precautions, please read the Health and Safety Guide www.htcvive.com
System Dashboard
Download VR apps, change settings and more in the System Dashboard. To access the system control panel, press the System button on any of your controllers while wearing the Vive headset and during any running application VR.
For 2 years I have been thinking about buying VR glasses. With the advent of new and interesting games- this desire more and more doomed itself to be realized in reality. And when I saw the release of the edition of the Fallaut 4 VR game, I decided for sure. And so ... as they say:
- Freaked out, broke, bought .... :)
With the advent of new VR-glasses from the company HTC Vive Pro - my choice fell on them.
By the way, this is my first acquaintance with VR.
Of course, I had to fork out for a fair amount of spending.
I purchased the 2nd generation HTC Vive - "Pro".
There are differences from the first one, but, as foreign experts say, "the changes are not significant." I would like to object or support them, but alas, I did not use glasses of the previous generation.
New very beautiful, very comfortable. Their weight and dimensions are just so as not to feel heaviness / fatigue and it is enough that they do not fly off like a cap in the wind when the head is tilted. As for the conditional comparison, this is the presence of a better picture in the new model; more accurate body movements that coincide with the reality; almost complete absence of visible pixels (I consider this an important difference); a headset appeared (a nice addition, but I'm sure many will remain faithful to their headphones, because don't expect something incredible from them. The sound is good, but not the ultimate dream. The microphone works fine); availability 2 front cameras(I don’t know how it was in the first glasses, but the picture pleases the eye).
It seems to be a lot of changes ... but still ... it seems to me that I still overpaid. I think the new VR glasses are more suitable and adapted for commercial use like software/game development.
In any case, after the first inclusion - you will forget about any money.))) It's worth it!
Installation.
Now I would like to say a few words about the installation.
I am not an IT guy. But when looking for places to buy glasses, I often came across an ad from the same stores and just private ads "virtual reality glasses settings -
INEXPENSIVE". Pffff... Here my vanity and pride were played out in earnest... but what could be difficult there? Why are they asking ~ 5k rubles!?
First I’ll say that there is a difference for connecting old and new glasses. It's not big, but it's there. New glasses are more demanding not only for hardware, but also for software.
And so that you do not sit for 15 hours (like me) and save ~ 5k rubles (like me) - pay great attention to your operating system!
Yes, yes ... it is in it that 99% of all problems lie. If not for her, I would have made a full connection in the first 3-4 hours.
I'll start over.
You will need to check your system requirements and upgrade as needed.
If you did not use a wire to connect them (like me), then their channels should be on one "b", on the other "c" - switched by a button on the back.
Actually, everything is with the bases, we repeat:
- We hang at a height of 2 meters,
- making a small angle
- set channels.
USB connection.
The manufacturer advises to put the USB cable into the USB 3.0 socket - supposedly they are faster, yes, they are. And so I did. But, some users have experienced difficulty connecting and downloading required components after plugging into this jack. If you have any difficulty with this, I advise you to use another USB port 2.0 is not as fast, but much more reliable. But in general USB connection implies a process in which it is necessary to change each USB socket until one of them fully loads all the components. I can say for sure that you cannot use the USB sockets located on the front of your PC, they are not suitable, they are quick-detachable only for flash drives, they receive little power. Therefore, we try only the USB sockets located in your motherboard on the back of your PC. The most ideal option is a USB socket on a separate board, which (if you have one) is installed in your motherboard.
When all wires are connected, make sure you turn on the button on the communication module and the indicator light turns green.
On the issue of nutrition.
Glasses, like controllers and the base, are not equipped with adapters for our sockets for 220v. It would seem like garbage, but if you live in villages, like me, this can become a problem in finding them and delay the installation for a while. Incl. stock up in advance ~ 3 adapters from US sockets for our 220v. One goes to power the helmet and 2 to power 2 bases. Also, if you want to quickly charge your controllers, you will need 2 more adapters. But, this is not necessary - they can be recharged from USB.
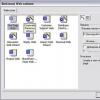
Now is the time to use the program SteamVR.
With its help, you will need to adjust the operation of the base and helmet, calibrate your height and the space around you. Also, in the future, through it you can make all the software updates of your devices.
Click on the program - "Set up a room" and follow the instructions. There will be no problems.
This program is also very convenient in detecting and status of all VR devices.
In working order, everything should glow green.
Everything!
This is where I would say most of the problems with connecting and using VIVE PRO correctly. The rest of the connection is no more difficult than connecting a gamepad.
Good luck to all!
Video and photo taken from the office. source ©
syllable master October 10, 2018 at 09:47 pmConnecting 2 HTC Vive to one computer. Step-by-step instruction
After buying a new model of a helmet, the delivery package of which includes only the helmet itself without peripherals, I was left alone with the old device, without the ability to connect it to a computer. By default, Steam VR is not able to work with two VR devices at the same time, so this article describes the procedure and ways to solve typical problems.
This method will most likely work for other VR headsets such as Oculus or WMR, but everything was tested on the Vive.
This method will also work for 3 or more headsets, if the characteristics of the hardware allow.
Attention. Some of the problems described in the article are due to attempts to use hardware that is not marked "server" as "server". For reasons known only to marketers - these device drivers refuse to function under a server operating system or a virtual machine - therefore, the article describes changes in their configurations. These methods are presented for informational purposes only and are not recommended for use.
Training
System requirements:
- Two video cards, each of which separately pulls VR games. (+1 piece for each subsequent helmet)
- A processor that supports virtualization and has at least 8 threads. (+4 flows for each subsequent helmet)
- 8GB random access memory. (+4GB for each subsequent helmet)
- Enough USB 3.0 on the motherboard for all your devices.
Characteristics of the iron used during the test:
- Motherboard: X299 AORUS Gaming 3
- Processor: i7-7820x (16 threads)
- Video cards: GTX-1080 2 pieces
- 64GB RAM
Installation
1.1. We install and produce the initial Windows setup Server 2016.1.2. (Optional) At this stage, I have a problem with the drivers network card. This guide helped me solve it.
2.1. We go to "Server Manager".
2.2. Go to "Add roles and features" and in the wizard that opens, create the "Hyper-V" server role. The server must be allowed to connect to your network.
2.3. After installation, go to "Hyper-V Manager".
2.4. We create a new virtual machine in the settings of which it is necessary to issue at least 4GB of RAM and at least 4 processor threads.
2.5. We start the virtual machine, we produce on it Windows installation 10 or Windows 7 to taste.
2.6. After installation and initial configuration, turn off the virtual machine.
3.1. Now you need to throw one of the video cards to the virtual machine. (Documentation)
3.2. Disable SLI if it was active
3.3. We go to the "Task Manager". We find the video card that we will give to the virtual machine. We turn it off.
3.4. We go into the properties of the disabled video card. In the "Details" section, find the "Location Paths" property. Copy the path from there.
3.5. Using PowerShell, we set up a virtual machine and give it a video card. For example, the machine name is VMName, and the video card path is $locationPath.
Set-VM -Name VMName -AutomaticStopAction TurnOff Set-VM -GuestControlledCacheTypes $true -VMName VMName Set-VM -LowMemoryMappedIoSpace 3Gb -VMName VMName LocationPath $locationPath -VMName VMName
You can return the video card using
Remove-VMAssignableDevice -LocationPath $locationPath -VMName VMName Mount-VMHostAssignableDevice -LocationPath $locationPath
3.6.
We start the virtual machine. If everything went well, the given video card will appear in the "Task Manager" of the virtual machine.
4.1.
Installing drivers for the video card.
4.2.(Optional) Default GeForce graphics card does not start on a virtual machine and gives an error 43. This method helped me with this problem.
5.1.
Throw normal through Hyper-V usb ports it is forbidden. (Through an extended session didn't work either) Therefore, there are two ways to solve the connection problem.
5.2.
if you have PCI-E USB controller - then it can, by analogy with a video card, be thrown to a virtual machine.
5.3.
If there is no controller, you can use the program USB-Redirector or USB Network Gate.
6.0.
Now virtual machine and the host will see each his own helmet, and further customization is the same as a normal VR Headset setup.
Conclusion
If you have any tips for optimizing the points in this article, experience connecting other VR headsets, experience with AMD video cards, or experience with a more “Correct” solution to driver problems - please write about it in a comment so that the article can be supplemented. Thank you.Tags: vr, htc vive, oculus rift, mixed reality, windows server 2016, hyper-v
The HTC Vive VR headset is one of the latest developments in virtual reality, and one of the most competitive options on the market. Released in 2016, the device uses two high-resolution screens, a positioning system, external stations and a set of sensors to work. The functionality of the helmet and support for a large number of games compensates for such a disadvantage as the price of 70 thousand rubles.
Advantage of HTC VIVE VR over competitors
Let's start the description of HTC Vive with the advantages of virtual reality glasses in comparison with analogues from other manufacturers. These include:
- the maximum functionality that can be obtained for this amount;
- high accuracy of controllers used to control in virtual reality;
- the ability to customize the helmet;
- support for several hundred VR games - several times more than competing models;
- the presence of its own screen - this feature distinguishes the helmet from inexpensive devices type Samsung Gear VR that needs a smartphone to work.
When using HTC Vive virtual reality glasses (black - although there are no other colors in the company's lineup), there is no motion sickness effect. Meanwhile, users of other models noted that they were motion sick after a long game. Although manufacturers claim that the appearance of seasickness depends not only on the helmet, but also on the physiology of a particular person.
Another advantage of the device is high level basic configuration - when buying HTC Vive, you don't have to worry about finding controllers and cables. All necessary parts are supplied with the helmet. And the disadvantages include only a large number of cables for transmitting audio and video - however, the same drawback is present in all professional models of virtual reality helmets.
HTC Vive virtual reality helmet review
Before proceeding Htc review Vive, you can list the main characteristics that it is desirable to pay attention to before buying such a helmet. These include the ease of setting up the gadget, technical specifications, sound quality and optics. For some, the design that the HTC Vive virtual reality helmet received, and the requirements for a computer that is needed to use virtual reality, and the price category may also matter.
Instructions for connecting HTC Vive
Before connecting VR Vive and starting its operation, the user is required to:
- Choose a suitable place - a room is suitable for this, where you can move up to a distance of 2-3 meters (the best option is a square with sides of 2000 x 2000 mm).
- Place the base stations on racks (or shelves) at a height of about 2 meters and in such a way that they look at each other.
- Connect HTC Vive to a special LinkBox device, which, in turn, is connected to a PC.
- At the final stage, the base stations are interconnected. A special synchronization cord supplies power to the sensors. The next step is to set up and calibrate the NTS virtual reality helmet.
Setting up and setting HTC Vive options
Setting virtual helmet starts immediately after it connects to the computer via LinkBox and HDMI cable - the Steam online service is automatically downloaded to the computer. After downloading in the client of the online service, you should find the VR mode and start calibrating it:
- Pick up the controllers of the HTC Vive VR helmet.
- Choose the position in which the user will play - sitting, standing and even lying down.
- Leave enough space for movement.
- Take a few steps, marking the perimeter of the workspace.
The user will need to spend no more than 20 minutes on calibration. After that, you can adjust the helmet itself for yourself, choosing a comfortable distance between the centers of the lenses and a suitable focus (for each eye, if the user has vision problems). To do this, use special controls on the side panels. It is not necessary to set the HTC Vive resolution at the very beginning of work - this setting is set for each specific game.
HTC Vive from a technical point of view
To the main HTC specs Vive include:
- a complete set of 32 sensors located around the perimeter and in other places of the helmet;
- viewing angle of 110 degrees;
- the presence of two internal displays with a resolution of 1200 x 1080 pixels;
- battery with a capacity of 960 mAh, which is enough for 4-5 hours of active play.
The weight of the helmet is 520 g. This is not enough for the user to feel discomfort even after several hours of using the gadget. In addition, the model is equipped with an external camera for interacting with ordinary reality at the same time as the virtual world.
Design
The bright and clear virtual reality provided by the HTC model is complemented by a stylish appearance devices. The helmet is made completely black, differing in this feature from most other models. Rounded corners and edges visually make the gadget a little smaller, and the shape of the interior space of the gadget allows you to use it without taking off your regular glasses.
The helmet controllers also look good, providing more flexible control compared to similar devices in other models. At the bottom of them you can see the key that launches the Steam menu, at the top - the second, for which you can assign additional functions. For control, a trigger is also used, on which the index finger should be, and two more buttons on the sides of the controller.
Display and helmet optics
To display graphic information The HTC VR helmet uses two displays, the total resolution of which is slightly higher than the FullHD format - 2160 x 1200 pixels. Image viewing angles equal to 110 degrees allow you to get a stereoscopic effect. Thanks to these features, the most comfortable immersion in virtual reality is ensured.
Another optical device external camera. With its help, you can move around the room without bumping into furnishings, without removing your helmet. The camera resolution is enough even to use a smartphone or read not too small text.
Sound
The soundtrack of virtual reality is provided by suitable headphones - branded ones that come with the kit, or purchased separately. One of best options to obtain high-quality sound is, for example, Sennheiser headset GSP 350. It creates such surround sound that you can even determine the location of the shooting enemy in the game.
When using a VR helmet, the sound source can be not only a headset, but also a PC audio system. In this case, the sound quality will depend on sound card computer. For getting best effect it is worth using systems like 5.1 or 7.1.
System requirements for the HTC Vive helmet
It should be noted that for the helmet to work, the user must be the owner of a computer that has the following system requirements:
- GPU is no worse than AMD Radeon R9 290 or NVIDIA GeForce GTX 970 with 4 GB of memory;
- CPU Intel i5-4590 or AMD FX 8350 or higher;
- RAM from 4 GB;
- Windows 7 and later versions of the platform.
- USB 2.0 ports and DisplayPort 1.2 or HDMI 1.4 video inputs.
These computer requirements are minimal. In order for the helmet to work without problems, it is advisable to connect them to a computer with 8 GB of RAM and a processor with 4 cores. However, the PC must have the same characteristics to use most modern games.
Package for HTC Vive
HTC's collaboration with software maker Valve includes:
- a set of two Vive controllers with power supplies, straps and cables;
- Audio cable;
- 3-in-1 cable;
- branded headset Vive Headset;
- two face pads and a screen cleaning cloth.
The list of equipment includes two cubes of base stations, a synchronization cable, a mounting kit and power supplies. Hyperkin case for Vive helmet not included. Therefore, you will have to buy a suitable option that allows you to make the colors of the gadget more diverse, separately.
helmet content
Valve's participation in the development of the helmet allows its customers to use the majority of VR games on the Steam online service. This feature is one of the main advantages of the gadget over other models. Helmets and VR glasses from other manufacturers are also compatible with some games, but only HTC Vive provides maximum immersion.
The number of gaming applications adapted for virtual reality and suitable for this device reaches one and a half thousand. Among them are games such as Project Cars, Time Machine VR and Elite Dangerous.
Debriefing
Ability to use VR-enabled games for HTC Vive and a high resolution the pictures are good, but not the only reason to buy this helmet. Another reason for buying can be called the constant movement of the player (or traveler through virtual worlds) while using the gadget. And, although the cost of the device is far from affordable for every user, if there are financial opportunities, it is worth giving preference to this particular model - or to the next generations of helmets of the same brand.
Dear readers, thank you for reading or scrolling through the article to the end. Please share the article on social media. networks. We are trying for you. It will give us additional motivation.
The main difficulty in setting up a virtual reality helmet from HTC is the selection of a suitable space. The device does not require the entire room to be vacated, but in most cases it is necessary to move furniture and, possibly, get rid of some interior items. The sensors located in the stations should be in direct line of sight relative to each other and form a rectangular area of about 3.5-4 square meters. This area can be increased or decreased, but it will not be possible to fully play on too small.
That's the price you pay for total immersion in Virtual Reality. Well, in order to fulfill connection, configure the software, and make the first launch of the device, even an unprepared user usually takes no more than twenty minutes.
base stations
You need to start with the selection of the area for their installation. It should be a rectangular area with sides of about two meters with a slight deviation up or down.
When the place is chosen, you need to take care of where the stations will be placed. Ideally, they should be hung above the playing area and directed towards its center at an angle of about 30-45 degrees.
But this can only be done when the whole room is allocated for them. More often, users mount stations on tripods or other stands that can be set to the same height. On the body of the stations there is a standard tripod mount, which transparently hints at the most convenient installation method. The main thing is that the installation is reliable, and it is easy to stretch the power wires to each unit.
How to connect HTC Vive
If the sensors see each other without a wire, everything is fine, but if not, you will have to connect them together using the extended cable that is included. It is worth remembering that the base stations are constantly working: to save electricity, you can turn them off yourself.
Next, the Link Box is connected to the USB 3.0 and HDMI of the computer and is connected directly to the helmet with a cable. After turning on the controllers, the application on the computer should report that the Vive is connected and ready to use. The program may install the Steam client if it is not present.
How to set up HTC Vive
The application will prompt the user to select the mode in which he plans to use the helmet. You can play sitting or standing in one place, or you can move in the space between the sensors.
Since there is enough space in the room and the base stations are already installed, there is no point in choosing the first mode. However, you can always return to it without dismantling the stations, if necessary.
Outlining
If the user selects the second mode in which to move, the program will ask to outline the area to be controlled.

To do this, you need to pick up the controller and walk with it around the perimeter of the installed stations. Outline the outline so that a rectangle with the same proportions as in the image fits inside.
It is not necessary to allocate too much territory, the application will not use it completely anyway. But when creating a contour, it does not hurt to take some margin. The application and sensors in base stations do not always work out the movement correctly, so it will not be possible to outline a sufficient area the first time.
Ready
On this installation and configuration HTC Vive ends. You can put on a helmet and start fine-tuning the mounts for your head and choosing the focus and distance between the lenses that are convenient for your eyes. Both lenses are positioned with controls located on the side panels of the device.