Ministry of Education of the Republic of Belarus
BELARUSIAN NATIONAL
TECHNICAL UNIVERSITY
Faculty of Management Technologies and Humanization
Department of "Customs"
Methodical instructions and tasks
to laboratory work
at the rate
"Computer information technologies"
Section "Computer graphics"
for students of economic specialties
UDC 002.6 (075.8)
Compiled by:
T.A.Galay
Reviewers:
Laboratory work No. 1. Introduction to the graphic editor Adobe Photoshop. 4
Theoretical part 4
Tasks 4
Adobe Photoshop. Laboratory work No. 2. Working with documents in Adobe Photoshop. nine
Tasks. nine
Laboratory work No. 1. Acquaintance with the Adobe Photoshop graphics editor.
The purpose of the work: To study the tools of the Adobe Photoshop graphic editor, and how to configure it in various modes. Familiarize yourself with floating panels and their purpose. Learn how to create and save different types of files in Adobe Photoshop.
Theoretical part
Currently, there are a large number of computer programs designed to create and process graphic information. Adobe Photoshop is the biggest whale in the sea of graphic editors. It allows you to process photos, create book and magazine illustrations at a high professional level.
Photoshop mainly works with raster graphics, although it can handle vector images as well. Most often, such images are obtained using a digital camera, by scanning an image, or by “capturing” a video frame.
A raster image is a matrix of colored dots. Raster images require a large amount of memory to store. Such images are difficult to scale and edit.
The main parameters of a bitmap image are:
image size (in inches, centimeters, points, peaks, etc.);
resolution (number of pixels per unit size);
color depth (number of bits per pixel).
Tasks
In the left corner is the toolbar - these are the tools of your work. With these buttons you will select, move, transform and color your image. When you press any button, it becomes active - this element is selected. Not all buttons fit on the panel - some are hidden. Select the Rectangle Selection button. Click and hold your mouse on the little triangle in the bottom right corner of the button - you'll see that there are actually 4 different selection methods hiding there.
3. On the right side of the screen are PALETTE. There are only 13 palettes and they are combined into several groups. If the palette is not on the screen, it can be called up via the WINDOW menu. Each palette has a menu, which is called by the right arrow.
So that the palettes do not interfere with viewing the image, they can be removed with the SHIFT + TAB keys. The same keys will return the palettes to their place.
Pay attention to the palette Color . It allows you to set the foreground color and background color. The corresponding color can be selected by moving the sliders R (for red) G (for green), B (for blue). You can enter a numeric value for each color, or simply click the eyedropper to sample the color.


Create a new file with the menu command FILE - NEW. In the dialog box, specify the parameters with which the document will be created:

A new 300 x 300 pixel document with a resolution of 72 pixels per inch has appeared, with the background layer filled with white. Working with a document without seeing its actual size is quite difficult, so you should turn on the ruler guides (VIEW - GUIDES or CTRL + R).
Select the tool " Brush". Using the palette Color”, select the color of your brush (for example, light green). Use your mouse to write the word Photoshop at the top of the window.
Apparently it didn't work out too well.
D  To align objects with lines, set image boundaries, check vertical and horizontal lines convenient to use guides(solid blue lines). Click on any ruler and drag the pointer down or to the right. Guides can be moved using the " moving". In order not to accidentally move the guides during operation, they can be fixed (VIEW - FIX THE GUIDES). You can temporarily hide them in VIEW - SHOW - GUIDES, or delete them (VIEW - CLEAR GUIDES).
Set some guides and try to write the text again (select the brush color - dark blue).
It is also convenient to work with the included grid: VIEW - SHOW - GRID.
For change scale images serves panel Navigator . On this panel, you can view the entire image in a thumbnail view. The part visible in the window is marked with a red frame. You can change the scale directly by entering a percentage value, smoothly moving the slider, or clicking on the buttons Decrease And Increase .
Magnify the image by 2 times (200%).

Choose a tool Brush and try to draw. (To clear the entire image, use EDIT - FILL - USE - WHITE or SELECT - ALL - Delete.)
Pay attention to the properties panel at the top of the screen.
Here you can choose another tool,form brushes, mode,turbidity,flow and enable features atomizer.
Try working with different brush shapes: hard round, soft round, spatter(splash), chalk(a piece of chalk), star(star), grass(grass), leaves(leaves), fuzz ball(wet ball) dry brush(dry brush). Choose from a variety of brush sizes and colors.

Customize in more detail form brushes can be done using the BRUSHES palette.

brush property Turbidity (more correctly - transparency). Makes the injected color transparent (the color becomes lighter, showing through the previous image). While you have not released the mouse button (one stroke) - painting goes in an even layer.
brush property Flow . Acts like haze. But at the same time, its own trace is painted over (that is, the dynamics of the movement of the brush is taken into account).
Button Enable sprayer capabilities works if the current is less than 100% (preferably 10-20%). Holding down the mouse button in one place makes the image brighter (as if you were holding down a spray gun button).
Fill the picture field with images of different colors and brightness. Now try changing the mode:
Select a 19 px hard round brush, set the color to medium brightness (for example, dark blue), and successively change the modes, undoing each last action (CTRL + Z):
ModeNormal(Normal)
In this mode, the original color is completely replaced by the imported one.
ModeMultiply(Multiplication)
In this mode, the colors of the source and the input are "multiplied", so the resulting color is always darker than the source.
If black is introduced, the resulting color also becomes black. White color does not affect the original.
ModeScreen(Screen)
In this mode, the colors of the source and the input are "split", so the resulting color is always lighter than the source. If white is introduced, the resulting color becomes white. Black color does not affect the original.
Modeoverlay(Overlap)
This mode darkens dark colors and brightens light ones. As a result of this superposition of pixels, the contrast of the image is increased.
ModeSoftlight(Soft light)
This mode enhances or weakens the color depending on the applied color (the result is similar to ambient light lighting)
If the input color (think of it as a light source) is lighter than 50% gray, the original color is whitened (lightened) identical to the tool Dodge (Lighter).
If the input color is darker than 50% gray, the original color is enhanced (darkened) in the same way as when the tool is working Burn (Darker).
Using pure white or pure black lightens or darkens the original color, but does not produce pure white and black, respectively.
ModeHardlight(hard light)
This mode enhances (darkens) the color, as in the Multiply(multiply), or weakening(lightening) colors as in mode Screen(Screen), depending on the applied color (the result is similar to lighting with a harsh light).
If the input color (consider it also a light source) is lighter than 50% gray, the original color is whitened identically to the mode Screen(Screen). If the input color is darker than 50% gray, the original color is enhanced in the same way as Multiply(Multiplication)
Using pure white or pure black is identical to normal mode.
The mode is very convenient for creating shadow areas.
ModeDarkens(darker colors)
In this mode, the original colors are replaced, namely, only those that are lighter than the entered one, and the points that are darker than the introduced one remain unchanged.
Modelighten(lightening color)
In this mode, the original colors are replaced, namely, only those that are darker than the introduced one, and the points that are lighter than the introduced one remain unchanged.
ModeDifference(Difference)
In this mode, the resulting color is equal to the difference in brightness between the source and added colors. As a result of this overlay of pixels, the effect of a negative image is created.
ModeHue(hue)
In this mode, the resulting color gets the color tone(hue) of the injected color, but retains the values saturation(Saturation) and brightness(Luminosity) of the original color. Try painting the image with a shade of black..
ModeSaturation(Saturation)
In this mode, the resulting color receives the saturation of the input, but retains shade(hue) and brightness(Luminosity) original. Grayscale images are not affected in any way.
Modecolor(Color)
In this mode, the resulting color is obtained with brightness(Lummosily) original but with shade(hue) and saturation(Saturation) of the input. This allows you to keep the gray scale. It is widely used for color toning of a monochrome image.
ModeLuminosity(glow)
Or rather, brightness. In this mode, the resulting color is obtained with shade(hue) and saturation(Saturation) of the original color, but with brightness introduced. In the gray scale, the result coincides with the input tone. This mode is the opposite of the mode color(Color)
ModeDissolve(Dissolution)
To see the effect of this mode, you need an additional condition. Set in the box Opacity(Turbidity) value 50%.
In this mode, the original color is replaced by the imported one with a random distribution and transparency. The result is especially noticeable with large instrument sizes. Paintbrush(Brush) or airbrush(Airbrush) and partial turbidity.
And now, using the knowledge gained, try to color the black and white image of a butterfly in the grass (file Butterfly Peacock Eye.jpg ).


Figure 1 Peacock Butterfly
MINISTRY OF EDUCATION AND SCIENCE OF THE MURMANSK REGION
STATE AUTONOMOUS EDUCATIONAL INSTITUTION OF THE MURMANSK REGION OF SECONDARY VOCATIONAL EDUCATION "KANDALAKSHSKIY INDUSTRIAL COLLEGE"
(GAOU MO SPO "KIK")
Guidelines
for the implementation of laboratory work in informatics and ICT
on the topic "Processing graphic information"
compiler: Kharchenko Ya.S.
Introduction………………………………………………………………………………………...2
1. Introduction to the program ………………………………….…………………………………...3
2. Laboratory work No. 1…………………………….……………………………………...4
3. Laboratory work No. 2 …………………………………………………………………………7
4. Laboratory work No. 3 ……………………………………………………………………… 8
5. Laboratory work No. 4 ………………………………………………………………….10
6. Laboratory work No. 5 …………………………………………………………………..13
7. Laboratory work No. 6 …………………………………………………………………..15
8. Laboratory work No. 7 …………………………………………………………………..16
9. Laboratory work No. 8 …………………………………………………………………..18
10.Laboratory work No. 9 ………………………………………………………………….20
11.Laboratory work No. 10……………………………………………………………………23
12.Laboratory work No. 11……………………………………………………………………26
13.Laboratory work No. 12……………………………………………………………………27
INTRODUCTION
Intensive use of new information technologies is an integral part of the successful activity of specialists in various fields: engineers, economists, lawyers, managers. Currently, the most widespread information systems based on personal computers (PCs). In our country, the actual standard when working on a PC are operating system Microsoft Windows and its applications.
The laboratory workshop is designed for students of various specialties to study the main features and functions of Adobe Photoshop. The proposed tasks are a basic course for mastering the data software products and do not pretend to exhaustive acquaintance with them. Nevertheless, they allow students to develop knowledge and skills that are quite sufficient for image processing.
The topic of the lesson;
The purpose of the lesson;
Tasks;
Providing practical work:
Explanations;
The order of the lesson;
used literature.
Criteria for evaluating practical tasks.
Mark "5" set if:
the work is completed;
there are no gaps and errors in logical reasoning and justification of the decision;
there are no mathematical errors in the solution (one inaccuracy is possible, a typo that is not the result of ignorance or misunderstanding of the educational material).
Mark "4" set if:
the work has been completed, but the rationale for the solution steps is insufficient (if the ability to justify reasoning was not a special object of verification);
one significant error or two or three minor errors were made.
Mark "3" set if:
more than one significant error or more than two or three minor errors were made, but the student has the required skills in the subject being tested; at the same time, at least half of the work was done correctly.
Mark "2" set if:
significant errors were made, showing that the student does not fully possess the required skills on this topic.
Mark "1" set if:
work showed complete absence the student has the required knowledge and skills on the subject being tested or a significant part of the work was not done independently.
Introduction to Adobe program photoshop
Theoretical part
Currently, Adobe Photoshop is one of the most popular image editing software in the world. It is widely used by both amateurs and professionals.
Adobe Photoshop users - photographers, retouchers, advertising artists, illustrators, designers, architects, etc.
The overwhelming majority of illustrations are prepared for printing and publication with the help of this program, since Adobe Photoshop allows you to perform a very large number of image processing operations: for example, improving the clarity of a photo so that they do not look blurry and incorrect. Retouching tools allow you to remove scratches, dirt and damage from the image.
Editor features:
1. Create greeting cards
2. Drawing posters
3. Drawing collages
4. Drawing covers, booklets, and posters
5. Creation of graphic elements for Web pages
6. Drawing a business card
7. Create stylish logos
8. Photo retouching
9. Restoration of damaged photos
10.Change the appearance of the photo
11. Creation of animated pictures
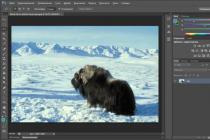
The working window of the program Adobe Photoshop:


In addition, Photoshop is often used to create collages, in which fragments of different images are merged together for unusual effects.
When working with Photoshop, you should distinguish between image resolution and monitor resolution.
Image resolution - is the number of pixels per unit length of the image. Typically, an image is measured in pixels per inch (1 inch = 2.54cm) (ppi).
For example, if the image resolution is 72 ppi, then 1 square inch of the image contains 5184 pixels (72 horizontally, 72 vertically, 72*72=5184). The same square inch of a 144 ppi image contains 20.736 pixels (144*144=20.736).
Resolution is defined when an image is digitized with a scanner, digital camera, or created in a graphics program.
The higher the resolution of the image, the higher its quality, since in this case more color shades can be transmitted.
The file size of a bitmap image depends on the number of pixels per inch. The larger the image size, the larger its file size.
Monitor resolution - the number of video pixels per unit length (in one inch). The resolution of the monitor depends on the set graphic grid size. Most often, a resolution of 72 video pixels per inch (dpi) corresponds to a graphic grid of 800 * 600, and a resolution of 96 dpi corresponds to a graphic grid of 1024 * 768.
When working with bitmaps It is important to understand that monitor resolution has nothing to do with image resolution.
Practical part
Lab #1
Target:
Basic concepts
Selected area- a fragment of the image within which the editing tools operate. The selected area is bounded by a blinking dotted line.
masked area- an image located outside the selection. This area is not editable and therefore protected from accidental changes.
ToolMarquee (Region) designed to select rectangular and elliptical areas.
Group Tools Lasso (Lasso) is used to select areas of arbitrary shape.
ToolMagic wand (Magic wand)- used to highlight pixels that are close in color.
Image cropping- cropping the image (removing unnecessary fields, fragments of the environment, etc.).
Task number 1: Create a vignette to decorate your photo.
Launch Adobe Photoshop using the icon

Open a photo - a portrait Portrait .jpg using the "Photoshop Pictures" folder located in the folder My documents are my drawings. The program window should look like this:

Select a tool from the toolbar Ellipti fromal Marquee (Oval area).


Feather the photo by selecting in Menu expiration date– Selection - Feather. Feathering will create a smooth transition between the pixels in the selection and the pixels surrounding the selection.

Enter in the field " Feather selection» value 10.

6. Run the command Selection - Inversion. The selected and masked areas will swap places.
7.Press the key Delete , to delete the selected area.
8. To remove the selection, run the command Selection - deselect.
9. Before you - a photograph with a feathered vignette.

10. Save the image to your folder, naming it "Portrait".
Task number 2: Apply your own photo to your work and create a vignette.
Lab #2
Target: Learn how to edit low-quality images and arrange them.
Task number 1: Create a photo with a sepia tone.
1.Launch the Adobe Photoshop program using the icon
2. Open the photo you took in the previous lesson.
3. Run the command Image - Grayscale mode.

The color photo will turn into a black and white image. Now let's replace the shades of gray with two colors - black and brown (this is sepia). In general, a black and white image can be illuminated with three or four colors.
4. Run the command Image - Mode - Duplex. In the window that appears, select "Two-color".

5.Select the second type of paint Pantone 1545 C by clicking on the white box:

In the window that appears, find the color type Pantone 1545 C :

Click the button OK. On the screen, you will see an image with a warm sepia tone, embellished with a feathered vignette. Thus, you can make photos "antique".
Save the photo.
Task number 2: Apply your own photo to the work. Age her.
Lab #3
Target: Learn how to edit low-quality images and arrange them.
2.Open the Fruit file.
3.Using the tool Lasso, in
Select only the red apple
along the contour.
4. Make 2 copies from the selected apple. To do this, with the apple selected, press and hold the key

5. Copy the yellow rose 3 times. After the changes, the drawing should look like this:

Task number 2. Open the yellow file. Perform copy and paste operations so that the drawing looks like this:

Lab #4
Target: learn how to make a collage
Basic concepts:
Collage- a combination of several fragments of different images in one.
Layer- an analogue of a sheet of transparent film on which a drawing is applied. If you fold such sheets in a stack, you get an image of several drawings. It can be argued that the image on the layer is an analogue of a vector graphics object.
Background layerbackground- the farthest.
Basic operations on layers- deleting, moving, rotating, scaling, changing the order of layers, transferring image fragments from one layer to another, merging layers.
PanelLayers (Layers) used to work with layers. It displays information about the layers of the active document. In addition, this panel allows you to perform various operations on layers.
Task 1: Create a collage.
1.Launch Adobe Photoshop.
2.Open the file " Seasons ».
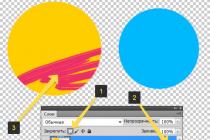
3.Open the " Layers" ( in the main menu, select the "Window" option, check the box layers). Note that the Layers panel contains only one background layer.


4. Open the file " bird ». There is only one layer in this document, on which the image of a bird is located. In this case, the transparent areas are presented in the form of a checkered pattern.

Transparent areas
![]()


Press the left mouse button, and without releasing it, move the cursor to the Seasons document window. Release the mouse button. A new layer has appeared in the Seasons document, which shows a bird from the Bird document:
7. Open the leaf file with a leaf image.
8. Move the sheet to the Seasons document:

9.Open the file " Flower". Using the tool Lasso,

highlight the flower along the outline. Execute the command Editing - copy.
10. Activate the window " Seasons"(Click on it with the left mouse button). Execute the command Editing - paste. The image that should turn out is presented below:

Task 2: Create your own collage using different pictures.
Lab #5
Target: Learn to edit images
Basic concepts:
Main color(foreground color) - the color that is used for drawing, filling selected areas, and also as the initial color of the gradient.
Background color(background color) - the color that appears when pixels are removed from the image.
By default, the foreground color is black and the background color is white. The colors of the front and back plans are indicated in the color fields on the toolbar.

ToolPencil (Pencil) allows you to create lines with hard borders.
ToolBrush (Brush) used to draw lines with a smooth, blurry outline.
ToolEraser (Eraser) erases unnecessary parts of the image by painting them with the background color.
ToolPaint bucket (Fill) is used to fill parts of an image with a uniform color or pattern.
ToolGradient (Gradient) is designed to create fills with smooth transitions between different colors.
Toolsmudge (Finger) used to offset and blend the colors of adjacent pixels.
Properties panelOptions (Parameters) contains information about the parameters of the selected tool.
Pixel blend mode- a way of interaction between the pixels of the source image and the drawing tool.
Task 1: Colorize a black and white photo
2.Open the file " dog". You need to choose the right colors and paint over the dog and the bowl with the bone.
3.Select a dog with a bowl and clouds.
4.Run the command Layer - New - Layer through clipping.
5. Select the dog. Choose a tool Brush. Set the main color to brown. Paint over individual areas of the dog on the dog's body, but do not completely paint over.
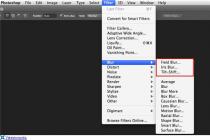
6.Run the command Filter - Blur - Gaussian Blur. The Gaussian Blur dialog box opens.
Experiment by moving the scale control " Radius". You will see that the higher the value, the more the colors are blurred.


7. Select the tip of the nose, and then the eyes and paint over them.
8.Select the clouds. Color them blue.
Task number 2 Colorize a black and white photo
1.Launch Adobe Photoshop.
2.Open the file "MyGirl". Let's convert the photo into a multicolor image. To do this, run the command Picture - Mode -RGB -color.

3.Using the tool Lasso select areas of the face and hands. The properties panel for that tool opens. Set field value on this panel shading equal to 2 pixels.


4. Select skin color as the main color.
5.Run command Editing - Fill. The Fill window will open.

Fill it out as shown above.
The hands and face of the girl will be painted in flesh color.
6.Now paint over the hair. Set the value of the field "P astushevka "- 5 pixels.
7. Color the bow. Set the value of the field "P astushevka - 3 pixels.
8. Select the girl's dress (do not forget to do a little feathering of the borders of the area). Select dark purple as base color dark purple (eg R=102, G=9, B=123) as base.
9. Paint over the table.
Task number 3: Colorize the file yourself Bear .
Lab #6
Target:
Task number 1: Creating a frame for a photo.
1.Launch Adobe Photoshop.
2.Open the file " truck ».
3. To surround the image with a frame, select the area that will fit into this frame

4. Run the command Selection - Invert.
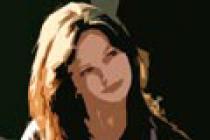
5. To make the frame appear, execute the command Filter -texture - Mosaic Tiles . Deselect the command Selection - Remove selection. You should end up like this:

Task 2: Open the file " Lizard". Decorate your photo with a frame of your choice.
Lab #7
Target: Learn how to draw pictures
Basic concepts:
Artistic text used to create small pieces of text, such as labels and headings.
Plain text used to create text documents.
Polygraphic parameters of the text- font, style, size.
Layer- an analogue of a sheet of transparent film on which a drawing is applied. If you fold such sheets in a stack, you get an image of several drawings.
PanelLayers (Layers) used to work with layers. It displays information about the layers of the active document. In addition, this panel allows you to perform various operations on layers.
gradient fill- a fill consisting of several color transitions.
Filter- a special module focused on creating a special effect.
Shell- a closed curve in which the text is placed, and the shape of the text is adjusted to the contour of this curve. In Photoshop, shell shapes are predefined.
Photo editing - a realistic image composed of fragments of several photographs.
Task number 1. Add artistic text to the image.
Launch the Adobe Photoshop program.
2.Open the file « Seasons ».
3. Select a tool type (text).

The cursor will change to look like the letter "I". On the properties panel Options (parameters) text options will appear
4. Select Times New Roman font, select Bold font style (bold), enter font size (eg 60pt), select font color (eg red).
5. Click in the part of the document where the first letter of the text should be (for example, on the light background of the image).

Enter the text XXI in the text input field. The result is shown below:
Task number 2. Create a shadow for the layer.
1.Launch Adobe Photoshop.
2.Open the file « Leaf ».
3. Using the Lasso Tool, select the sheet.
4. Run the command Layer-effects-layer-shadow. In the "Layer style" window, set the parameters as in the figure below:

5. Click OK.
Lab #8
Target: Learn how to mount an image
Task number 1. Mounting photos.
1.Launch Adobe Photoshop.
2. Open files « FROMAT", "Portrait", "Window".
3.Reduce the size of the picture « portrait ». To do this, run the command Image is the size of the image. Set the image values as shown below:

4. Using the tool Lasso pick a girl.
5.Copy the image ( Edit-copy).
6. Activate the window with the picture « Window ». To make a collage, select a tool Magic wand. Select parts of the window with it as shown in the figure:


6. In order for the girl to be displayed in the window, run the command Image - insert B. You should get as shown in the picture below.

6. Now let's add a cat to the collage. Reduce the size of the "CAT" picture using the settings below:

7. Select the kitten and move it to the window as shown in the picture:

7.Activate the window with the picture « CAT », make a kitten display. To do this, run the command Image-Rotate Canvas - Horizontal mirror image of the canvas.
8.Copy the kitten and paste it into the window « Window ». You should end up with an image like this:

Task number 2. Create a "Twins in the Car" montage using the files Newcolor , truck Andcat . In this case, one boy should be in the back of the car, the other in the cab, and a kitten should sit on the steps of the car.
Lab #9
Target: Learn how to tone correct
Basic concepts
tone range- brightness range of image pixels. The darkest shade corresponds to the brightness of O, and the lightest - 255.
bar graph- a graph of the distribution of pixel brightness. The horizontal axis is the brightness values, and the vertical axis is the number of pixels for each brightness level.
Shadows- the darkest part of the image with low brightness values.
Light colors (lights)- the lightest part of the image with high brightness values.
midtones located between shadows and light tones.
black dot is the darkest pixel in the image.
white dot- the lightest pixel in the image.
Gamma- - the contrast of the midtones of the image. Gamma range - from 0,1 before 9,99.
The main task of tone correction- ensure the correct distribution of pixel brightness in the image.
Tone correction commands: Brightness / Contrast (Brightness / Contrast), Levels (Levels), Curves (Curves), Auto Levels (Automatic tone correction).
Task 1: Tone correct a dark photo.
1.Launch Adobe Photoshop.
2. Open file « hengehog ».
3.Copy the picture of the hedgehog.
4. For the copied image, run the command Image-adjustment-levels.
5.In the opened dialog box Levels move the gray slider to the left:

![]()
The midtones of the image will lighten up. Average input field Lead levels the gamma value is displayed ( gamma is the contrast of midtones). In our example, it should increase to 2,94. Since the brightness of the monitor is different for everyone, this value may be slightly more or slightly less. Thus, the photo will become lighter and details that were previously invisible will appear in it.
6.Compare the result with the original image.
Task number 2: Perform tone correction of a light photo.
1.Open file « Fox ».
3.Tune the photo ( the value of the input levels should decrease to 0.30)

4. Compare the result with the original image.
Task number 3: Perform automatic tone correction.
1.Open file « truck ».
3. For the copied image, run the command Image - adjustments - autocolor.
4. Compare the result with the original.
Task 4: Tone correct a dark image using the Curves command.
1.Open file « hengehog ».
2. Create a copy of the image.
3.Run the command
4.A dialog box will open Curves.
a control point appears on the curve.

![]()
5. Place the mouse cursor on the control point and move it to the top and to the left:

6.The image will brighten.
Comment: you can put several control points on the curve and with their help adjust the appearance of the curve and, therefore, the brightness of the image.
Task #5: Tone correct a light image using the Curves command.
1.Open file « Fox ».
2.Create a copy of the image.
3. Run the command Image-adjustment-curves.
4.A dialog box will open Curves. Click the left mouse button in the center of the curve.
A control point appears on the curve.
5.Perform image tone correction.
Task number 6: Perform tonal correction of a dim image using the Curves command, using the Truck file.
Task number 7: Perform tonal correction of the image using the Lizard file.
Make 5 copies of the original file. Apply different tone correction commands to each image.
Task number 8: Perform tonal correction of the image using the BigCat file.
Task number 9: Perform tonal correction of the image using the Roses file.
Make 4 copies of the original file. Apply different tone correction commands to each image.
Task 10: Perform tone correction of the image using the "Tools" file.
Make 4 copies of the original file. Apply different tone correction commands to each image.
Lab #10
Target:
Basic concepts
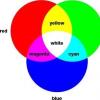
Color circle- a diagram that shows the relationship between the basic colors of the RGB and CMY models.

blue
The relationship of color models RGB and CMY is as follows:
1. Colors lying opposite each other on the color wheel (the line connecting from passes through the center of the circle) are mutually related: a decrease in the content of one color leads to an increase in the content of another color and vice versa.
2. Each color on the color wheel is defined as the sum of adjacent colors to it. The content of any color can be changed by influencing the colors adjacent to it.
Color correction feature changing one color causes the other colors in the image to change.
The main task of color correction is adjusting the color balance (ratio of colors in an image).
Task #1: Adjust the color balance.
1.Open file « CAF É».
2.Run command Image-duplicate. 2 identical photos will appear on the screen. Correct the copy and compare the result with the original.
3.Run the command Image-adjustment-color balance. Let's remove the excess bluish tint, for this, in the dialog box that opens, check the box
"Bright hues".

4.Move the top slider to the extreme right position, corresponding to the minimum amount of blue.

![]()
Task number 2. change the color shades of image fragments.
1.Open file « FRUIT ».
2.Run command Image-duplicate. 2 identical photos will appear on the screen. Let's turn the yellow rose into pink, the red apple into green, and give the pear a yellowish tint.
3. Select the yellow rose along the contour. Execute the command
4. Change the position of the sliders so that the following values appear in the corresponding input fields: -84, +10, 0.

5.Press OK.
6. Deselect the rose. Select the red apple along the outline.
7. Run the command Image-Adjust-Hue/Saturation.
8. Change the position of the sliders so that the following values appear in the corresponding input fields: +90, -20, -10.
9.Press OK.
10. Select the pear along the contour. Change its hue to yellow.
11. 2 identical photos with different color shades will appear on the screen.
Task 3.
Open the NEWCOLOR file. Change the color of the boy's suit.
Task 4.
Open the CAFE file. Change the color of the chairs.
Task 5.
Open the IRIS file. Change the yellow Hues of the flower to purple.
Lab #11
Target: Learn how to draw pictures
Basic concepts
Retouching - sharpening and elimination of small image defects.
Task number 1. sharpen images using various sharpening filters.
1.Open file « FRUIT ».
2.Run the command Image-duplicate.
3. On the copied image, select the yellow rose.
4.Run the command Filter-sharpness-sharp edges. Sharpness (clearness) will increase slightly.
5.Now let's use another filter. Execute the command Editing - cancel Sharp borders.
6.Run the command Filter - Sharpen - Sharpen. The contours of the rose petals will become clearer. Function Do clearer enhances the sharpness of outlines and does not affect areas of the image with smooth color transitions.
7.Compare the result with the original and close the copy.
Task number 2. Eliminate small defects from the photo.
Open file « FRUIT (if it is closed).
Make a copy of the drawing.
If you pay attention to the lower left corner, you will see a defect that needs to be removed.
Using the tool Rectangular area select a fragment of the image with a defect.
Execute the command Filter - Noise-Dust and scratches. A dialog box will open Dust and scratches. Field Radius defines the size of the area that is used to average the colors of neighboring pixels. The smaller the field value Border, the less the colors of neighboring pixels differ from each other, and vice versa. Combining different values in the fields Radius and Border, you can quickly remove dirt and scratches from photos.
Set field value Border equal to 12, and the value of the field Radius - 16.
Click OK. The defect has been fixed.
8. Compare the result with the original and close the copy.
Task number 3. Eliminate a defect from a photo with the Stamp tool.
Set the stamp size. Choose a brush (stamp tip) with soft edges of a small size, for example 30.

Now let's choose the right sample. In this case, you can use the area of the image located slightly below or above the defect, since the illumination of the pear changes little vertically.
Let us move the courses above the defect by a distance approximately equal to the height of the defect.
Press the -ALT key - and do not release it, move the mouse cursor just above the defect and press the left mouse button.

Release the –ALT - key, move the mouse cursor to the defect and press the left mouse button. The defect has been eliminated.

10. Compare the result with the original and close the copy.
Task number 4. Open the gerl file. Remove the shadow from the girl yourself.
Lab #12
Target: Learn to work with images
Task 1. Lighten a fragment of the image with a tool.
1.Open file « FRUIT ».
2.Run the command Image-duplicate. 2 identical photos will appear on the screen.
3. Select clarifier. On the property bar of this tool, select a soft-edged nib, such as 65.
4. Remove all the shadows in the picture. Do not close the file.
Task 2. Darken a fragment of the image.
1.On an open file « FRUIT » darken the image .
2. Select from toolbar Blackout(in the toolbar it is hidden behind the Dodge tool). In the property panel of this tool
set the value to 20% in the "Demo" input field.
3. Select a small brush, set the Brush value to 15.
4.Make a shadow for the apricot and its shadow.
Instructional - technological map
Practical work No. 11
Topic: Technologies for processing graphic information in a personal computer
Job Title: Photo retouching.
Objective: learn basic image retouching techniques using the Stamp, Spot Healing Brush, and Patch tools.
Acquired Skills: create and edit graphic objects using programs for processing raster and vector graphics.
Safety precautions: instruction number 2
Working hours: 2 hours
Means of education:
Equipment and materials:PC, projector, interactive whiteboard, photo clipping
Technical training aids (TCO):raster editor Adobe Potoshop, text editor MS Word.
Questions for self-examination:
What is retouch?
What types of retouching are there?
What tools are used for technical retouching?
What tools and techniques can be used for artistic retouching?
Theoretical part
Retouch- this is a change in the initial photo, in order to hide certain imperfections, for example, imperfect skin, unwanted objects in the photo or various kinds of scratches and much, much more.
Retouching is technical and artistic:
1. Technical retouching– it allows you to remove the so-called technical flaws in photos in the form of scratches and scuffs
2. Artistic retouching- allows you to remove some unnecessary elements from the photo, as well as make various kinds of cosmetic corrections.
Practical part
Perform artistic retouching
Work progress
Open the original photo.
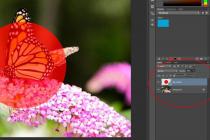
Create a new layer, this gives you the flexibility to use the retouching tools, because if something goes wrong, you can easily fix problem areas by simply erasing bad areas with an eraser and then retouching again. In addition, you can change the blending mode of this layer, reduce the opacity, blur, etc. etc.
To create a new layer, just click on the second icon from the right in the Layers palette.

Take the Healing Brush tool. Healing brush settings (make it active and right-click on the image): set the angle value to about 135 degrees, and the shape to about 80%. We set the hardness to about 50-60%, if you apply zero hardness, then the work of the healing brush will be noticeable. Be sure to check the box alignment"and in the field" Sample" - "All layers". Now after adjusting the brush, carefully remove all imperfections on the skin. Hold down the key alt, click next to the flaw on the skin (take a sample), and then click the tool on the flaw itself. The more often you take a skin sample, the better the retouching will turn out, and the sample must be taken from all sides of the flaw, while the brush size should be slightly larger than the flaw itself. Let me remind you that you can quickly change the size of the brush using square brackets ( [ - reduce the size of the brush, ] - increase). The Healing Brush can be used on any area of the skin, with the exception of places close to contrasting borders. In these places, when using a healing brush, it turns out not retouching, but some kind of dirt. This is where you need to use the tool Stamp» ( S). The method of using it is no different from the method of using the healing brush.

To eliminate major flaws, it is better to use the tool " Patch". Since the patch on an empty layer does not work, we create a copy of the main layer, for which we drag it to the second icon on the right in the palette " Layers".

Choose " patch"in mode" A source".

We circle the big disadvantage. Moreover, it is extremely undesirable to make even edges, the less smoothed edges you make, the less retouching will be noticeable.

We click the left mouse button inside the selection and, without releasing it, drag it to an area of smooth skin that does not have imperfections. Release the mouse button.

This is how the skin should turn out after working with a restoring brush and a patch.

Compare the image of the girl before and after photo editing in photoshop.

Note: to move from one tool to another that are in the same group, you must hold the key Shift and alternately press the hot key to change the tool. For example, to move from the Healing Brush to the Patch, you need to hold down the Shift and press hot key J. But you can do the same, but without the key Shift. To do this, go to the Photoshop settings - " Editing - Settings - Basic or press the keyboard shortcut Ctrl+K.

On the tab " Main"uncheck" Change tool with Shift key"and press" Yes". That's it, now you can change tools using a hot key without using Shift.

Task 2
Glamor retouching
Glamor retouching- one of the methods of processing photographs by professional designers and retouchers, which allows you to hide some of the flaws on the face of the model, as well as give it a special charm, attractiveness and "glamor".
The secret of real glamorous retouching is that defects are not removed, but only smoothed (blurred), and, most importantly, skin texture is preserved. The point is that if you simply blur the flaws and roughness, then the glamor effect will not work. The face will become puppet and inanimate. Therefore, you need to return the pores using one of the image channels, where they are most visible.

Image 1: Before and after glamor retouching in Photoshop.
Express retouching in photoshop in two layers.

BLURING. Duplicate the background layer, Backgrownd. Now let's use the filter group Blur – Gaussian Blur (Gaussian Blur) with a radius of 25-30 pixels to make the outlines fuzzy. Don't worry about the blurry image. This blur will be the basis for smoothing skin imperfections. True, it completely destroys the texture of the skin and pores. The face becomes doll-like, but we don't need it. For now, hide the blurry image behind a mask: Layer Layer mask Hide all…

WE RETURN THE LEATHER INVOICE. Go to the Background layer in the tab - Channels. Highlight (Select all) red or green channel. Select the channel where the pores are visible. Go to the Layers tab and copy the background, pasting it on a new layer above the blurred one. Now apply a filter Other high pass (Color contrast) with a radius of 3-5 pixels to the layer to highlight skin pores and other texture elements. Assign the layer blending mode Soft light (Soft light), you will see how the contour sharpness has increased. Attach this layer to the mask layer below by pressing Alt + click between layers. The sharpening effect is hidden behind the mask.

WE BRING GLAMOR. Take a soft white brush - hardness 0%, opacity 30% and start gently moving over the mask in the necessary places. Blurring will appear, and the attached channel will show texture and reduce the appearance of gray in the shadows. You can reduce the blur effect by adjusting the transparency of the layer. And increase the sharpness of the texture, for example, by blending mode (Overlap).
Independent work
Do your own portrait and glamor photo retouching (files: retouch1 and glamor retouch).
Task for the report: the report shows all stages of the work in the form of screenshots.
Homework: perform glamorous retouching of your own photo.
In this lesson, we will consider elementary file operations in Photoshop: launching the program, opening and closing files, saving the edited image. The simplest actions in the Photoshop environment are considered: obtaining information about the image and the document, selecting the viewing scale, moving the image in the document window.
Share work on social networks
If this work does not suit you, there is a list of similar works at the bottom of the page. You can also use the search button
Other related works that may interest you.vshm> |
|||
| 9755. | Lessons on the uneven bars. Classes on a gymnastic goat | 103.95KB | |
| Physical education is very important for a person. That is why they stand or hang so that the person in the lowest position does not touch the ground. To pump the oblique muscles of the press, raising the legs with a turn of the torso or spreading the legs to the sides is performed. For push-ups, both parallel and angular bars are suitable. | |||
| 14709. | Adobe Photoshop | 964.56KB | |
| A layer in Photoshop is an infinitely stretching workspace in all directions. Layer and Workspace in Photoshop The layer is not limited to the workspace. A layer in Photoshop is an infinitely stretching workspace in all directions. Normal layer A normal layer is a virtual surface. | |||
| 17917. | Multiple Balloons in Adobe Photoshop | 511.51KB | |
| Adobe Photoshop is the most popular graphic editor for raster images, ahead of photography. Wine is one of the main tools of computer designers, zocream, web-site retailers, artists, map retailers, photographers. A software product that occupies a market niche with it cannot compete with it. Therefore, the topic of developing this software security is relevant and timely. | |||
| 18993. | Color correction in Adobe PhotoShop | 656.84KB | |
| Spreadsheets are compiled for models, so they allow you to designate how information should be given in the model, how to submit and how the program is guilty of manipulating data. The model is presented in mathematical terms, showing the blue of important changes that characterize the whole situation in business. | |||
| 11850. | Development of an electronic textbook on the graphics editor Adobe PhotoShop | 5.07MB | |
| Firstly, it allows the learner himself to choose both the time and place for learning; secondly, it gives an opportunity to get an education to people who are deprived of receiving traditional education for various reasons; thirdly, to use new information technologies in teaching; fourthly, it reduces the cost of education to a certain extent. Thus, the development of information technology provides ample opportunity for the invention of new methods of methods in education and thereby improve its quality. All study material must be presented ... | |||
| 6068. | The subject and tasks of the theory of telephone messages (teletraffic). Telephone load, call flows and service device occupation times | 74.09KB | |
| Telephone load, call flows and service device occupation times. The explanation lies in the fact that subscriber lines, even in the daytime when the largest number of calls are made, are used on average by no more than 20, that is, they are not used for 80 hours. The use of communication should be convenient for subscribers, so it is necessary that the need to repeat calls due to the fault of the telephone network occurs infrequently and the waiting time for establishing a connection is small. Mathematical model includes... | |||
| 592. | Theoretical foundations and practical functions of the BJD | 16.01KB | |
| In other words, traditionally, in this scientific direction, mainly only the local system of life activity is considered as forming a kind of security foundation for a system of a higher level, the so-called global system of life activity. Accordingly, it is possible to single out the space of local life safety, which is part of a more general space of global life safety. In addition, speaking of local life safety, it should be borne in mind that in ... | |||
| 712. | Life safety. Practical work | 448.98KB | |
| Neuropsychic overloads are divided into: mental overstrain; intellectual loads; solving complex problems; perception of information signals and their evaluation; distribution of functions of other persons, taking into account the complexity of the task; work in conditions of time pressure; overstrain of analyzers sensory loads: long duration of concentrated attention a large number of volumes of simultaneous observation; the small size of the objects of distinction with a significant duration of concentrated observation; work with optical instruments; ... | |||
| 11260. | Practical guides to journalism in pre-revolutionary Russia | 17.48KB | |
| The appearance of the first practical manuals on journalism must be considered in the context of quantitative and qualitative changes in Russian journalism in the second half of the 19th - early 20th centuries, which were predetermined by the general development of the country, primarily by changes in the conditions of economic and social life. | |||
| 998. | Practical recommendations for resolving and preventing conflicts in TELEFON LLC | 54.56KB | |
| A special place in a series of crisis CURVED is in contact with other people. The tasks set during the performance of the work are as follows: CROPPED work involves the use of a number of general scientific methods of research: the transition from the general to the special and specific combination of analytical methods of cognition with the synthesis of its results, inductive and deductive approaches in the study of the sociological method, etc. The main and CUT are analyzed. Conflict is the quality of interaction between people or elements of the internal CUT Conflicts interfering ... | |||
Sevastopol station of young technicians
Department of Information Technology
Collection
practical work
by graphic editor photoshop
Sevastopol
2015
Target - provide students with a collection of practical work that allows them to effectively consolidate theoretical knowledge in practice.
The manual contains work on the graphic editorphotoshop.
All works in the collection are offered in order of increasing complexity. The collection has a modular structure.
The collection of practical works was compiled by the SYUT methodologist:Shatrov A. A.
Practical work No. 1
Copy the given tools into a text editor and next to each of them sign its purpose, method of application.


![]()
![]()
![]()
![]()
![]()

![]()


![]()


![]()

Practical work No. 2
In the graphic editorphotoshop

Practical work No. 3
In the graphic editorphotoshopcreate 5 files (1.8 by 3). In each of them draw the following flags using the selection and drawing tools.

Practical work No. 4
In the graphic editorphotoshopscan next photo. Using the removal tools, selection frames, brushes and palettes, edit the image so that only the flags remain visible. The background must be white.

It is necessary to align the flags horizontally and place the flags in the second row symmetrically in the center relative to the 1st row.
Practical work No. 5
Scan an image. Edit with the graphic editor tools and color using the palette.

Practical work No. 6


Practical work number 7
In graphic Photoshop editor you need to edit the image.

Create a new layer. Name it "Background". Fill it with a gradient. Put the "Background" layer under the main image layer. Go to the outline layer, select and delete all unnecessary. Adjust the contour lines where necessary (if you do not do this, the fill and gradient cannot be applied to the image element).
Using tools: fill and gradient colorize the image. When painting the workpiece, use no more than three colors. Colors must be chosen so that they look harmoniously against the created background.
Practical work No. 8
In the graphics editor Photoshop, you need to edit the image.

Create a new layer. Name it "Background". Fill it with a gradient. Put the "Background" layer under the main image layer. Go to the outline layer, select and delete all unnecessary. Adjust the contour lines where necessary (if you do not do this, the fill and gradient cannot be applied to the image element).
Using tools: fill and gradient colorize the image. When painting the workpiece, use no more than three colors. Colors must be chosen so that they look harmoniously against the created background.
Practical work No. 9

Practical work No. 10

Practical work No. 11
Using one of the proposed blanks, create a frame for the sheet in A-4 format. When doing work, use the copy method or stamp (both methods can be combined).

You should end up with a frame that looks like this:

Practical work No. 12
In a graphics editor, you need to colorize a black and white photo.


When editing a photo, use filters and color balance adjustments or curves, whichever is better for you.
Practical work No. 13
Scan your (take a photo) photo using layers, transform it according to the given picture.

Practical work No. 14


Create a background and place the main figures on it, sign the work.
An example of a finished composition:

Practical work No. 15
In the graphics editor Photoshop, mount the image.
Raw material:

Possible work option:

Practical work No. 16
Check color reproduction by changing color channels. IN text editor create a matching table.

Practical work No. 17
Using blanks, create a calendar in Photoshop graphics editor.

Convert canvas size to formatB-5.
Practical work No. 18
Edit the photo in a photo editor.


Practical work No. 19
Create a composite (composite image). Apply filters to it. Create a background. Add a text inscription to the resulting composition.

Practical work No. 20
Create an image in a graphics editor.

Practical work No. 21
In the Photoshop graphics editor, create a congratulation. When you design the work, use the frame from work No. 9.
Possible work option.

Dear Zoya Vasilievna!
Happy Birthday!
Happy birthday to you,
From a pure heart we wish
Good health for many years
May you always be with you in life
Love and tenderness, affectionate word.
Earthly happiness, bright, great.
Success, understanding
Among friends, colleagues - recognition.
May your hopes and dreams come true
And on this day - flowers for you!
Neptun LLC team
Sevastopol
2004
Practical work No. 2 2
Create a vignette in Photoshop. The first page should contain a large photograph placed in an oval frame. On the second page are small photographs of the group with inscriptions. The first row is occupied by photographs of teachers. Place both pages on A-4 size.
Practical work No. 2 3

Unlock the image layer and make a copy of the layer. Right-click on the new layer and select Blending Options. In the window that opens, in the "Mode" field, set the value to "Lightening". Use the Opacity option to edit the strength of the applied effect.
Select the sky using the selection tools. Using the Brightness and Contrast tool, we achieve maximum clarity.
You should get:

Flatten the layers and save your work.
Practical work No. 2 4
Spend color correction photographs (need to be lightened).

Practical work No. 2 5
Edit the portrait.
First you need to crop the portrait so that you get an image like in Figure 2. Rice. 2
Convert the image to black and white. To do this, we use with you “Image” -> “Correction” -> “Channel Mixing”.
Check the box "Monochrome". The Red channel is 30 and the Green channel is 70. If you set other parameters, then the sum of the values in all channels must be equal to 100.
Apply the settings. You should end up with an image like Figure 3.
 Rice. 3
Now let's take care of the eyes. The eyes are very dark in the photo and need to be lightened. To do this, take the Dodge tool, change the brush. You will need a blur brush. Set the brush size so that it is comparable in size to the size of the iris. Additionally, for the brush, set the "Range" - midtones and "Exposure" - 10-12%.
Now, with a few clicks on the eyes, lighten them up. To not be very scary, you need to edit the pupils. To do this, we need to darken a little with the help of the “Dimmer” tool. Tool settings are selected by analogy with the previous one.
Now let's deal with bruises under the eyes. Use the Lasso tool to roughly select the bruises. Press CTRL + H to hide the selection line - this will make further editing easier.

Rice. 4
Use the Curves tool or the Color Balance tool to edit the hue of the selection.
After that, select a smaller area and do similar manipulations with it.

Rice. five
As a result, we should get an image, as in Figure 6.

Rice. 6
Now we need to duplicate our layer twice. This can be done in the layers palette.
For the top copy of the layer, specify the parameters: "Darken" and opacity - 35%.
For the bottom copy of the layer, specify the parameters: "Lightening" and opacity - 55%.
Figure 7 and 8 show the settings for the layers.
Now you need to apply the Gaussian Blur filter to the top layer. With the "Radius" parameter of 15 pixels.
Apply the same filter to the bottom layer. Only with the "Radius" parameter of 20 pixels.
See Figure 9 and 10 respectively.
Let's create a new layer.
Turn off the visibility of the original layer, press the " Alt" key and at the same time press the key combination " shift" + "Ctrl" + "E". Turn on the original layer and turn off the light and dark copies of the layers at the same time. As a result, we should get a photo, as in Figure 11.
 Rice. eleven
Now we will select the “opacity” parameter of the top layer, so that the skin tone is smoothed out, but at the same time, so that it does not look over-smoothed, fake. The parameter value is approximately 30-40%.
Figure 12 shows what we should end up with:
 Rice. 12
Now you need to add a mask to the top layer. To do this, select "Layer" - "Layer Mask" - "Hide All". Select a medium size brush with soft edges and set its color to white. We draw on the image with a brush in those places where it is necessary to smooth the skin (clothes, eyes, lips, eyebrows, etc. are skipped).
The result of the mask is shown in Figure 13.
 Rice. 13
Now you need to remove the extra layers. To do this, select "Layers" - "Run Flatten". If necessary, using the Curves tool, you can slightly lighten the entire image. To increase the sharpness of the image, it is necessary to apply the "Sharpness contour" filter (filters - sharpness - contour sharpness). The filter with parameters is shown in Figure 14.
 Rice. fourteen
The final result of the work is shown in Figure 15.
 Rice. 15
Practical work No. 2 6
Edit your photo and frame it.
original photo(see figure 1).
Use the Crop tool to cut off unwanted elements in the photo. The cropping result is shown in Figure 2. Rice. 2
Add an adjustment layer. To do this, first unlock and then copy the layer in the layers palette.
Convert the image to black and white. To do this, we use with you “Image” -> “Correction” -> “Channel Mixing”.
Check the box "Monochrome". In the channel "Red" - 100.
Apply the settings. After the conversion, you should get a workpiece as in Figure 3.
Now we need to add a new layer. For the created layer, set the parameters:Blending - darkening;
Opacity - 50%.
We take a black brush with a large radius, with soft edges. We set the Opacity parameter for it - 10-11%. We paint over everything, except for the pipe and the fallen birch in the foreground.
You should have a blur on the new layer, as in Figure 4.
 Rice. 4
Let's add another adjustment layer. See above for adding an adjustment layer. Copy should be the initial layer.
For this layer, set the parameters: - blending - clarification;
Opacity - 25-45%.
Create a layer mask.
Create a mask for this layer. To do this, select "Layer" - "Layer Mask" - "Hide All". Select a medium-sized brush with soft edges and set the parameters for it:
White color;
Opacity - 10%.
We draw on the image with a brush in those places where the birch lies.
Create another layer with the same settings. Create a layer mask.
Add an adjustment layer and apply "color balance" to it. The settings are shown in Figure 5, 6, 7.
 Rice. five
 Rice. 6
 Rice. 7
In the end, you should have the following order in the layers palette, as in Figure 8.
 Rice. 8
After all the manipulations, our workpiece should look like it is shown in Figure 9.
 Rice. nine
Now you can merge the layers.
Apply the filter "Unsharpness" (Filter - Sharpness - Unsharpness). In the filter, set the parameters, as in Figure 10.
 Rice. 10
Apply the filter "Add Noise" (Filter - Noise - Add Noise). In the filter, set the parameters, as in Figure 11.
 Rice. eleven
Now we create a file with a larger size than the resulting blank. Fill it with black. We copy our workpiece onto this black sheet and align it.
The finished work should look like Figure 12.


