Year of issue: 2011
Firmware version: 09.97
Developer: Allnokia.ru
Edition type: Modified
Interface language: Russian, Ukrainian, English, German, Bulgarian.
RM firmware: RM-561
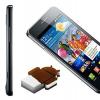
Phone: Nokia 2700
Description:
Firmware can be loaded into Nokia 2700 using the usual data-cable that comes with the kit.
Remember, flashing Nokia 2700 with firmware from another model is strictly prohibited!
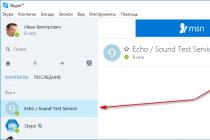
In order to determine the type of hardware and the firmware version of the Nokia 2700, you need to dial * # 0000 # in your phone.
"Installation method via Phoenix:" ▼ Attention! The battery must be charged! The best option is a full charge + plugged in charger.
1 Connect your phone to Phoenix.
A. Connect your phone to your computer (PC Suite mode).
B. Start Phoenix.
2 Create a USB connection.
A. At the top of the Phoenix window, where it says "Connections:", on the right, click on the "Settings" button.
B. At the bottom of the window that appears, click "Add".
C. In the window that appears, where Driver is written, select USB (at the very bottom of the list).
D. Then click the Scan button below.
Click again on the Scan button.
The device appeared:
After that, be sure to press the Select button.
E. Click "OK".
F. Restart Phoenix. Now at the top (ConnectionsWell select "USB".
G. Now in Phoenix click "File" -> "Scan Product". If everything is in order, your product will be shown below in the status bar.
Now is the time to back up some settings, certificates, contacts and messages (if you need to). Also copy all important data from the gallery to a memory card or computer.
3 Stitching
A. After clicking "Scan Product", a new menu "Flashing", "Testing" etc. will appear. Click "Flashing" -> "Firmware Update".
B. Now you need to select Product Code. To do this, click "..." to the right of the Product Code. If you know what code to use, then choose the one you need. If not, then choose the code like this: if you need Russian, look for one that has either "RU", or "Cyrillic", or "Russian" in its name. If Russian is not needed, choose any code.
C. After selecting Product Code, click the "Refurbish" button below. That's it, the firmware has started. The entire flashing process takes approximately 7-10 minutes. During the flashing process, it may seem that the flasher is frozen, but this is not the case. It just takes a little patience.
During the firmware we do not touch the cable and the phone, unless, of course, we want to break it. If you are flashing a smartphone, then it can be flashed in the "Offline" mode (I did it this way)
The following pictures show the actual process of flashing a Nokia phone.
If the flashing is successful, you will see the following message: "Product flashing succeeded". And your phone will automatically turn on.
That's it, the firmware is complete. You can unplug the cable and close Phoenix.
But it's not always that simple. Sometimes (very rarely) at the end of the firmware you may receive the message "... 1 of 3 items were not backed up ..." In this case, the firmware will be completed "successfully", but the main memory of the phone will be formatted. You will not have any standard melodies (except Nokia Tune), no themes, no pictures. Will not be
Dimensions: 109.2x46x14mm
Weight: 85 BC
Year: 2009 r.
General characteristics
Communication standard: GSM 1800, GSM 1900, GSM 850, GSM 900
Talk time: 6 h
Standby time: 288 h
Antenna: built-in
Battery type: Li-Ion 1020 mAh
Case design: monoblock
Display characteristics
A type: 2-inch, TFT, 240x320 pixels, 262000 colors
Touchscreen: No
Backlight: there is
Sound
Vibration alert: there is
Polyphony: there is
Silent Call: there is
Speakerphone: there is
Ringtones: there is
Additionally: MP3 file as ringtone, 3.5 mm audio output
Call management
Auto redial: there is
Call hold: there is
Call forwarding: there is
Determination of the number: there is
Voice dialing: there is
Additionally: recent calls log: automatic storage of the last 20 incoming / outgoing / missed calls.
User interface
Volume control: there is
Voice control: there is
Speed dialing: there is
Customizable profiles: there is
Organizer
Clock: there is
Alarm: there is
The calendar: there is
Calculator: there is
World Time: there is
Dictaphone: there is
Input characteristics
Backlight: there is
Blocking: there is
Joystick: 5-position
Predictive text input T9: there is
Communication capabilities
SMS: there is
EMS: there is
MMS: there is
GPRS: Class 10 (4 + 1/3 + 2 slots)
WAP: 2.0
Bluetooth: yes, A2DP
PC connection: there is
E-Mail: there is
Infrared port: No
HSCSD: there is
EDGE: there is
HTML browser: there is
xHTML Browser: there is
Additional features
Games: there is
MP3 player: there is
Main camera: 2 megapixels, maximum resolution 1600x1200 pixels
Video: possibility of filming or viewing
FM receiver: there is
Java applications: MIDP 2.0
Number of phonebook entries: 1000
Built-in memory: 64 MB
Supported memory cards: microSD
Replaceable panels: No
Maximum memory card size: up to 2 GB
QWERTY keyboard: No
GPS: No
Push-to-talk: there is
version v9.97
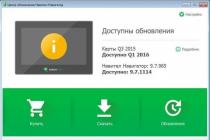
To flash your Nokia 2700 Classic phone download the firmware and flashing software NSU - Nokia Software Updater
1.
Open "My Computer" and in "Folder Options" -> "View" enable the display of hidden files and folders. Click Apply, OK.
2.
Download the firmware, it will be in .exe format. You will need to run it on your computer and select any folder for unpacking, but an empty one is better.
3.
Next, copy the files that will be in the Products and rm-313 folders to the address:
If your computer has Windows XP, drop the files here: Documents and Settings \ All Users \ Application Data \ Nokia \ Nokia Service Layer \ A \ nsl_service_module_00001 \ vpls \ www.dsut.online.nokia.com.oti.caresuite \ Products \ rm-313 \
If Vista is installed or Windows 7 then copy the files here: ProgramData \ Nokia \ Nokia Service Layer \ A \ nsl_service_module_00001 \ vpls \ www.dsut.online.nokia.com.oti.caresuite \ Products \ rm-313 \
Note: If some folders are missing, then you need to create them. The entry \ rm-313 \ can be different (as we wrote just above, the numbers depend on the model of your phone Nokia).
NSU the firmware will not be downloaded again, the software update process will start immediately. In this case, the Internet must be connected, the phone can be used as a modem. The traffic should go less than 1 mb, if more, it means that you did not copy the firmware to the NSU correctly. In this case, click "Cancel" in the program, check the address (more precisely, whether you copied the firmware correctly) and repeat all over again.
Let's look at how to reflash dead Nokia phones that won't turn on using the Phoenix utility. Screenshots are taken using the example of Nokia N8-00 phone firmware, but this procedure is suitable for all Nokia BB5 phones.
This guide is a translation of the article:
NOTE:
- This article is not intended to be a guide to action. All responsibility for the firmware of your device lies with you. Remember, you may void your manufacturer's warranty.
- The phone battery must be charged (you can check it on another phone).
- It is recommended that you close all applications (on your computer).
- Phoenix software does not check the phone software version, and if an older version is installed, the phone may not turn on; so please use the latest firmware.
- Always use the correct firmware version and check the product code on the sticker under the battery!
What do you need?
- Data cable via USB (miniUSB or microUSB).
- Nokia BB5 phone
- installed Nokia Phoenix Service Software
- suitable Nokia software
The procedure for flashing "dead" Nokia phones
1. Disconnect the phone from the cable. Make sure the phone is turned off. Remove and reinsert the battery if necessary.
2. Unpack the downloaded software into the "Products" folder in the Phoenix program directory (for example, "C: Program FilesNokiaPhoenixProductsRM-XXX").
3. Run Phoenix Service Software in Administrator Mode. (Windows Vista, 7: right-click -> select Run in administrator mode from the context menu; XP: log on with administrator rights).
From the Connections drop-down menu, select the "NO CONNECTION" connection type.

4. From the File menu select the Open Product option.

5. A window will appear in which you will need to select a mobile phone code. The product code can be found on a sticker under the mobile phone battery. (Usually it looks like RM-xxx)

6. In the “Flashing” menu, select the “Firmware Update” option.

7. A window will appear in which you need to click the "..." button in the upper right corner to select the language pack / product code that you want to reflash.

8. A selection window will appear. Select the product code / language pack you want and click OK.

9. In the Firmware Update window, check the Dead phone USB flashing checkbox to flash the "dead" phone.

10. Click the Update Software button to start the firmware update procedure.
If after updating the firmware the phone does not turn on, try running the procedure again, only instead of "Update Software" press the "Refurbish" restore button!

11. A window will appear with instructions. Follow these instructions: disconnect the USB cable, press and hold the phone's power button for at least 8 seconds, then connect the USB cable and click the OK button in the window (if this method does not work, press the OK button, then press the phone's power button and immediately connect the USB cable ).