Problems with the "firmware" of the receivers. No COM port. Laptop use
Most of the "old" computers and laptops, purchased more than 5 years ago, always had several COM ports (RS-232). At least there was always at least one "RS-232" connector.
Rice. 1. Connector on the computer case
Various external equipment was connected to it: mice, printers, modems, specialized equipment. Therefore, there were no problems connecting the receiver to the computer for “firmware”. It was enough just to connect, run the program to update the receiver software and calmly do everything you need.
In modern computers, the RS-232 connector is often missing. This is where problems arise, often very unpleasant ones. In most receivers there is no other way to "firmware" other than using "RS-232". And not all receivers have a “USB” input for connecting an external flash drive.
And sometimes there is another problem: the laptop has a "COM" port, but it works with receivers of one model, but not with others. This is due to the violation by the laptop manufacturer of the RS-232 data transfer standard. They do this in order to conserve battery power. If the manufacturer of the receiver was technically scrupulous and accurate, then a special chip for the "COM" port will be installed in the receiver. Thanks to this chip, the receiver will work with both a laptop and a computer. But installing a microcircuit increases the total cost of the product, and lately manufacturers have been saving even on these little things! Therefore, there is a problem of incompatibility between laptops and most receivers.
When using a computer, the problem of the lack of the necessary RS-232 ports is solved simply: you need to purchase an additional module with COM ports. This board installed in the computer is called "PIC-COM" or simply "COM ports board".
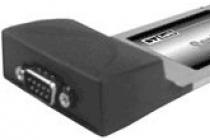
Rice. 2. PCI board for computer with two "COM" ports
If you are not strong in computers and have never dealt with the installation of additional equipment in a computer, then contact a specialist! Otherwise, you can "kill" expensive equipment.
After the board is installed in the computer, the operating system "Windows" - "OS" assigns a number to the newly installed ports, for example, "1", "2" ... "25".
When using a laptop, you cannot install a regular board from a computer: the standard and size are not the same. There are two ways to solve this problem: expensive, but high-quality, and cheap, but not fully compatible. In the first case, you need to purchase a special board with ports for the laptop. The price for these boards is high, and I did not manage to purchase this board, even under the order.
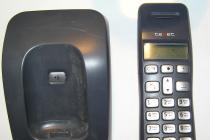
Rice. 3. Laptop board with "COM" port
And there is a catch: in the "old" and "new" laptops, there are two different standards for additional equipment! Before purchasing, check the instructions for your laptop!
If you could not purchase a board for a computer or laptop, then there is only one way out: “USB”. Almost all modern computer models have a “USB” output, at least two, or even all eight! Various "USB - COM" converters are commercially available.
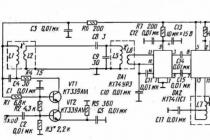
Rice. 4. Converter "USB - COM"
Rice. 5. Scheme of the converter "USB - COM"
How to solder a USB-COM adapter yourself. Option 1
How to make a USB-COM adapter yourself, which can be used to connect converters and other devices to computers that do not have an "iron" COM port.
Attention!
The adapter described below ensures that only the RX and TX signals are matched.
All other modem signals are disabled.
For most devices without hardware flow control, this is more than enough.
With Pilot VAF / MAF converters, the adapter works 100%
Go!
You will need the following parts for assembly:
1. PL2303HX (USB-USART bridge from Prolific) - 1 pc.
2. MAX232CSE (UART-RS232) - 1pc.
3. Quartz 12.00 MHz-1pc.
4. Capacitors 10 nF (smd1206) - 2 pcs.
5. Capacitors 1uF (smd1206) - 6pcs.
6. Resistors 27 Ohm (smd1206) - 2 pcs.
7. Resistors 1.5KΩ (smd1206) - 1 pc.
8. Mini-USB connector -1pc.
9. Connector DB-9 male - 1 pc.
10. Foil textolite for the board 48 * 22mm - 1 pc
Adapter diagram

Printed circuit board

Schematic and printable files in Eagle PCB Editor format can be downloaded (downloads: 791)
Assembly and setup
Here, in fact, everything is elementary - we make a board, drill 4 holes and solder all the details.
As a result, you should get such an adapter:

The board, so that it does not oxidize, can be blown out with polyurethane varnish or any quick-drying automotive varnish that is at hand.
Next, we connect this device to the USB port of the computer.
Windows will detect a new device and ask for a driver.
After feeding the Windows driver, a new Prolific COM port should appear in the system:

Now you need to check the performance of the adapter
To do this, on the adapter in the COM port connector, with a screwdriver or a wire, we close contacts 2 and 3 together (digits with pin numbers are usually stamped on the connector itself - take a closer look) Alternatively, you can solder a temporary jumper:

Launch the Hyperterminal program (Start->Programs->Accessories->Communication->Hyperterminal)
There is no hyperterminal on Vista and Seven! Therefore, you will have to go to Google / Yandex to download the hyperterminal or any of its analogues.
We select our new COM port in the connection settings:


Now we start the connection, select the English layout and try to print something.
The symbols of the pressed keys should appear on the screen:

If the letters do not appear, then check the installation
That's actually all!
Now it remains to remove the jumper from pins 2-3 and you can use the adapter for its intended purpose.
Those. the input of such a “converter” is connected to the free “USB” connector of the laptop, the driver (control program) is installed from the disk from the kit, and a virtual COM port with the assigned serial number appears in the system settings.
How to solder a USB-COM adapter yourself. Option - 2
Figure 1. General view

The proposed block in assembled form allows you to implement the principle: bought - connected. The device will allow users of personal computers to connect devices operating from the COM port (RS232C) to the USB port.
Estimated retail price: $18
The adapter will be useful in practical applications: for connecting various devices to a personal computer, as well as modems and programmers.
Specifications
Supply voltage from the USB port: 5 V.
Consumption current: 20 mA.
RS232C connection speed: 110-230000 bps
Interface: USB1.1, USB2.0.
Supported operating systems: Win98, Win2000, WinXP, Vista, Linux, etc.
Overall dimensions of the device: 60x30 mm.
Contents of delivery
Adapter block assembly: 1.
Instruction: 1.
Design
Structurally, the adapter is made on a double-sided printed circuit board made of foil fiberglass, protected by a transparent heat shrink tube.
The adapter provides all modem signals: DSR, DTR, RTS, CTS, RI, DCD, as well as the main RXD and TXD signals.
Figure 2. Electrical circuit diagram

Figure 3. View of the printed circuit board from the parts
Description of the block
The circuit diagram is shown in Figure 2.
The central part of the device is a CP2102 microcontroller manufactured by SILICON LABORATORIES. The MAX3243 converter manufactured by Texas Instruments is used as a level driver chip. The adapter provides all modem signals: DSR, DTR, RTS, CTS, RI, DCD, as well as the main RXD and TXD signals.
Installing the device in the OS
To install drivers for your computer, you must first download the appropriate driver for your operating system.
Next, install the driver on your personal computer. Plug in the adapter. The operating system will detect it and "ask" for the driver, you should tell it the location of this driver (the place where it was unpacked).
After successful installation, the LED on the adapter should light up, signaling the readiness of the device for operation!
Driver you can download (downloads: 537)
BM8050 FUNCTIONAL TEST WITHOUT EXTERNAL HARDWARE
To check the transmission and reception of all necessary modem signals according to the connection of the COM device.

Install jumpers on pins 2-3, 4-6, 7-8 of the BM8050 COM connector.
Connect the device to the USB port of the PC.
See which port the OS has allocated for the device by going to Start --- Settings --- Control Panel --- System --- Hardware --- Device Manager --- Ports (COM and LPT) --- Silicon Labs CP210x USB to UART Bridge (COM1).
Launch the standard HiperTerminal Windows application from Start --- Programs --- Accessories --- Communications --- HiperTerminal.
Stop a running connection, if it is active, to do this, click Call --- Stop at the top.
See which port is used by the program to communicate with the device, for which go to the top left File --- Properties and opposite "Connect via" select the same port as in the Device Manager (in our case COM1).
In the same window, make sure that "Hardware" flow control is selected in the program, for which click the button in the "Settings" center and select "Hardware" in the lower "Flow Control" window.
Exit the program settings by clicking OK, OK again.
Type the text "Text" in the HiperTerminal program, while the text "Text" is printed on the screen, which confirms that the device is working.
Remove the jumpers from pins 2-3, 4-6, 7-8 of the BM8050 COM connector.

Type the text "Text" in the HiperTerminal program, while there is no print on the screen, which confirms that the device is working.
Driver setup and port selection for USB-COM adapter
Here the first problems await us: firstly, the OS could assign too large a number to the virtual port, for example, "25". And the program for "firmware" of the receiver allows you to work with port numbers from one to four. Secondly, not all USB-COM converters can work with the firmware program and the receiver itself. The reason is that equipment manufacturers have manufactured their products and programs in different ways. It is necessary to check all converters individually for your program and your receiver. It often happens that the converter works with one equipment, but not with another.
If the first problem is solved by changing the port number in the OS settings, then the hardware, program, and converter compatibility problem cannot be solved.
To change the assigned OS number, you must change it manually. To do this, you need to enter the "Device Manager": "Start" - "Settings" - "Control Panel" - "System".

"Control Panel"
In the window that appears, select the "Hardware" tab and click on the "Device Manager" button. The Device Manager window will open. In the window that appears, in the tree-like list, select the line “Ports (COM and LPT). In the drop-down list, you will see all the ports available on your computer. Select your virtual port: "USB to COM converter". I have a "Prolific" model converter.
List of available ports
Click on this line with the RIGHT mouse button, in the window that opens, select the “Properties” option.
Setting the selected port
In the window that appears, select the "Port Settings" tab. In the "Speed" line, select "115200", then click on the "Advanced" button.

Configuring Port Settings
At the bottom of the window that opens, find the "COM Port Number" tab.
Changing the COM port number
Click on the tab and select the desired COM port number.
Note that some port numbers may be occupied by existing equipment, such as the built-in modem. You cannot use one port at the same time!
After completing the settings, click "OK" to save the changes made and completely exit the settings mode by closing all previously opened windows. After that, restart your computer to make the necessary changes. If you changed the “COM” number of the “USB - COM” port of the converter, then simply remove it from the computer connector and reconnect it.
Are available
Buy in bulkThe adapter will allow users of personal computers to connect devices operating from the COM port (RS232C) to the USB port. The usb com adapter will be useful in practical applications: for connecting various devices to a personal computer, for example, a set of "Thermostat 4-channel, microprocessor timer, thermostat, clock NM8036"; block "Thermostat 8-channel microprocessor timer, thermostat, clock BM8036"; modems, programmers and peripherals from other manufacturers.
Specifications
Device design
Structurally, the adapter is made on a double-sided printed circuit board made of foil fiberglass, protected by a transparent heat shrink tube. The BM8050 USB COM converter provides all modem signals: DTR, RTS, CTS, RI, DCD, as well as basic RXD and TXD signals.
Additional Information
Nowadays, computers with a COM port are becoming rarer and rarer, and laptops with built-in COM ports probably disappeared as a class ten years ago. This archaic interface has been replaced by USB. And, although the USB interface has become a de facto standard and has a huge data transfer rate and other positive aspects, meanwhile, in amateur radio practice, the old COM port with the RS232 standard has not lost its relevance. And the point here is that, for all its archaic nature, it is not difficult to organize the exchange of information via the RS232 protocol using a software method. Of course, some microcontrollers have hardware support for the USB interface, but these are already high-level microcontrollers, multi-legged and expensive. It is hardly advisable to use them in simple homemade products. In amateur radio practice, it is difficult for such microcontrollers to come up with a place to perform simple tasks, as well as to come up with devices that would need high speeds and data transfer volumes. Therefore, the RS232 protocol will remain in demand in simple home-made devices for a long time to come. In addition, there are quite a few devices that still use the COM port. Hence the need for a COM port on the computer arises. The usb com BM8050 adapter will help you solve this problem.
Checking BM8050
Connect the contacts of the device according to the sketch..jpg
Launch the HyperTerminal program. If your PC does not have it, download it from the Soft section. http://www..rar
Run the program. Select a COM port. Leave all options as default.
With a working adapter in the window that appears, when you press the keys on the keyboard, the pressed letters should appear.
Connecting multiple VM8050s on one PC:
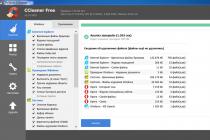
To operate several VM8050s on one PC, the VM8050s connected to the PC must have different serial numbers. Their numbers must be changed using the serial number renaming program "CP210xSetIDs.exe".
Download the archive of the BM8050 serial number renaming program from the software section http://www..zip
Connect the first VM8050 to the PC and see which port Windows has allocated for the device, for which go to Start --- Settings --- Control Panel --- System --- Hardware --- Device Manager --- Ports (COM and LPT ) --- Silicon Labs CP210x USB to UART Bridge (COM4). - Click the "Update Device List" button in the serial number renamer "CP210xSetIDs.exe". In this case, the serial number of the connected device will appear in the TOP "Serial Number" window, and the number "0000" in the MIDDLE (long) "Serial Number" field.
Change the value "0000" to "0001" and click the "Program Device" button.
Connect the second VM8050 to the PC and see which port Windows has allocated for the device, for which go to Start --- Settings --- Control Panel --- System --- Hardware --- Device Manager --- Ports - Click the " Update Device List" in the serial number renamer "CP210xSetIDs.exe". In this case, the serial number of the connected device will appear in the TOP "Serial Number" window, and the number "0000" in the MIDDLE (long) "Serial Number" field.
Select in the TOP "Serial Number" box the device that has the number "0000" in the MIDDLE (long) "Serial Number" box.
Change the value "0000" to "0002" and click the "Program Device" button.
Close the serial number renaming program "CP210xSetIDs.exe" by clicking the "Close" button at the bottom right.
Now, when connecting several devices on a PC, the OS sees several COM devices.
Scheme
Connection sketch for verification
Contents of delivery
- Adapter block assembly - 1 pc.
- Instruction - 1 pc.
Questions and answers
- tell me where you can download the driver for the adapter BM8050
- Victor, the driver can be downloaded from our website: http://website/shop/laboratory/interface-converters/1326700
- tell me where you can download the driver for the BM8050 adapter for Windows7
- Victor, drivers here: http://site/shop/laboratory/interface-converters/1326700
- Hello! I am a beginner radio amateur - I want to buy a BM8050 USB to COM adapter (RS232C). I need it for data transmission - I want to master digital communications BPSK 31 and RTTY. There is a radio station, a laptop HP 635 - WINDOWS 7 and a cord for connecting the radio station to a computer. Please explain, is this USB-COM (RS232C) BM8050 Adapter a finished product (in the sense of connecting and starting to work) or does it still need to be flashed for the function I need? I also ask you to clarify whether a driver is needed for it and where it can be found. Thank you. Best regards, Dmitry
- The device is ready for use immediately after purchase. Drivers can be downloaded from the developer page of the chip used in the device http://www.silabs.com/products/development-tools/software/usb-to-uart-bridge-vcp-drivers
- Hello! Can I buy this adapter in Zheleznodorozhny?
- Delivery is carried out by courier, or to self-delivery points.
- Good afternoon I purchased a USB-COM RS232 adapter from your company. tell me where on your site to download the driver for installing the BM8050 unit
- https://www.silabs.com/products/development-tools/software/usb-to-uart-bridge-vcp-drivers
I welcome everyone again on the pages of my blog and today I want to tell you how connect usb com port on Windows. Let's talk about what it is and what it is used for. I think it will be interesting for novice network administrators, and just for advanced users, for me at one time it was just some kind of magic that allows you to configure server hardware.
What is connected through the com port
Through the com port, modems and mice were previously connected. It is now used to connect to uninterruptible power supplies, embedded computing hardware, satellite receivers, cash registers, facility security devices, and many other devices.
Using the COM port, you can connect two computers using the so-called "null modem cable" (see below). It has been used since the days of MS-DOS for transferring files from one computer to another, in UNIX for terminal access to another machine, and in Windows (even modern ones) for a kernel-level debugger.
But in a networked world via com port connect to the console port of network devices (switches, routers, brands such as Cisco or Juniper)
What is the connection scheme to the switches through the serial port. There are adapters, for example from st-lab. On one end of the USB that you connect to the computer, and the second is the com port.


Installing com port usb drivers in Windows
Unfortunately, in Windows, connected devices, usb to com are not always automatically installed in the system, and you have to look for drivers for them. If you bought it yourself, then a driver disk was included, and you can use it, if it is not there, then we look at how to find drivers.
Open Device Manager in Windows. If you do not know how, then press CTR + Pause breake, or press Win + R and enter devmgmt.msc in the run window. As you can see, in the Ports (COM and LPT) section, I found an unknown wire on the third COM port, and the system did not have drivers for it, as the yellow icon tells us.

We go to the properties of this device and select the hardware ID, you will have something like usb\VID_067B&PID_2303&REV_0300, so you copy it and look for it in Google or Yandex.

Then we right-click on the device in the device manager and select install drivers, specify the path to them and set, if everything is ok, then the warning icon will disappear.
Further, you can already use the capabilities of the com port, using such utilities like Putty, where you select the Serial item and specify the desired Com port port, you can view it in the same device manager.

I hope you have learned and figured out how to connect the usb com port in Windows.
You will need
- - computer with internet access
- - browser
- - system administration skills
- - Advanced Virtual COM Port
- - USB Serial Converter or Virtual Null Mode
Instruction
Download and install the Advanced Virtual COM Port program. To do this, open a browser and follow the link http://www.advancedvirtualcomport.com/files/AdvancedVirtualComPort.zip. This program includes network and local functions of the virtual COM port. It can virtual port and join it via virtual modem cable, via network or . These, created in the program, look the same as real ones. They work in a similar way. Run the program, follow the procedure for creating a port: click the "create port" button, select the source of the port being created. Follow the instructions of the program. Next, go to the "Control Panel", select "Device Manager", there follow the appearance of a new port in the list.
Download the virtual port driver to set the virtual com port from the site http://com0com.sourceforge.net/. Unpack the archive with the driver into a folder, connect the USB cable to the computer. The other end of the cable, where there are two DB-9 connectors, do not connect anywhere. Next, the hardware will be installed automatically. Select the option "search for a suitable driver for the device", specifying its location. Next, click the "Browse" button and select the downloaded driver. In the next window, click the "Finish" button. After installing the USB Serial Converter, the Serial Port Setup Wizard will start. Repeat the hardware installation procedure using the Found New Hardware Wizard. Restart your computer to make a virtual com port. Go to "Control Panel", "System", click "Device Manager" and track the appearance of a new port.
Download and install Virtual Null Mode. Creating a virtual com port with this program is a fairly simple procedure. After installing the program, the program will prompt you to create a new device, select "Yes", then select the port numbers, click the "OK" button in the program window and in the dialog box. Next, the program will install virtual ports on the computer. Reboot your PC, go to "Device Manager" and check for new ports.
Sources:
- virtual usb port
- Disabling the use of virtual COM ports in Windows
The virtual port is intended for connection to the same port of several installed applications. To do this, copies of the port are created through which data is sent from applications to the real port and the attached device.
You will need
- - Internet access;
- - programming skills.
Instruction
Go to http://www.advancedvirtualcomport.com. Go to the file download section and select the Advanced Virtual COM Por program. This application is designed to configure a virtual port and enable its network and local functions. It creates a virtual port and connects it to the modem via a virtual cable to access the network or the internet.
Download the installation file to your computer anywhere. Launch the Advanced Virtual COM Por program and select the "Create Port" function. Next, follow the application's instructions to set the virtual port.
Download the USB Serial Converter driver from http://comocom.sourceforge.net/ to install the virtual port. Unpack the archive with the utility and connect the USB cable to the computer. Leave the other side of the cable free, i.e. don't connect anywhere. This will then automatically install the hardware.
Click on the "Search for a suitable driver" button and specify the location of the downloaded folder. Click the Done button. The virtual port setup wizard will start. When finished, restart your computer and check for a new port.
Install the Virtual Null Modem program on your personal computer, which will easily help you create a virtual port. You can download the application from http://www.virtual-null-modem.com/. After the installation is complete, a window will appear asking you to create a virtual port. Click the Yes button and enter the port number. Restart your computer after installing the new port.
Check the appearance of the virtual port. To do this, click on the "Start" button and go to the "Control Panel" section. Select the "Device Manager" menu and read the list of ports, one of them will be virtual. You can also access Device Manager by right-clicking on the My Computer shortcut and selecting Manage.
Related videos
When working with a PC, there are times when several applications are installed on your system that require a com port to work. However, the number of these ports is not always equal to the number of such applications. Therefore, if there is a shortage of these devices, the OS provides for the creation of virtual ones, the number of which is unlimited.

In modern computers and laptops, manufacturers have stopped using the COM port, which was widely used earlier. If you have an old computer that you bought about 7 years ago, you can find several of these ports on it. The COM port was designed to connect various external equipment, such as a mouse, printer, modem, and other special tools. Now there are problems with connecting various outdated equipment to new laptops or computers. For example, it is quite difficult to connect a receiver now, since you need to use a COM port for this.
What to do in this case? There is, of course, a way out. You can make a USB to COM converter yourself. How to do it? In this article you will find answers to your questions.
Do-it-yourself USB-COM adapter
Now we will look at how to make a USB-COM adapter that will work with RX and TX signals. It will not work with other types of modem signals, but this is quite enough to connect standard equipment.
To proceed with the assembly, you will need to purchase the following parts:
- Two 10nF capacitors and one 1uF capacitor.
- Two 27 ohm resistors and one 1.5 kΩ resistor.
- Mini-USB connector and DB-9 one each.
- Quartz 12.00 MHz.
- PL2303HX.
- Foil textolite for board 48*22 mm.
After purchasing these parts, you can proceed directly to the assembly. First, we will need to consider the USB-COM adapter circuit (you can see the image below).

Assembling and setting up the adapter
There is nothing difficult in the installation. First you need to take or make your own fee. After that, we drill four holes. Next, we need to solder all the details, the location of which will correspond to the diagram. This completes the build.
To prevent the board from oxidizing, it must be blown out with polyurethane varnish. If this is not available, you can use any other quick-drying car varnish.
It's time to move on to the settings. We connect our board to the computer. If everything is assembled correctly, it will determine the device on which you need to install the drivers.
We install the Prolific drivers for such a port on the computer. By going to the "Task Manager", you can see that it has been determined and is now fully functional.
Examination
To check the performance of our adapter, you need to close the contacts near the COM port with some thin object (see the image below where this needs to be done).

Go to the "Connection settings" section, where you need to select the COM port. In a new window, you should configure the following parameters of our port:
- signal transmission rate - 115200;
- data bits - 8;
- parity - no;
- stop bits - 1;
- flow control - no.
Next, confirm the changes by clicking the OK button. After that, you should start the connection. We turn to the English layout and print any words in the program. All the characters you clicked will be displayed on a white background.
In the event that this does not work, that is, the words are not displayed, you need to change the installation. We adjust it until the characters are displayed.
That's all. You can release the pins that you clamped and start using the USB-COM adapter.

USB RS232 DB9 COM adapter cable
If you are unable to make your own adapter, you can purchase USB RS232 DB9 COM. Its price varies within 1000 rubles, and it has pretty good technical characteristics. Probably the most important thing is a good connection speed. It is also supported by almost all operating systems. Unfortunately, it only works with USB 2.0.
Connecting to a computer
To connect the USB RS232 DB9 COM adapter to your computer, you need to search the Internet for drivers suitable for your operating system. Download and unpack them. We connect the adapter to the computer, after which we indicate where the drivers are located. If everything was done correctly, the LED on the device will light up, indicating that it is ready for operation.
Possible problems
Unfortunately, even when you use a purchased USB-COM adapter cable, problems may occur. They must be fought, and it is not difficult to do this.

Alternative solution to the problem
If you need to install additional equipment that needs a COM port, you can also use a module with this connector. It is simply installed directly in the computer and connected to the motherboard. After installing the COM-port card or PIC-COM (second name), it is also assigned a number. As in the previous cases, this number can be changed if problems arise. If you are not sure that you can properly install this board in your computer, it is better to take the help of professionals so as not to harm other equipment.

Unfortunately, this solution can only be used for computers. In laptops, it is quite difficult to install an additional board, and this requires additional costs. Firstly, the case itself will not allow you to install an additional module, and secondly, it may not be supported by your model. Therefore, in the case of a laptop, you should use a USB-COM adapter.
Conclusion
If you need to connect outdated equipment that requires a COM port, you can make an adapter yourself. It's pretty simple. If you do not want to do this, you can purchase a USB-COM adapter. Its price is about 1000 rubles. Remember that you still have to install drivers and check the functionality of this hardware. On Windows 7, the USB-COM adapter is quite easy to install, since you can find all the drivers for this operating system on the Internet.