12.11.2017 20024
This lesson shows how to set up the program in terms of accounting for retail sales, setting up a cashier's workplace and shop equipment.
basic settings
Let's start with the basic settings - I'll show you where the retail sales accounting is enabled:
We set the sign of accounting for retail sales, set the storage periods for pending and archived receipts, set up what to do with receipts after closing a shift (you can archive it, or you can delete it immediately). If you are using gift certificates, check the appropriate box. If you have several stores (or there are several cash registers in one store, enable the use of several cash register cash registers):

If you plan to accept payments by bank cards, you need to enable the appropriate setting:


If you have several retail outlets, you need to enable the use of multiple warehouses:


If you plan to issue to buyers discount cards, accrue bonuses for them, turn on the appropriate settings in the CRM and marketing section:


Now let's set the sign of the use of commercial equipment:

If we use Offline equipment (a cash register, into which data is first loaded from a file with the rest of the stock list, and then a retail sales report is loaded from it into the database, also through a file), we set the use of exchange with such equipment:

Now you need to create a warehouse for the retail store, the main settings are highlighted in red:

The retail price type must be selected - the price of the item of this particular type will be inserted into the cash register receipts. Well, and accordingly, you need to set the prices of the item for this type.
For each cash register used in the organization, we introduce an element of the directory Cash register KKM:

We create a new checkout:

The cash register indicates the organization from which the sales are made, the type of cash register, warehouse, as well as the serial and registration number of the equipment. For a correct exchange with the accounting department of the enterprise 3.0, it makes sense to choose a division:

The cash register in the program can be of 3 types:

Fiscal registrar- cash register connected to a computer and 1C. When a check is broken in the program at the checkout, a check is printed, when the shift is closed in the program at the checkout, a cancellation report (Z-report) is printed.
KKM offline- the cash register, into which information about the inventory balances is loaded daily (the file is formed in the program), and at the end a file is formed in this cash register, which is then loaded into the program (based on it, reports on retail sales are created in the UT).
Autonomous KKM- a cash register that is not connected to the PC and the program and does not support the offline exchange mode. When working with such a cash register, the sales data is entered manually by users (a document called Retail Sales Report is created).
To demonstrate how to work with an offline cash register type cash register, we will create another cash register cash register (this time you do not need to select a warehouse):

For each user of the program, you can set up sales rules - set, if necessary, limit the use of manual discounts, and also set up rights in the cashier's workplace:

On the first tab, the application of manual discounts is configured:

On the second - the powers in the cashier's workplace (RMK):

Connectable equipment
Now you need to configure the equipment connected to the program (since in fact, I have no equipment, I will install the emulator, well, look where and how this is done in principle):

We go to the list of connected equipment:

In the opened workplace, select the type of equipment (Fiscal recorders) and add a new device:

In the equipment card, I select the emulator (in your real case, you need to select the driver that matches your specific model fiscal machine). Please note that the connected equipment is tied to a specific workplace:

We will also create a device with the offline KKM type. Select the version of the exchange format and specify the download and upload directories for exchange files:

If necessary, a barcode scanner and an acquiring terminal are immediately connected:

Now we just need to set up the workplace:

In the RMK card, we can configure hotkeys for various actions (a handy thing, it can significantly speed up the process of customer service:

In the hotkey settings, we can not only assign convenient key combinations to various actions, but also add different nomenclature to Fast goods(for ease of selection, add here the products that are sold most often, for example, T-shirt bags):

If personal sales of sales floor managers are used (revenue is analyzed in the context of managers), then in addition to the cashier, a manager must also be selected as a seller.
On the first tab of the used equipment table, add the created fiscal registrar emulator:

If necessary, an acquiring terminal is also added here.
Comments (3)
Arslan 2018-09-25 09:17:30
Why is the cash register indicated on the Cashier tabs in the RMK Settings To answerDmitry Medvedkov 2018-09-28 11:47:38
On this tab, the user needs to add the cash desk of the organization from which the sales will be carried out, and select equipment of the "CRE with data transfer" type. After that, the Punch check command will be available in the Incoming cash order and the Outgoing cash order (when making a return) using the cash register specified in the settings, with which you can punch a check on the cash register and transfer the data to the OFD in accordance with Federal Law No. 54-FZ. To answerYuliya 2019-04-22 16:07:26
Can custom price be customized for retail. Those. to have the Nomenclature "goods for shares" and for it at the checkout to be able to set an arbitrary price to the cashier. To answerPayment details Cost, licensing, use by several users Product cost - 0 rubles. The number of jobs is unlimited. No additional licensing required. What are the payment options? You can pay from a bank card (Visa, Mastercard or Mir), a Yandex wallet, or send the TIN of your organization for invoicing (from an individual entrepreneur). When paying from a legal entity, covering documents are provided if necessary. Is payment on the site safe? Payment by credit card or through a Yandex wallet on this site is absolutely safe. The site has an SSL certificate - unique digital signature for reliable protection during data transmission. How to get a file after payment? After payment, you will be automatically sent an email within one minute with a link to download the product (you specify your address when paying).
Technical Issues How to add a product to the database? You can implement the product yourself by looking at the instructions. If you have any difficulties with this, I can help. Contact me and we will schedule a specific time to contact you. If the development does not start (or will work incorrectly) In this case, first of all, check according to the instructions whether you have connected the development correctly. If the check yielded nothing, make a screenshot of the error and send it to me by mail with the name of the development. At your choice, I can either correct the error and send new version file, or refund. If the development breaks after the update, you will need to contact me with the number of the new release of your configuration and the name of the development you purchased. After that I will send an adapted version of the file by mail. Is it possible to finalize the development on your own? Yes, you can. The source code is open and available for any revision, there are no restrictions. Are there any configuration changes? No, the implementation of the development does not change the configuration of the database in any way and will not be reflected in subsequent updates. Is there a demo version? No, I can't provide demo access to development.
Other questions Sale of developments outside working hours / holidays / weekends Sale on the site is carried out in automatic mode around the clock, seven days a week, holidays and lunch breaks. Are the developments updated? Some developments are updated and improved from time to time. Whenever a product is updated, you will receive email alerts with a description of the changes and a download link (free). You also have the opportunity to send your wishes for improvements. Are closing documents provided? When paying by invoice, an act of completion is provided with a seal and signature (scan and / or original by Russian Post, upon request). A refund Cash for the purchase of site developments are returned immediately in full in the following cases:
- development does not start or works with errors in your database, and you refuse to adapt it,
- the development does not correspond to the functionality stated in the description.
Having a problem with your payment?
Payment on the site works on the basis of the Yandex payment service. If it does not work for you, I can assume that you are not in Russia, and Yandex does not work in your country (or is unstable).
What to do?You can pay alternative ways:
- Sberbank card: 4276 3000 2875 5851
- Yandex wallet: 410011805420743
In the note to the payment, be sure to include the 500 product ID and your address Email, where I will then send a link to download the development.
In the 1C configuration "Trade Management, Edition 11" there are several built-in exchange plans, including those with the configuration "Enterprise Accounting, Edition 3.0" (Fig. 1).
It is a set of rules according to which objects from one configuration will be loaded into another. In our instructions, we will configure the exchange between 1C Accounting 3.0 and 1C Trade Management 11 based on the 1C 8.3 platform.
The presence of the plan we need in the list of typical exchanges greatly facilitates the integration process. However, there are a few presets that need to be done in both configurations.
First, consider the sequence of actions in 1C Enterprise Accounting 3.0. Let's find in the section "Administration - Settings" the item "Configuring data synchronization" (Fig. 2).

Here it is necessary to enable the checkbox "Data synchronization" and be sure to indicate the prefix of our database (Fig. 3). If you wish, you can - before this date, no data will be loaded or changed.

Now go to the "Data Synchronization" tab and configure the exchange itself (Fig. 4). There can be several exchanges. For each, its own line is created (a button with a plus sign "Configure data synchronization"). We already have two entries in the 1C Accounting demo database. Let's check the settings of the latter (button with a pencil "Configure rules ...").

We only fill in the tab “Rules for receiving data” (Fig. 5), since we will not send anything. On the “Rules for sending data” tab, set the checkboxes “Do not send”.

It remains to check the connection parameters (Fig. 6). We select "direct connection", specify the address of the database on the disk, from which we will receive data, and the user / password of the same database. The user must have full rights or at least the right to perform synchronization. Sometimes a virtual user is created specifically for exchanges.
For details on the settings in this section, refer to Help (F1).

Similar settings are made in the "1C Trade Management 11" database.
Setting up an exchange from the Trade Management side 11
In different releases, the section we need may have a different name. In our example, this is the item "Integration settings - Other programs" (Fig. 7).

The rest is similar. The same "Data Synchronization" checkbox, the same item and similar settings. (Fig. 8).
Only the prefix is different. It is important!
Get 267 1C video tutorials for free:

Go to the "Data Synchronization" tab and create a new exchange. You can select the configuration with which we want to exchange, you can click on the "Configure data synchronization" button, the exchange itself is created using the "Configure" button (Fig. 9).

From this moment, the differences from the previous setting in BUX.3.0 begin. We need to fill in the "Data submission rules" tab (Fig. 10). And the main thing that needs to be done is to determine the composition of the sent data.

There are several ways to select the data that we are going to transfer (Fig. 11). All of them are collected in the "Register" section. You can select either one object or a list. Or all at once.
Let's go back to the previous tab and perform one more important point, already familiar to us - we will indicate the connection parameters (Fig. 12). The parameters are configured in the same way as for accounting. Only this time we are using a virtual user named "Exchange".

Launching and checking the exchange between 1C Accounting 3.0 and 1C Trade Management 11
The exchange is carried out by clicking the "Synchronize" button, which is located on the first page of the settings (Fig. 13). This button can be found on other pages as well. Moreover, there is not much difference in which of the two configurations to press this button. The exchange is two-way.
We press the button and go to the next step.

If the exchange is performed for the first time, then you will have to perform manual synchronization, that is, compare the same objects of two configurations, if any (Fig. 14). If this is not done, duplicates may appear.

At the next step, it will be possible to select the organizations for which the data will be transmitted, and some other selections (Fig. 15).

Description of all selections appears in a special window, and full list objects that will be sent can be obtained in the report on the composition of the sent data (Fig. 16).

The exchange can take a long time, the time depends on the number of transferred objects. After completing the process, we get a picture of the following form - Fig. 17. By clicking the "Configure" button, you can configure the schedule according to which the exchange will be carried out automatically.

Access to the program settings is carried out from the subsection:
NSI and administration - Settings for NSI and sections
Let's get acquainted with the basic settings and how they affect accounting. For example, we will use the demo database "1C: Trade Management" in the standard package.
Company
The organization
NSI and administration - Settings for NSI and sections - Enterprise, subsection "Organizations" (opened by default)

Here you need to specify the production calendar, which is used as the work schedule of the enterprise. This is necessary for the system to distinguish between working days and non-working days. The choice is made from the directory "Production calendars", the calendar must be filled in for the current year.
Flags for configuring the following features are also available here:
- Several organizations. Enabling accounting for several organizations in the infobase. If the checkbox is not selected, only one organization will be recorded, and there will be no corresponding selection in documents and reports.
- Subdivisions. Enabling the use of subdivisions.
- Separate subdivisions on a separate balance sheet. Must be included if such units exist.
- Separate purchase and sales operations for ex. and reg. accounting. If this flag is set, the so-called. "Management organization" (predefined), on behalf of which operations are carried out for management accounting purposes.
Currencies
NSI and administration - Settings for NSI and sections - Enterprise, subsection "Currencies" (open)

The flag "Multiple currencies" enables or disables the possibility of multicurrency accounting in the infobase. When the flag is cleared, accounting is kept in only one currency, and there is no choice of currencies in the documents.
In the corresponding fields, the currency of management and regulated accounting is specified (by choosing from the currency reference book). In the demo database, regulated accounting is kept in rubles, and managerial accounting is in US dollars.
Important... After any transactions have been entered into the system, it is not recommended to change the currency accounting settings.
Nomenclature
Item accounting aspects
Master data and administration - Settings of master data and sections - Nomenclature, subsection "Accounting aspects"

The flag "Many types of nomenclature" makes possible use several types of nomenclature, including the creation of new ones. If the flag is cleared, only two types of items are available with the types "Product" and "Service".
There are also flags for setting options such as:
- Sales item sets.
- Reusable (returnable) packaging.
- Specifications.
- Packaging.
- Series.
- The quality of the goods.
When the flags are set, only the possibility of using these functions is enabled, it is optional.
Units
NSI and administration - Settings for NSI and sections - Nomenclature, subsection "Units of measurement"

In this form, the basic units of weight, volume, area and length are indicated. While creating information base"From scratch" the system fills in these values automatically, the user can change them. A reference of units of measurement and the inclusion of the ability to specify an additional unit for reports are also available here.
Planning
NSI and administration - Settings for NSI and sections - Planning

Scheduling settings allow you to enable or disable features such as:
- Sales plans.
- Sales plans by category.
- Seasonal odds.
- Assembly plans (disassembly).
- Procurement plans.
CRM and marketing
CRM settings
NSI and administration - NSI and sections settings - CRM and marketing, subsection "CRM settings"

In the CRM (customer relationship management) settings, you can enable or disable the following features:
- Independently lead partners and contractors. This function allows the program to reflect the complex management structure of our partners (for example, if we conduct trade operations with a holding in which several partners belong to one partner). legal entities- counterparties).
- Record customer complaints. If the flag is unchecked, registration of the claim will not be available.
- Business regions.
- Projects.
- Customer transactions and transaction management. When the flags are set, it is possible to record the stages of the transaction and its result, build a sales funnel.
Marketing
NSI and administration - Settings for NSI and sections - CRM and marketing, subsection "Marketing"

This includes the ability to use:
- Several types of prices.
- Price groups.
- Manual and automatic discounts, their restrictions, loyalty cards, bonus programs.
Sales: Set Up Customer Agreements
NSI and administration - Settings for NSI and sections - Sales, subsection "Wholesale"
Earlier in this article, we looked at customizing customer orders.
Now let's turn our attention to the use of agreements with clients. They are needed to fix the terms of sales to the client. In the corresponding setting field, you can select the types of agreements that will be available: standard and individual, or only standard or only individual, or not use. The first option is installed in the demo database.

Warehouse and delivery
NSI and administration - Settings for NSI and sections - Warehouse and delivery

In this form of setting, you can enable such features as:
- Several warehouses. As in the case of using several organizations, currencies, etc., when the flag is cleared, only one warehouse will be recorded, and there will be no warehouse selection in the documents.
- Order warehouses. If the flag is set, it becomes possible to apply the order scheme of warehouse document flow. The corresponding settings must be specified in the warehouse card.
- Use of packing lists for acceptance and shipment.
- Delivery management. Includes functionality for managing the transportation of goods.
Accounting for goods
Master data and administration - Settings of master data and sections - Financial result and controlling, subsection "Accounting of goods"

Here you can configure the possibility of transferring goods between your own organizations, including the "Intercampani" scheme.
In addition, here you can configure the control of balances of goods of organizations, including at the end of the day and when canceling receipt documents. When control is enabled, the program will not allow you to post (or cancel) a document if negative balances are generated as a result of this action.
We have considered only the most basic settings of the "1C: Trade Management 8" program. Other settings will be covered in our next articles on accounting in 1C.
Let's take a step-by-step solution to a hypothetical ticket for the Expert Advisor exam. Hope this decision will help you prepare for the exam. I want to warn you, I do not guarantee that the answer to this question is 100% correct and complete, this is just my vision.
The next stage is filling out the regulatory and reference information:
Organization and related information: accounting policies, write-off methods, bank accounts, warehouses, cash desks, cash registers of cash registers, organizational units, items of expenses / income, areas of activity, and others.
Items and Related Information: Item types and
Information about customers: partners, their agreements, item prices.
Introduce individuals.
3. Entering users and setting rights
At this stage, in Trade Administration 11, it is necessary to add all users to the database in the user guide and set the corresponding rights to them:

Customize record-level rights as needed.
4. Entering initial balances
You must enter all the leftovers of the activity before starting the program. Usually, balances are entered for a specific period, for example, on January 1. In the system, such information is entered on the Administration tab, item Initial filling of IB - Documents:

In this article I will tell you how to customize the interface of the Taxi program for comfortable work, so that all the necessary buttons and the most necessary reports are always at hand.
1) Let's start with the most common question of my favorite clients related to the lack of the "Operations" menu. Many accountants used it to search for reports, processing, documents that were sometimes very difficult to find in other sections of the program.
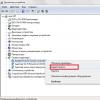
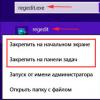
As such, there is no Operations menu in Accounting 3.0. Its counterpart is called "All functions" and by default the display of this section in the program is not set. To turn it on, you need to enter the menu, which opens using the orange button with a triangle in the upper left corner of the program. In the list that appears, select the "Service" section and open the "Options" section.
In the window that opens, check the box "Display the command" All functions "and fix the result by clicking the" Apply "button.

Now in the same Main menu (orange button with a triangle) we see the section "All functions"

In which everything that we are so used to seeing in Accounting 2.0 in the section "Operations":

2) Now let's consider the possibilities of the program in terms of customizing the TAXI interface. For example, now my program looks like this:

Those. sections above. Open windows in the bookmarks below. Let's see how to change the arrangement of all elements of the working window of the program. Again, open the main menu and find the section "Panel Settings" there.


Then everything is simple. With the left mouse button, grab the section whose position we want to change and drag it to where we want to see this panel. For example, like this: I will move the "Open panel" to the top, and drag the "Section panel" to the left side of the window.

We press the button "Apply" or "Ok" and voila, this is how our program began to look:

Perhaps it will be more convenient for someone to work this way.
3) One more tip for setting up the program. As a rule, each accountant has some sections or reports that he uses on a daily basis. Well, for example, SALT or SALT on the account. And it would be very convenient if they are always there, always at hand. This can be done very simple trick by placing the required reports in the "Favorites" section. Find the balance sheet in the "Reports" section. Hovering over it to point the mouse, we see next to a gray asterisk.

By clicking on it, we mark the selected report as "Favorites"

Section "Favorites"with the help of the panel editor already known to us, we will place, for example, at the bottom of the working window of the program.


4) And one more "secret" for setting up the program interface. In various sections of the program there are documents that some people never use. Well, just by virtue of the specifics of the organization's activities. For example, in the section "Purchases" documents related to EGAIS.

We do not need these documents and we can remove them from the desktop. To do this, in the edited section in the right upper corner click on the gear and in the menu that appears, select the item "Navigation settings"

In the window that appears, we see two columns. On the left are commands that can be added to our desktop. And on the right, those commands that are on our desktop. Find the EGAIS section on the right column and click on the "Delete" button

Accordingly, the documents that are in the right column can be added to the desktop by clicking the "Add" button
5) And finally, for those who do not want to get used to the Taxi interface. You can change the interface to the one that was in the first versions of Accounting 3.0.
In the section "Administration" we find the item "Interface"

Here, the developers offered us the choice to change the program interface to the same as in previous versions 8.3 and similar Accounting 7.7. By choosing the one that interests us appearance program, it will have to be restarted.

This is how the program will look like with the previous interface.

For interest, let's see what an interface similar to Accounting 7.7 is.

I don’t know, I don’t know. I'll probably return to my usual "Taxi".
Well, that's all I wanted to tell you today. I hope some information will be useful to you while working with the program.