As with any ccess object, you can create a report manually, or using the Report Wizard is recommended to create a draft report. The process of creating a new report is similar to creating any ccess object, i.e. you just need to select the database object Report - Create and then in the New Report dialog box select the report creation mode. Design mode is best used to modify the settings of a draft report created using the Wizard or Autoreport.
Share work on social networks
If this work does not suit you, there is a list of similar works at the bottom of the page. You can also use the search button
Topic:
DBMS MS Access. Reports.
Reports, like forms, are derived Access objects based on tables or queries. Forms are a convenient tool for quickly viewing data, but their main purpose is to provide data entry and editing. After entering data into tables using forms that make it easy to enter, you may want to display the data in an organized way. Reports are used to present data in a convenient and easy-to-understand manner.
- Data output using reports.
General provisions.
Like any Access object, you can create a report manually or using the Report Wizard (recommended for creating a draft version of the report). A report is generated based on a table (several tables) or a query. The process of creating a new report is similar to creating any Access object, ie. you just need to select the database object Report - Create and further in the dialog box New report select the report generation mode.
When you select the Auto Report mode, you can quickly create a simple report. Design mode is best used for modifying (customizing) a report created "roughly" using the Wizard or Autoreport.
Report design development.
The appearance of reports is completely determined by the type of information presented in them. When creating a report, you first need to think about how the necessary data will be presented. Planning and forecasting will reduce the time for subsequent editing and fine-tuning.
During preparation, the following questions should be considered:
- Who is the report for? What information does the user want to see and how should it be placed?
- What is the best format for this? For example, can data be placed in multiple columns? How many columns will there be?
- Do you need to report subtotals?
- Should the report show all the data or just the totals?
- Will the report use a title and graphic elements (lines and boxes) to make the report easier to read?
- Should the report look the same as the "paper" documents that the user is used to?
Selecting a data source.
Reports use the same record sources as forms: tables and queries. Selecting (and changing) the report data source is done in the same way as for a form.
For example, when developing a simple customer directory report with address and phone number (in the database Supplies ) one table will be used Clients . The report, which should present only part of the table's data, will be based on a query that selects records based on certain criteria, such as date. A report containing only summary data will be based on a query containing the functions Sum or Count . A report containing data from several database tables is easier to make based on a relational query.
Use of grouped reports.
Reports have several features that are missing in forms: one of them is the ability to grouping . A grouped report divides the data into bands according to the values of the fields selected for each grouping level. An example of a grouping is a report containing information about deliveries (in the Deliveries database), grouped first by customers, and then for each customer by brand of petroleum products. The report allows up to 10 levels of grouping, but it is extremely rare that there is a need for more than three or four levels, and most often one level is enough.
The Report Creation Wizard specifies whether grouping is required. But even before running the wizard, you can create a query that will group data, and based on this query create a report.
The fields used to create report groups are also used for sorting . For example, in the group of each oil product, you can sort the shipments by date ascending. Sorting is a very useful feature, especially if the report is based directly on a table. Data sorting can be defined using the Wizards dialog box during report creation.
- Creation of reports.
Creating a report using the Report Wizard.
Let's look at creating a simple report based on a table in the database Supplies . Let the report be an invoice to the customer for the delivered petroleum products (indicating the customer, the name of the petroleum product, the volume of delivery, the price of the product, the cost of delivery). It is better to make such a report based on a query with the parameter Orders_Customer .
Step 1: Choose a Creation Mode report using Masters request based With Orders_Customer (Fig. 5.1). Just like the other Access wizards. The Report Wizard asks a series of questions about the report you are creating and builds it based on your answers.
Rice. 5.1. Select the query on which the report is generated and the mode for generating the report.
Step 2: Set the fields requests that will be reflected in the report (Fig. 5.2). Fields can be selected from different tables and queries (using the Tables/queries list).

Rice. 5.2. The window for selecting fields for the report.
Step 3: Selection of grouping levels.
Set grouping by field Customer . This means that these fields Customer will be placed in a separate column and sorted in ascending order.

Rice. 5.3. Grouping window
Comment. If the report is created on the basis of several tables, then it will be necessary to set (before defining the grouping) primary table for presenting data. This immediately creates a grouping (which, however, can be changed).
Step 4: Select sorting levels. Up to four sorting levels are offered.
Since the grouping by field was selected in the previous step Customer , sorting can be done by field Product (you can choose from the list in the first window).

Rice. 5.4. Sorting task window.
Comment. If the data has numeric fields (quantity, cost), you can use the Totals... button to set the final calculations in the group. For example, when compiling a list of supplies, a certain client can be asked to calculate the total cost of supplied petroleum products (Fig. 5.5).

Rice. 5.5. The window for setting the final calculations.
Step 5: For grouped data, the Wizard offers six options (Fig. 5.6) for location - view layout . The location of data groups is carried out according to the specified fields with an indent or aligned to the left. Differences in layouts are a matter of taste, not a change in functionality. All layouts are almost the same. Any selected layout will still have to be "brought" in the Constructor to a convenient form.
Here you can also mention the types of Autoreports:
- into a column (fields are placed from top to bottom with borders around each field)
- tape (fields are placed from left to right, there are column headings)

Rice. 5.6. Layout selection window.
For example (invoice for the supply of petroleum products), a stepped layout was chosen.
Step 6: Choosing a Style report (Fig. 5.7). You can create your own style and save it.

Rice. 5.7. Report style selection window.
Step 7: The last page of the wizard sets the name of the report.
The specified name is also used as the title of the report in preview mode.
Comment. The report preview mode is similar to the same mode in Word to preview the document before printing. Similarly Word -document for the report page parameters are set (margins, orientation).

Rice. 5.8. The window for specifying the name of the report.
So, in fig. 5.9 shows the finished report in preview mode. In this form, it is quite convenient, but still needs additional configuration. None of the standard layouts are perfect.

Rice. 5.9. Final report.
- Report setup.
The created report layout can be modified in Design view.
Report view in Design view.
Report type Invoice (based on query with parameter Orders_customer ) in the Design mode is shown in fig. 5.10.

Rice. 5.10. The report generated by the wizard.
In general, the report contains three areas:Report Header, Header, Group Header, Data Area, Footer, and Report Note. These areas can be resized by "dragging" their borders with the mouse (just like the borders of any window).
When creating forms and reports, the same panel of elements is used, therefore, the same elements can be placed in the report as in the form. However, interactive elements (lists, combo boxes, buttons, radio buttons, etc.) are not suitable for reports, although a checkbox can be used to represent values Not really .
Most often used in reports inscriptions (for placing arbitrary text), text fields (to output data from a table field or the result of an expression), page break (go to a new report page) and decorative design elements drawing, object frame, line, rectangle).
Report setup.
You can use the report generated by the wizard in its original form (for verification reading). However, for reports that are meant to be explored and used further, the following changes are recommended to give the report a more elegant look. It is not necessary to do them in every report, but in most cases it will be very reasonable.
- Delete extra group field column headers. If a field is displayed under a group heading, then the column heading is no longer required.
- Adjust the sizes of labels and text fieldsto properly display headers and data.
- Change the text alignment in the controls as needed.By default, Access aligns numbers to the right and text to the left.
- As a data source, use an expression that allows you to combine two or more fields displayed in one text field (using the & concatenation sign).
- Specify the format (and units) of monetary values.
- Place your column headings properly to improve appearance printed report.
- Set value yes properties Do not display replaysdata area fields.
- Set value Yes Properties Extension for the control that contains the title, and for any controls that contain more than one line of data, which will allow the transition to the next line.
- Set value Yes Properties Compression for all elements of the data area, as well as for the detail area itself. This will avoid empty lines in a report when duplicate data is omitted or when there is no data in a field.
- Set value Whole property group Do not break in the dialog boxSorting and grouping(Fig. 5.15) in order for the group to start on new page if the page break occurs in the middle of the group.
The view of the modified report is shown in fig. 5.11.
Formatting reports.
Typically, reports do not require additional formatting, although the Report Creation Wizard offers several options. Just like when working with forms, you can apply the selected style to the report (menu Format - AutoFormat). In addition, the selected report element can be formatted manually (for example, change the typeface, font size, and color).
At permanent job with reports of the same type in design mode, you can create your own sample . By default, a new report in Access is based on the Standard template, which has White background and font Arial 8 pt size (similar to document word).
Sometimes, blank data areas are left in reports when they are printed. You can use concatenation (concatenation) controls in a single expression when specifying the text field's data source.
For example, to display the full address on one line, you can use the expression:
=[Postcode] &"," &[Country] &","&[City]
C using the dialog boxFormat - AutoFormatin design mode, you can specify new format report. The formats offered are similar to those offered by the Report Creation Wizard.

Rice. 5.11. Report configured in Designer.
Characteristics and properties of reports.
Reports have almost the same properties as forms. We note several useful properties that are specific only to reports. Report properties determine, for example, how headers and footers appear, or let you specify how data is sorted and grouped, select column formats, and determine whether duplicate data output is suppressed.
To get help information about any property, you need to place the pointer in the property field and call the help (key F1).
For example, to display the properties of the report as a whole, you need to select the report
(Edit - Select report) and select the command View - Properties (Figure 5.12)

Rice. 5.12.Window of report properties.
To display the properties of any other element, you need to select it and, by right-clicking the mouse, select the Properties item in the context menu (Fig. 5.13).

Rice. 5.13. Report context menu.
Formatted report properties.
The formatted report properties are located on the Layout tab (Figure 5.10). These properties include:
- Header and footerpages. Possible options:All Pages, No Header, No Note, and No Header/Note.
- Inseparable group. This property offers two values (In column and On page) to define how the group will be presented.
Grouped fields properties.
The grouped field properties are located on the All tab (Fig. 5.14). To change the property, you must select the desired value from the list or set it manually.
For example, to avoid repeating data in grouped fields, set the value yes properties Do not display replaysfor the selected field.

Rice. 5.14. Properties window of the grouped field Client.
Sorting and grouping
Using the Sort and Group dialog box (View - Sorting and Grouping) you can set some properties of the group.
For example, if it is desirable (and possible) to present a group of data when printing on one page, you must set in the dialog boxSorting and grouping value The whole group of the Do not break property (Figure 5.15).

Rice. 5.15. Dialog windowSorting and grouping.
Set the numbering of lines in the report.
To set the numbering in the report (for example, account positions), you need to create a new free field and in the properties form (Fig. 5.16) on the tab Data set: Data = 1 (beginning of numbering) andCumulative amount- For everything with consecutive numbering of all positions of the report (or For a group with its numbering in each group).

Rice. 5.16. Free field properties window.
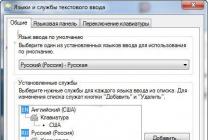
Create mailing labels.
You must use the Label Wizard to create mailing labels.
Do the following:
Step 1 . Selecting the label master and data source table.

Step 2 Decal size selection.

Step 3 Choice of style.

Step 4 Selecting the fields to be placed on the label and specifying additional text.

Step 5 Sets the output order (sort) of labels.

Step 6 Naming the report.

Other related works that may interest you.vshm> |
|||
| 9102. | DBMS MS Access. Creating requests | 811.23KB | |
| When running a normal select query query, the results are dynamic set data. When creating a query layout, m. When developing a particular query, any combination of basic operations is allowed. Create a select query. | |||
| 4445. | Main objects of MS Access DBMS | 19.85KB | |
| Access is a database management system (DBMS). A control system is understood as a set of programs that allows not only storing large amounts of data in a certain format, but also processing them, presenting them in a form convenient for users. Access also gives you the ability to automate frequently performed operations. | |||
| 9877. | Creating user databases in Access DBMS | 290.11KB | |
| Creation of user databases in DBMS ccess is dedicated to the creation of a database for accounting and processing information on business documentation of a private business enterprise. The developed database will be used in the office work of the enterprise. The use of this database allows you to reduce the time required to prepare reports, reduce unproductive costs, which gives a direct economic effect for a private enterprise... | |||
| 20690. | DBMS Access database Music school | 448.49KB | |
| There are several varieties of database management systems DBMS, some are focused on programmers, others - on ordinary users. It allows you to easily perform basic operations with the database without resorting to programming: creating, editing and processing data. Microsoft ccess serves as a convenient tool for entering analysis and presenting data and provides high speed application development. | |||
| 9098. | DBMS MS Access. Working with table data. Create Forms | 622.88KB | |
| Edit data and print the form. Forms. The process of creating a new form is similar to creating a table, i.e. you just need to select the database object Forms - Create and then in the dialog box New form select the form creation mode. | |||
| 7771. | Bazi danih (Microsoft Office Access 2011 DBMS) | 147.49KB | |
| Liverpool Impact DB record - a series of tables with a specific implementation of the meaning of the understanding of the subject area. The DB field is a value for the power data tables, an attribute of a given understanding of the subject area. Entries in the tables are updated with the values of their fields. For example, for tables, the warehouse of the musical group is the key field, Code. | |||
| 13839. | Designing a notary's office database using Access DBMS technologies | 13.53MB | |
| The notary is one of the most important institutions of the legal system, designed to promote the formation of a democratic legal state in which the rights and legitimate interests of citizens and citizens are reliably protected. legal entities through notarial acts. | |||
| 9099. | DBMS MS Access. Purpose, functionality. Building simple relational tables | 343.83KB | |
| So, in the previous lecture, the basic principles of factographic information systems were considered: data structuring and the construction of two-dimensional tables; bases of relational approach bases of logic algebra and principles of information search. Create new base data file.mdb open an existing database file. ccess is a multi-window application however only one database can be open at any time. | |||
| 7713. | Cash flow statements | 29.5KB | |
| Traffic reports Money IAS 7 2. Cash flow information is useful to users of financial statements because it helps to discount an entity's cash requirements and ability to create cash and cash equivalents. In addition, users need information about the timing and certainty of generating cash flows. Therefore, the purpose of IFRS IS 7 is to establish requirements for the presentation of information about changes in the amount of cash and cash equivalents ... | |||
| 8062. | Parallel DBMS | 179.52KB | |
| The advent of parallel DBMS was driven by the fact that single processor systems were unable to meet the growing demands for scalability, reliability and data processing performance. The use of parallel DBMS allows you to combine several low-power machines to obtain the same level of performance as in the case of one but more powerful machine with an additional gain in system scalability and reliability compared to single-processor DBMS. These include: shared memory systems;... | |||
Reports in Access are used to present data in an easy-to-understand and expressive way, and are intended primarily for printing, not for displaying on the screen. Typically, reports are the end products of working with a database. As well as for creating forms, data from tables and queries (sometimes also forms, but this case no longer applies to simple reports) is used to create a report.
Report design uses much of the same technology as forms design, but unlike forms, the user is not allowed to change data in reports. When editing reports in mode Constructor(see Fig. 42) the same areas of the interface are used as when editing the form - areas header and Notes, areas Upper and Footer, Data area.
Rice. 38. Window for selecting report generation modes
The following modes are used to generate reports: Constructor, Report Wizard, Chart Wizard, Mailing Labels, as well as Autoreports: per column and tape(see fig. 38).
As in the case of forms, a fully prepared report created using Autoreports, obtained immediately after specifying the original table or query. Master Postal stickers although it works in several steps, it does not require much explanation. Based on same usage Report wizards most reports are created in Access, which can have a fairly complex structure. The work with this Master will be discussed in detail below.
It should be noted, however, that all of the above reports are called affiliated(to the data source), since all of them, like forms, use tables or queries to build them. The most complex structure has reports created "from scratch" by the user himself in the mode Constructor. Reports that may contain subordinates reports, use special sorts not provided by the Wizards, and use various functions Access, etc., refers to the so-called. free reports. However, creating complex reports using Constructor requires additional knowledge and is not considered here.
Based Report wizards in Access, a report can be prepared in which the data of the source table or query is combined according to certain criteria. These reports are the most common because they allow you to calculate totals for groups of data and provide information in an easy-to-use way. To create such summary reports, use the command Grouping…(see Fig. 39) and the corresponding calculations on grouped data in the dialog box Results(see fig. 41). In this case, you can specify up to four fields by which the data will be grouped.
If the report contains numeric fields, then for each interval of a group of numeric values, the Wizard automatically calculates the sum of the values contained in these fields. However, using the dialog box commands Results(see Fig. 41), you can calculate the averages ( Avg), minimum and maximum (respectively Min, Max) grouped field values, as well as percentages.
Rice. 40. Selecting grouping intervals for fields with grouping
Rice. Fig. 41. Window for setting calculations when creating a report with totals
You can always edit the created report in the mode Constructor(see fig. 42). To define or change the properties of individual areas of the report, click on the title bar of the corresponding area and select the command Properties.
Note that in reports, some of the controls contain properties Extension and Compression. If you set their value to True, then Access will automatically adjust the size of the corresponding element when printing, thanks to which long text will not be clipped by this element's window, and short will not shrink the element's window so that it does not take up extra space when printed.
Rice. 42. Window Constructor to edit a report
In conclusion of working with the database, we will demonstrate a simple and useful feature that the Access DBMS provides due to its compatibility with other databases. software applications package Microsoft Office(MS) - prepare the distribution of serial letters in a test editor Word, using the information stored in the database tables.
Prepare in text editor Word serial letter template thanking customers for their active participation in concluding contracts for the supply and ordering of goods in your warehouse.
Create a new “Acknowledgements” query, which includes the names of the organizations that took the most active part in concluding contracts with your company, defining the sample condition by the amount of concluded contracts for the supply of goods (the top three firms should be included in the sample). Based on the generated query, start creating a new report using the wizard Merge with MS Word, why you need to execute commands in sequence Links to Office/ Links to MS Word.
This will open a dialog box. Compound Document Wizards. You can work with a previously prepared MS Word document or create a new one by selecting the appropriate command in the dialog box. When you create a new document, Access starts Word, establishes a DDE link between Word and Access, and opens a new one. Text Document, in which you can compose a new letter.
Rice. 43. Linking Word and Access
Prepare a serial letter with the content shown in fig. 43. The names of the fields in quotation marks are entered in sequence in the corresponding place in the text of the letter from the list, which must be opened by clicking on the icon Add merge field(see fig. 43). The list should contain all the fields of the created "Thanks" request, including the "Customers" and "Products" fields we need. After clicking on the icon Fields/Data and using the buttons for scrolling the values of the fields from the database query table, you can preview the letters prepared for printing.
When printing letters, they are replaced by the data of the corresponding database table. The number of letters is determined by the number of records in the table, from which the values for the control fields in the letter are inserted in turn for each record.
After saving and closing the text document, return to Access. Thanks to DDE communication when changing data in a table Access data in a serial letter will be updated automatically. Note that when you open a file with a serial letter in the Word editor, Access automatically loads with the required database.
Control questions
Purpose of reports.
Structure of reports.
Reporting modes.
Report Wizard.
Calculations in reports.
Constructor reports.
Creation of joint documents Access and Word.
LITERATURE
Informatics / Ed. S.V.Simonovich. St. Petersburg: Peter, 1999.
Veiskas D. Effective work with Microsoft Access 2.0, 1996.
Dwine G. Access 97. User's Encyclopedia. Kiev: DiaSoft, 1997.
Jennings R. Microsoft use Access 2000. Moscow: Williams, 2000.
Novikov F., Yatsenko A. Microsoft Office 2000 in general. St. Petersburg: BNV, 1999.
Zmitrovich A.I. and etc. Information Technology in economics. Minsk: Vedas, 1998.
Reports in Access are used to present data in an easy-to-understand and expressive way, and are intended primarily for printing, not for displaying on the screen. Typically, reports are the end products of working with a database. As well as for creating forms, data from tables and queries (sometimes also forms, but this case no longer applies to simple reports) is used to create a report.
Report design uses much of the same technology as forms design, but unlike forms, the user is not allowed to change data in reports. When editing reports in mode Constructor(see Fig. 42) the same areas of the interface are used as when editing the form - areas header and Notes, areas Upper and Footer, Data area.
Rice. 38. Window for selecting report generation modes
The following modes are used to generate reports: Constructor, Report Wizard, Chart Wizard, Mailing Labels, as well as Autoreports: per column and tape(see fig. 38).
As in the case of forms, a fully prepared report created using Autoreports, obtained immediately after specifying the original table or query. Master Postal stickers although it works in several steps, it does not require much explanation. Based on same usage Report wizards most reports are created in Access, which can have a fairly complex structure. The work with this Master will be discussed in detail below.
It should be noted, however, that all of the above reports are called affiliated(to the data source), since all of them, like forms, use tables or queries to build them. The most complex structure has reports created "from scratch" by the user himself in the mode Constructor. Reports that may contain subordinates reports, use special sorting not provided by the Wizards, as well as use various Access functions, etc., refers to the so-called. free reports. However, creating complex reports using Constructor requires additional knowledge and is not considered here.
Based Report wizards in Access, a report can be prepared in which the data of the source table or query is combined according to certain criteria. These reports are the most common because they allow you to calculate totals for groups of data and provide information in an easy-to-use way. To create such summary reports, use the command Grouping…(see fig. 39) and the corresponding calculations on the grouped data in the dialog box Results(see fig. 41). In this case, you can specify up to four fields by which the data will be grouped.
Create with Report wizards for the "Contracts" table, a report in which the data will be grouped by the "Goods" field. Within the group, sort the data by date (see Figure 39). However, using the command Grouping…, set your grouping intervals for the data in the grouped fields (see Figure 40).
Rice. 40. Selecting grouping intervals for fields with grouping
Rice. Fig. 41. Window for setting calculations when creating a report with totals
You can always edit the created report in the mode Constructor(see fig. 42). To define or change the properties of individual areas of the report, click on the title bar of the corresponding area and select the command Properties.
Note that in reports, some of the controls contain properties Extension and Compression. If you set their value to True, then when you print, Access will automatically adjust the size of the corresponding element, so that long text will not be cut off by the element's window, and short text will not shrink the element's window so that it does not take up extra space when printed.
In conclusion of working with the database, we will demonstrate a simple and useful feature that the Access DBMS provides due to its compatibility with other Microsoft Office (MS) software applications - we will prepare the distribution of serial letters in the Word test editor using the information stored in the database tables.
Prepare in a Word text editor a template for a serial letter of thanks to customers for their active participation in concluding contracts for the supply and ordering of goods in your warehouse.
Rice. 42. Window Constructor to edit a report
Create a new “Acknowledgements” query, which includes the names of the organizations that took the most active part in concluding contracts with your company, defining the sample condition by the amount of concluded contracts for the supply of goods (the top three firms should be included in the sample). Based on the generated query, start creating a new report using the wizard Merge with MS Word, why you need to execute commands in sequence Links to Office/ Links to MS Word.
This will open a dialog box. Compound Document Wizards. You can work with a previously prepared MS Word document or create a new one by selecting the appropriate command in the dialog box. When you create a new document, Access launches Word, establishes a DDE link between Word and Access, and opens a new text document in which you can compose a new letter.
Prepare a serial letter with the content shown in fig. 43. The names of the fields in quotation marks are entered in sequence in the corresponding place in the text of the letter from the list, which must be opened by clicking on the icon Add merge field(see fig. 43). The list should contain all the fields of the created "Thanks" request, including the "Customers" and "Products" fields we need. After clicking on the icon Fields/Data and using the buttons for scrolling the values of the fields from the database query table, you can preview the letters prepared for printing.
Rice. 43. Linking Word and Access
When printing letters, they are replaced by the data of the corresponding database table. The number of letters is determined by the number of records in the table, from which the values for the control fields in the letter are inserted in turn for each record.
After saving and closing the text document, return to Access. Thanks to the DDE connection, when the data in the Access table changes, the data in the serial letter will be updated automatically. Note that when you open a file with a serial letter in the Word editor, Access automatically loads with the required database.
End of work -
This topic belongs to:
Working with databases
Belarusian State Technological University. Department of Informatics and Computer Engineering..
If you need additional material on this topic, or you did not find what you were looking for, we recommend using the search in our database of works:
What will we do with the received material:
If this material turned out to be useful for you, you can save it to your page on social networks:
1. Basic information about reports.
2. MS Access DBMS tools for creating reports.
3. Creating a report in Design mode.
3.1. Setting Report Page Options
3.2. Report structure
3.3. Report Formatting
There are several options for obtaining a printed document in the MS Access DBMS:
Printing a table in table mode (displaying all records or records that meet filtering conditions in a table view);
Printing a Query Recordset in Datasheet View;
Print the form in Form View or Datasheet View;
Printing a report.
1. Basic information about reports
Report- a customizable dialog box that allows you to organize a formatted representation of data intended for output to the screen, printer or file. In MS Access DBMS, reports are database objects.
The reports are the best remedy to present information from the database in the form of a printed document. Compared to other means of printing data, reports have 2 fundamental advantages:
- provide ample opportunities for grouping, sorting and calculating subtotals and grand totals for large sets of records (calculations can be made by group, several groups and by the report as a whole);
- allow you to output data in a form close to standard document forms.
Stages of creating a report.
At the first stage, a layout of the future report is developed on paper. At the same time, it is indicated: from which table or query it is necessary to display data, the levels of grouping and sorting data are determined, which fields should be presented in the report and which controls will be used to display data, whether calculated fields are needed, what graphic elements will be used to give professional looking report.
At the next stage, the report is constructed using the DBMS.
2. DBMS toolsMS Accessto create a report
To create a new report in the MS Access DBMS, go to the tab in the database window Reports and click on the button Create . In the dialog box that appears New report(Fig.10.1) select a report creation tool.
All tools listed in the dialog box New report can be divided into three main groups:
– automatic reporting tools (Autoreport: to column, Autoreport: tape);
– Report Creation Wizards (Report Wizard, Chart Wizard and Mail Stickers);
- report builder.
Fig.10.1. Dialog New Report
Automatic reporting tools allow you to create a report of the appropriate type based on the selected data source: a table or a query.
Report creation wizards allow you to create reports in a dialog mode with the user. Using the wizards, you can create a data source for a report, select a data presentation type, define fields for grouping, sorting, and summarizing, select group summary functions, define a report layout and style, and specify a report name.
Report Designer is the main tool that allows you to create reports of any complexity manually. The type of report and its content depend on the qualifications of the report developer.
Typically, automatic report creation tools or wizards are used to create a report prototype, and already in the report designer, the report is brought to a professional look.
You can work with reports in three modes: in mode, in mode and in mode.
The mode is designed to generate a report and display all data from the record source on the screen, the mode is designed to quickly generate a report based on mechanical substitution of data from several data source records (selection and sorting criteria are ignored), the mode is designed to create and change the report structure. You can use the button to change the report mode. View on the toolbar Report Designer or similar menu command View.
3. Create a report in Design view
To create a report in mode, do the following:
1. Set page options.
2. Select or create a record source for the report.
3. Determine the levels of grouping and sorting.
4. Place the record source fields in the report.
5. Add calculated and free controls.
6. Set up properties of controls and sections of the report.
7. Format the report to give it a professional look.
3.1. Setting Report Page Options
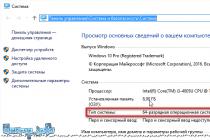
The main purpose of the report is to print out information from the database in a formatted form (close to the form of a paper document). Therefore, before designing a report (placing controls in the report), it is necessary to set the parameters of the report page (select a printer, determine the sheet size and orientation, set margins, etc.).
If there is no physical printer, you must install the printer programmatically using the command operating system Start | Setting | Printers | Installing the Printer.
To configure report page parameters, run the command File | Page settings …. Dialog window Page settings shown in Figure 10.2.


Page tab (a) Margins tab (b)
Fig.10.2. Page Setup Dialog Box
Page settings are configured for each report.
If it is possible to output reports to different printers, then in the dialog box Page settings tab Page you can select the type of printer you want. Dialog window Printer selection shown in Figure 10.3.

Fig.10.3. Printer Selection Dialog Box
Other page parameters depend on the type of the selected printer (see Figure 10.2): maximum paper format and size, minimum margins, paper feed type.
The color of the report depends on the type of the selected printer and the settings of its properties: output in color or black and white.
3.2. Report structure
The structure of the report in the mode is shown in Figure 10.4. Any report has the following sections:
– report title(displayed only on the 1st sheet of the report ( title page) and may contain the name of the report, company logo, legal address enterprises, etc.);
– page header(appears at the top of each page and may include headings, date printed, page number, etc.);
– data area(designed to display fields from a query or table - the source of records for the report);
– footer(displayed at the bottom of each page and may contain headings, date printed, page number, etc.);
– report note(displayed only on the last sheet of the report and may contain final calculations, conclusions on the report, etc.).
Of all the listed sections, the section - the data area - is mandatory.
The Report Title and Report Note sections are displayed/hidden in the window at the same time. The same show/hide principle applies to the header and footer sections (see Figure 10.4).

When grouping records in the report window (see Fig.10.4) can be added for each group, and in reports you can define up to 10 levels of grouping and sorting, independently of the following sections:
– group header(displayed at the beginning of each new group and may contain a field by which the grouping is carried out);
– group note(displayed at the end of each group and may contain group totals).
You can change the height of any section of the report using the mouse by dragging the bottom of the section up or down.
The report width is adjusted based on the selected paper size, paper orientation, and print margins.
An example of determining the width of a report for A4 paper is presented in Table 10.1.
Table 10.1
The width of the report should not exceed the calculated size, because the information displayed in the report will be broken on several pages.
You can change the width of the report with the mouse by dragging the right border of the report to the left or right.
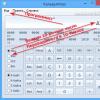
Just like in a form, you can insert various controls into any section of a report: attached, calculated, and free. Expressions in calculated report fields are formed according to the same rules as for forms:
= [Price] * [Quantity]
SUM([Cost]
Last Name & " " & Left(First Name; 1) & "."
With help control Subform/Report You can embed subreports in the main report.
Properties can be refined for each control, section, and report as a whole.
Generated report Order form in mode and mode is shown in Fig.10.5.

Fig.10.5. Order Form report in Design mode (а) and in Preview mode (b)

Fig.10.6. Properties window of the OrdinalNumber field
To display each group (order form) on a separate page, you must set in the properties window of the section OrderCode group note tab Layout property value End of page: After partition(fig.10.7).

Fig.10.5. Properties window of the NoteGroups1 section
3.3. Report Formatting
One of the elements of the report window is the toolbar. Format form/report, which contains buttons and drop-down lists that make it easy to select formatting options (color, font, line thickness, alignment, and so on).
Formatting also means placing controls in report sections, aligning controls, resizing controls, setting spacing between controls. You can use the mouse or use the menu commands to perform these operations. Format (Align..., The size …, Vertical spacing... and Horizontal spacing...).
For faster execution of report formatting operations, you can customize the toolbar Format form/report by copying the buttons from the menu to it Format.
A report is a specially structured presentation of data to be printed.
The report design mode interface is similar to the design mode for screen forms.
Creating and formatting a report can be done in both Report Wizard mode and Design mode.
You can insert charts and illustrations into the report, and data can also be sorted and grouped by the contents of the fields in the report.
1. Creating a report using the Report Wizard:
Select the Create tab and then Reports, then Report Wizard.
From the list, select a table or query based on which the report will be created.
After opening the Report Wizard window, define the fields;
Define grouping and sorting fields;
Determine layout and orientation;
Selecting the desired style;
Enter a name for the report, the default is the base table name.
2. Creating a report in design mode.
The report structure consists of several sections:
1. At the very top of the report is the Report Title section. It contains an inscription with the name of the report.
2. Header. Contains labels that correspond to controls in the Data area section.
3. Section Data area. Contains controls that are associated with fields included in a report in one or more tables.
4. At the bottom is the Footer section. Contains formulas that display the current print date and report page number.
5. At the very bottom is the Note section of the report. This section is typically empty, but can be used to insert a summary formula or other calculations that are performed on the data displayed in the Data Region section.
25. The concept of an algorithm, properties of algorithms
Algorithm - an exact finite system of rules described in some language that determines the content and procedure for actions on some objects, the strict implementation of which gives a solution to the problem.
Any algorithm does not exist by itself, but is intended for a specific performer (human, robot, computer, programming language, etc.). The set of commands that a given executor can execute is called the executor's command system. The algorithm is described in the commands of the executor who will implement it.
The algorithm is characterized by the following properties:
discreteness (discontinuity) is a property of the algorithm that characterizes its structure: each algorithm consists of separate completed actions, they say “It is divided into steps”.
Efficiency is the property that any algorithm must complete in a finite (maybe very large) number of steps.
certainty (determinacy, accuracy) - a property of the algorithm, indicating that each step of the algorithm must be strictly defined and not allow different interpretations; the order in which the individual steps are to be performed must also be strictly defined.
mass character – the applicability of the algorithm to all problems of the type under consideration, for any initial data.
Formality - this property indicates that any executor capable of receiving and executing the instructions of the algorithm acts formally, i.e. is distracted from the content of the task and only strictly follows the instructions. Discuss “what, how and why?” the developer of the algorithm must, and the performer formally (without thinking) executes the proposed commands in turn and obtains the required result.