Dear colleagues. Recently, a friend who works in a photo studio called me and told me about such a problem. They brought them a DVD disc to print photos from it, but after the disc was inserted into the drive, the computer freezes, the drive does not respond to any actions, and it is not possible to remove the disc.
Let's try to figure out what can be done in this situation and how to remove the disk from the drive.
Situation 1.
Let's assume that you put in a disc that your computer could not recognize or "read". You want to eject a disc, but the drive has stopped responding to a button press.
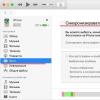
First of all, open the "My Computer" folder, find the device into which you inserted the disk, right-click on it and select "Eject" from the drop-down menu:
If this does not help, restart the computer and try ejecting the drive by pressing the drive button before the operating system loads. If the drive does not respond, then wait for the operating system to fully load and try to eject the disc again using the menu in the "My Computer" folder.
Situation 2
You inserted a disc, after that the drive stopped responding to your attempts to remove the disc, and when you open the My Computer folder, instead of the drive icon, there is an empty space. First of all, try restarting your computer and try to eject the disc before the system boots.
If this does not help, after loading the operating system, check if your drive is detected and if the drive icon appears in the My Computer folder. If the icon does not appear, try using System Restore and restore your computer to an earlier state.
If you are unable to use the system restore function (for example, if it is disabled), or the restore did not work, try removing and reconnecting your drive. It is done like this. Open the device manager and find our drive:
Select it and at the top click on the "Action" item, and in the drop-down menu, select "Delete". In the window that opens, click OK and complete the removal of the device:
Restart your computer.
After restarting the Windows operating system, the device will be detected and reinstalled.
Follow the instructions on the screen to complete the installation.
If you are not prompted to restart your computer, follow these steps:
From the Device Manager Action menu, select the Update hardware configuration option.
Follow the instructions on the screen.
After your drive is detected by the operating system and appears in the My Computer folder, try ejecting the drive using the My Computer folder menu or by pressing the button.
Situation 3.
You inserted a disc and the computer completely freezes. Neither reboot nor other manipulations help. Then do the following. Turn off your computer. Take a thin metal object (a thin knitting needle, a large needle, or a piece of a straightened paper clip). On the front of the CD/DVD, look for a small hole, as shown in the picture:
Then stick a needle (or other metal object) into this hole and start pressing. The harder you push, the more the disc tray pops out. The main thing is to press the needle evenly, because you may not get on the lever that is responsible for removing the disc. Then, when the tray is extended enough, pull it out completely by hand, remove the disc and push the tray back.
Reboot your computer and check if your drive is working. If even after removing the disk your drive refuses to work normally, then it is possible that it is out of order and either it needs to be replaced or repaired.
By the way, the last method of ejecting a disk can come in handy when it is not possible to turn on the computer (for example, due to a lack of electricity in the network), and you urgently need the disk that is in your drive.
Sincerely, Alexey Dneprov.
Want to get even more free information? Subscribe right now to the newsletter "Video shooting and editing - 1000 professional secrets":
Disk can get stuck in the drive for a variety of reasons, ranging from a power outage in the house, to mechanical damage to the CD-ROM itself. In any case, the disk must be removed, and this task is absolutely doable.
You will need
- needle, pin, any thin, straight object of this type.
Instruction
1. Make sure the stuck disk is not currently in use, ie. programs or data from this disk are not open. Otherwise, end all programs on the disk.
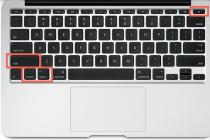
2. Try pressing the Media Eject key on your computer keyboard (the button with the underlined up arrow symbol in the upper right corner or F12).
3. If you can't eject the disc, try pressing the Media Eject key while holding down the Fn button (for laptops).
4. If all of the above does not help, try dragging the disk icon to the Trash easily.
5. If this does not help, restart your computer. For Mac computers, press the mouse or trackpad button at once and use Restart from the Apple menu in the upper left corner of the desktop.
6. For a further attempt to eject the disk, you will need to restart the computer by simultaneously pressing four keys at once: Command + Option + O + F. After opening the Welcome to Open Firmware window, release the keys and enter the eject cd command and press Return. It is assumed that after this the disk will become available for extraction, and the system message ok will appear on the computer screen under the command entered. To continue with a typical boot, type mac boot and press Return (for Mac computers.
7. In the absence of the desired result, find on the front side of the drive a small round hole with a diameter of 1.0-1.5 mm. Insert a needle into it at a right angle and press. When you hit the lever, the CD-ROM will open and the disc will become available.
A hard disk is one of the most vulnerable elements of a PC. When replacing this device, you need to be very neat. In addition, the main thing is to positively prefer the latest hard drive.

You will need
- screwdriwer set.
Instruction
1. Disconnect the power supply cable from the mobile computer. Turn off your laptop. Tilt the device and remove the battery. Study in advance the type of fastening of this battery.
2. Unscrew the necessary screws holding the battery. Modern laptops use special latches. Move all available controls to the Open position. More often than not, the latches are marked with special signs in the form of an open lock.
3. Remove the battery from the mobile computer case. Locate the compartment prepared to store the drive. Remove the screws and open the cover of this compartment.
4. Now remove the screws holding the hard drive carriage. Carefully move the hard drive away from the connectors. Pull the rough disk out of the case. Examine the interfaces of the device.
5. If you see a lot of separate pins, then this rough disk has an IDE interface. SATA hard drives have two flat connectors. Get the equipment you need.
6. Remember that for mobile computers you need to use severe disks with a 2.5-inch form factor. After receiving a new hard drive, secure the device in the carriage using the remaining screws.
7. Install the hard drive in the mobile computer bay. Connect the equipment to the connectors by sliding it in the desired direction. Screw in the control screws that will prevent the hard drive from turning off while using the laptop.
8. Close the compartment cover. Secure it with screws. Turn on the mobile computer and open the BIOS menu. Make sure the latest rough disc is identified and available for use. Proceed with installing the operating system on the latest drive. Be sure to format the newest hard drive before use.
In the vast majority of applications for the Windows operating system, the graphics used in toolbars and menus are stored in module source segments in icon format. Windows icons are sets of image-mask raster pairs, thereby allowing you to save several icons of different resolutions in one file using transparency. There are tons of free icon collections available today. But occasionally, for research and experimentation, it is required to stretch icon from the present module.

You will need
- Resource Hacker program.
Instruction
1. Open the PE module in Resource Hacker. In the main menu, click on the “File” item. Then select "Open". The open file dialog will be displayed. Go to the directory where the file you want to extract is located icon. Select a file from the list that displays the contents of the directory. Click the "Open" button.

2. Search for the icon you want to extract. Later, after the PE module is loaded, a panel is displayed on the left side of the application window, which is a tree control. It will contain information about all sources of the module in the form of a hierarchical representation grouping sources by type. Expand the "Icon" section. Then step by step expand the subsections of this section. They will display elements whose names will correspond to the numeric identifiers of the icons. Step through the elements. View icon images in the far right pane. Do the same with the “Icon Group” section.

3. Start saving the detected icons. Select the desired source. Click on the “Action” menu item. In the displayed submenu, select the item corresponding to the operation of saving the selected icon. The name of the item has the form: “Save [section: subsection: identifier]”.

4. save icon. In the “Save resource to…” dialog that appears, specify the directory where the icon file will be saved, as well as its name. Click the "Save" button.

5. View your saved icon. Use the probabilities of image viewers, Windows Explorer, or the probabilities of the file manager. Make sure the extracted icon has been correctly saved.

Related videos
Note!
Extraction, modification and subsequent distribution of icons that are copyrighted may be illegal. Always be familiar with the license for the software and the graphics used in it.
Useful advice
Use specialized software such as Icon PRO, Microangelo, aWicons PRO to view and edit extracted icons.
Various unpleasant incidents happen in life. And it is not always possible to immediately consult a doctor in order to receive qualified medical assistance. If a situation suddenly occurred when you drove a splinter in the form of a needle into a certain part of the body, then you need to do it immediately.

You will need
- - tweezers;
- - glue, tar or resin.
Instruction
1. Before anyone else, keep in mind that unskilled picking in the body in order to pull out such a splinter can provoke subsequent complications and the formation of a secondary infection. However, if the needle penetrates the body, it must be done immediately. True, immediately notice all the horror stories that the needle, once in the flesh of the body, immediately begins to travel through the veins and comes to the heart, which can provoke a fatal outcome. Experts call these stories an ordinary bird, however, they do not refute that needle must be immediately pulled out of the soft tissues. However, cases of needle migration through the soft tissues of the body did occur.
2. If the needle or part of it has not completely entered the body and is quite close to the surface of the skin, then it is allowed to use various methods, with the support of which it is allowed to get it. For example, it is allowed to use ordinary tweezers, with the help of which you grab the tip of the needle, stretching the skin. If you get needle succeeded - the task is eliminated. Disinfect the area where the splinter was just and don't worry.
3. Another way is to lubricate the place where the edge of the needle sticks out with strong glue, tar or resin. When the layer dries up, together with it, an unpleasant splinter can be removed from the body. If you pull such a splinter to a child, then try, before everyone else, to comfort him so that the baby relaxes as much as possible. Then the splinter will come out much easier and faster.
4. All of the above methods are only suitable when the tip of a whole or broken needle is visible from the body to the naked eye. If the needle entered the body entirely, then you should immediately go to an appointment with an expert. Let the surgeon take a good look at you, even if there is a slight doubt about the likelihood of a needle entering the body. Before the doctor scrupulously examines you, try not to move unnecessary times: a needle is a solid business.
5. The doctor will first take an X-ray, and later will perform a surgical tying, with the help of which the needle will be removed from the body. If necessary, the doctor will administer anesthesia, and the operation will be swift and rather primitive.
inserted disk into the drive, they wanted to work with him, but he turned out to be “vicious”. The drive refuses to release it, and for some reason you cannot restart the computer. Familiar surroundings? This task is solvable.

You will need
- Unlocker program, needle or paper clip.
Instruction
1. If by simply pressing the “open / close” button on the drive it is not possible to eject the disk, then there is a very small probability that the task is in this button itself. In order to exclude or certify this option, use the programmatic extraction method - open the "My Computer" window by double-clicking on it on the desktop. In the window on the icon drive right-click and select "Extract" from the context menu that appears.
2. In the event that no reactions have occurred, it is absolutely acceptable that one or another file on the disk is occupied by some system process, maybe even a virus. In order to check this, use the Unlocker program. If it is not there, then by all means install it, it will fit you very well for solving many problems.
3. After installing the program, the Unlocker item will appear in the context menu of the drive, click on it. A program window will open, in which there will be information about which process is using this or that file on the disk. If the program showed a list of files and paths to processes, then the files are locked and, consequently, the disk cannot be ejected.
4. To unlock files at the bottom of the program dialog box, click on the "Unlock all" button and try to eject the disk. If all else fails, then move on to the next method.
5. Take a paperclip and straighten it (you can also use the back of a thick needle). There is a small hole on the front of the drive (it is used to open the tray in an emergency), insert the end of a paper clip there and push inward. The tray latch will loosen and you will be able to pull it towards you and eject the disc.
Useful advice
If none of this helps, or a similar snag recurs regularly, then remove your drive and take it to a repair shop.
People who work a lot at the computer sooner or later face breakdowns. keyboards. Some keys may start to stick, move crappy in their cell. Patterns may be erased on some keys. Don't rush to throw away your keyboard! It is allowed to give a second life.

You will need
- Instruction manual, sheet of paper, screwdriver set.
Instruction
1. Familiarize yourself with the operating instructions for your keyboards. If you can't find the manual on paper, visit the manufacturer's website for your keyboards. On it you will be able to find the authorities for the operation of your keyboards electronic. In it you will be able to discover the structure of your keyboards. With her help, you will be able to realize how cool it is to disassemble your keyboard and find all the noticeable fasteners and bolts.
2. You also need to redraw the location of the buttons, so as not to confuse them in the future. To do this, take a sheet of paper, draw a diagram on it. keyboards and label all keys. It is also possible to find such a scheme on the Internet and print it on a printer.
3. Tilt the keyboard with the keys down. Loosen all bolts. It is also necessary to unscrew the bolts that may be on the front. After this, carefully open all the latches and gently pull the back panel towards you. She must take off. After that, you need to take out two layers. Find a small socket with diodes. Usually it is attached with one small bolt. Unscrew it and dismantle it.
4. Now you need to start at ease to extract the keys themselves. If all the keys are in separate sockets, then you need to carefully press the key with your finger from the back. The latches will compress and the key will be released from the mount. This procedure must be done very smoothly and neatly, so as not to damage the latches with an inadvertent movement. If the keypad is solid, then you need to find the latches or bolts with which it is attached to the body keyboards. Unscrew the bolts or open the latches and carefully remove the canvas from the grooves. Assembly keyboards must be done in reverse order.
Probably you have already come across such an unpleasant situation when a different letter was assigned to one or another partition of one hard disk or DVD drive. It turns out that the alphabetical priority in the naming of sections can be changed using standard Windows tools.

Instruction
1. Why is this happening and by what thesis are drive letters separated? If you installed the operating system on a blank, unpartitioned, rough disk, the newly partitioned hard disks take on the remaining letters. As usual, the “C” drive is the system drive, and the letter “D” is assigned to the drive (drive). Also, such a case with unequal assignment of drive letters can occur when installing other storage media, say, flash drives or card readers (some can reserve up to 4 disks).
2. To change the drive letters originally assigned by the system, you need to open the Computer Management applet (for Windows XP). Click the "Start" menu, in the list that opens, select "Control Panel". After that, go to the "Administration" section and select "Computer Management".
3. You will see the Computer Management applet. Select "Disk Management" and right-click on the DVD drive (disk drive). From the context menu of the drive, select Edit letter drive or the path to the drive.
4. In the window that opens, click the "Change" button, then click the drop-down list "Assign letter disk (A-Z)" and select any free letter. If the desired letter is occupied by one of the hard disk partitions, select any letter, so that later it was possible to get the necessary one when changing the letters of the hard disk partitions.
5. Later, the metamorphosis of the letters of the hard disk partitions, return to the settings of your drive - now it is allowed to change the former letter drive to the desired one.
6. In the Windows 7 operating system, this operation is performed similarly. To quickly launch the Disk Management applet, click the Start menu, type diskmgmt.msc in the search bar. In the search results, click on the found file. If you are unable to perform this action, you can do this: click the "Start" menu, select "Control Panel", in the window that opens, go to the Administrative Tools section and run "Computer Management".
7. All actions for changing drive letters or drives are similar to the case described using the Windows XP operating system as an example.
Imagine the situation that you inserted a disk into your drive, and not only is it not readable, but it also slows down the work of each computer. It is not possible to extract it from the drive using conventional methods. You will have to use other methods.

Instruction
1. Check the drive button to remove disk from computer. The probability of a button malfunction is very small, but still there. In this case, only the button does not work in the drive, the rest of its systems must be in perfect order. In order to verify this or discard this version, double-click on the "My Computer" icon on the desktop.
2. Right click on the drive icon. In the context menu that appears, select "Extract". If the tray is ejected, you can remove disk and start to deal with the faulty button. If the miracle did not happen, keep looking for options.
3. Install the Unlocker program on your computer. You will need it in order to check if any of the files on the disk not a system process or a virus program. It is permissible that it is consequently the drive that does not open. After the program is installed, go to "My Computer".
4. Recall the context menu of the drive icon. Now it has an Unlocker item. Click on it with the left mouse button. The program will start. Its window will display information about which file with disk and what application or process is busy. If the path is specified, then this file is locked.
5. To get disk from the drive, click on the "Unlock All" button. The list will be cleared. If you can't get it later disk try another option.
6. Take a thin needle or a paper clip (the paper clip must be unbent and straightened). Locate the small round hole on the front of the drive. It should be under the tray, next to the button. Insert the needle in there and press lightly. Without releasing, pull the tray towards you.
7. Pull carefully so as not to break the loose latch. If this method did not bring the desired result, then you need to contact the service center for help from experts, or you can easily buy the latest drive for your personal computer.
Related videos
One of the main collections of an optical drive is speed disk reading. The higher it is, the faster the information will be written from the media to the rough disk of the computer. But there is a small flaw here: the higher speed drive, the noisier it works. But if this defect is insignificant for you and it is much more important for you, so that the recording is carried out faster, then you can increase speed drive .

You will need
- – CDSpeed v2.0 software;
- – program Speedlock beta-2.
Instruction
1. Minimum and maximum speed limits drive depend on the specific model. You will not be able to set a higher speed than the one listed on your optical drive specification.
2. To increase the speed of the drive, you need to use special software. One of the most primitive and comfortable programs is called CDSpeed v2.0. Download this utility from the Internet - it is free. Unpack the archive with the program, there will be only one file. The utility does not require installation - simply double-click on this file with the left mouse button.
3. A small window will open. There is an arrow at the top of the window. If you click on this arrow, a list of connected drives will appear. Select the drive from this list speed which needs to be increased. Of course, this is only necessary if you have multiple drives installed on your computer.
4. The maximum value is written in the lower left corner of the window. speed optical drive, say, Max 48. Nearby there are two arrows, one of which points up, the other - down. Next to them is the current speed drive. Click on the arrow pointing up with the left mouse button. Speed drive will be increased by 1. Thus, you can increase it by as much as you need. After that, click Exit. The program window will close.
5. Another tiny speed control utility is called Speedlock beta-2. It's also free. To run it, you only need to unzip and double-click on the executable file. A window will open. In this window, find the line Preferred. There is an arrow next to the line. Click on this arrow and increase speed drive, then click Apply. Later than this speed optical drive will be increased.
When repairing or improving the computer, the user may need to remove drive from the system block. This procedure is quite primitive and absolutely can be performed independently.

Instruction
1. Before you start, do not forget to unplug your computer from the network by unplugging the power cord. After that, remove both side panels of the system unit, usually for this you need to unscrew the fixing screws located in the back of the case. On some computers, you will need to remove the front panel to remove the side panels.
2. Disconnect from drive plumes, remembering their location. Power connector on IDE- drive x can be quite tight, to remove carefully shake it from side to side. After disconnecting the cables, unscrew on both sides drive screws holding it. Now carefully remove the device from the system unit.
3. Installation drive performed in reverse order. If you are changing an IDE drive and you have another device on the same cable as it, check the location of the jumper. On the device that is at the end of the loop, the jumper must be set to the master location. On the one connected to the middle connector, put the jumper in the slave location. If you put a drive and a hard drive on the same cable, the final one must be connected to the end of the cable.
4. When installing devices with a SATA interface, you do not need to set jumpers, because it is unthinkable to connect more than one device to a SATA cable. When connecting the cables, do not use force: if the block does not fit into the connector, then you have not aligned them exactly or are trying to insert them opposite.
5. Most cables have special keys that do not allow the connector to be connected abnormally. If there is no key, the first core should be found on IDE cables, it is highlighted in red or blue. After that, look at the pin numbering on the connector of the connected device. The first conductor of the loop must be connected to the first contact.
6. If you are instead of a decrepit IDE- drive if you want to install SATA, check if your computer motherboard has the appropriate connectors. If there is, pay attention to the power connectors - they are different on SATA drives. If your PC power supply does not have the correct connectors, purchase a SATA power adapter.
CD is an optical disc for recording and storing data. A CD drive is a device that writes and reads data from a CD. After reading or writing, the disk must be removed from the drive.

Instruction
1. To eject the CD, press the button on the front of the drive. In normal mode, after this, the tray is pulled out, in which the disc is placed.
2. You can get the disk using Windows tools. Double-click the left mouse button on the "My Computer" icon. Locate the CD drive icon, right-click on it to open the context menu and select the "Eject" option. After this, the drive tray should pop out.
3. If you can't open the CD drive, check to see if it's being used by programs that read or write data. Wait for the conclusion of the work of these programs, then try again. Perhaps the program that was accessing the CD has hung. Use the keyboard shortcut Ctrl+Alt+Delete to open the process manager. In the Applications tab, see which tasks use computer sources. Sweep up the hung program and click End task.
4. If no programs are accessing the CD and the tray still won't open, restart your computer and try opening the drive again. If you hear the classic sound of a spinning spindle, then the malfunction is not too serious - more likely than anyone, the tray is stuck.
5. Take a sewing needle or a hefty thin knitting needle. Look for a hole in the front of the CD that is a hefty small diameter. With the eye forward, insert the needle into the hole perpendicular to the plane of the panel and press the tray latch. After this, the tray should pop out.
6. If the drive does not open, take a flat sharp object, say, a scalpel or a clerical knife. With a needle or a knitting needle, press the tray latch, and with a knife try to pry the door and pull it towards you. After you have opened the drive in this way and removed the disc, restart the computer.
In order to install the disk, you first need to take a set of tools for the computer and the rough disk itself.

Then back up the information that is on the dilapidated drive. In the event of some kind of breakdown, you can lose all information from the hard drive (rough disk). Next, you need to turn off your computer, and disconnect the power from the network. Remove the side of the case. We are looking for a device that needs to either be replaced or installed. As usual, a rough disk in the case is placed a little higher than the disk drive. A rough disk is placed next to the front panel so that the connectors are turned towards the back of the panel. Then we disconnect the power and data cable on the back of the drive. Carefully remove the connector, shaking a little, so as not to damage anything. Occasionally, hard drives are fixed in a case with the support of a metal screen bracket. Then you should pull out the disk together with the bracket, and then remove the top cover, called the screen. After that, you need to pull out the screws (4-8 pieces), with the support of which the coarse disk is fixed in the case. Now you need to install the disk in place of the dilapidated drive. The disc should fit snugly, but without effort or distortion. From the back of the hard drive there should be free space for cables. Make sure that the newest drive does not cling to other equipment. The drive connects to the computer with support for 2 cables: a cable from the computer's power supply and an interface cable, the one that connects to the IDE connector. Make sure the connector fits snugly into the socket. If the connection is loose, then your drive will either malfunction or not work at all. It should be checked that the connected cables are in place and not pressed. If everything is typical, install the housing cover in place. We connect your disk, and the computer to the network.
Diskette, whose sliding door is skewed, may be stuck in the drive. It will not be possible to pull it out by pressing the button. To remove the elastic disk, the drive will have to be removed and disassembled.

Instruction
1. Shut down the operating system and wait for the mechanical shutdown of the computer. Power off the system unit and all peripherals. Remove both covers, then separate both cables from the drive (one of them comes from the motherboard, the other from the power supply). Be sure to sketch how they were connected.
2. Remove the screws on both sides that secure the floppy disk drive to the chassis. Pull it out either towards you, or, if the case is equipped with a decorative trim over the drive, in the opposite direction. In the second case, do not touch the video card - it is permissible, for this it will have to be temporarily removed.
3. Remove the top cover from the drive. If it is held by screws, remove them beforehand. Use a screwdriver to forcibly return the sliding sash to the middle position. Later, use the same screwdriver to lift the floppy disk and direct it towards the slot. Later, pull it out with your hands.
4. Look around the drive for the presence of third-party objects: paper clips, springs from floppy disks, etc. Shake them out, then try several times to insert a working floppy disk into it, and then remove it with the button. The mechanism must work clearly. Close the drive with a lid, and then make sure that the mechanism works in the former way.
5. Install the drive in the computer in reverse order. Connect the cables to it according to the drawing you made earlier. Incorrect connection of the interface cable can damage the port on the motherboard, and the power cable will inevitably damage the drive itself. Close the system unit, turn on the power, wait for the OS to load and check the drive in action. If you need to read data from a floppy disk that you just removed, remove the shutter and spring, and then, without touching the magnetic disk, insert it into the drive, make a backup copy, and then remove it. Huge do not use this floppy disk.
Related videos
Note!
After the mechanical ejection of the disk, a restart of the computer is required to correct the drive's performance.
Useful advice
The mechanical method of removing a jammed disk is universal and applicable to the vast majority of computers, regardless of the operating system.
Almost all car owners whose cars are equipped with CD players face the same problem - jammed discs. Since they are installed inside the car itself, it is possible to get them only from one side, unless, of course, you are ready to remove and disassemble the player itself. A disc stuck in the player is a rather unpleasant problem. Fortunately, there are several options for dealing with such a headache. However, note that if you do something wrong, you can damage the player (or the disc will remain inside). In any case, the advice in this article is no substitute for the authoritative opinion of a car expert.
Steps
Using the power and eject buttons
Shut off the car. Some players have a "forced eject" feature designed specifically to eject a disc when other methods fail. Since in this method there is no need to get inside the player itself, we recommend starting with it - in any case, you do not lose anything. First of all, turn off the car if you haven't already.
As soon as you turn off the engine, simultaneously press the "power" button and the "eject disc" button on the player and hold them for ten seconds. If your player supports the "forced eject" function, then at the same moment the disc will pop out.
If that doesn't work, start the car again. Some CD players may not work while the machine is turned off. When you start the engine, also try to press and hold the same buttons: "power" and "forced eject".
Take a look at the player manual. In general, pressing the above buttons at the same time is the same force eject command for all players, however, some CD players may use other buttons to eject a jammed disc. Look at the instructions that came with the player - there should be information about the functions that will allow you to eject the disc.
Wait 10 seconds, then reconnect the terminal. After that, start the car and try to remove the disk as usual. Disconnecting and reconnecting the CD player's power may cause it to reset to factory settings, which may restore the function responsible for ejecting discs.
If the player still does not turn on, replace the fuse. Please refer to the user manual. Often the fuse box is located behind the dashboard on the driver's side. Disconnect the battery. Remove the protective sheath from the fuse box, replace any player fuse that may have blown.
With a knife or wood chips and tape
- Note: just like the other methods described in this article, this method runs the risk of damaging the jammed disc or the CD player itself. If you don't want to risk your property, take your car to a professional for repairs.
-
Tape (sticky side out) around the edge of a spatula (or similar). The adhesive tape should be strong, for a good result, Gorilla tape is suitable. Spatulas are usually tapered, so the tape should not slip off. If you are using a different shaped object, such as a popsicle stick, first stick the tape to the object, then wrap it around a few times, turn the tape inside out, and do a few more turns to ensure it sticks firmly to the object.
Glue a piece of thin paper to one side of the knife. A knife wrapped in adhesive tape will be difficult to put into the player. The paper will make one side of the knife smooth. Glue printer paper or colored paper to the knife and cut it to the shape of the knife with scissors.
Insert the knife into the player sticky side down. Move the knife until you feel the knife touch the edge of the disk. Press lightly on the knife until it sticks to the disc. When you feel that the knife has stuck, try to gently lift and remove the disc.
Be careful not to get electrocuted. Insert a long flat knife or something similar directly into the player. Metal knives conduct electricity, so if you have a suitable object made of wood or plastic (like a popsicle stick), use it. If not, make sure the player is disconnected from the power sources, turn off the car, turn off the player and disconnect the negative terminal from the car battery.
With a plastic card and a screwdriver
- Note: if the method is used incorrectly, the disc or player may be scratched or otherwise damaged. As always, be careful, and when in doubt, it is better to consult a professional.
-
Take a hard plastic card, such as a driver's license or a credit card. In this case, you need a thin but firm card. It is advisable to use an inactive card, one that you do not mind losing or breaking. Stick a piece of double-sided tape to the narrow edge of the card.
- You can also use one-sided tape by sticking it to the card, turning it inside out and wrapping it around the card several times.
-
Take a thin flat screwdriver. This method is similar to the spatula method above, but the difference is that the screwdriver helps the card adhere to the disc. You will need a fairly short, thin flathead screwdriver. The thinner, the better, since it must be partially pushed into the disk opening.
Slide the card through the slot OVER the jammed disc (sticky side down). A screwdriver may be needed to guide the card so that it passes directly over the disk and sticks only when it goes 1.5–2 cm into the opening.
Insert a screwdriver over the card, gently press it on the card. This will ensure that the tape on the bottom of the card sticks to the top of the jammed disc.
Observe the precautions for working with electricity. As mentioned earlier, disconnect the CD player from all current sources and make sure there is no electrical charge. Turn off the car, turn off the player, disconnect the negative battery terminal.
My explorer shows three drives C: D: E:. C and D are hard disk partitions and E is a CD drive, BUT I DON'T HAVE IT!
So far, it has not bothered me, but now I have made another hard disk partition and it has the letter F, since E is busy and a non-existent drive is tucked between the hard disk partitions!
How to remove a non-existent CD drive or at least change its letter? Let me remind you right away that Acronis and other programs for working with hard disk partitions are not suitable - they do not see CD drives, especially non-existent ones!
Yuri | June 14, 2017, 18:53
Answer presto | May 18, 2013, 18:13 WINDOWS 10 WORKS 100% THANK YOU!!!
Vadim | March 26, 2017, 03:02
Thanks guys, we figured out how to delete a non-existent drive E!
Thank you very much!!!
Sagris | September 2, 2016, 04:01 PM
I assume that you installed the UltraIso Portabl program on a local disk and did not delete the program folder, find and delete it, and get rid of the non-existent "CD E"
Abdul | April 28, 2016, 10:29 am
Uninstall UltraISO if not needed. And if you use the program, then in the program in the settings, turn off the virtual disk or rename it.
UltraISO - Options - settings - virtual drive - number of drives - set to zero.
Alexey | August 3, 2014, 09:28
Even in the UltraISO settings, you need to disable the virtual disk (if this program is installed).
Presto | May 18, 2013, 18:13
There is a way, but you have to use the registry editor. Run regedit.exe on the command line. Select HKEY_LOCAL_MACHINE\SYSTEM\MountedDevices, right-click on \DosDevices\E: - Rename - replace E with any free letter - close the registry editor, reboot. Now, in Disk Management, assign the freed letter E to the third partition. And the entry in MountedDevices corresponding to the drive can be deleted, if it appears again, then not under the letter E.
Vyacheslav | May 10, 2013, 21:14
Lots of answers and all wrong. It was said that this SD drive is nowhere to be seen except in the conductor. And it's not in the device manager. And then they write to change his letter. I wonder how if the disk is not visible anywhere? They are talking about some unnamed program. I have the same problem. I once read that you can remove it from the BIOS, but where I can’t find this article because of the prescription of time.
Maybe someone remembers?
Nicholas | March 3, 2013, 03:49 pm
On your screenshot - you have a CD-Rom in your system. If you don't physically have a CD drive in your system, then it's a virtual CD-Rom. How to delete? Using Windows tools or the program that this virtual CD-Rom was made with. You already wrote about it here. How to change the letter - also wrote. You can also look in this article about changing the letter (here with pictures). If you do not understand what they are talking about, then call a specialist, let him correct everything on the spot.
ProFFesr | February 20, 2013, 04:02 PM
Yes, judging by the picture here, they did something with the sections, it's okay
Alex | February 17, 2013, 19:59
If there is no physical CD drive in the computer, and the CD drive is shown on my computer, then the CD-ROM emulator is most likely enabled, such as Daimon Tools, or it is in the same Nero ...
Pages: [ 1 ] 2
See also:
2 hard drives on a computer
? Windows Resource Protection cannot start the recovery service
? Problem with starting the computer and system restore
? Close ports 135 and 445
? Some programs don't work
? System rollback
I had to tell them how to do it, so I decided to write an article about removing a stuck or non-opening laptop or computer drive and believe me it’s really easy in detailed news, I’ll tell you about it.
How to eject a disk?
Moreover, it will need to be obtained by anyone.
First, make sure that all programs that use the drive, whether it's writing files to it or doing anything with the drive, are stopped and closed. The simplest thing is to right-click on the drive and select eject disk if it does not eject, go to the next method:
Why does the DVD drive tray in the computer keep opening?
Another self-made repair, this time they brought a desktop computer, with a sealed tape, a drive tray.
The symptoms of the disease are something like this: the drive tray continuously opens and closes, Windows loads and works slowly, and even when you try to access the DVD drive through Windows, the explorer window generally falls into a complete stupor.
To begin with, I disassembled the system unit and disconnected the data cable from the DVD drive itself. To exclude the influence on the drive of Windows itself or some sort of picked up viruses. But this option did not give anything, the drive still opened and closed the tray, even while in the BIOS.
Taking a good look at the tray itself, I was somewhat confused by these scuffs and creases on the front surface of the drive and around the tray. Apparently they tried to open it with brute force, picking the tray with something sharp.

Although, to open the tray, it was enough just to insert a paper clip into the desired hole, slightly press on it and the tray would slide out by itself.

I disconnected all cables from the drive and pulled it completely out of the system unit.
Here you can see that the edge of the tray is bent inward, such dents were almost along the entire perimeter.
Remove the decorative strip of the tray. It has latches on the bottom, so we pull its bottom edge towards ourselves and at the same time press it to the top so that it slides off the guides.

We straighten or cut off all creases, after which we assemble the drive, connect all cables and check.

In my case, the problem was immediately solved, the drive stopped pulling out the tray.
How to get a disc out of the drive if it won't open?
As it turned out, the whole problem was in these creases on the decorative strip of the tray. It looks like the tray did not close completely, as a result of which the sensors did not work as they should and the drive brains began to drive the tray back and forth. It would be possible not to remove the drive from the case, since the bar can be easily removed from the outside. But I also decided to look inside the drive, in case of possible damage. So if your computer suffers from something similar, then the first thing to do is to inspect the drive from the outside. Especially if you tried to pull the disk out of it before by brute force.
Other pages of the site


When copying materials from the site, an active back link to the site www.mihaniko.ru is required.
Today my friends called me, with the problem of a DVD / CD disc stuck in the laptop drive, and the drive does not open and asked how to eject disc from drive. I had to tell them how to do it, so I decided to write an article about removing a stuck or non-opening laptop or computer drive and believe me it’s really easy in detailed news, I’ll tell you about it. Moreover, it will need to be obtained by anyone.
So let's start to remove the disk that is stuck in the drive drive: the tool for extracting any paper clip, needle or pin.
Let's go a short guide to removing disks from the drive of any device, whether it's a laptop or a personal computer.
First, make sure that all programs that use the drive, whether it's writing files to it or doing anything with the drive, are stopped and closed.
How to eject a disk from a computer?
The simplest thing is to right-click on the drive and select eject disk if it does not eject, go to the next method:
We try to press and hold the eject button on the CD / DVD drive itself until the disc is ejected, if this time the drive does not open and the disc still spins and the drive does not open, then proceed to the next method:
If the top two methods did not help to remove the disk from the laptop / computer drive, we proceed to try to restart our device, first we try the usual method of rebooting through the start menu if it does not reboot and does not turn off then we proceed to hard shutdown of the PC or laptop, in other words, hold down the power button and hold it until the device turns off, after which we try to turn it on again and remove the disk from the drive of our laptop or computer in the usual way, and if this method has not helped, we proceed to the following steps that will definitely help us:
The mechanical method of ejecting a disk from a laptop or computer drive in the picture above shows where the emergency eject hole is located from the drive of our drive, this method is suitable for almost all existing drives, now we need the above listed tools, we take a regular paper clip and anything we select according to the diameter of the hole in the drive and press the mechanical eject lever. So I congratulate you, you were able to independently remove the disk from the drive of your drive with the help of an expensive specialist. It happens that the drive fails in this article you will read (How to replace the drive on a laptop).
Many of us have often encountered such a problem when it is impossible to remove a disk from a computer. Today we decided to tell you how to remove a stuck disk.
First, let's talk about how you can pull the drive out of the laptop. A disc gets stuck in a drive for various reasons. In any case, you need to get it out of there. This is done as follows: If pressing the button on the drive fails to eject the disc, then there is a possibility that the problem lies in the "open - close" button itself. In order to exclude or, on the contrary, confirm this option, use the software extraction method. Namely, open the MY COMPUTER window, right-click on the drive icon, and in the window that appears in front of you, select the EJECT command.
If nothing happened, most likely, some file on the disk is occupied by a system process. To find out, use the "Unlocker" program. After you install it on your PC, an item called "Unlocker" will appear in the drive menu, which you will need to click on. A window will open after that, where all the information about which process is using the file on the disk will be indicated. To unlock the file, click on the UNLOCK ALL button, which will be located at the bottom of the dialog box. Now you can try again to get the stuck disk. If this option did not help you, then move on to another. To do this, take a paper clip and straighten it, then insert the tip of the paper clip into the small hole in the drive, which is located on the front panel of the system side. Next, push the paperclip inside this hole, after which the latch should loosen. Pull the disc towards you and remove it.
How can I remove the hard drive?
Most users prefer to repair office equipment with their own hands. To repair it, in some cases, you need to pull out the hard drive. And it is very simple and easy to do it. Before you start work, that is, start removing the hard drive, you should not forget about safety precautions and turn off the personal computer from the mains. In this issue, this moment is key. Now you can start disassembling the PC case. First, the side covers are removed from the system unit, so you will see six bolts on the back of the case. Unscrew them, and you will have free access to remove the hard drive.
Before you start unwinding the mounting bolts, disconnect all power wires and cables that lead to the device. Do everything carefully and carefully, for the reason that there is a high probability that the wiring may be damaged. After everything is turned off, you can proceed to unscrew the mounting bolts. Fold the bolts as you unscrew them separately from the rest so that confusion does not occur. After you unscrew all the screws that hold the hard drive, you can easily remove the hard drive itself.

