Welcome to my blog site. Today we will talk about creating a website from scratch php. Before starting the development of an Internet project, webmasters ask themselves the following question: in what programming language should I create a blog? Knowledgeable developers say it's better to use php. Consider why you need to learn this particular language, and how to do it in practice.
What is this programming language
Php stands for Hypertext Preprocessor. It executes server-level commands that embed html code. Why should you start learning with this particular programming language? One reason is the popularity of WordPress. Today, most of the Internet projects are created on it, and it was developed on php.
I would like to deviate a little from the topic and consider the issue. Where to place the created site? This is an important point, since the performance of the created Internet project directly depends on it. I offer you.

The next equally important reason for success is that php allows you to create dynamic web projects. This cannot be done on pure html because it is static.
What do you need to work
You will not be able to program unless special software is installed on your PC. Consider what is needed for this:
- Apache server;
- MySQL database;
- Browser;
- A text editor, or specialized software, in which the source code will be written. Their selection is huge. To make it easier for you to decide, read my article "".
I would like to note that it is difficult to install a local server, php and a database separately. You need to understand the intricacies of server programming. So use Denver. Download this program for free and install it on your PC. If you are unfamiliar with him, see the article "". It describes in detail the process of downloading and installing a local server. Everything you need to work is in one distribution and you just have to install it on your PC.

Why is it worth studying
An Internet project created in php differs from html in more convenient settings. Namely, the ability to automate the process of creating a page. For example, it is enough to change one word in the blog header and all pages will change their background. Try to do it in html? You will need to open the source code of each page and edit it. It's long and inconvenient. If you created the header as a php plugin, then you only need to make changes in one file.
If you are reading this article, then you have decided to get serious about web programming. In this case, a good textbook is indispensable. I recommend that you pay attention to the manual written Dmitry Koterov "PHP7" . Use it as a reference book. It will help you study.

Website structure in php
Let's consider a small example. We have an Internet project with a header, a footer, two sitebars and a block for the main content.

All pages are created with the php extension. This is how his code will look like.
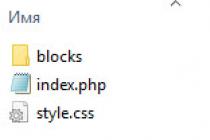
Index.php
| <html > <head > <title ></title> [ "DOCUMENT_ROOT" ] ."/head.php" ; ?> </head> <body > <div class="hat"> [ "DOCUMENT_ROOT" ] ."/top.php" ; ?> </div> <div class="page"> <div class="sidebar_left"> [ "DOCUMENT_ROOT" ] ."/sidebar1.php" ; ?> </div> <div class="content"> Main part</div> <div class="sidebar_right"> [ "DOCUMENT_ROOT" ] ."/sidebar2.php" ; ?> </div> <div class="footer"> [ "DOCUMENT_ROOT" ] ."/footer.php" ; ?> </div> </div> </body> </html> |
Important! As you can see from the source code, these files are connected using the command:
require_once<здесь прописываем полный путь/имя>.
Let's consider each of the included files separately. Each of them is responsible for a separate part of the Internet project. There can be any number of them. It all depends on the tasks that the Internet project will perform. Let's take a closer look at these files.
head
An attentive reader has noticed that this file is not in the Internet project template schema. Let's look at why. It contains meta tags, pluggable styles, favicon and scripts that are planned to be used. This information is repeated on every page of the blog, so it is logical to put it in a separate file. It might look like this:
| <link rel="stylesheet" type="text/css" href="/style.css" /> <link rel="shortcut icon" href="/images/favicon.ico" /> <script type="text/javascript" src="/javafile.js"> |
Top
Consider what the header of the created Internet project consists of. Usually, a logo, communication methods, advertising, and so on are added here. It might look like this:
Left column
In the sidebar1.php file, located on the left, place the blog menu, links to useful materials for the reader, and advertising. It may look like this:
sidebar2
The sitebar file contains information that is displayed on the right of our layout. It can also contain menus, links, and popular user posts. It looks like this:
Site Footer
The very bottom part of the page is called footer.php. It, like the header, is repeated on all pages of the Internet project. In it, place contact information, copyright, hit counter, social network icons, links to sections of the Internet project. The code might look like this:
This is what a blog written in php might look like. This is a simple option, because it does not involve working with a database, and is called a modified version of the html site.
A novice webmaster will think, what else to see on this topic? I recommend that you familiarize yourself with the interesting courses of Rusakov, after studying which you will be able to independently create engines for Internet projects and online stores .

There are still questions left. Watch these video tutorials.
Conclusion
Use the recommendations described above, and you will be able to create a professional Internet project on your own. I recommend that you visit the programmers portal GeekBrains.ru where there is also a lot of useful information.

Today we talked about creating a blog in php from scratch. It may seem to many that the process of creating a dynamic website is very complicated, but this is not entirely true. The main thing is desire and purposefulness. Subscribe to my VKontakte group, it also has something to see.
To create a promising, expandable and effective site of any complexity, you should start with a simple one. This process is not easy, it requires certain basic knowledge of PHP and MySQL, but if you look at it point by point, you can draw up a kind of “work plan” that will come in handy when creating new sites. Let's prepare the "core" and the base for the project. At first, it will be a regular business card site, but then, by adding functionality, it can be turned into anything. So let's get started.
1. Database preparation. Create the first table in the MySQL database
Create a new database, for example "mysite". Personally, I'm used to working with UTF-8 encoding, so I'll make a reservation right away: make sure that all text files of the site, the database itself, tables and table fields are in the same encoding.
Create a table in a new database. Let's call it "pages". This table will store the static pages of the future site and information about them. The table must contain the following fields:
- page_id - page ID (SMALLINT, primary key, auto_increment);
- page_alias - page alias for the CNC address string (VARCHAR, 255);
- page_title - title of the page in the browser window (VARCHAR, 255);
- page_meta_d - page meta description for the meta description tag (VARCHAR, 255);
- page_meta_k - meta keywords for the meta keywords tag (VARCHAR, 255);
- page_h1 - page title (VARCHAR, 255);
- page_s_desc - a short description of the material, for example, if the site materials will be in the form of a blog (TEXT);
- page_content - the main text of the page, which will be displayed in the central column of the site (TEXT);
- page_publish - contains "Y" if the page is published, or "N" if it is hidden (CHAR, default is "Y").
Immediately after creating the table, insert the values for the main page of the site into it. In the "page_alias" field for the main page, I suggest inserting the value "home". Meta tags - according to the theme of the entire site. In the same way, you can create other pages, for example, "About the company" with the "about" alias and its own meta tags, or "Contacts" with the "contacts" alias, etc.
2. Create a site configuration file
In the root folder of the site, which should be empty at this stage, we create a “cfg” folder, in it, using .htaccess, we close access with the “deny from all” directive. Create a core.php file with the following content:
// MySQL
class MyDB
{
var $dblogin = "root"; // YOUR DATABASE LOGIN
var $dbpass = ""; // YOUR DATABASE PASSWORD
var $db = "mysite"; // NAME OF THE BASE FOR THE SITE
var $dbhost="localhost";
var$link;
var$query;
var $err;
var $result;
var$data;
var $fetch;
Function connect() (
$this->link = mysql_connect($this->dbhost, $this->dblogin, $this->dbpass);
mysql_select_db($this->db);
mysql_query("SET NAMES utf8");
}
function close() (
mysql_close($this->link);
}
Function run($query) (
$this->query = $query;
$this->result = mysql_query($this->query, $this->link);
$this->err = mysql_error();
}
function row() (
$this->data = mysql_fetch_assoc($this->result);
}
fetch() (
while ($this->data = mysql_fetch_assoc($this->result)) (
$this->fetch = $this->data;
return $this->fetch;
}
}
function stop() (
unset($this->data);
unset($this->result);
unset($this->fetch);
unset($this->err);
unset($this->query);
}
}
This file contains only a simple database connection class for now, but in the future you can add various useful functions to it that will be available from anywhere in the site code. Don't forget to change your username and password for your database.
If you are working on a Windows environment, I can recommend using the . This editor has line numbering, and it easily translates text from one encoding to another. ATTENTION! If you work in UTF-8 encoding - convert files to UTF-8 without BOM - this will help to avoid problems in the future.
3. Create index.php - the main site controller
The configuration file has been created. Now we create index.php in the root folder of the site - this will be the main script of the site, a kind of "main controller". Contents of the index.php file:
define("INDEX", ""); // SET MAIN CONTROLLER CONSTANT
Require_once($_SERVER."/cfg/core.php"); // CONNECT THE CORE
// CONNECT TO DB
$db = new MyDB();
$db->connect();
// MAIN CONTROLLER
switch ($_GET) (
case "page":
include($_SERVER."/com/page.php");
break;
default:
include($_SERVER."/com/home.php");
break;
}
Include($_SERVER."/template.php");
$db->close();
The $_GET variable will tell the main controller which site component to load on request. Now our site has only two components: “page” and “main page” (in principle, you can get by with one component for displaying a regular page, but often the look of the main page of the site differs from the usual pages of menu items). The logic of the main controller is as follows: the name of the required component (the value of the $option variable) is extracted from the URL string, depending on its value, the file of the component itself is included (contained in the /com folder). The component file does all the necessary work, retrieves data from the database and writes it to variables to be passed to the design template. At the very end, the site design file is connected, into which all the variables and data extracted in the components are transferred. This sounds a lot more complicated than it works.
4. Create a normal page output component
In the root of the site, create a folder "com" - it will store the component files. A site component, in my understanding, is a file in which data is processed for different sections of the site. For example, the component of a regular page retrieves the title, description, and text of the material from the database and writes them to the variables $title, $meta_d, $meta_k, $content, etc. This data is then transferred to the design template (you can create your own design template for each component ) and displayed to the user as an HTML page. For example, a catalog component that can be created in the future would do almost the same thing, but with data about products - and there are specifics, other fields in the table, and so on. Therefore, for each functional section of the site, it is worth creating a separate component. In the MVC (Model-View-Controller) scheme, the component plays the role of a model.
Create a file "page.php" in the "com" folder. The contents of the file are as follows:
/* PAGE COMPONENT */
$alias = $_GET;
$query = "SELECT * FROM pages WHERE page_alias="".$alias."" AND page_publish="Y" LIMIT 1";
$db->run($query);
$db->row();
// COMPONENT VARIABLES
$id = $db->data;
$alias = $db->data;
$title = $db->data;
$h1 = $db->data;
$meta_d = $db->data;
$meta_k = $db->data;
$s_desc = $db->data;
$component = $db->data;
// IF THE PAGE DOES NOT EXIST
if (!$id) (
header("HTTP/1.1 404 Not Found");
$component = "ERROR 404! This page does not exist";
}
$db->stop();
5. Create the Home Page Display Component
The main page in our database is stored under the pseudonym "home", and so far it does not differ in its structure from the usual pages of the site - it's just an article. Nevertheless, we will create a separate component for it - for the future, so to speak.
The content of the "home.php" component in the "com" folder is almost the same as the content of the normal page component, except for the query string to the database and the name of the component. The query string now looks like this:
$query = "SELECT * FROM wx_pages WHERE page_alias="home" LIMIT 1";
6. Create a design template for the entire site
Create a template.php file in the root of the site. In fact, this is a normal web design layout in HTML + CSS format, only with PHP variables in the right places. Insert between title tags, in the central column of the site insertand so throughout the template we place the necessary variables that are declared in the components.
The root folder should also have "css" and "images" folders for design elements. In the file /css/style.css - you can customize the styles to your liking.
7. Clean links and .htaccess file
To create clean links, I use mod_rewrite with direct instructions for the rules for each component separately, since parsing the address bar using the controller itself is considered unnecessary functionality. The content of .htaccess at this stage is:
Rewrite Engine On
RewriteBase /
RewriteCond %(REQUEST_FILENAME) !-d
RewriteCond %(REQUEST_FILENAME) !-f
# FORBIDDEN FILES
RewriteRule .htaccess - [F]
RewriteRule template.php - [F]
# mod_rewrite RULES
RewriteRule page/(+)([\/](0,1))\.htm$ index.php?option=page&alias=$1 [L]
In the future, we will add rules for the search components, catalog, articles blog, etc. There is only one point: to convert links like "mysite.com/index.php?option=pages&alias=about" into a link like "mysite.com/pages/about.htm" - looks pretty nice. In development, try to avoid the $_GET array for safety reasons and don't rely on it. It is advisable to store only parameters for the main controller ($option variable) and for the component ($alias variable) in it.
Also, in each folder of the site, “just in case”, create an empty index.html file - this is necessary so that nothing is displayed when accessing the directory through the address bar.
Tags: php, mysql, site engine, controller, site creation, mvc
Create a file named hello.php and put it in your web server"s root directory (DOCUMENT_ROOT) with the following content:
Example #1 Our first PHP script: hello.php
hello world" ; ?>
Use your browser to access the file with your web server"s URL, ending with the /hello.php file reference. When developing locally this URL will be something like http://localhost/hello.php or http://127.0.0.1/hello.php but this depends on the web server's configuration. If everything is configured correctly, this file will be parsed by PHP and the following output will be sent to your browser:
hello world
This program is extremely simple and you really did not need to use PHP to create a page like this. All it does is display: hello world using the PHP echo statement. Note that the file does not need to be executable or special in any way. The server finds out that this file needs to be interpreted by PHP because you used the ".php" extension, which the server is configured to pass on to PHP. Think of this as a normal HTML file which happens to have a set of special tags available to you that do a lot of interesting things.
If you tried this example and it did not output anything, it prompted for download, or you see the whole file as text, chances are that the server you are on does not have PHP enabled, or is not configured properly. Ask your administrator to enable it for you using the Installation chapter of the manual. If you are developing locally, also read the installation chapter to make sure everything is configured properly. Make sure that you access the file via http with the server providing you the output. If you just call up the file from your file system, then it will not be parsed by PHP. If the problems persist anyway, do not hesitate to use one of the many options.
The point of the example is to show the special PHP tag format. In this example we used to indicate the start of a PHP tag. Then we put the PHP statement and left PHP mode by adding the closing tag, ?> . You may jump in and out of PHP mode in an HTML file like this anywhere you want. For more details, read the manual section on the basic PHP syntax .
note: A Note on Line Feeds
Line feeds have little meaning in HTML, however it is still a good idea to make your HTML look nice and clean by putting line feeds in. A linefeed that follows immediately after a closing ?> will be removed by PHP. This can be extremely useful when you are putting in many blocks of PHP or include files containing PHP that aren't supposed to output anything. At the same time it can be a bit confusing. You can put a space after the closing ?> to force a space and a line feed to be output, or you can put an explicit line feed in the last echo/print from within your PHP block.
note: A Note on Text Editors
There are many text editors and Integrated Development Environments (IDEs) that you can use to create, edit and manage PHP files. A partial list of these tools is maintained at » PHP Editors List . If you wish to recommend an editor, please visit the above page and ask the page maintainer to add the editor to the list. Having an editor with syntax highlighting can be helpful.
note: A Note on Word Processors
Word processors such as StarOffice Writer, Microsoft Word and Abiword are not optimal for editing PHP files. If you wish to use one for this test script, you must ensure that you save the file as plain text or PHP will not be able to read and execute the script.
note: A Note on Windows Notepad
If you are writing your PHP scripts using Windows Notepad, you will need to ensure that your files are saved with the .php extension. (Notepad adds a .txt extension to files automatically unless you take one of the following steps to prevent it.) When you save the file and are prompted to provide a name for the file, place the filename in quotes (i.e. " hello.php "). Alternatively, you can click on the "Text Documents" drop-down menu in the "Save" dialog box and change the setting to "All Files". You can then enter your filename without quotes.
Now that you have successfully created a working PHP script, it is time to create the most famous PHP script! Make a call to the phpinfo() function and you will see a lot of useful information about your system and setup such as available predefined variables , loaded PHP modules, and configuration settings. Take some time and review this important information.
Example #2 Get system information from PHP
Last update: 1.11.2015
Now we will create a small site, which is designed to give an initial understanding of working with PHP.
To create programs in PHP, we need a text editor. The most popular program today is Notepad++.
Let's move on to the previously created directory C:\localhost , which will store all the site's documents. Let's create a text file and name it index.html. Open it in a text editor and add the following code to it:
Enter your details:
The html code contains a form with two text fields. When the button is clicked, the form data is sent to the display.php script, as it is specified in the action attribute.
Now let's create this script that will process the data. Add to folder c:\localhost new text file. Let's rename it to display.php. By default, php program files have the extension .php. So let's add the following code to the display.php file:
Here already in the html markup there are blotches of PHP code. Tags are used to add PHP expressions to a page, between which there are instructions in the PHP language. In the php code, we receive the form data and display it on the page.
Each individual PHP expression must end with a semicolon. In this case, we have three expressions. Two of them receive the submitted form data, for example $name = $_POST["firstname"]; .
$name is a variable that will hold some value. All variables in PHP are preceded by a $ sign. And since the form on the index.html page uses the POST method to submit, we can use the $_POST["firstname"] expression to get the value that was entered in the text field with the attribute name="firstname" . And this value gets into the $name variable.
With the echo statement, you can display any value or text that comes after the statement on the page. In this case (echo "Your name: ".$name . " " . $surname . ""), using a dot, the quoted text is concatenated with the values of the $name and $surname variables and displayed on the page.
Now let's turn to the input form by going to the address http://localhost:8080:
Enter some data and click on the submit button:
So, the script worked for us display.php, which received and displayed the submitted data on the page.