If your system keeps getting errors or won't boot at all, you can try fixing the issue with the Windows 7 recovery disc.
It contains a set of utilities for testing and restoring the system, such as:
- Launch Recovery
- System Restore
- Restoring a system image
- Windows Memory Diagnostics
- Command line
And so, to create a Windows 7 recovery disk, you need to follow these steps:
1. Click "Start->All Programs->Service" and select "Create a System Recovery Disc".
As a result of performing these steps, the "Create System Recovery Disc" window should load.
This action can also be performed using the "recdisc" command by running it in the Run window (Win+R) or in .
2. Select your CD/DVD drive from the dropdown list.

3. Insert a blank disc into the drive.
In this example, a recovery disk was created for a newly installed, 32-bit Windows 7. After burning, the amount of data was 147 MB. Therefore, a regular CD is also suitable for recording a disc.
4. Click the "Create Disc" button.

The process of creating a recovery disk will begin and will take a few minutes. The standard Windows tools are used to write recovery tools.
5. When the recording is finished, a window will appear prompting you to specify system information on the media. Click the "Close" button.

As you know, unfortunately, the "OSes" of the Windows family do not particularly differ in high stability in work. It is they who are most susceptible to viruses or malware, as well as unforeseen malfunctions, which often leads to extremely sad consequences when the system becomes impossible to boot. And Windows 7 is no exception. Creating a Windows 7 recovery disk will help here. How to do this in several ways, we will now consider.
Windows 7 Boot Issues
As for the reasons that can affect the performance of Windows 7, there can be a lot of them. Despite the fact that of all the operating systems of this family, the "seven" is one of the most stable and secure, nevertheless, it is not immune from such cases.
Speaking of boot problems, they can be roughly divided into two main categories: software failures of the OS itself and hard drive malfunctions, including system errors. Quite often, such situations are associated with, say, virus attacks, the influence of malicious codes, incorrect shutdown, overheating of the HDD, an unexpected power outage, which can even cause physical damage to the hard drive during a short circuit, etc., etc.
But now we will talk about how to create a Windows 7 recovery disk. In most cases, fixing software failures and helps to fix many problems, even when automatic from a checkpoint is not possible (in Windows 7 this is very common and is associated with errors on hard drive or in the partition where the OS itself is installed).
Using the Windows 7 Recovery Disc
Now just a moment of patience. Before proceeding to the direct solution of the issues of creating a Windows 7 recovery disk, a few words about its use. The fact is that when booting from such a disk (or flash drive), all saved parameters, drivers, programs, etc. are not loaded from the hard drive, since the system present on it does not have boot priority.

To correctly use the Windows 7 recovery disc, you need to specify in the BIOS settings that the first boot device will be a CD / DVD media or USB flash drive. This option is selected in the Boot Sequence (Boot Device Priority) section in the First Boot Device line.
Note: if a flash drive is specified as a priority device, it must already be inserted into the corresponding USB port before turning on the computer.
Where to begin?
So let's get started. It should be said right away that many users do not particularly bother with creating a Windows 7 recovery disk, preferring to use the original installation or recovery kit.

On the one hand, this is a fairly simple solution, but it is suitable either for installing the system from scratch, or for accessing (if there is one on the disk). The problem is that not all users know how to use it. This is where a manually created disk comes in handy, especially since using it you can restore not only the system, but also data from the hard drive.
Windows 7 recovery
There are several ways to create a boot disk. To begin with, consider the standard tools of the Windows OS itself.
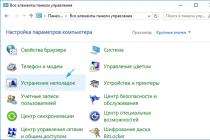
The first and easiest method is to use the "Control Panel", in which the "Backup and Restore" section is selected. In this section, you must select the line "Create a system recovery disk", after which you will be prompted to select a device as a boot tool. It remains only to insert an empty "blank" into the drive and start the recording process.

We note right away that in most cases a regular CD will suffice for a 32-bit system. The volume of recorded information will be about 150 MB. If you are going to use a 64-bit Windows 7 recovery disc, it is better to take DVD media.
This is not the only way to access commands. You can also use the main Start menu, where in the Maintenance section you select access to backup and restore or the direct command to create a system boot disk. You can use the recdisc command from the Run menu (Win + R). The essence of this does not change.
Creating a system image
Creating an image of the system can be equally effective. This method allows you to get copies of all disks and partitions necessary for the correct operation of the OS.
In the section above, instead of creating a recovery drive, simply select the "Create a system image" option, after which you will need to select a backup location (hard drive or its partitions, or network location). In principle, the procedure is almost the same as that described above.
What you need to recover a hard drive
Naturally, Windows 7 can produce in the way just discussed, but it is better (and this has been proven in practice) to use special utilities. One of the most powerful is Acronis True Image. In it, you can create and restore Windows 7, and backup the entire hard drive and its partitions.

In this case, in the program menu, you need to select the "Create archive" item, after which you can choose what exactly needs to be copied. There are two fields here: "Entire hard disk or individual partitions on it" and "Files and folders". It is clear that you can make a complete copy of all the hard drive data, but here it is worth considering one important aspect, namely, the amount of information placed in the backup.
This is where the problems with the lack of disk space begin. For a solid image, it is better to use removable HDD drives connected via USB ports, and in most cases, a regular flash drive is suitable for saving individual files and folders. It all depends only on the volume of the “screw” itself (files and folders) and the volume of removable media.
Third Party Applications
A fairly simple solution to the question of how to create a Windows 7 recovery disk image can be to use popular utilities such as UltraISO, Daemon Tools, and many others. As a rule, all software products of this type have at their disposal the appropriate tools for working with images.

In this case, the image itself is first created (of the system or hard drive), and then it is written to the appropriate removable media.
If nothing helps with recovery
And now a few words about boot problems if the Windows 7 system recovery boot disk does not help.
The failure in the system could be triggered by viruses, so even booting from a disk will not fix the problem. The copy will still “pick up” a virus from the hard drive, because the recovery does not affect user files and folders (and viruses disguise themselves as such).

In this case, before restoring, it is recommended to use utilities such as Kaspersky Rescue Disc, which can be loaded even before the OS itself starts. As practice shows, they remove viruses much more efficiently than stationary antiviruses, the operation of which directly depends on the state of the “OS”.
In some cases, if the system has not recovered, you can try to solve the problem using utilities to check the HDD. Among them, there are also those that start even before the Windows OS starts loading. However, using an antivirus and then using a system recovery disc works very well in most cases. A hard drive check may be required only if problems are found related to physical defects or system failures in the form of bad sectors that cannot be corrected by standard methods.
If your Windows system has “broken” so that it doesn’t even boot and you can’t do anything about it, then one of the surest options to bring the system back to life is to restore it from a previously created image, i.e. from a backup copy. To do this, you will need a special boot disk called a recovery disk, which will allow you to start the recovery process from the image. A regular installation disk or USB flash drive with Windows is also suitable. In this article, I will talk in detail about what a recovery disk is and what exactly you may need it for.
What is a system recovery disk, what is it for?
A system recovery disk is a bootable CD / DVD disk or flash drive on which a special program is recorded that allows you to use various options to restore it in the event of a Windows breakdown. You can boot from this disk even before Windows boots, that's why it is called bootable, this is its peculiarity and usefulness in case of critical situations.
How does it work with a standard Windows startup? You turn on the computer, after which, for a few seconds, the components of the computer are checked (you don’t even notice this process) and then Windows starts to boot.
In the case of booting from a system recovery disk (as well as from, in general, any boot disk or flash drive), after conducting test checks of computer hardware, Windows will not boot. Instead, the computer will start booting from the inserted disk or flash drive.
Further, I will use the concepts of "recovery disk" and "boot disk", without mentioning the USB flash drive each time. Because the recovery disk and boot disk can always be not only a CD / DVD disk, but also a USB flash drive!
Below I will give an example of a common situation that any user, from a beginner to an advanced one, may encounter…
At one point, Windows crashes and everything is fine, if you could at least load it. That is, in this case, you could already, being in the system itself, try to fix the problem in various ways, for example, roll back the system to a previous state or start Windows recovery from a previously created image (backup).
But what to do in a situation where Windows even refuses to boot? You, as usual, turn on the computer, and Windows does not boot, for the life of me, neither way nor way, and no additional recovery tools are launched.
In this case, the Windows recovery disc can help you out. When you boot from this disk, a special graphical shell (program) will open, with which you can launch various Windows diagnostic and recovery tools.
Here is what this shell looks like on the example of a recovery disk for Windows 8:
The shell looks just like a normal Windows installation disc. It will provide various options for diagnosing Windows and ways to restore it.
For example, here you can start a system restore to a previous state, i.e. rollback. If this does not help, then through the same shell you can start the Windows recovery process from a previously created image.
A recovery disk and a Windows backup (image) are not the same thing!
Do not confuse the concept of "recovery disk" and "Windows backup" (image), they are completely different things!
Recovery disk, as you should have understood from the above, this is a boot disk that allows you to launch a special shell in which you can try to restore Windows in various ways if it does not boot.
Windows Image- this is a Windows backup (in other words, "archive"), that is, a copy of the entire hard disk partition on which you have Windows installed, along with all programs, settings, and your files. With this copy, you can restore Windows at any time with all the programs installed at the time the copy was created.
How to create a Windows backup to restore it if the system does not boot is described
So, if you do not have a recovery disk, then you will not be able to restore the system from the image if your Windows does not boot. Simply because you will not be able to start this recovery process in any way.
You need to understand that the recovery disk is just a shell for the ability to run various recovery options!
How to create a recovery disc for the right version of Windows?
On the issues of creating recovery discs for various operating systems, I wrote several articles separately so as not to pile up a lot of information in one.
In the articles you will not find the possibility of creating a recovery disk for Windows XP, because this system has long been outdated, is not officially supported by Microsoft, and there was no such thing as a recovery disk in it.
Conclusion
The recovery disk can help you out in a critical situation when the system crashes, does not start, and you do not find simple solutions to the problem or cannot apply them for any reason. It is better to have such a disk just in case, or if you have, then an installation disk with the desired operating system, because it also has recovery functions!
It happens that a computer user is faced with a serious problem - damage to the operating system. Often, this situation causes panic among many, especially if, when buying a computer, the OS disk was not included. So, is it urgent to get a new disk with software? But it is very expensive, and even a shame if, when buying a computer, the user paid for the installation of a licensed version.
Fortunately, such a problem can be avoided, you just need to take care of the remedy in advance. system recovery. To protect yourself from a sudden breakdown of Windows, you need 2 tools: a boot disk and a system image. To begin with, you need to figure out what it is all about.
System recovery disc, or otherwise "boot disk", is a tool that allows you to boot your computer if the system is damaged. However, having loaded Windows from such a disk, you should not rejoice, because the launch did not occur from a computer, but from a pre-prepared recovery, and the OS itself still remains damaged. That is, if you remove this tool, the computer will stop turning on again.
A system image is the very copy that will allow you to restore missing or damaged files. At its core, a system image is an archive with a complete record of the computer's state at a certain point in time. Every time you install any programs, drivers, or otherwise change Windows, you should create an image, this will allow you not to lose the latest changes during recovery.

To create these two very useful and important tools, you should follow the path: Start - Control Panel - Archiving Computer Data - "", and following the instructions, create a boot disk and burn it to a disc. It is best to use an external hard drive to store the system image, as the image will take up a considerable amount of memory. It is best that the media used be defined specifically for this purpose.
The first step is to open "My Computer" and find the connected hard drive, select it with the right mouse button and find the line "format". After the formatting window appears, you need to set the "format to NTFS" option and check the "quick format" box, so the disk drive will be prepared for recording the system image. Then we return to the "backup and restore" window and select the "Create a system image" item, just like when creating a boot disk, just follow the instructions. When you are prompted to choose a location to save the image, you just need to select a pre-prepared external hard drive.
How to back up Windows
If you work with important data and system performance, as well as the safety of information is very important to you, then you must have come across such a concept as backup or backup. If you are a novice user or a “user” of an average hand and have never encountered this, then you should get acquainted with this useful, and sometimes necessary, feature. Backup can not only save your data in the event of a system crash or malfunction, but also help you quickly and efficiently transfer your familiar operating system with all settings and changes to another computer or hard drive.
You can make a back-up of the system either using third-party programs or using the built-in features of Windows 8. To create backup means Windows, you should go to the "Control Panel" and find the item "Backup and Restore" there. On the left you will see the item "Creating a system image". It remains only to read the system messages and follow the instructions. This method is relevant for both Windows 8 and Windows 7. You can also create a system recovery disk so that in the event of a system failure, you can restore your computer from the disk. Nothing complicated, as you can see, no.

Now consider the option of creating a backup using third-party programs. Acronis True Image is one of the most convenient and time-proven programs. To create a backup, select "Create archive". Next, select "My Computer" and the program will create a copy of your system, up to the layout of the hard drive. Take care in advance where you will store the backup: either connect an external hard drive, or create a partition on the hard drive of a suitable size.
Next, select the partitions you want to save, select the type of archive to be created, and wait. following the instructions, backup even a novice user can create. Restoring the system through Acronis is also easy. To be able to restore the system even without reinstalling Windows, create a multiboot flash drive with Acronis True Image on it. You can learn more about how to do this by reading related articles on the Internet.
In order not to expose your data to danger, we advise you to regularly create and update system backups. By creating them, you do not have to worry that the data may be lost forever, and in the event of a system failure, it can be painlessly restored to a working state.
– Igor (Administrator)One fine day you sit down at the computer. Press the button on the system unit or on the laptop. And in the next minutes, you realize that the day starts somehow strangely. Namely, that Windows 7 does not boot. Or a strange screen is loaded with a bunch of incomprehensible messages, but for some reason with the Windows logo. This usually predicts that you will spend some time on the pleasant task of restoring your system.
And the embarrassing fact that anything can be the cause of such a not-so-fun event. Starting from the failure of the system itself, ending with the tricks of malicious programs. We do not take into account a hardware failure, since this option can either take from an hour to several days, or end with the replacement of components. In case of malware, you can always try to restore the system by checking with an anti-virus LiveCD, for example, from Dr.Web CureIt.
But what if the problem is not sinister viruses and problematic pieces of iron? And is it trite, in damage to one of the system libraries due to a malfunction in the Windows operating system? Let's think. The first thing that comes to mind is to open the disc box and find the coveted Windows installation disc. So you climbed into the box, and suddenly you realize that the day continues to please you. There is simply no disk. Cold sweat covers you. You start thinking further. "Hmm. And I was not too lazy at one time and created a bootable Windows recovery disk according to the instructions on ida-freewares!". And with relief in your soul, you begin to revive your fallen system.
Note: The following instruction is applicable to Windows 7 / Vista. For the case of Windows XP, it is better to use special builds from the net, or various LiveCDs, such as "Zver CD", which include a fairly large set of tools for system recovery. Plus, in such assemblies everything is brought to a more or less understandable state, so you can always find the treasured items in the style of "check the integrity of Windows", etc.
- Open the start menu
- Type "create" (without the quotes) in the "Search programs and files" box
- Select "Create a System Repair Disc"
- A dialog box will open with a list of your CD/DVD drives.
- Insert a blank disc and select the desired disc
- Click the "Create Disc" button
Alternative path: Control Panel -> System and Security -> Backup and Restore. In the left pane, select "Create a system repair disc" and then follow all steps from the 4th.
After the disc has been burned, put the disc somewhere safe and secure. We hope you never have to take it out of there. However, it is better to be prepared for problems than to hope for a chance.
Note: The created disk will allow you to quickly deal with most of the common problems that can happen with Windows. If you're having problems that the recovery disc didn't fix, then chances are the problem isn't as simple as it sounds. Therefore, be mentally prepared that you may have to spend a little more time than you planned. However, this is exactly what you need to start with in any case.
Note A: Of course, you can go the other way. Namely, create disk images to quickly restore your system. Or contain a disk that duplicates the system partition, which will be launched in case of problems with the main system partition. But, it will require you to have some knowledge (or a willingness to learn) and a willingness to put in the time and a bit of patience to set it up.