How should we treat the fact that in the near future all conversations in our apartments will be automatically recorded and stored for several years? Can this be seen as an invasion of our privacy?
In my opinion, if you have not committed anything illegal or suspicious, then there is nothing to fear. Our private conversations are not of interest to the secret services. Nobody will listen and analyze them. After a while, they will also be automatically erased.
In the end, after all, no one is embarrassed by the fact that we are filmed by surveillance cameras on the streets, at the entrances, in the subway and institutions. These records are also stored somewhere, with their help many crimes are revealed. The creation of a system of continuous audio monitoring of residential premises using household electronic water meters will greatly increase the efficiency of law enforcement agencies.
If for some reason you are categorically against the presence of extraneous witnesses in your life, I will give some useful tips on how to neutralize wiretapping in your water supply. Since the legal status of such audio monitoring devices is not yet clear, the intelligence officers formally cannot have any claims against you in this regard.
How to mute the radio modem
Some tenants, having learned about the existence of a listening device in the water supply of their apartment, begin to jam its signal. The easiest way is to shield the “smart” water meter by putting a pan or iron can on it, or by wrapping it in metal mesh or foil. You can also use special jammers for voice recorders, radio microphones and cell phones that operate in Bluetooth, WiFi, 3G, Dect, as well as 400-450MHz and 2400MHz.
However, we should not forget that the electronic device in the water supply riser performs the functions of not only a listening device, but, above all, the actual water meter. If there is any interference with the wireless communication between the device and the terminal, these problems should be corrected by the service company. Otherwise, on the basis of the contract you signed, you face serious penalties and interest.
How to mute the microphone
Therefore, it is not the radio modem that should be prevented, but the radio microphone installed in the water meter.
This can be done using a special so-called “white noise” generator, which reduces the intelligibility of the recording. The process of speech perception in "white noise" is accompanied by the loss of the constituent elements of the speech message. Therefore, when listening to the phonogram of such a speech message, it is possible to establish the fact of the presence of speech, but it is difficult to make out the details of the conversation.
Any average radio amateur can assemble a “white noise” generator from noisy electronic elements (transistors, diodes) with noise voltage amplification. It should be installed in the water supply riser as close as possible to the “smart” water meter.
This is what a factory made white noise generator looks like.
The problem is that if you are jamming the radio microphone, then this fact (again, in automatic mode) will be immediately recorded by SORM-3. And then your apartment will definitely be singled out from the crowd and put under special control.
How to fool the entire audio monitoring system
The most effective solution is not to create obstacles for collecting and sending information from your apartment to SORM-3, but to deceive the automatic audio monitoring system by replacing this information. To do this, the "smart" water meter must be supplemented with a special device that replaces the original recordings of conversations in your apartment with randomly generated conversations of neutral content.
From time to time, some buyers have a question. Or even a claim. The microphone you sold is cracking, they say! Please replace. We can replace that without problems, but as practice shows, it's not at all about the microphone. In order to save our time and the legs of incompetent buyers in this matter, let's look at the main reasons why a microphone crackle may occur. Let's repeat again. It's not the microphone that's cracking!
Causes of Microphone Interference
The first reason for the crackling of the microphone, on which crackling may occur - this is a poor-quality microphone cable. How can you check - it is he who is to blame for the tracks or there are some other reasons. Turn on your system. Pull the microphone cable with your hand, fiddle with it. If the matter is in the cable, you will immediately hear a crack. Those. if no crackling is observed at rest, and when you pull the cable, interference appears, then this is exactly the point - you need to replace the microphone cable.
The second reason for microphone noise- too high input signal level. The microphone has a rather weak output signal level. Therefore, between the power amplifier and the microphone, there is always a microphone preamplifier. Sometimes it is a separate device, sometimes it is built into a mixer or other device. How to check that the crackles that occur during the operation of the microphone arise precisely because of the high signal level in the preamplifier. If the microphone has a toggle switch - 10 dB or - 20 dB or something similar, try attenuating the level of the signal coming from the microphone. If there is no such switch, try turning the sensitivity knob or the input signal level knob on the mixer or on the device that the microphone is connected to.
Third Cause of Microphone Interference- it is similar to the second one. Appears when you write a microphone signal through an audio interface. The fact is that the digital signal has clearly defined characteristics. For example, 44 kHz, 16 bits. And the amplitude of the signal (lowest, highest) is a certain amount of dB. If you go too far with the input signal level, then even if the microphone preamplifier of the audio card can cope with it, the analog-to-digital converter may not be able to. The "treatment" in this case is to attenuate the input audio signal coming from the microphone to the input of the audio card. As a rule, this is done either by a switch on the microphone or by the signal level knob in the microphone amplifier of the audio interface.
Only if all the above measures did not help, you should pay attention to the microphone itself. As a rule, cod and interference occurring in the microphone can also be divided into several components.
- Broken microphone membrane
- Breakdown in the electronic circuit of the microphone
- Bad contact in the connecting wires of the microphone
You can fix it yourself, perhaps, only a bad contact. If you carefully disassemble the microphone housing and find a contact violation, then by disappearing this place you can fix the problem. A broken membrane can only be replaced, but this is not a budget enterprise. It is justified only in case with expensive microphones. In other cases, it is more productive to replace the microphone itself. Well, violations in electronic circuits that still need to be able to diagnose can only be corrected by a qualified specialist.
Hello dear and respected readers of the blog. When purchasing a microphone for Skype communication or just for sound recording, we most often do not even think about setting it up.
Bought set works without problems and discomfort. So everything is gut, there is no need to climb into the jungle of settings.
But this is not always the case. It happens that when buying a microphone that is not the cheapest, you have to delve into the settings in order to get everything right.
You can also buy enough CPU fans to cut down on the noise in your recording. Internal noise from sound card Internal computer components, such as the sound card, can generate significant electrical noise that can cause a lot of background noise in your recording. To find out if your system is generating internal noise, test "no inputs" and record some time. If your recording shows static, it confirms internal noise. Sound card shielding is an option.
Once you've looked at the common causes that lead to background noise, there are some tips to follow that can effectively eliminate them. Mounting the microphone on the stand. Setting up the microphone on a stand helps to reduce vibration. If you hold the microphone in your hand, it can pick up the movement of your fingers while recording. The microphone stand allows hands-free recording.
As practice shows, far away users often not only do not know how to set up sound on a computer, but even how to connect it correctly. In this article, we will look at all these points in more detail.
Having bought a microphone, first of all, it must be connected to a computer. To do this, you need to connect a microphone to the sound card in a special input.
Using a pop shield for the microphone. These can be eliminated by covering the microphone with a pop screen. A pop screen is essentially a circular frame with a thin, solid material stretched over it, and eliminates the "pop" of these sounds. Using the correct recording levels By setting the recording levels to high, background noise can be masked out. A high input level not only masks noise, but also gives a better signal-to-noise ratio. However, very high levels can cause the signals to be compressed, resulting in distortion.
Set the input level to about -6dB, this allows enough headroom and also avoids distortion. My instructions, or feel free to contact me for help. Static on a wireless microphone usually occurs when the microphone is too far away from the receiver, the battery dies, or when something interferes with the signal. We will consider intervention in another step. Often the easiest way to resolve static is to change the battery or move the microphone closer to the receiver.
Usually it is marked with a pink (orange) rim, unlike the green input next to it, which is needed to connect speakers or headphones. If the microphone began to hiss or make sounds, move it away from the speakers.
By the way, in one of the following articles I will talk about professional sound cards. What is different, how to choose and much more - not to be missed.
A good way to get the microphone closer to the receiver is to move the receivers to a backstage area or stage. Many venues already have a wire running from their backroom or stage to their tech booth. This is generally considered the "correct" way to use a wireless microphone system.
To eliminate microphone interference, you need to set the frequency on the microphone and receiver to a different frequency that is not being used. Refer to your manual for information on how to change the frequency. Basically, you just have to play around with it to find the best frequencies in your area. You can also use a wireless frequency analysis program, but this is expensive and requires expensive hardware.
2 Echo in headphones with microphone
When connecting headphones with a headset, a rather unpleasant situation can arise when talking with a person via Skype, due to the high sensitivity of the microphone, you will hear your own echo. In this case, you will need to turn down its volume.
To do this, go to start menu -> all programs -> accessories -> entertainment -> volume
Digital microphones use about a tenth of the bandwidth that an analog microphone does, but with some cheaper digital microphones, you may run into high latency issues. The reason why digital microphones have high latency is because the sound is mostly analog. Digital microphones must convert an analog signal to digital and then convert that digital signal to analog. Not to mention that they will choose the channel with the least attenuation.
and reduce the value by about half until the conversation is comfortable and without the presence of echo. In case of problems with sound, I advise you to read the article -.
I also remembered a case when, when recording sound on a laptop through a microphone, some extraneous noise was constantly heard. The problem manifested itself when the microphone was on the same table as the laptop. If you remove the microphone from the laptop, the sound was clear.
Step 3: Mysterious Channels Change
Granted, this processing takes milliseconds, but adds enough milliseconds together and you'll have a noticeable delay. Most major manufacturers have fixed this problem in recent years. Sometimes when you have a microphone synced to the receiver via infrared, the microphone "Magically" switches to a different channel or changes the setting. This often happens, but it's enough to mention. This is an easy solution, first find the infrared receiver on the microphone and then place a small piece of gaft tape on top of the receiver.
The culprit turned out to be a leg from a laptop, due to which the laptop vibrated on the table and a sensitive microphone picked up extraneous noise. This is how it happens, be careful friends 🙂
It is unpleasant to communicate in Skype or another messenger for IP telephony when there is noise in the headphones due to software amplification of the sound. With weak microphones, users often use the software amplification of the incoming audio signal, which is digitized when it enters the recording device. The payoff for the fact that the interlocutor will hear the user better is an increase in the level of noise, cod, the occurrence of a squeak, etc. After reading the article, you will learn how to remove unpleasant noises in the microphone in Windows 10 without resorting to some serious solutions. First of all, we perform the following manipulations:
If you need to sync, just remove the gaff tape and replace it when you're done. Even when you don't tell them about it! Here are two ways to solve this problem. Most microphones are power-locked. This will keep the microphone even if it is turned off. This is the most efficient way. The only way to turn it off is to know how to remove the power lock or remove the battery after the power lock is on. Refer to your owner's manual to see if your microphone has a power lock and how to turn it on.
- reconnect the device to a different port, for example, on the back panel of the system unit, if available;
- check the microphone on another computer or smartphone.
The easiest way is to entrust the search for a problem to the Windows 10 tool called "Troubleshooting". According to Microsoft representatives, in the latest OS, this tool has become perfect and copes with the tasks much better. There are two ways to diagnose.
Usually most mics use the same key combination to unlock what they did to lock. Place a piece of tape or medical tape over the power switch. Most people won't remove the tape for fear of breaking the microphone, as well as protection from accidental switch strikes.
Intermodulation is similar to interference. Intermodulation occurs when you have two microphones or other wireless devices filling each other's frequencies. The only way to fix this is to change the frequencies to another frequency that doesn't overflow. To find frequencies that are not crowded, use an intermodulation analysis program. You can add other specs, but you need to know the specs. Also, frequency jolt occurs when you use too many mics at the same time.
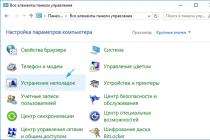
Via Control Panel
1. We call the Troubleshooting applet in the Control Panel.


3. Click on the item "Sound recording".

If you require more than 16 microphones, you will need to go with a digital system. The most important part are the antennas of the wireless system. If your antenna is damaged or the antenna layout on your receivers is off, then you're in for some big problems. Most wireless box pack transmitters have a small wire coming out of the top or bottom of the pack. Make sure it's not stressed as this can severely damage the wireless signal.
Also, the antennas on the receiver must be tilted 90 degrees if you are using the antennas that are included with your receivers. You can also get directional and omni-directional external antennas that will greatly improve your wireless range. If you are using directional antennas, make sure you have them at least 5 feet apart and point them so that they cover the entire area you want to cover. The best case scenario would be to have them 10 feet apart, but this may not always be the case.

Context menu of the Speakers icon
Through the context menu of the sound icon, open the sound troubleshooting tool.

In both cases, the OS will fix the problem on its own if it can diagnose it.
Any fixed frequency microphone will have an antenna with a specific length. You can't change the length otherwise it won't work. If your antenna on a fixed frequency microphone is getting worse, then you need to get the exact same antenna from the factory if you're going to fix it yourself. Otherwise, get a new microphone or send the microphone in for service.
One of the most common problems with wireless systems is signal blockage. Walls, metal, even the human body can interfere with signals. There isn't much you can do about signal blockage, except for trying to move the receivers around, trying to find a good spot that isn't blocked. Also make sure that the antennas do not touch human skin. The human body acts as an antenna that absorbs the signal.

Remove software amplification of digital audio signal
Microphone noise suppression, if audio amplification is enabled, is performed under the name "Sound".
1. Right-click on the speaker icon and call "Recording Devices".
Step 8: Wireless Microphones
One of the most effective ways to get a good quality wireless connection is to get the right wireless system for your needs. This is the best way to determine which mics will fit your needs and save you money in the long run. If you're using a portable install, make sure you've reloaded any problems you might run into.
Their cheaper products are good for some applications. They have somewhat decent sound quality. Cons: Products made very cheaply do not stand up to proper professional use. Their analog systems are more prone to wireless interference than some other brands. Will not support portable system.
![]()
2. Select the default microphone for which you want to remove noise and background sounds.
3. We call the properties of the equipment.

Bottom line: if you're on a budget and don't need a lot of mics, get one of their cheaper products. Not bad for installed systems. Cons: Most of their products will outperform other brands. Don't buy if you are mixing cheaper brands. Bottom line: the best option in my mind.
Lectrozone. Pros: Excellent sound quality. It is considered to have the best quality of any company. Probably the most expensive microphone. Bottom line: these mics are mostly used in video production and for production on an unlimited budget. Bottom line: Not a bad mic for those on a budget. Line 6: Pros: Decent digital systems for the money. Bottom line: a good entry-level digital system. There are other brands, but these are the ones you'll see the most. If you have a question about a specific brand, please feel free to ask me.
4. On the "Levels" tab, set the volume to 100% and the microphone gain to 0 dB.

If the recording device is very weak, it is not recommended to use a gain of more than 10 dB.
5. Go to the "Listen" tab.
You may quote portions of this information for educational purposes. Under no circumstances will you sell this information. In the license agreement on the right. Use of this information means that you agree to these copyright terms.
How it works, we explain in this guide. You can do it manually, using adaptive features and processes. Below we explain them in detail with examples. Basically, the following steps are useful for the most common noise. Select Noise Reduction under Effects and Restore. . Double-click the track with noise, or click Edit and select the appropriate track.
6. Check the box "Listen from this ...".
7. We say something into the microphone and at the same time listen to the sound through the speakers or headphones.
In the age of information technology, any resources that carry information are of a certain value. The indicators of value vary from the degree of significance to the information, and therefore, maintaining the confidentiality of the conversation or in some cases is necessary. To record sound, devices are traditionally used in which a microphone is combined with a data carrier, more simply - voice recorders.
A voice recorder can be called any device that incorporates an element that responds to sound vibrations and a carrier for storing the received audio information (magnetic tape, hard disk, FLASH memory), regardless of the design and integration. You should consider how voice recorders work, and what methods of protection against unauthorized recording exist.
The functionality of the microphone is to respond to sound vibrations, thereby generating or changing an existing electrical signal. The task of the protective device is to prevent the microphone from full-fledged operation by a multitude of interferences that have a relation to the desired sound frequencies. According to the type of action, the jammers for the voice recorder can be divided into:
- Devices that generate interference signals above or below the audio range. As you know, the sound range heard by the human ear and perceived by the microphone is 20 Hz - 20 kHz, so various generators of ultrasound or infrasound will have practically no effect. An exception can be considered a powerful generator, the signal harmonics of which accidentally fall into the audio frequency range.
- high frequency generators. They affect only voice recorder devices that use a radio path for data transmission (radio telephones, "bugs"). Application for a classic voice recorder, in which the microphone is located with the carrier in the same housing, is useless.
- Perhaps the only effective means to protect against unauthorized sound recording is acoustic noise generators. Such devices generate a sound signal in a random sequence, choosing the boundaries of the frequency of the human voice. The advantages of such generators are efficiency and not very high price, the main disadvantage is that the generated noise is perceived by the human ear, which can cause some discomfort.
Technically, protection against recording a conversation on a voice recorder is quite feasible today. But practice shows that the best protection, which gives a 100% guarantee, are administrative measures: the suppression of the use of sound recording devices during a private conversation. In addition to unauthorized voice recording, "secret" in the form of an installed hidden camera can be used. But it is quite possible to search for hidden cameras if you have the appropriate equipment for this.
Of course, it is unpleasant when any conversation is made public, even if it does not contain classified information. Indeed, even in the case when there is absolutely nothing to hide, there may be envious people who strive to expose information about your personal life to the public. It is clear that this is not only not pleasant, but also what good consequences can entail, such as ridicule or blackmail.
A huge number of people can share confidential information and not even suspect that the conversation is being recorded. Therefore, in order to protect your personal life as much as possible, you need to use a variety of means. It is about how to prevent the recording of conversations that we will talk today.
Recording media
It is worth noting that the microphones used to record the conversation have unique technological properties. It is important to remember that modern recording tools have the ability to “hear” everything the same as a person, and some of the devices even more.
The conversation can be recorded on:
- Mobile phone;
- Bugs for hidden listening;
- Dictaphone.
Well, with the means of recording, probably, everything is more or less clear. Let's move on to how to try to protect your personal space from listening, that is, recording private conversations without your knowledge.
How can hidden recording be prevented
It is worth noting that the answer to this question is actually very simple. The ideal way to interfere with recording is a voice recorder jammer. It is worth noting that it is difficult to call this device miniature. It is for this reason that it is most likely not possible to use it discreetly.
This device generates interference by propagating a high amplitude signal in a frequency range that is not audible to humans. But in turn, the device that is used for recording receives this signal in the form of very loud noise, thereby losing the ability to “hear” and record conversations.
The main feature of the jammer is that it can interfere with the operation of any active recording devices.
In order to have an idea of how the jammer works, it is absolutely simple to conduct an experiment at home. To conduct the experiment, you will need:
- Interference generator;
- Mobile phone. Smartphone with installed or built-in voice recorder program;
- Hardware voice recorder.
The essence of the experiment is to determine the efficiency of the device and determine the optimal distance at which there will be confidence that the radiating waves will really work and interfere with recording. For the experiment, you need to change the distance between the noise generator and the voice recorders and record the result. This is the only way to objectively assess the quality of the device at a particular distance.