Today, the market is oversaturated not only with electronics, but also with almost any product from a wide variety of areas. In such a situation, there are always two options: to buy a finished product and "do not soar", or try to do something with your own hands, having at your disposal basic components and the old "unnecessary junk, which is a pity to throw away."
Despite all my love for gadgets, I found that in the kitchen, where I spend most of my time (no, no, not by the refrigerator :), there is simply no wall clock. And, it would seem, any normal person would go to the nearest store, buying inexpensive "walkers" with any color, shape, size and type of attachment, but the soul also wanted to get a weather station.
And the desire to buy a watch with a weather station function passed as quickly as it was born. Why? Yes, because an old reader has been gathering dust in the closet for several years Pocketbook IQ 701, which was charged on the very first day after the purchase of the iPad.
To sell - it is better to throw off the mountain (they will offer three rubles on the market day), to give - how to offend. To enjoy? Sorry, but a six-year-old tablet feels very uncomfortable in 2016.
Resolved - we make a clock and a weather station out of it.
Step 1. Small revision

About universal port mini and, moreover, microUSB for charging in 2010 have not yet been heard. Classic plug as in mobile chargers Nokia phones... Voltage - 12 Volts, which you will not find in modern smartphones and tablets.
The main problem is the too short power cable coming from charger... For wall mounting, plugging in an extension cord is not an option.
The simplest solution is to cut the plug about 4-5 centimeters from the end and solder a long piece of two-core copper wire with the same cross-section.

For structural strength, we put on a heat shrink tube. White was not at hand and had to take what was.
We check - everything works: the power is on, the reader is charging. You can move on to the next step.
Step 2. Younger archaic Android

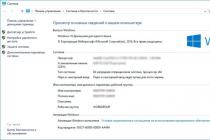
We open the settings item with information about the tablet and sadly find that there is Android 1.6. Yes, yes, that archaic, buggy and unfinished Android, which iOS looked at as a dull bunch ... well, you get the idea.
I don’t know, maybe six years ago PocketBook IQ 701 seemed to be a productive device, but 2 GB of internal memory, a resistive (!) 7-inch screen that reacts only to rough poking with a finger or a sharp object, 256 MB random access memory and creepy brakes every time you open the menu.

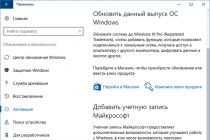
Find the required firmware, which is promised the most smooth operation [Download Android 2.1.2 for PocketBook IQ 701], we throw the memory card into the root and carry out the installation. I suppose there is no point in describing all the installation steps in sequence - everything is on the corresponding forums on the Internet.
The firmware update process went smoothly and the reader really came to life. The animation has accelerated, the loading speed of applications has noticeably increased. But, of course, this is the same old reader with reduced performance.
Step 3. Looking for the right application

"Fresh" Android version 2.1.2 is installed, but it's too early to rejoice. Finding the right software for such an archaic version of the system is still a task. In addition, the reader does not have a Google Play store - everything needs to be installed through the APK.
That is why it was decided to download a dozen of all kinds of alarms with weather and applications that theoretically support work on Android 2.1.2, and then install it one by one and look at the result.

Out of a dozen, only three applications started working. But the development of the company was perfect GreenLog... A universal clock with a fully customizable interface and, most importantly, the weather!

Application Tablet Clock available for download in the Google Play store [Download Tablet Clock]
Launched and understood - this is what you need! The ability to indicate the city in which the current weather is of interest, change the color of numbers and the color theme in general, large numbers and a nice font that makes you nostalgic for the first electronic watch. I stopped at light green (green) and proceeded to the final stage.
Step 4. Installation or some scotch tape

There are few options for mounting on a kitchen cabinet: self-tapping screws and mockery of the old man's body are too cruel. The choice fell on double-sided tape. Initially, I was worried that the thin strips of tape would not withstand the considerable weight of the reader (540 grams), but the fears were not confirmed.
On the back side, it is enough to stick two strips of adhesive tape, having previously degreased the surface of the tablet and the door on which we will mount it.
Five minutes and everything is in place. The reader is installed and ready for continuous operation. In the application settings, we remove automatic shutdown screen and voila!
What is the bottom line

The old PocketBook got a second life. It has again become a functional gadget, which I now use, although not for its intended purpose, but with obvious benefit.
For the life of the battery, I was not particularly worried and did not bother to open the tight-fitting plastic cover in order to turn it off. He did not hold it for more than two hours, and since he will be connected to the network all the time, autonomy does not interest me.
What can the old reader do now?
- Show the current temperature for the day and for the week
- Display a complete summary of precipitation, wind speed, and more.
- Show a clock that is visible at any time of the day or night
- If desired, play YouTube videos and act as a weak multimedia server
- He can be seen at any time of the day or night, and he will never sit down.
- He is not afraid of voltage drops - the built-in battery will maintain the current time in case of power outages
And the best part is the price. This revision cost me exactly zero rubles. Sometimes it's nice to do something with your own hands, breathing new life into a forgotten technique.
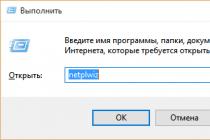
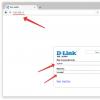
Now we need to set up and install our clock required applications... To begin with, if, as in my case, your sensor does not work or is missing.))) We need this cable from one end of it has a microUSB or miniUSB plug, and from the other a USB A (f) jack, for connecting all kinds of peripherals (mice, keyboards, storage media, hub, card reader, etc.), almost all tablets support OTG mode. We connect a mouse through such an adapter and we can fully use our tablet. If for some reason the mouse does not work, then there may be several reasons:
- "The mouse is not supported by our tablet" - try another (from another manufacturer) mouse.
- "There is no OTG support" - this is of course rare on tablets, but it happens.
- "Broken microUSB connector" - The connector needs to be replaced.
If the first and third points can be corrected, but with the "Lack of OTG support" everything is much more complicated, but there is a way out and about this some other time.
The choice of software.
From my operating experience, I came to the conclusion that you need to install on the tablet:
- Tablet Clock or any other clock app you like.
- Vocalizer voice engine - for speech synthesis.
- FTPServer is a simple and free FTP server.
- Webkey is ‘an application for controlling the phone from the browser. (needs root)
- ioBroker.paw is an application for control android device GET or POST requests.
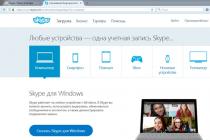
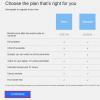
You can find different watch apps of this type on Google Play. As I originally planned, I installed Tablet Clock, it can be installed both from Google Play, but the developer is in no hurry to fix the problems that arise, and from w3bsit3-dns.com, there you can always download the corrected version of the application. For example, some time ago, openweathermap.org changed the conditions for accessing weather data, and began to provide it only after registering and receiving an API key, in free version with a number of restrictions, but for private use this is quite enough for several devices.
There should be no difficulties with setting up, just go to the website to register, come up with a username and password, type in your mail, after registration you will be assigned an API key, which you need to enter into the application, then select a city, only in Latin letters, after which you can fully use the application.
 This is the data that will be displayed on the screen.
Here, of course, you can stop if you only need a "watch", but this is not enough for me. There was an idea to use them as an informer for a smart home. Deduce useful information or speak through speech synthesis the weather, temperature, important information about events. To do this, you need the speech synthesizer itself. After going through different voice engines, I settled on Nuance Vocalizer Milena Premium High, at the moment it seems to me the best offline voice engine. You can listen to an example of synthesis here. You can download it here. Installation is reduced to unpacking the archive, copy the "VocalizerEx" folder to the root of the device's memory, and install the vocalizer_e.tts_1.0.2.3p.apk application, after installation, go to Settings> Language and input> TTS settings> select vocalizer TTS. If you did everything correctly, then when you click "Listen to an example" an example of a voice should sound.
FTPServer is an FTP server that allows you to receive and send files to devices. With the help of this application, it is very convenient to transfer files via WI-FI, without the need to connect the "clock" to a PC.
Webkey - The advantage of this application is that you can control your android device from the browser. It helps a lot when you need to tweak, update or reinstall something without going to the device, you just need to know its IP. There are two versions of the application, old and new, so if it doesn't work a new version try installing the old one. The only downside is that you need root.
Well, now the most important thing is how to manage our watch. After rereading a bunch of text on the Internet and trying different automation applications such as Tasker, Automate, MacroDroid. By far the leader of all such applications is Tasker with a bunch of useful plugins. His me long time used, but there were a couple of problems that bothered me a lot, it was the incompatibility of some plugins with some of my tablets and a significant waste of time installing all the necessary plugins and configuring them. Since I did not find an application that satisfied me in everything, I decided to create it myself. In search of information on the Internet on this topic, I ran into the PAW Server for Android application, this is a web server where you can control, view the phone book and SMS, make calls and much more through the browser, but unlike Webkey where the page emulates screen images from phone, here the information is displayed in the form of an xhtml page. main feature in what can be formed dynamic web pages using information from android device, by means of BeanShell using the tag in the page code
 Screen Paw server html page.
 This is how the ioBroker.paw page looks like
After reading more information, I realized that PAW Server completely suits me and based on it and the completion of xhtml pages, you can receive or transmit almost any information from the device, using GET or POST requests. So he did, even on the basis of the first developments, a symbiosis with ioBroker appeared in the form of the ioBroker.paw driver. But gradually my "Wishlist" exceeded the capabilities of PAW Server and still had to create my own application, but based on the source code from this application (thanks to them for that). This is how ioBroker.paw appeared, while the application is in the test, but already now it is satisfying to almost everyone. Now there is no need to configure and install a bunch of different applications every time. If you are not planning to integrate with iobroker, you can see the commands for managing by means of GET requests. Of course, there is still work to do, the main thing is to find time.
Have you lying around old tablet? Or do you want your favorite device to show the time and weather forecast while charging? Then these are the apps for you!
Modern home Digital Watch are pretty stupid, but their price is not much less than the current cost of tablet computers. And the prices for weather stations generally bite. So why buy a stupid watch or a weather station when you can take this app to buy the cheapest tablet or take an old one that you no longer use and get a smartwatch:
They will not waste time, when the power is turned off and for backup power, no batteries are needed, because there is a battery in the device.
- the brightness of the screen is regulated by itself. It does not blind at night, it can be seen during the day. Even if your device does not have a light sensor - they will use the device's camera to measure light (disabled in the default settings)
- display color can be changed to any of 16 million
- alarm clock from the Android operating system
- display of the current date, sunrise and sunset times
- display of weather now, forecast for a day with a step of 6 hours, forecast for the next week: temperature, wind speed and direction, pressure, cloudiness, humidity, precipitation and if the sky is clear - the phase of the moon. Temperature units, speed temperature and pressure are selectable.
- possibility automatic start and closing the app when connected and disconnected from the charger (disabled in the default settings)
- and you don't even need to set the time on this watch, operating system Android will take time from the network itself and you will always have the exact time!
You can also use this application for your favorite device as a screensaver when charging. Very convenient for devices with a docking station - turn on autostart and auto-off in the settings - and the clock will be displayed automatically when installed on the docking station!
Usage tips:
At the first start, select the city for which to display the weather.
If your tablet has a navigation bar, it will be hidden when you launch the application. In this state, clicking anywhere on the screen will return that string without affecting the application in any way.
Clicking on the alarm icon will display the system window for setting the alarm.
Pressing on time brings up the application menu (the same as on the device menu button, if it is not there).
Clicking on the weather switches to two different types of forecasts - for a day and for a week.
If your device does not have a light sensor, but there is a camera, preferably a front camera, turn on the brightness adjustment using the camera in the settings - the light will be measured by the camera every 30 seconds. If you run the application without a connected charger with this mode - time autonomous work shrink.
The time and date format is taken from the system.
If you want to reduce the brightness even less than your device allows, change the R, G, B values in the text color settings to lower values. For example, if you put 80 instead of FF for green (# 00FF00), the brightness will be 2 times lower.
You can choose to rotate the screen in the settings.
We need:
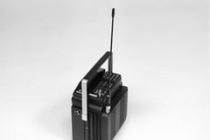
- an old tablet (in my case, Texet TM-7029, but it can be almost any)
- charging to it
- thin wires
- screwdriver
- soldering iron
- solder, rosin
- multimeter
- resistors (may not be needed, depending on your tablet, the denomination also depends on the tablet)
- convert DC-DC voltages (may not be needed, depending on your tablet, the rating also depends on the tablet)
- drill
- drill for metal 6mm
Step 1 Power.
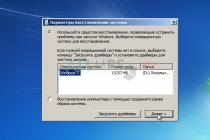
This is the most difficult and crucial step. Older tablets have a lot of problems. One of them is an old battery that does not hold a charge. There are several ways to solve this. The easiest is to leave the battery plugged in and supply power through normal charging... But there are pitfalls here. First, over a long service life, the connection socket breaks and no longer provides a reliable connection. Secondly, aesthetically, I personally do not like the view of the charging wire sticking out from the side. Thirdly, a complete battery failure is possible and then the tablet simply will not start. As you already understood, an individual approach is needed here.
I will only tell you in detail about my Texet TM-7029, and for the rest I will give options for what you can do. So, in my case, the connection connector is broken and the wire does not hold in the socket, the battery is weak, but still alive. We disassemble the tablet.

I tried to solder the battery and supply power through its connection marks. The tablet started, but gave an error and turned off. Therefore, I decided to leave the battery, and connect the power through the micro USB socket, as it should be charged. The micro USB socket is soldered on the back of the board. We unsolder the battery and speaker wires. We unscrew all the screws holding the board. It is not necessary to disconnect the screen and touchscreen cables. We turn the board over and see that the socket contacts are very small. You can unsolder the socket and solder the wires to the contacts, then it will be much easier, but I wanted to leave the possibility of connecting to a computer, and therefore with a multimeter I found a capacitor standing to smooth the power on this line and soldered the wires to it:


I will give tips for owners of other tablets. You can also try:
Disconnect the battery, connect the native charger, turn on - great, we test in different modes load stability. If it is cut down under load, you can try to take the adapter more powerful, or replace the wire with a shorter \ solid one, since the material, the length and the cross-section of the supply cable have great importance and can easily create conditions under which the device cannot take more than a certain current.
Majority modern devices charged via USB understand whether the computer is in front of them, or a native / non-native memory. And this understanding comes to them via the data bus D + D-. In this regard, the device will take a certain current, namely up to 500mA from a non-native memory and USB, and up to the nominal value of the adapter from the native one. Accordingly, using the device via USB without a battery becomes impossible. Regarding the inclusion of the "native" memory mode, there is information that:
most android devices need to short D + D-
some Samsung to supply both D + and D- at 2.5v
Iphone and D + and D- by 2v. iPad D + = 2.5v and D- = 2v

So, some people think (or just do) that the adapter external power supply you can put "plus or minus" on the corresponding contacts instead of the battery and there is nothing wrong with that. This is not entirely true. In most cases, power from the battery goes first to the power controller, as well as from the external power goes there. Not too lazy to find and open the datasheet for the microcircuit of this controller, for example AXP209, it says in English and white that the power supply from the battery side should not exceed em ... 6.3v, but it will burn out at 11v. maximum. And on the controller of another tablet, no more than 4.5V is written ... you can't guess here, in addition, sometimes the power from the battery can go straight to other nodes. And it is not known how in those nodes they will treat your 5v, instead of not higher than 4.3v. In general, here you need to look.
In addition, it is possible that the voltage from your charger to the contact pads of the battery sags on the wires, or just under load, then, in general, everything is in order) The main thing is to make measurements.
As for the choice of the maximum current of the power adapter, then, for good reason, you need to put an ammeter in the gap of the battery plus and see how much the device actually eats in different modes. In general, honest two or three amperes with a power reserve should be suitable.
If the backlight blinks and the sound crackles, try soldering a capacitor between the plus and minus of the battery contact pads on the device itself (the more the better), you can have two. One, for example, 3000mkf - the second 0.1mkf.
As another option, you can connect power to the contact pads of the battery through a DC-DC converter, setting the converter to a voltage of 4.2 V.
In general, everything can be beaten even easier: put a silicon diode with a current margin on the plus from the adapter, on a silicon diode the voltage drop during direct connection is 0.6-0.7v, it turns out just a "battery" voltage.
We connect the soldered wires to the wire at the end of which the UBS connector.
The main thing is not to mix up the polarity. You can take a wire from an old phone and cut off the phone plug. Most often, the wires differ in color. Red is a plus, black is a minus, cut the remaining pieces shorter and insulate.
Step 2 Cover
It is necessary to provide for ways of attaching or staging our tablet. To wall mount our tablet, you need back cover drill a hole. We use a 6 mm metal drill for this. First you need to measure the middle and only then drill. And don't forget to cut a notch for the power cord. If the lid is metal, like mine, we cut it with scissors for metal, if the plastic - just with a knife.

If you have a flipper case for it, you can just put it on. For example like this:

Step 3 Programs
The functions of our tablet completely depend on installed programs... One of the options is a table clock with weather. I use for this free program Tablet Clock. You can download it through Google play link:
Usage tips:
At the first start, select the city for which to display the weather.
If your tablet has a navigation bar, it will be hidden when you launch the application. In this state, clicking anywhere on the screen will return that string without affecting the application in any way.
Clicking on the alarm icon will display the system window for setting the alarm.
Pressing on time brings up the application menu (the same as on the device menu button, if it is not there).
Clicking on the weather switches to two different types of forecasts - for a day and for a week.
If your device does not have a light sensor, but there is a camera, preferably a front one, turn on the brightness adjustment using the camera in the settings - the light will be measured by the camera every 30 seconds. If you run the application without a connected charger with this mode, the battery life will be reduced.
The time and date format is taken from the system.
If you want to reduce the brightness even less than your device allows, change the R, G, B values in the text color settings to lower values. For example, if you put 80 instead of FF for green (# 00FF00), the brightness will be 2 times lower.
You can choose to rotate the screen in the settings.
Another option is a digital photo frame. The application is called Digital Photo Frame. It's free too. It also has musical accompaniment. You can download it from Google play at the link.


Have an old tablet lying around? Or do you want your favorite device to show the time and weather forecast while charging? Then these are the apps for you!
Modern home electronic clocks are pretty stupid, but their price is not much less than the current cost of tablet computers. And the prices for weather stations generally bite. So why buy a stupid watch or a weather station when you can take this app to buy the cheapest tablet or take an old one that you no longer use and get a smartwatch:
They will not waste time, when the power is turned off and for backup power, no batteries are needed, because there is a battery in the device.
- the brightness of the screen is regulated by itself. It does not blind at night, it can be seen during the day. Even if your device does not have a light sensor - they will use the device's camera to measure light (disabled in the default settings)
- display color can be changed to any of 16 million
- alarm clock from the Android operating system
- display of the current date, sunrise and sunset times
- display of weather now, forecast for a day with a step of 6 hours, forecast for the next week: temperature, wind speed and direction, pressure, cloudiness, humidity, precipitation and if the sky is clear - the phase of the moon. Temperature units, speed temperature and pressure are selectable.
- the ability to automatically start and close the application when connected and disconnected from the charger (disabled in the default settings)
- and you don't even need to set the time on this watch, the Android operating system will take the time itself from the network and you will always have the exact time!
You can also use this application for your favorite device as a screensaver when charging. Very convenient for devices with a docking station - turn on autostart and auto-off in the settings - and the clock will be displayed automatically when installed on the docking station!
Usage tips:
At the first start, select the city for which to display the weather.
If your tablet has a navigation bar, it will be hidden when you launch the application. In this state, clicking anywhere on the screen will return that string without affecting the application in any way.
Clicking on the alarm icon will display the system window for setting the alarm.
Pressing on time brings up the application menu (the same as on the device menu button, if it is not there).
Clicking on the weather switches to two different types of forecasts - for a day and for a week.
If your device does not have a light sensor, but there is a camera, preferably a front one, turn on the brightness adjustment using the camera in the settings - the light will be measured by the camera every 30 seconds. If you run the application without a connected charger with this mode, the battery life will be reduced.
The time and date format is taken from the system.
If you want to reduce the brightness even less than your device allows, change the R, G, B values in the text color settings to lower values. For example, if you put 80 instead of FF for green (# 00FF00), the brightness will be 2 times lower.
You can choose to rotate the screen in the settings.
Weather provided by OpenWeatherMap - http://openweathermap.org
All weather information under CC-BY-SA 2.0 licenses - http://creativecommons.org/licenses/by-sa/2.0