The consequences of updating windows to 10 are known to everyone. Someone just doesn’t like it, someone doesn’t feel comfortable, etc. But when they bring a laptop and they say you need to reinstall windows to save the data, you think it's a trifling matter ... But it's better not to say that at first 🙂
And so, a Toshiba laptop appeared on my desk. In principle, a banal task, to save, install and give away. But something went wrong...

It all started with the fact that the data refused to be copied normally to an external hard drive. But a decision, strange at that time, was made to copy it to a second logical disk. It seems like everything went well after that, the data was saved. Successfully went into reboot, went into bios, disabled security boot and uefi. And they began to install windows 7 ... The Seven said immediately, there was no hard drive. To say I was surprised is to say nothing. Anyway. We go to the hard Acronis disk director, which tells us that the disk is in gpt. Here was the first jamb on my part. Well, I think, let's convert the first logical partition to mbr, and leave the second to gpt. But apparently Acronis disk director had a different opinion and decided not to bother like me, but just took it and converted the entire disk to mbr.
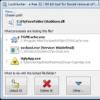
Well, all data is already lost! We need to do it further, we boot again from 7 and start the installation ... After the first reboot after installation, the installation does not continue, we get a black screen with a logo and wild attempts to boot ... The effect is zero! I’m starting to smoke forums, everyone is exactly hiding me ... I look at the sticker on the bottom of the laptop, and there it looks at me 8 ... Well, I think, then we’ll put 8, the client doesn’t care, the main thing is not 10 ... We load 8, start installation and we get:

Well, I think, it means a crooked distribution kit ... It happens ... But after trying all the available distribution kits, I realized that the problem is not in them ...
Not only is it already 4 in the morning, but the laptop is still getting obsolete and goes into shutdown due to overheating ... It was decided to take a break and think.
The next day I decided to still put 7, but approach this issue differently. I booted from the distribution kit and went into recovery, waited until windows successfully rejected me with the words “Well, I don’t have a backup copy” ... I launched my favorite console 🙂
MS DOS
diskpart list disk select disk 0 clean exit
diskpart list disk select disk0 clean exit |
CLEAN - Clear configuration information or all data on the disk.
After rebooting and trying again to install windows 7, everything finally fell into place and began to work as it should.
For reference, the patient was: Toshiba Satellite l50-a-k8s
Another article from the series devoted to restoring laptops from various manufacturers to factory settings from the recovery section is dedicated to Toshiba laptops.
I want to warn you right away that restoring Toshiba laptops to the factory state takes much longer than similar actions with laptops from most other manufacturers (although this is a rather lengthy process for everyone), so it is very important that the laptop is connected to the mains and has a full battery charge, in case of power failures.
And, of course, it is necessary to carry out all the necessary preparations. I wrote more about this in the article, so read it if you haven't read it yet. All further actions assume that you have followed all the recommendations described in it.
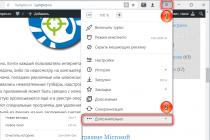
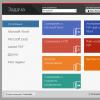
So, in order to start the recovery environment from the recovery partition stored on the Toshiba laptop hard drive, you need to press the F8 button when you turn on the computer, as if we wanted to select the boot mode. If you have never done this before and do not know at what point you need to press the button, then after turning it on, simply click on it until the following menu appears on the display:
Select the item "Troubleshoot your computer", which comes first in the list and press the Enter key.
Soon, a prompt will appear on the screen to select the recovery language. After selecting the language settings that interest us, click "Next".
After that, we will be asked to select the user on whose behalf the procedure will be launched. You will also be asked to enter a password if you have one.
After completing the necessary steps, click OK.
When you run the utility, a warning appears that all data will be overwritten. We will also be warned about the need to connect a network adapter.
Since it is assumed that we have completed all the necessary preparations by this point, we press the “Yes” button (I apologize for the poor quality of the image).
Now you will need to select the recovery option. Since the article is about restoring Toshiba laptops to factory settings, select the item "Restore factory default software" and click "Next".
Specify the recovery method as "Restore to the state at the time of purchase (Including system recovery options)" and click "Next" again.
We will be warned again that all data will be lost. We press "Next".
After these steps, preparations for system recovery will start.
And soon the recovery procedure will start, which will take some time.
We must wait until a message appears stating that the recovery has been completed and we will be prompted to click the "Finish" button to restart the computer. Click "Finish"
But that's not all. As they say, the haircut has just begun. As I mentioned, the process will take a long time. The consolation is that our presence is not required. All further actions will be performed automatically, including periodic reboots of the computer. In the meantime, you can do household chores.
A signal that the recovery is fully completed and the laptop is ready to work will be an invitation to select the language of the operating system.
This article on how to reset a Toshiba laptop to factory settings is over.
If my article turned out to be useful for you, please advise it to your friends using the social network buttons or simply by sharing the link.
Write "Free Help" in the subject line of the email.
Installing (reinstalling) WINDOWS XP
How to install Windows* on a computer. This article only describes the basic steps. Many people think that this is a complicated procedure, but in fact, everything is not so difficult and an experienced user can do it on their own.
How to reinstall Windows.
If you decide to rearrange the operating system, then in addition to this you will have to reinstall all programs and drivers. We strongly recommend that you clean the entire hard drive before installing to avoid garbage accumulation.
1) Copy all the necessary data to an external drive
2) Find device driver discs for your computer or download drivers from the Internet. You can also use the DriverMax program, it will create a copy of all the drivers and after reinstalling you just need to run the program and specify the path to the saved drivers
FURTHER
How to install windows.
We will give an example of installing the Windows XP SP3 operating system on a Toshiba Satellite L300D-20M laptop.
1) First, let's make the computer boot from the CD. To do this, enter the BIOS and select DVD-ROM as the first boot device. For this laptop, this is done as follows: at the start screen, press the “F2” key, after which we get into the BIOS control screen. Select the “Boot” submenu, find the CD / DVD item and make it a priority (raise it to the very top). We save with the “F10” key and exit the BIOS. (Alternatively, press “F12” at the start screen and choose to boot from DVD)**
2) When loading, a message will appear asking whether to boot from the disk (Press any key to boot from CD), just press any key.
3) Next, you need to partition the hard drive and choose where to install the system. We decided to split the disk into 2 partitions: the first one is for the system and programs with a size of 100GB, the second one is for personal files (movies, photos, etc.), all the remaining 130GB space will go under it. Delete all previously created partitions with the “D” key. With the “C” key, select the creation of a partition and set the size to 100000MB. And once again select the "unallocated area" and create a partition for all the remaining space. After that, we will start the installation by selecting drive “C” and pressing “ENTER”. Select "Format partition as NTFS".
4) After copying the files and starting the installation, the system will ask you to enter the key, then specify: region, language, time and network settings. We set up the way we want.
5) At the end of the installation, the system will ask you to enter an account name.
6) The whole system is installed, we install drivers and programs, after that the system is ready for use.
*) this article is about installing Windows XP
**) Initially, during installation, the system produced a blue screen, this was due to the SATA controller mode (in this build of Windows there are no drivers for this laptop to work if the SATA controller mode - AHCI is enabled). To solve this problem, you must either write the drivers for XP to a floppy disk and load them with the F6 key at the beginning of the installation or go into the BIOS, select the “Advanced” submenu, select “SATA Controller Mode” and select the “Compatibility” mode There is another way in which you do not need to disable the mode SATA. To do this, you need to download the SATA drivers for this laptop, write them to a floppy disk and load them by pressing the "F6" key during system installation. (Also, you can not use a floppy, but add the SATA drivers to the distribution kit using the Nlite program and burn the installation disk for the laptop)
IT option -
If you notice that your Toshiba laptop has become slower than before, or errors and crashes have begun to appear in its work, then it's time to reinstall the operating system. Hangups and other problems can also be related to the hardware component, but most often they occur due to incorrect operation of the operating system and programs. In any case, before you take apart the machine and start digging into its components, try reinstalling Windows on your Toshiba laptop. Using a branded recovery disc, you can complete this procedure in just a few clicks.
Instructions for reinstalling Windows 7 on Toshiba laptops
- Open the CD/DVD drive using the button on the drive cover.
- Place the recovery disc that came with your laptop here.
- Close the tray and send the computer to restart.
- In the first seconds after the computer starts booting, press the "F12" button. In the list that appears on the screen, select "CD / DVD" - this is the device from which the system will boot. Press Enter.
- In the window that appears, select "Toshiba Recovery Wizard". Then click Next.
- In most cases, you will be prompted to choose between "Windows 7 32-bit" or "Windows 7 64-bit". Make your choice. Click "Next".
- Select "Recovery of Factory Default Software" and click the "Next" button. Here select "Recover to Out-Of-Box State" and click "Next" again.
- Click "Next" again and then "Finish". The process of reinstalling Windows on the Toshiba laptop will begin. When all the necessary steps are completed, the computer will reboot on its own and you will receive a newly installed Windows 7 operating system.
You don't have to do anything else to reinstall Windows on a Toshiba laptop. It remains to install the applications that are needed for work and restore data. You did not forget to make a backup copy of all important documents at the very beginning?!
The following explains how to recover a Toshiba laptop preloaded with Windows Vista or Windows 7 from a hard drive using the hard drive recovery procedure.
There are two different recovery wizards discussed below. The first is the "Toshiba Hard Disk Recovery" tool and the second is the "TOSHIBA Recovery Wizard".
| Note. First of all, you need to back up your important data! |
a) Toshiba Hard Drive Recovery Tool
Step 1 - Starting the Hard Drive Recovery Procedure
Step 2 — Performing a Hard Drive Recovery

Step 3 — Completing the Recovery Process
b) TOSHIBA Recovery Wizard
Starting the hard drive recovery process

Process #1 - "Restoring Factory Default Software" (Restoring to the state the system was in at the time of purchase)
There are three ways to restore a laptop.
All of them will be discussed below.
- Recover to out-of-box-state (including the System Recovery Options utility)
This option allows you to restore your laptop to the state it came from the factory by default. The partitions will be deleted and recreated as they were when they were first loaded.
Next.

Next.

After initialization, the recovery process will automatically start.

After the end of the recovery process, a CRC check will be performed.

After checking the CRC, the recovery will be completed, and you will need to click the button Finish to restart your computer.

- "Recover without changing the hard drive partitions"

The following warning message will appear on the screen:
The first section will be deleted. You will lose all data in this partition.
Are you sure you want to continue?To start recovery, click the button Next.

If you are sure that you have saved all the data and want to start, click the button Next.
The section will be initialized.
- "Recover to a custom size partition"
Select the desired size of the system disk C (for example, 260 GB), then click the button Next, to continue.

The following warning message will appear on the screen:
All sections will be deleted. You will lose all data on your hard drive.
Are you sure you want to continue?To start recovery, click the button Next.

If you are sure that you have saved all the data and want to start, click the button Next.
The section will be initialized.
From this point on, the further procedure exactly coincides with the process of restoring the system discussed above to the state in which the system was at the time of purchase.
Process 2 - "Erase the hard disk" (delete all data and partitions from the hard disk)
There are two ways to clean up a laptop hard drive.
They will be discussed below.
"Delete all data and partitions from the hard disk" (quick delete process)
The following warning message will appear on the screen:
CAREFULLY!
Click the button Finish to turn off the computer.
"Delete all partitions and overwrite all sectors on the hard disk" (very slow deletion process)
This process may take several hours. Its duration depends on the size of the hard drive.
The following warning message will appear on the screen:
CAREFULLY!
As a result of this operation, you will lose all data on your hard driveThe data on the following hard drives will be deleted.
1. Toshiba MKxxxxxxxGSX (example)If you do not want to delete the data on the hard drives listed above, click the "Cancel" button.
If an external hard drive is connected to your system, it will be among those listed above.
However, if you do not want to delete the data on the external hard drive, disconnect it from the computer.
A few seconds after disconnection, the name of the hard drive will disappear from the list, then you can continue.To start erasing the data on the hard drives listed above, click the Next button.
Data on hard drives will be deleted.
When the uninstallation is completed, the following screen will appear.
Deletion of all data and partitions completed.
Click the button Finish to turn off the computer.