Now, in order to have access to the World Wide Web, it is not necessary to tie your gadget with wires to a specific location. The MTS telesystem makes it possible to connect to the internet via a modem without using a fiber optic cable. In this review, we will look at all the ways to connect an MTS modem to a laptop or PC.
Connect the MTS modem to a computer or laptop
After buying a USB device, a natural question arises, how to connect the MTS modem to a computer or laptop.
To configure MTS Internet, you need to do the following steps:
- turn on the PC or laptop, insert the device into the appropriate USB port. As a rule, the SIM card is already inserted into the modem. However, if this is not the case, embed it into the device properly;
- then the system will automatically install the necessary drivers, after which the corresponding icon will appear on the taskbar.
- click on the icon that appears and complete the installation process;
- after the task is completed, the “MTS Content” icon will appear on the PC screen. This completes the setup process;
- in the future, to access the Internet, it will be enough just to click the tab and click the "Connect" button.
In principle, connecting an MTS modem on a device with any OS is identical. However, there are still some differences.

Consider how you can configure the MTS modem on Windows 7. By the way, the settings will be the same if Windows 8 is installed on the PC.
Action algorithm:
- Connect the USB device to the PC and wait for the drivers to install. After installing the necessary software, the corresponding icon will appear on the desktop.
- Next, you need to set the desired parameters. To do this, click on the icon and follow these steps: "Properties", then "Additional", and enter the following initialization values: "AT + CGDCONT = 1", "internet.mts.by". Save your changes.
- Next, go to "Start", then "Access and Network Control Center", then "Setting up a connection via phone."
- In the last tab, enter the following data:
- the name of your USB device;
- Network name "MTS GPRS";
- USSD for dialing * 99 # (the command can be checked with the provider);
- username/password – mts.
- After entering the data, click "Save". If all the data is correct, the "MTS Connect" icon will appear on the desktop.
In case of any failures or malfunctions, correct the adapter parameters. To do this, follow these steps:
- Go to the activated connection, select the "Properties" tab and check the TCP-IP protocol. Here, check the boxes next to the following values:
- IP identifier by default;
- auto-retrieval of DNS servers;
- canceling the use of remote network gateways;
- disable autocompression of IP protocols.
- Save changes and restart PC.
After these simple steps, the MTS high-speed connection should work.

The USB manual configuration sequence for the corresponding software is the same as in the previous case. The difference can only be in the design of the interface. Otherwise, the control panel is no different here.
In the previous case, we considered the algorithm for enabling MTS Internet on Windows via a USB port. Let's learn how to turn on the Internet through a Bluetooth adapter. If there is such a module on your device, you can configure the MTS connection modem driver as follows:
- Turn on Bluetooth on your laptop and smartphone, and synchronize the device data;
- Next, the drivers will be automatically installed, and the “MTS Connect” icon will appear on the desktop.
In the future, you can access the Internet by clicking on the appropriate icon.

You can also install an MTS modem on a tablet. For this, both 4 and 3G networks are suitable. This method does not involve automatic installation, so the USB ports will have to be docked manually:
- Connect devices with OTG wire. Immediately after that, the “3 / 4G” label will be installed on the main screen.
- Then click on the "Settings" column, and set the APN. To do this, select "Cellular network", then "APN";
- In the last tab, set the following values: Name - “internet.mts.ru, dial-up request - * 99 #.
- After saving, restart the tablet and use the MTS Web Access as you wish.
If your tablet sees a USB device in CD-ROM format, do the following:
- Connect the modem to the PC, then download and activate the Hyper Terminal utility;
- Run the application, go to the router, indicate in the "Code" column - ate 1, in the "Value" column - AT ^ U2DIAG = 0 and save.
After that, the tablet computer will function correctly.
How to connect a modem to a router?

Routers were originally designed to connect to the Internet. Not all of them are able to work in tandem with USB from cellular providers, even if they have the appropriate port.
Advice! Please read the specifications of the device carefully before purchasing. Pay special attention to its synchronization with other devices.
To resolve the issue, follow these steps:
- Insert the USB into the dedicated slot.
- To enter the router menu, enter the password "192.168.0.1" in the line of any Internet browser.
- Once in the menu, install the provided drivers. Connect to 3 and 4G networks.
- Create an (APN) internet access point, specifying the parameters: phone number * 99 #, write the name and address "internet.mts.ru".
- Set auto connection to the web.
- Save the changes and restart the hardware.
After such simple manipulations, you will be able to distribute mobile Internet.
Note! On many USB devices, the necessary settings for various TV systems are already installed and do not require manual activation.

The reasons for the lack of a Web network can be:
- lack of funds or GB on the user's balance. In this case, it is enough just to replenish your account, or buy the missing GB;
- The laptop or PC is defective, or the hardware has special settings. A qualified programmer will help fix the problem;
- Incorrect data is specified in the network settings parameters. To resolve the issue, double-check the correctness of the data, and try rebooting the device;
- technical work on a cellular line (it happens extremely rarely). Turn on the Internet on other cellular devices. If there is no high-speed connection there either, call the toll-free number 0890 to clarify the situation.
Today's article is dedicated to those people whose home Internet is available through an old ADSL modem. Today, many providers still offer the Internet through such outdated technologies, but sometimes there is simply no alternative. One such provider is Rostelecom. From this article you will learn how to connect a router through a Rostelecom modem, but this will also work with other ADSL modems.
Wiring diagrams
If you are currently using a connection via an ADSL modem, then your scheme looks approximately like this: a telephone cable is connected to a splitter (or splitter). From this splitter, one wire goes to the home phone (however, it may not be), the other to the modem. And from the modem, the twisted-pair network cable connects directly to a computer or laptop. Such a scheme is actively practiced today.
The easiest way to connect a router via a modem is to create an additional link in this chain in the form of a Wi-Fi router. We simply use the same "twisted pair" to create a connection between the router (WAN port) and the ADSL modem.

How to connect a Wi-Fi router via modem: ways
There are several ways to implement such a scheme:
- Make the modem work as a bridge, and the router as an access point (that is, a router). In this configuration, the settings must be made on the router.
- The second method involves using the router as a "continuation" of the signal.
Note that the second method is the simplest. In this case, you don't really need to do anything. Only a minimum is needed: configure the router to receive a dynamic address and activate the mode of distributing addresses over the DHCP network. Most users know they need to do this, but don't know how. It is easy to connect the modem as a router, where the latter will act as a "distributor" of the Internet: in the router settings in the Advanced tab (the name of the tab may depend on the router model and manufacturer) there is a DHCP option. It must be activated, and then any device connected to the Wi-Fi router will automatically connect to the Internet. Before connecting the modem as a router, you need to make sure that all the settings in the ADSL modem are already there. They are usually entered by an employee of the provider.

The second way: how to connect a WIFI router to a modem
Considering that the first option is the most difficult, it is worth analyzing it using the example of the most common D-Link router. So, insert a cable with a small connector into the modem's ADSL connector, and plug a patch cord into the LAN connector and connect it to a computer or laptop.
Modem settings
Now you need to enter the settings on the computer itself. Go to the Windows Control Panel (Start - Control Panel), find the "Network and Internet" tab and click on "Network Management". There we are interested in the item "Change adapter settings". Find "Local Area Connections", right-click and select "Properties". There you need to set all the TCP / IPv4 protocol settings to automatic.
Now in the browser you type the address 192.168.1.1 and you get to the admin panel of your router. Here you need to enter a pair of login / password. Enter admin/admin (default). In the menu that appears in the Quick Setup section, you need to uncheck the DSL Auto Connect line and set the values \u200b\u200bfor the VPI and VCI lines. They must be obtained from the provider. Also, these values \u200b\u200bcan be specified in the connection agreement, so do not rush to call the provider. In the PORT item, enter the value "0". Now click on "Next" (Next) and check the box next to the Bridging value. This will put the modem into bridge mode. You also need to check the box next to Enable Bridge Service and set a name for the bridge. Next, we will be required to register the IP address and modem mask. We write there: 192.168.1.1 and the standard netmask 255.255.255.0.

Now let's move on to setting up our Wi-Fi router. First of all, we take out the cable from the laptop and insert it into the router. It must be connected to the modem via the WAN connector, to the computer via any LAN port. Now we connect to the router, go to its settings in the WAN section and select PPPoE as the connection. Now you need to enter all the data that the provider provided us (password, login), apply the settings, save. After that, the router will distribute the Internet from the ADSL modem. Now you know how to connect the modem as a router, but there are other ways.
Sharing from laptop
The fact is that the laptop or computer itself can be used as a router, and setting it up is easy, you just need to know how. You can connect the modem as a router using a computer only if it has a Wi-Fi adapter. Laptops have it by default. The scheme will look like this: a small one enters the modem's ADSL connector, a "twisted pair" comes out of the modem directly into the laptop. A laptop (or computer) accesses the network and shares it over Wi-Fi. Does this require settings? Yes, but now there are special programs for sharing the Internet over Wi-Fi, for example, Connectify Hotspot. There are other programs for this purpose, but the essence is always the same. You can also share the Internet using the built-in Windows tools, but this is already a big topic for a separate article.

Conclusion
These methods, how to connect a router via a modem, work in 80% of cases. Depending on your router or modem model, the names of the settings that were mentioned in the article may differ, but the essence remains the same. Therefore, in this case, you should not focus on the names. In general, setting up a router and modem will not take you much time if you did everything right.
As you know, a computer without access to the World Wide Web is not of particular interest. Almost everyone needs the Internet, but not everyone knows how it is configured. The procedure for connecting a laptop to the Internet is practically no different from a similar operation on a stationary PC. There are only a few ways that will be discussed in detail.
Connecting a laptop to wired internet
Wired Internet has long become a familiar pleasure that many people have. Such a connection has both pros and cons. The access speed will be relatively high, but the laptop will not be carried far, as the wire limits the distance. All settings are usually performed by the wizard when connected. It will also be necessary to reconfigure everything after reinstalling the OS. This will require a couple of steps.1. In the control panel, go to the "Network and Internet" tab.
2. Select the "Manage networks ..." item.
3. Press the button "Setting up a new connection ...".

4. Select "New connection", then click on the 2nd option.

5. Now you will need to enter the information provided by the provider (login, password). Here you can also set a name and attempt to connect. If everything is configured correctly, then the Internet should appear on the laptop.

Connecting a laptop to Wi-fi
The most convenient method. If you have a configured Wi-Fi router at home, you can connect your laptop to the Internet in just a couple of minutes.Procedure:
1. Activate the wireless module on the laptop.
2. Open the "Network Connections" tab in the control panel.
3. Now you need to find a wireless connection and activate it through the menu ("Enable" item).
4. It remains to select a specific point from the list and try to connect to it.

If an access password was previously set, then you need to enter it. If the network is open, then nothing needs to be entered. However, you should definitely set a combination to secure the connection so that no one can connect to it.
Internet connection using a modem
After purchasing the modem, the first thing to do is to connect it to a free USB port. Usually all components are automatically installed. Once the software installation is complete, you can begin the setup process.1. Go to the control panel, find the "Network Control Center ...".
2. You need to "Set up a new connection", then click on the item "Internet connection".
3. A list of three options will appear, you need to click "Dialed".

4. Now you need to enter the information that was provided by the service provider and complete the setup process.

Setting up a connection on a laptop is very simple, but you first need to decide on the connection method. It is very convenient to use a Wi-Fi router, as you can connect not only a computer, but also a smartphone.
How to connect a modem to a laptop?
Master's response:
A few years ago, not everyone could, for technical reasons, afford Internet access. This could be especially felt by residents of areas that are far from the city. Today, it is enough to purchase a modem, make all the necessary settings and use the Internet.
Even in the store, you should make sure that the modem is compatible with the operating system. If you have Windows XP installed on your laptop, then the modem will work without problems, and if earlier versions, then be sure to consult on this issue. And in the instructions for the modem, in an accessible language, all the steps for installing it are described.
Each computer equipment comes with an installation disk, with which the modem is installed. First, insert the disc with the mirror side down into the drive and close it. A window should appear on the monitor indicating that the installation has begun. And at the same time, the prompt "found new equipment" appears. All it says is that the drive has been detected. If such actions did not occur within a few minutes, then try to start the installation yourself. To do this, select "start" and then "my computer". Among devices with removable media, you should see a disk icon. Double-click the left mouse button to open it, or press the right button once and select "open" from the menu that appears. If the problem still persists, then try starting again. If the problem persists, then the cause should be sought in a faulty drive or damaged removable media.
Installing the program, you just need to follow the prompts that appear. In the installation window that appears, select the language and folder for storing files, and then click "install". The program will automatically install on your computer.
It remains to insert the modem into the USB connector and configure the Internet connection settings, which can be obtained from the service provider.
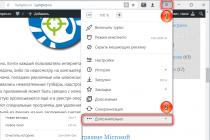
Some time ago, I described the problem when programs, toys or movies spontaneously minimize to the taskbar, the reason for this was the “background” activation of the Connect Manager program update. This program is included with the USB modem from MTS - and performs the functions of an Internet connection manager.
And why not abandon this program altogether? Create an Internet connection manually using Windows. What will it give us? Firstly, we will save the memory and processor power of the computer. Connect Manager will not load, and secondly, we will save your nerves - programs will not be minimized to the system tray.
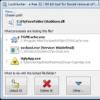
BUT there is one small obstacle - when installing Connect Manager`a, drivers are automatically installed on the modem. You can get around this obstacle by downloading drivers for your modem from the Internet earlier (there are universal drivers for certain manufacturers on the network that are suitable for most modem models) and later, after removing the connection manager, first install the drivers on the modem, and then create an Internet connection . Or look for drivers on the modem itself, I had this file: DriverSetup.exe
Small note: In Windows 7, it is advisable to run the driver installation in xp sp3 compatibility mode, or try as administrator. Drivers from Windows XP 64bit are suitable for Windows 7 64bit. Drivers for Vista - compatible with Windows 7.
If there is no automatic installation, you need to specify the path to the previously unpacked drivers (the path to the folder with the drivers).
So I'll show you how it's done in pictures.
First of all, open START -> Control Panel -> Network Connections

Open the New Connection Wizard, if your window does not look like this but with a panel, then select “New Connection” in the information panel.

The New Connection Wizard starts with a start page that describes options for connecting to the Internet.
 The next window presents options for connecting to possible networks. Since we are connected to the Internet, we select the appropriate item.
 We will create a connection manually by entering all the necessary connection parameters
 Let it not scare you that we are creating a connection through a regular modem - we will use our native USB modem at the highest possible connection speed.
 Just the same at this stage, we specify our modem as the connection source. I note that you can create several connections through different modems. If you have only one USB modem, then this window may not appear. The system will choose it by default.
 Connection name - here we write for ourselves what our connection will be called so that we can understand later. Can be called by any name.
 Phone number to connect - it must always be specified. For different telecom operators providing Internet services, the dial-up number may be different.
 Enter login and password to connect
MTS: Login: mts, password: mts
Megafon Login: gdata, password: gdata
Beeline Login: beline, password: beline
 The connection settings are completed - the final stage - check the box to create a connection shortcut on the desktop. If not set, the connection is still being created exactly and it can be seen in the control panel - network connections.
 This is how the connection window looks like - by clicking on the call button, a connection is made. You can also view and, if necessary, change the properties of the connection.
 That's probably all - the connection has been created, you can use it.