The strange and undocumented mechanism is finally clear.
The text below will not make it normal, but I will at least somehow try to describe this miracle, in the hope that my story will help save time on studying.
Under the cut, there are a lot of letters from the category of "tanks", using argo 1C, non-specialists are not interested.
All settings were made for version 1C Document Management CORP 1.4.12.1, client-server version, platform 1C: Enterprise 8.3 (8.3.6.2152).
So, access groups are intended for setting up rights and restrictions of access rights for specific users and groups of users of the system. The set of rights and the possibilities for their restriction are determined by the given profile of access groups. For example, the "Business Software Sales Managers" access group with the users Ivanov and Petrov can refer to the "Sales Manager" profile, which provides the ability to restrict type of access "Types of nomenclature". Then if for this type of access for all values you specify the option "Forbidden", and add the type of nomenclature "Business software" to the list, then Ivanov and Petrov will have access only to those data and operations that are associated with business software.
This definition is given by the help in the program. The Internet mainly cites two sources: 200 questions and answers and a book from 1C training courses, which, in fact, do not really clarify anything. In particular, for me personally, it was completely incomprehensible how to set up restrictions on several criteria at once: organizations, types of documents, activity issues, and access stamps. I did not find anything useful, so I had to reach the truth by trial and error.
The essence of the whole mechanism turned out to be simple as an ax: if you want the user to have access to a certain object, all the details of this object from among the regulated types of access must be explicitly and, what is fundamentally important, simultaneously allowed in at least one access group assigned to the user .
A little more. For the organization of types of access in 1C workflow, the plan of types of characteristics is responsible " Types of access ", nine details are predefined in it, according to which, in a typical solution, it is possible to set restrictions on objects at the record level (RLS):
- Types of internal documents
- Types of incoming documents
- Types of outgoing documents
- Event types
- Activity issues
- Access bars
- Correspondent groups
- Access groups for individuals
- Organizations
We take as a basis very simple model- two organizations: Firm-1 and Firm-2, two types of documents: Account and Agreement and two questions of activity: AHO and Salary. All users will share the same access group profile.
Our goal is to divide all users into groups with access only to a certain organization, and each of them has those who work with contracts and those who work with accounts. Let's complicate our lives with one more restriction: some users should have access to the questions of the Salary activity, the rest - not.
So, to solve this simple task, we need to configure as many as EIGHT access groups:
- Firm-1, Invoices, Payroll Issues
- Firm-1, Accounts, Questions of AHO
- Firm-1, Contracts, Salary issues
- Firm-1, Contracts, Issues of AHO
- Firma-2, Bills, Payroll Issues
- Firm-2, Accounts, Questions of AHO
- Firm-2, Contracts, Salary issues
- Firm-2, Contracts, Questions of AHO
There is no hierarchy or inheritance in the program. The number of access groups is obtained by multiplying the number of options for the proposed restrictions. Therefore, if you decide to set up restrictions on a dozen issues of activity, for a dozen types of documents, in the context of at least two organizations, then be prepared to administer 10 * 10 * 2 access groups. Add to this, or rather multiply by two or three profiles - users, receptionists, clerks and your hair will never fall back on your head.
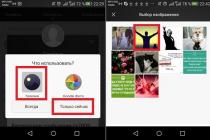
Editions 2.0" to create a new user and assign him the necessary rights. To do this, go to the "Administration" section. Select the "User and Permissions Settings" menu item. Here we go to the "Users" directory.
Let's add a new user. We indicate his name - Ivanov Ivan Ivanovich. Check the box to allow access to information base allowed. We will automatically fill in the name to enter the infobase. We can also assign a password to the user. It will be requested upon login. Fill it out twice. Also we can use authentication operating system if we have it configured. Where can we select users and lists of users in our system. And then it will be possible to disable "Authentication 1: From the Enterprise". The user will automatically log in to the system without entering a password. This kind of authentication is most convenient for working in network distributed systems.
In the next step, we need to specify an individual for our new user. Let's go to the directory Individuals". Let's create a new one. Enter the last name, first name, patronymic. Indicate the date of birth - it is required to fill in. And at the next stage, we may be in for a surprise.
We need to specify an access group for an individual, since we are using record-level access to the directory of individuals. Those. Each user of the infobase can have access to a specific section of the "Individuals" directory specified in a separate hierarchy called "Individuals access groups". In this case, it is not filled in with us, so we cannot select it in our props.
Let's go back to "User and Rights Settings". Let's find "Access groups of individuals". And create the elements of this directory. Let's create an access group - "Employees of the enterprise". And we will create an access group - "Contractors". You can use different access groups for individuals in your infobase. For example, you can also divide them into customers and suppliers. You can use the division of individuals by specific managers who work with them. You can arrange a regional branch of groups of individuals.
So, we have set our access groups for individuals. We return to the "Individual". And now we can choose specific element. In this case, it is the “Employee of the enterprise”. Let's point it out. And click the "Save and close" button.
Let's go back to the user. Now we can choose an individual Ivanov Ivan Ivanovich. And write down our element in the same way. New user recorded and now we must grant our new user the rights under which he will work in the system.
There are several directories for working with rights in the system. This is, first of all, the "Users" directory. These are Access Groups. These are "Access Group Profiles". And there is also a hierarchy of users - these are "User Groups". Here it is marked with a checkmark.
Thus, we have a rather complex structure for granting user rights. In order to understand it, I suggest referring to the following picture. In this picture, we see the hierarchy of granting rights for users in the enterprise management system.
At the lowest level of granting rights is the so-called "user roles". They are set at the system configuration level and cannot be changed in user mode. The set of roles in the system is quite wide and it allows you to configure quite complex sets of rights for users.
At the next level of our entitlement system are "Access Group Profiles". In this case, we have rights - an accountant, a sales manager and a purchasing manager. Each access group profile is presented with its own set of roles. They can intersect with each other, can be exhibited independently. Those. there are some roles that are inherent in all profiles of access groups. Those. for example, some basic rights. And there are also specific roles that are assigned to each profile individually.
The next level of granting rights are "access groups". One access group corresponds to one access group profile. However, in several different access groups, we can use the same access group profile. What is all this for? Access groups expand the possibilities of restricting user access to the database. What does it mean? This means that we have one profile with certain roles, but we describe in access groups what additional restrictions are imposed on this profile.
Thus, we get several groups with the same profile, but with different levels of access to the database. Those. for example, we have a sales manager, and we can create an access group - a sales manager who has access, say, to the Moscow region. Separately, we can create a sales manager access group that has access to the Moscow region. And thus adjust the rights in our information system.
Now let's turn to our new user Ivanov Ivan Ivanovich. And assign him an access group. Well, as we can see, on the left he has "Groups" and "Permissions". Access groups are assigned in access rights. To be included in any access group, we need to click the "Include in group" button. A list of groups opens, and select the “accountants” group for it. The user is assigned the "accountants" access group, which has the "accountant" profile. And in the future, our user can already work with the system.
Let's see what kind of group this is, how it works, what it consists of. As we can see, a profile is specified for the group. And also we can see the members of our access group. Here, as individual users are present, for example, Ivanov Ivan Ivanovich, whom we added. There are also user groups here, which we will talk about a little later. Those. can be added like individual user and user groups. And also here the restrictions for access to individual directories are additionally described.
Let's see how the access group profile works. We open the profile "Accountant". And here we see a set of roles that are inherent in this profile of access groups. Also, on the "Access restrictions" tab, the restrictions inherent in this profile are indicated.
Now let's look at what user groups are. Let us pass to the groups of Ivanov Ivan Ivanovich. This is just a list of groups. As we can see, Ivanov Ivan Ivanovich is not included in any of the groups. We will include it in the "accountants" group by simply clicking on the checkmark. And press the "Record" button.
Now let's go to "Permissions". And here we will see that Ivanov Ivan Ivanovich automatically got through the "accountants" user group into the "accountants" access group. Those. thus, we have two ways to assign rights to users. For example, let's add our Ivanov Ivan Ivanovich to one of the groups, for example, "storekeepers". Click "Record". Let's go to the "Users" directory. Here we see just a list of users without a hierarchy. If we move to the "accountants" group, then we will see Ivanov Ivan Ivanovich in the "accountants" group. Also, if we move to the "storekeepers" group. We will also see Ivanov Ivan Ivanovich in the group "storekeepers".
Thus, we have a fairly complex branching network to grant rights to our users. You need to approach its use wisely and not produce additional entities that you will not use.
21.09.2014
The task is to delimit access to information on the branches of separate divisions in the ZUP for the personnel officer and the payer.
Types of access objects will be by organizations and individuals.Configuring Record-Level Access Control Enabled
Main menu - Tools - Program settings - access restriction tab
Since we initially took a clean database, let's fill it with data.
Let's start organizations with a name.
Central organization
Branch of the central organization (as a separate division)
The second branch of the central organization (as a separate division)

Let's create access groups for individuals:
CO (for individuals of the central office)
Branch of the Central Organ (for individuals of the branch)
The second branch of the AC (for individuals of the second branch)
AC + Branch of the AC (for individuals working in the AC and the branch of the AC)
DH + 2nd branch of the DH (for individuals working in the DH and the second branch of the DH)
Branch of the AC + Second branch of the AC (for individuals working in both branches)

Let's create user groups:
Central heating group
Group Branch CO
Group of the Second Branch of the CO

Let me remind you that the checkboxes for everyone set the types of access objects - Organizations and individuals.
After entering user groups, you can assign physical groups to which the action will apply.
In the case of setting up RLS differentiation in separate branches, you need to know the following point - according to the laws of the Russian Federation, personal income tax and insurance premiums are calculated from the beginning of the year and, most importantly, on the basis of the organization as a whole. This means that the branch accountant, when calculating taxes, must know how much taxes have already been accrued and benefits have been granted for this individual in all other separate divisions. And this is access to the data of all other branches, including the central office.
After this fact, it may very well seem that it is impossible to correctly delimit access to separate branches, but this is not so, and here's why. The developers of the typical ZUP configuration have developed a data structure when, when calculating taxes, the calculation data is always recorded for the branch and the parent organization at the same time, and when calculating for the purpose of calculating the tax in the branch, the data is taken from the parent organization. It turns out that access to all branches is no longer needed, but only to the parent organization. It's already warmer, but firms tend to want to limit affiliates' access to central organization data. It would seem that nothing will work again!
I can safely assure you that everything will work out! If we take into account the concept of RLS, no document will be visible if there is at least one object prohibited for the user, i.e. documents of other organizations will not be visible if there is at least one object (individual) that is prohibited to the user.
Based on the above, we make the following access settings (the "Permissions" button) for user groups.
For the central organization


For Group branch CO


For the element “Group Second Branch of the CO”, we also make the settings:
On the tab "Organizations" - the Central organization and the second branch, and on the tab "individuals" - all access groups of individuals in which the name of the second branch appears. All flags are checked.
Let's get users of organizations:
Personnel officer - personnel officer of the central organization
Personnel officer1 - personnel officer of the branch
Kadrovik2 - personnel officer of the second branch

and set for all users the corresponding user groups from the list of users

or do it in the user group itself

We are now hiring employees.
CO First Employee (central organization)
Branch FirstEmployee (branch employee)
Second Branch First Employee (employee of the second branch)
Branch_CO First Employee (employee hired by the branch, transferred to the central organization)
Upon acceptance, we assign access groups to individuals
CO First Employee - "CO"
Branch PerviySostrudnik - "Branch CO"
Second Branch First Employee - "Second Branch of the Central Organ"
Branch_AC First Employee - "AC + Branch Office"
All employees were hired on 01/01/2014, and from 09/01/2014 the employee of the "Branch_CO First Employee" was transferred from the branch to the central office.
Open the journal "HR Accounting Organizations" under the administrator, who is not subject to RLS restrictions and see all the documents

We open the list of employees, and we see only two employees selected according to the restriction setting.

We open the journal "Organization Personnel Accounting" and see 3 documents selected according to the restriction setting.

We enter under the user Kadrovik1
We open the list of employees, and we see only "our" employees.

In the journal "Personnel Accounting of Organizations" there are also only "their" personnel documents.

We enter under the user Kadrovik2
A list of employees

Journal "Personnel Accounting Organizations"

The RLS distinction works in the same way with regard to calculated information, but I will not give examples here.
That's it, the task set in the title is completed - users see only "their" documents.
Also, you can get acquainted with the nuances of writing queries when setting a distinction.
At the record levelin my article "Using the Allowed directive"
Vladimir Ilyukov
Rights, roles, access group profiles and access groups allow you to configure user rights in 1C Enterprise 8.3. User rights in 1C 8.3 are a set of actions that he can perform on directories, documents, reports and settings. It is very important to understand these concepts if several users will work with the program and each of them needs to be assigned the appropriate rights.
The article describes how to properly distribute rights between users of the 1C ZUP 3.1 program so that each of them can work within their competence and job descriptions. The material of the article does not imply any special computer knowledge.
Profiles and access groups in 1C ZUP 3.1
To differentiate access rights in 1C Enterprise 8.3, "Rights", "Roles", directories "Users", "Access Groups" and "Access Group Profiles" are used.
Law and Role
Rights and roles are some permitted actions (Reading, Viewing, Deleting, Conducting, etc.) over constants, directories, documents and other configuration objects. Each right represents a unit of action from a list of possible ones. The minimum integrator of rights is the role. Each role consists of a set of certain rights. Rights and roles are created in the configurator. The user cannot change their composition.
As in previous versions 1C Enterprise 8 user can be registered in the configurator mode and assigned the necessary roles in the same place. However, 1C ZUP 3.1 provides for about several hundred available roles (in the user card they are listed on the “Other” tab: “Configurator> Administration> Users”).
With such a huge number of available roles, it is very difficult to sort it out. In addition, for the uninitiated, many role names mean little. In such a situation, selecting roles in the configurator for the user is a very time-consuming task. However, at the user level in 1C ZUP 3.1, it is easily solved using the "Access Group Profiles" and "Access Groups" directories.
Directory "Profiles of access groups"
Each element of the "Access group profiles" directory is a role integrator. The link to this guide is located at Administration > User and Rights Setup > Access Groups > Access Group Profiles. The developers have already described the most popular profiles in it.
- Administrator,
- Timekeeper,
- personnel officer,
- calculator, etc.
You can create your own profiles in the directory, but in most cases this is not necessary. Predefined profiles already contain the necessary sets of roles allowed for them (permitted actions). Note that the timekeeper has a minimum set of allowed actions. But even to describe it, it took about 50 roles, drawing.
The elements of the "Profiles of access groups" directory are set as a suitable value in the "Profile" attribute of the "Access groups" directory.
Directory "Access groups"
The meaning and purpose of this directory is that it lists users (members) who will have all the rights of the access group profile assigned to it.
To open this directory, you need to follow the links "Administration > User and rights settings > Access groups > Access groups". One access group called "Administrators" is preinstalled in it. The rest are created as needed by users with full rights.
The same "Access Group Profile" can be assigned to different "Access Groups". In contrast, any "Access Group" can only have one "Access Group Profile". In many cases, it is convenient to indicate the name of the access group profile assigned to it as the name of the access group, figure.

On the "Members of the group" tab, you must list users from the directory of the same name. The selection should be guided by the fact that the access group usually corresponds to official duties its members. The higher the position, the more rights. Any access group can have an arbitrary number of members, figure.

The relationship between the described configuration objects is clearly illustrated in the following figure.

In general, the same user can be a member of several access groups.
Description of access group profiles in 1C ZUP 3.1
It follows from the above that the user's rights are determined by the profile of the access group to which he is a member. It remains to figure out how the profiles of access groups differ from each other. For example, from the name of profiles 1C ZUP 3.1 it is not clear how exactly their roles differ.
- HR officer (no access to salary).
- Personnel officer.
- Calculator.
Unfortunately, their descriptions are not given in the configuration. Judging by the name, it can be assumed that a user with the “HR officer” profile, in contrast to the “HR officer (without access to salary)”, has some kind of access to the salary. But to what extent is completely unclear. Another question: is the payer entitled to work with personnel documents?
For those who have it, they can familiarize themselves with the description of the access group profiles given by 1C. It has been published, but it is very short. The author's article provides more detailed description access group profiles. At the same time, in order not to distort the descriptions given by 1C, they are marked in the article with a special font.
Administrator
A user with the "Administrator" profile has the right to perform everything that is provided for by the standard functionality. To do this, such a user must have the "Administration", "System Administrator" and "Full rights" roles enabled.
Auditor
View all program data, but without the possibility of changing them, 1C.
All sections are available to the auditor for viewing, except for the "Administration" section. He can view personnel and settlement documents and generate reports. The auditor has the right to view the regulated reporting only. The "Settings" section is also visible to the auditor, but here he can only view the existing settings.
Typically, this profile is included in the Auditor access group. At the same time, it is advisable to include it in the access group of those leaders of the organization who, due to official duties, need the data of this program, but they do not know how to work with it or should not.
Timekeeper
Viewing and changing timekeeping documents, 1C.
Links to journals that contain documents for changing time records are located in the "Salary" and "Settings" sections. The "Salary" section contains two links: "Tables" and "Individual work schedules", figure.


The timekeeper has the right to view the rest of the objects, but he will not be able to change them. Personnel documents have information about planned accruals. However, they are not displayed to the timekeeper and he cannot see them. For example, in the "Employment" document, only two tabs "Main" and "Employment contract" will be displayed to him. The "Payment" tab will not be displayed, figure.

The timekeeper has the ability to generate some personnel reports and the report "Timesheet (T-13)".
HR (no access to salary)
It differs from a personnel officer in that viewing and changing the planned payroll are not available, 1C.

Personnel officers without access to the salary are deprived of the opportunity to view the planned accruals and the method of calculating the advance. They also cannot print an acceptance order, as it displays accruals. However, unlike a timekeeper, personnel officers without access to salaries can create new and correct existing personnel documents.
In addition, the "HR officer (without access to salary)" has the ability to generate all "HR reports", edit the directories "Individuals" and "Employees". But he does not have the rights to edit the directories "Organizations", "Units", "Positions" and those related to military registration.
The profile "HR (without access to salary)" is intended for those users who should not see planned accruals (salaries, allowances, etc.).
personnel officer
View and change information about employees in terms of personnel records, including planned payroll, as well as personnel documents. Viewing directories of the enterprise structure, 1C.
In addition to the rights that the “HR officer (without access to salary)” has, the “Kadrovik” has the right to assign, add and change planned accruals in the registrars for personnel records, figure.

That is, "Kadrovik" has the opportunity not only to see the planned charges, but also to change them. It is advisable to use this profile where there is no secret about accruals to employees.
Senior personnel officer
It differs from a personnel officer in that he can change directories of the enterprise structure and personnel records settings, 1C.
The “Senior Personnel Officer”, in addition to the rights that the “Personnel Officer” has, has the ability to edit the directories “Organization”, “Units”, “Positions” and reference books related to military registration. In addition, senior personnel officers have the right to change the staffing table.
Regarding access to the objects listed below, the following can be noted.
- Setup > Organizations. All details are available for editing except for the "Accounting policy" form.
- Setup > Accruals
- Setup > Holds. Can be viewed without editing rights.
- Setup > Source Data Entry Templates. Can be viewed without editing rights.
calculator
Viewing and editing documents for calculating and paying salaries, contributions, information about employees (in the part that affects calculations), 1C.
A user with the "Calculator" profile has the ability to view personnel documents without the ability to edit personnel information. But he has the right to change the planned accruals in them. For example, the salary set by the personnel officer, the calculator can change or add some other planned accrual.
The calculator cannot create personnel documents on his own. But he has the right to set a new or change the existing work schedule for the list of employees.
- "Setting > Organizations".
- "Settings > Payroll".
- "Settings > Accruals".
- "Setting > Holds".
- "Setup > Initial Data Entry Templates".
In other words, the calculator is not entitled to make any settings. It works with ready-made settings.
Senior calculator
It differs from the calculator in that it is possible to change the settings for calculating payroll, accruals and deductions, 1C.
The "Senior Calculator", in addition to the rights that the "Calculator" has, has the rights to change the following settings.
- Setup > Organizations.
- Setup > Accruals.
- Setup > Holds.
- Setup > Initial data entry templates.
- At the same time, “Settings > Payroll” remains inaccessible to the senior payroll. It is advisable to assign this profile to those payers who own the technology for the formation of new types of calculations.
HR payer
Combines the rights of a personnel officer, payroll and timekeeper, 1C.
There is nothing to add here: three in one. It is advisable to use this profile where one user simultaneously acts in three persons: a timekeeper, a personnel officer and a payer.
Senior HR Accountant
Combines the rights of a senior personnel officer, a senior calculator and a timekeeper. The last two profiles are implemented for the convenience of setting up the program in small organizations, where one user can be responsible for all areas of accounting, 1C.
A clarification is needed here. Indeed, the senior personnel officer-calculator has the right to set up “Accruals”, “Deductions”, “Payroll indicators”, etc. But he does not have the right to set up “Payroll” and “Personnel records”. True, at least for release 3.1.4.167.
Opening external reports and processing
All users, including auditors and timekeepers, have the right to work with external reports and processing. However, for security reasons, the ability to use external reports and processing is disabled by default. If the report (processing) is obtained from reliable sources, then you can update the ability to work with external reports and processing as follows.
On behalf of the administrator, run the payroll program in user mode. On the system panel, go to the link "Main menu > Tools > Options". In the form that opens, update the flag “Display the “All functions” command” and click on “OK”.

We set the flag of the same name in it. After that, in the sections “Personnel”, “Salary”, “Payments”, “% taxes and reporting” and “Reporting, certificates”, in the subsection “Service”, the links “Additional reports” and “Additional processing” will be displayed.
Managing Prohibited Dates
To set the change prohibition date for documents of past periods, follow the links "Administration > User and rights settings > Change restriction dates", figure.

Users who do not see the "Administration" section means that they are not entitled to configure the date of prohibition of changes to documents of past periods.
Synchronizing data with other programs
This profile allows you to configure the communication mode. In the future, in accordance with the settings made, an exchange between payroll and accounting programs is provided. By default, the roles of this profile are available only to administrators: "Administration > Data synchronization".
It should be remembered that the profiles "Opening external reports and processing", "Management of ban dates" and "Synchronization of data with other programs" are not self-sufficient. This means that if you create an access group with any of these profiles and connect the user only to it, then when they try to open the program, we will receive a message.

It indicates that the created access group does not have mandatory roles connected, making it self-sufficient.
Conclusion
Planned accruals can be assigned not only by users with the "Calculator" and higher profiles, but also by users with the "HR" and higher profiles. But deductions are neither scheduled nor one-time personnel officers have the right to appoint.
Access to the settings "Personnel accounting" and "Payroll" is available only to users with full rights. The senior personnel officer-calculator does not have such rights.
In order to differentiate user rights, as a rule, pre-installed profiles are quite enough. You can create new profiles if necessary. At the same time, to create a self-sufficient profile, it should include some mandatory roles, such as "Launch thin client”, “Basic rights”, etc. In practice, it is easier to make a copy of the closest profile in terms of rights, and then edit it as necessary.