If anyone has unused pieces of LED strips, suitable housings from garlands or other devices, you can assemble a small bedside lamp on one (triple) LED 5050UW3C... The circuit was taken as a basis for the LED night light in the switch from the Radio magazine, the unit can be in the switch and used:
To simplify and compact the installation, I quickly piled a small scarf, assembled and tested it in work:

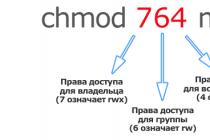
The capacitor for the luminaire is taken 0.33x630V - this is for a LED current of 20 mA. In messages on the forum there is a simple table on the current consumption of a group of LEDs, for different film capacitors. Photo finished LED lamps and the seal:


In principle, as a night light it is quite enough, these LEDs come in a brightness of 7000 mKandell (7 lm) and as the simplest night light it is the most. This is an ordinary LED from a tape for an operating voltage of one element of 3.2 V - it contains 3 crystals of 20 mA, there are 3 of them in each section connected in series at 12 V, they themselves do not heat up.


Something turned out like those nightlights that are sold for cribs or for orientation in the dark at night. Well, the flask is a plastic pressed crumb, all the same supplies from Soviet garlands, 3 pieces remained, I previously collected it on it.


I screwed it to the bottom of the case with a bolt and, for reliability, glued the disassembled industrial plug, they are in plastic, I disassemble and use them.

I tested the lamp for several hours, for greater reliability, I think, replace the half-watt resistor with 1 W, since, although it is not so much, it heats up. Well, since the case allows, I will put a small electrolyte at 100 uF at the output of the diode bridge - it will not hurt. Author - Igoran.
Discuss the article HOW TO MAKE A NIGHT LIGHT
How to assemble an LED night light with your own hands. Calculation and manufacturing. A practical guide.
Good day, dear radio amateurs!
Today we will consider the procedure for calculating and manufacturing an LED night light.
Very often in the nursery, where small children sleep, it is necessary to leave a little lighting at night. Typically, table lamps with a low-power electric bulb are used for this purpose. Let's consider this issue with you from the financial point of view. Let's say it's screwed into the nightlight electric lamp incandescent with a power of 25 watts, and the night light itself works for at least 6 hours a day (only at night). It turns out:
- the night light consumes energy per day - 25x6 = 150 watts;
- per month - 150x30 = 4500 watts, or 4.5 kW;
- per year - 4500x12 = 54000 watts, or 54 kW.
Let's say one kilowatt of energy costs 2 rubles 50 kopecks, we get: 54x2.5 = 135 rubles.
It seems to be a little over a year, but as you know, the ruble saves a penny.
The question arises, is it possible to replace the incandescent lamp with something? Sure. For example, replace it with an energy-saving lamp. But its cost, and the energy consumed per year, will exceed the initial consumption of 135 rubles per year. Of course, it will pay off later, but very slowly, and it is not known how much it will actually work. The only way out in this situation is to use LEDs.
Surely many of you have unused chargers from cell phones long gone to another world. Using such unnecessary Charger, multiple LEDs and resistors, it will be easy to assemble the LED night light. So let's get started. To assemble a night light, we need:
- unused phone charger;
- four (as many as possible) super-bright LEDs of different glow colors;
- several resistors.
Here is a set I used to assemble a night light:
What is shown in the photo:
- a disassembled charger, from which I cut off a part with a plug from the case;
- five super bright white, red, green and blue LEDs;
- several resistors to limit the current through the LEDs when they are connected to the charger.
Characteristics of my LEDs:
– white, blue, green- type: FYL-8013UWC (UBC, BGC), maximum current consumption - 20 mA, drop voltage (voltage at which the required current through the LED is provided) - 2.8-3.6 volts;
- red - type: FYL-8013URC, maximum current consumption - 20 mA, drop voltage - 1.8-2.3 volts. The glow angle of all diodes is 15 degrees, that is, they are narrowly directional. Such LEDs (white glow) usually used in flashlights.
Since I have narrow-beam LEDs, I decided to attach the night light to the ceiling, and direct the LEDs to different corners of the room (I have five corners in the nursery, so I took five LEDs, two of them are red, as the lowest power in this group in terms of characteristics. I will power the night light from the second, unused group of chandelier wires, i.e. one switch for the chandelier, and the second for the night light. Of course, you can do it differently, this is not the main thing. the details are obtained there.
Let's start assembling... Initially, we measure the voltage at the output of the charger, it turned out for me - 6 volts. Now we need, using Comrade Ohm's law, to calculate the resistance of the current-limiting resistors.
Here we will stop a little. LEDs, even of the same color, have different voltages drops on them, and therefore, in theory, each LED must be connected to a power source through its own current-limiting resistor, the value of which is selected empirically so that the current through the LED does not exceed 20 mA (and this is the most correct solution). Take my white LEDs for example. Their drop voltage can be in the range of 2.8-3.6 volts. This means that if one LED has a drop voltage of 2.8 volts, then for it the current-limiting resistor must be of the following rating:
- R = (U power supply - U drop) / I consumption = (6-2.8) / 0.02 = 160 Ohm
and with a drop voltage equal to 3.6 volts:
- R = (6-3.6) / 0.02 = 120 Ohm
As you can see, each LED must have its own current limiting resistor. But you can do it differently. Let's combine white, blue and green LEDs, which have the same voltage drop across them, into one group, and assume that they have the same voltage drop - 2.8 volts. Such a solution will only lead to the fact that there will be some inhomogeneity of the brightness of the LEDs, but, as in my case when using super-bright LEDs, this will not be especially noticeable. In addition, instead of 5 resistors, only two will go to my circuit (one for a group of white, blue and green, and one for a group of two red ones). Also, if you have a sufficient number of LEDs, they can be matched for the same drop voltage. How to do it. We take an LED and connect it to a milliammeter. Increasing the voltage from the power supply (from the minimum value), we notice what voltage the power supply will show when the current through the LED is 20 mA, and we select the LEDs according to a close reading of the voltage of the power supply.
We calculate the resistance resistor into groups of three diodes:
R = U / I(which means that the resistance of the desired resistor is equal to the supply voltage divided by the current drawn by the LEDs). We take into account that the voltage drop across these LEDs is (take the minimum) - 2.8 volts, so we subtract the voltage drop from 6 volts - 2.8 volts and get - 3.2 volts. The consumed current is taken as 60 mA (three LEDs of 20 mA each), which must be translated into amperes - 0.06A (because in Ohm's formulas everything is counted in Volts, Amperes and Ohms) and we calculate the required resistance:
R = 3.2 / 0.06 = 53 ohms(we take the nearest denomination - 56 ohms). It turned out that in order for a current of 20 mA to flow through the given LEDs at a power supply voltage of 6 volts each, or 60 mA in total, it is necessary to connect them to the power source through a 53 ohm resistor. Now we need to clarify what power this resistor should be so that it does not burn out during operation of the device. As is known P (power) = UxI... We substitute the values, given that I have three LEDs in the group and their total current consumption will be 60 mA, or 0.06 A.
P = 3.2x0.06 = 0.192 W... This means that the current-limiting resistor for a group of three LEDs must be selected with a power of at least 0.25 W.
In the same way, we calculate the resistance for the second group of diodes (red), taking into account that the minimum voltage drop of these LEDs is 1.8 V, and the current consumption is 40 mA (20 mA per LED), 6 volts - 1.8 volts = 4.2 volts :
R = 4.2 / 0.04 = 105 ohms. Power P = 4.2x0.04 = 0.168 W.
There is no resistor of 105 Ohm in the line of ohm resistances, so we take the nearest one - 110 Ohm with an allowable dissipated power of 0.25 W.
We carried out all the necessary calculations, now we draw a diagram of the device. , which can be found on the website:

It remains to assemble our LED night light:

This is how it turned out for me. I glued it with glue Moment in the center of the ceiling, and adjusted the LEDs so that they shine exactly in the corners of the room. The dimensions of the device turned out to be 2.5x2.5x5 centimeters, that is, in principle, very small. But as practice has shown, at night such lighting looks quite attractive and does not irritate the eyes.
And the last thing. I measured the current consumption of this device from a 220 volt network and got I = 6 mA. If translated into power consumption, we get: P = 220x0.006 = 1.32 W:
- per day - 6x1.32 = 7.92 W, round up to 8 W;
- per month - 30x8 = 240 W;
- per year - 12x240 = 2880 W, or approximately 3 kW.
And 3 kW multiplied by 2 rubles 50 kopecks gives 7 rubles 50 kopecks against 135 rubles with a regular light bulb. Comments, as they say, are superfluous. Although, in theory, a normal meter has no right to respond to such a low energy consumption!
This article describes simple scheme LED night light that turns on at nightfall. It is powered from a transformerless power source directly from the 220 network, thus it was possible to do without the use of a dimensional transformer.
Description of the operation of the LED night light
The night light uses super-bright white LEDs (HL1… HL4), which are used in lanterns, lamps and various lamps. Each individual LED operates at approximately 3.6 volts. Therefore, these four LEDs in series should be powered from 14.4 volts.
The required voltage of the LED night light is created by the VD5 zener diode, powered by a rectifier made according to a transformerless circuit. This circuit consists of quenching radioelements C1, R1, R2 and a rectifier diode bridge VD1 ... VD4. The night light is activated by means of the RK1 photosensor, which controls the VT1 transistor switch.

In the daytime or when the general lighting is on, the resistance of the photosensor is quite small, for this reason the transistor is reliably closed.
With a decrease in the illumination of the photoresistor, due to an increase in its resistance, a voltage bias appears at the base of the transistor, which leads to its opening.
When the unlocking level is reached, the transistor turns on the LEDs HL1 ... HL4. Again, when morning comes, the value of the photoresistor decreases and the LEDs turn off. Adjustment of the level of switching on of the LED night light is performed by resistance R3.
Details... Capacity C1 - any brand for a voltage of more than 400 volts, capacity C2 for a voltage of at least 50 volts. Zener diode VD5 for a voltage of 16 ... 18 volts, or you can connect two in series at the desired voltage. Diodes VD1 ... VD4 for a voltage of more than 400 volts and a current of at least 400 mA. Transistor VT1 brand KT503G or similar.
A night light is a lighting device used both for its direct functional purpose and as an additional decorative element. It is difficult to overestimate the role of these lamps in shaping the design of a bedroom, rest room. In stores, in the markets of electrical engineering, you can find a variety of models, but all of them in certain aspects will resemble each other. If you want to show imagination and originality, then create a LED night light with your own hands.
You can make a lighting fixture for decorating a bedroom from scrap materials, including CDs, cardboard or plain paper, nylon threads, plywood sheets, glass or plastic bottles, etc. There are so many options that it will not be possible to fit everything in one article. The focus is on LED lamps, therefore, the devices are less power-consuming and as safe as possible.

This device is characterized by compactness, simplicity of design, which is associated with the use of a simple electrical circuit... Any person who has set such a goal can create it on their own. When forming the design, be guided by the interior of the room in which the device will be installed.
For the production of lighting fixtures, old electrical parts obtained from broken fixtures and even unrelated equipment, including fumigators, mobile phone chargers, electrical plugs, etc. can be used. Tin cans, plastic or glass glasses, children's toys and even syringes (of course, without a needle) can be used to decorate and create a unique shape.
If you are confident in your strength and want to realize an unusual idea, then you may need to purchase more expensive items and parts.
In the process of performing work on the assembly of the luminaire, pay great attention to electrical and fire safety. If low power LED bulbs are used, the possibility of a short circuit cannot be excluded. The consequences can be especially unpleasant when using lamps in children's rooms. Try to rule out even the most unimaginable and unlikely outcomes.

Avoid using classic incandescent bulbs or halogen bulbs as they heat up excessively during operation. LEDs - perfect solution... In addition, they reduce the amount of electricity consumed by 7-8 times and will be economical even with the lighting on for the whole night.
Of course, you can pick up a low-power incandescent lamp. Using an illustrative example, let's calculate the amount of energy consumed per year for a 25 W incandescent lamp. Suppose the lamp is on for 5-6 hours daily. In this case, in 360-365 days (exactly one year), 55-60 kW will run. The indicator is insignificant, but you can save money. With identical wattage, diode lamps will be much brighter, so if the luminous flux from a 25 W incandescent lamp is enough, then buy a 5 W LED (or less).
In night light circuits made of fumigators, chargers with voltage drop through resistors, wide and narrow directional LEDs can be used. Choose products with maximum brightness.
Narrow-beam devices have a limited light beam aimed at only one direction. This device will look good together with the main light source (for example, a chandelier), while it is imperative to connect the chandelier and night light through a double switch so that you can activate the devices separately.

Varieties of homemade nightlights
Below we will consider the most common options for making do-it-yourself night lamps.
Moon-shaped transistor night light
To build a luminaire, you will need an LED strip and two transistors through which the first element is connected. The first transistor will automatically regulate the device due to the incident light, after which it will start the second transistor, which directly turns on / off the flex board.
By adding a resistor to the circuit, you can adjust the sensitivity and threshold with which the transistors are triggered and the backlight lights up.
As for the design of the night light, then before starting work, find a sheet of plywood and cut a circle out of it. The base should resemble the letter "O". Use the printer and print the image of the moon. When everything is done, pick up the drill and drill two holes. One - in the upper part, will serve as a fastening of the night lamp to the wall, the other, in the lower part - will be used to pull the cable.

Next, glue the base of the lamp to the plywood circle using special PVA wood glue. You will first have to sand the surfaces, making them perfectly flat and smooth. Be sure to degrease, otherwise the adhesion will be poor. The design as a whole is as simple and straightforward as possible.
After a few hours (until completely dry) measure the length led strip by attaching the board along the edge of the letter "O". Cut off the excess at the location indicated by the manufacturers (look for the “scissors” image).
- Solder the wires and LED strip.
- Paste the printed image of the Moon onto the plywood circle. Take your time to smooth out any wrinkles. The edges need to be bent, forming a "skirt", which will have to be cut off later.
- Wait for the glue to dry.
- Drill a hole to install the photocell. Choose a place so that the element matches the pasted image.
- Peel off the protective layer located on the back of the flex board, and then stick the LED strip around the perimeter of the oval. Pass the wire through the pre-drilled hole at the bottom (see above).

- This hole must be used to pass the power cable coming from the source (distribution board, socket, etc.).
- Use a regular nylon cable tie to bundle the wires together.
- The transistor connection diagram can be found on the Internet - it is as simple as possible. Unfortunately, you can't do without the basics of electrical engineering here.
- Solder the wires to the photocell and use heat shrink tubing to improve the insulation.
- Solder the wires from the power cable to the PCB.
- It is recommended to fix the board to the luminaire with Velcro or other quick-detachable elements.
- Place the photosensor into the pre-drilled hole and fix with adhesive.
Hang the finished device in the room where you plan to use it, and enjoy the result. Using pulse unit power supply, you will protect yourself and avoid unnecessary expenses: when the night light is off, but the power supply is connected to the network, the latter will practically not consume electricity.
LED night light from an old electric plug
Another simple DIY night light is made from a regular electrical plug. Of course, unlike "porridge from an ax", creating a lamp from one plug will not work, so you need LEDs, two resistor elements, two capacitors, a zener diode and PVC tubes. The latter will be needed to isolate the wires and eliminate short circuits.
Visually inspect the plug and remove the grounding pins. Remove the clamp, then grind off the rim on the LED using a file.
The wiring diagram for electrical elements is similar to the use of a fumigator (a device plugged into a socket with a "tablet" to repel mosquitoes and flies). The device is disassembled, the heating element is removed, and an LED is mounted in the free space. The voltage from the power supply is supplied through a capacitor. Excessive voltage acts on the rectifier bridge, a resistance and a capacitor are activated at the output, smoothing the ripple. The mains voltage should be about 400 V.

In this case, an electrical plug is used instead of a fumigator. The finished scheme is placed inside the plafond, the shape of which can be arbitrary. The plafond is created independently or bought in a store (usually plastic or glass products). You can cut the frame of the night lamp out of wood, covering it with a protective layer of special varnish and impregnation on top, excluding the appearance of fungus or mold and rotting.
In this case, we are talking about decorating the device. As electronic circuit you can choose any of the options described above. Plywood is a natural and environmentally friendly material that is easy to process. With a hand or electric jigsaw, you can easily give it the desired shape.
In the process of making such a lamp, you may need a jigsaw, drill, glue, nails, a hammer and a pencil or other stationery for marking.
The finished products are mounted on the wall, and the luminous elements are located between the wall and a plywood sheet of the selected shape. Cut out a picture of a cat from plywood and hang the finished lamp on the wall. It looks just gorgeous and much more original lighting devices sold in stores.

To create a "home zoo" of nightlights, you need a template of an animal, stars and other objects, which will have to be printed on a large sheet of paper. Cut it along the contour, acting as carefully as possible. It is desirable to print on a sheet of A3 size, but it can arrange an option on A4 size if a small lamp is being manufactured.
Place the drawing on the plywood and trace around it with a pencil or marker along the contour. Next, you need to cut out the resulting figure and attach the LED strip to the back. Find the center of the cut shape where you want to attach the board. This will create a night light that shines evenly in all directions. For fastening, an adhesive layer hidden under protective film on the back of the LED strip.
Now you need to think about fixing the lamp to the wall. To get the best result and to avoid a situation where the light practically does not go beyond the boundaries of the plywood figure, the night light should not be close to the wall. Glue a wooden block to it or screw it with self-tapping screws and already build a fastening element on it (for example, an "eyelet" for which the device can be hung on a dowel sticking out of the wall).
Please note that you can cut out several identical figures, make nightlights out of them, but place them at different angles.
This option involves cutting out a metric from plywood with the name of the child, spouse, etc. If you want a more original lighting fixture, try creating a multi-level plywood fixture by cutting out various shapes and superimposing them on top of each other due to the difference in size. If the size of such a device is large, then instead of an LED strip, it will be rational to use a LED lamp.

Do not use incandescent lamps or halogens for plywood, wood and paper nightlights. They have an excessively high heating temperature, which increases the level of fire hazard.
Homemade from a faulty fumigator
This method was partially described above, but let's take a closer look at it. To make such a night light you will need:
- fumigator - so that you don't feel sorry for him, take a device that is out of order;
- two capacitors;
- resistor;
- diodes for a rectifier bridge;
- two white LEDs (although the glow and color temperature are selected individually, in accordance with the preferences of each consumer).
The sequence of actions is as simple as possible: the body of the fumigator is disassembled, the heating element is removed and LEDs are mounted in its place.

The principle of operation of the resulting luminaire is as follows: the mains voltage is supplied to the capacitor. The reactance of the device interacts with the excess voltage and goes to a rectifier bridge consisting of KD209 diodes. The voltage output from the rectifier bridge activates the pull-up resistor, while the second capacitor is responsible for smoothing the ripple.
The resulting DC voltage feeds the white diodes through a capacitor. The voltage across the first capacitor must be at least 400 V. This is important to consider when building a rectifier bridge from diodes. The total number of LEDs will vary depending on the desired end result. Regardless of the choice, the wiring diagram remains the same.
Charger for your phone as a power supply
Almost every person in the house has a charger from the old mobile phone... Perhaps this power supply is defective or just lying around unnecessarily.
Inspect the charging and determine its capacity. Let's assume that this parameter is 6 watts. Use Ohm's Law to calculate the resistance of the required current limiting resistors depending on the LEDs used. The maximum current passing through the LED must not exceed 20mA.

If the voltage of the selected diodes is the same, then they can be connected through one resistor. The light will still be heterogeneous, but such differences are insignificant and imperceptible to human eyes. After completing the assembly, fix the parts with superglue and install in the center of the ceiling, next to the chandelier.
During the day, the lighting fixture will be invisible, and at night it will delight you with a dim light, sufficient so that the room is not as dark and gloomy as children imagine it to be. The power of the finished luminaire will be 7 W, so the power consumption will be minimal.
Thus, for a homemade nightlight, you can take the body of any electrical appliance out of order. This is one of the main advantages of DIY lighting fixtures. Larger lighting fixtures are made from powerful LED bulbs or one piece of flexible tape.
The choice of materials, the step-by-step process and the power of the LED devices depend on the desired end result. The main difficulties are associated with the soldering of the electronic circuit, and decorating the device, for example, with plywood, is not difficult.
Do-it-yourself night light - many would not do this, it's easier to buy than to assemble, and it's cheap. I have to disagree, a good night light can be bought for $ 2-5, and cheap Chinese night lights with gas discharge lamps for $ 1 will last you a month at best - personal experience.
The scheme of a rather powerful and persistent night light is outrageously simple.
It uses white super bright LED per watt, although in the circuit it does not operate at full power, since the maximum current supplied to the LED is 70-75-mA.


A transformerless circuit has been implemented, which in recent times found wide application in electronic devices. This scheme quite stable in operation, does not overheat and is not afraid of short circuits, the output current depends on the capacity of the film capacitor. The capacitor itself must be selected with an operating voltage of at least 250 Volts (250-630 Volts), with a capacitance of 1 μF, the output will produce a current equal to 75mA.


Due to the low output current, the LED will not overheat during operation. In order to prevent voltage surges from burning the LED, a limiting resistor should be used.
A diode rectifier can be taken ready-made or assembled from 4 rectifier diodes with a current of more than 100 mA (better than 1 Ampere) and with a reverse voltage of at least 1000 Volts, cheap low-power diodes 1N4007 are great.


The body is used from an industrial night light, the whole circuit is reinforced inside with hot melt glue.


I have been actively using this night light for two weeks, it is included in the network almost constantly. The internal circuit does not overheat and is completely safe, while the electricity meter "does not see" it - which is very pleasing.
Best regards - AKA KASYAN