HDR stands for High Dynamic Range, English abbreviation is used for shorter and more convenient use, HDRI stands for High Dynamic Range of the image. HDR is a type of photography that allows you to create images with a greater dynamic range than is usually possible.
To understand what it is and understand how to use it, you first need to understand what dynamic range is.
On the left is a photo with a lot of contrast between lights and shadows. To do this, you need a camera that allows you to manual setting... If, in addition, it has a bracketing mode, it is much better as it automatically triggers 3 photos with different exposures without having to adjust the 3's parameters yourself.
We will also need a tripod or some sort of support point as we are going to shoot different photos that will be blended later. Although the most modern software automatically aligns them, keeping small differences between them, using a tripod, you will have confidence that the photo will be edited without any problems and, moreover, you will not lose the edges of the frame due to the alignment.
Dynamic range
Dynamic range is a measure of the spectrum of lighting at various levels - from the darkest blacks to the brightest whites - that can be displayed on the camera. Dynamic range determines the amount of contrast you can capture or display without losing detail.
The dynamic range that you can capture with your camera is significantly higher than what can be displayed on your monitor.
However, the more photos you take, the more you can cover. You just need to go to the camera and, as always, practice and experiment with different results. However, of course, there are many users who have not quite understood what it is and what results can be achieved with this option.
Before continuing, we must point out that we are not talking about something new, but about a technique that has long been used in the world of photography. Traditionally, this method has been based on the superposition of several negatives so that images are obtained with great clarity.
Why is it so important?
Some scenes may have too much contrast due to of a certain type lighting. That is why experts advise avoiding shooting at noon in bright sunlight, as the cameras cannot cope with the full range of light. In low light, other problems may arise - the image will be too dim, not contrasting. As a result, the photo will have soft shadows, but the frame itself will be a little nondescript.
The name for dynamic range is due to the fact that the resulting image changes the amount of light it shows between the lightest and darkest areas. What the camera of our smartphone does to achieve this effect is to shoot several times with different lights in order to subsequently combine them into one result without saturating the light parts and not highlighting the dark areas.
Until smartphones appeared with built-in cameras and powerful processors... Perhaps in this case, the result is a bit surreal, as in the image above. The important thing to use this mode is light and that it has very different intensities throughout the scene. The best situations for getting good results are.
Image at midtones
Are there ways to avoid this?
With digital photography, these problems are much easier to solve, since the result of the shooting is instantly visible on the display. Depending on the resulting frame, you can change the camera settings, or change the angle. We can also use flash to reduce contrast on a sunny day and use a special filter to balance out the difference in brightness between the sky and the landscape.
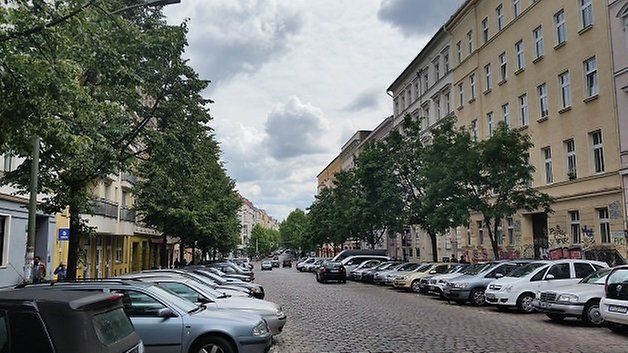
Landscapes with lights and shadows Sunsets Portraits against light. ... In the next image, we have a shadowed street and a very bright sky. 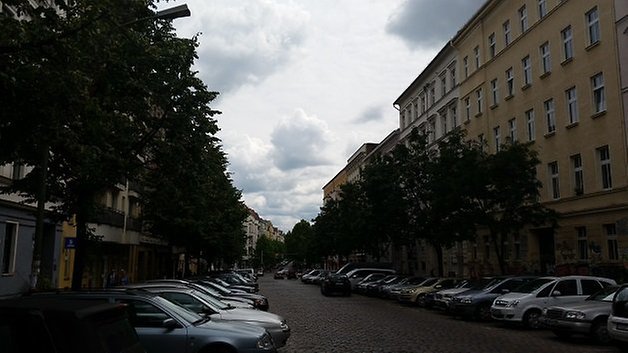
This will be of no use in images that are hue-dominated and provide uniform luminance. In scenes with motion, the results are even worse, because if something moves, the image will be blurry.
Luminosity or uniform tone Vivid colors Scenes with movement. ... But every time there is a trend towards standardization of the mode and nowadays in almost all camera applications, you will find it right on the screen with automatic mode. ![]()
There are also many apps that have this mode and can bring different results to the default app your smartphone has.
What's more, there are processing techniques that can be used in Photoshop, especially when shooting in RAW mode, which allows you to capture images with maximum detail in the darkest and lightest areas of the frame.
How does HDR work?
HDR allows you to use a wider range of brightness in an image, and the range can be much larger than in a regular image. True Image HDR is created from multiple shots of the same scene taken at slightly different exposures.
The human eye has a much greater ability to distinguish tones from most cameras. Our eyes are incredibly flexible: they can adapt to see the details of shadows and highlights in the same scene. Likewise, your camera is not flexible. On a sunny day, you can see through the window while still seeing the interior of the room you are sitting in. If you try to make an image that matches what your eyes see, it will either highlight the white sky or crush the details inside the room to black.
Dynamic range is a measure of the ability of a photographic sensor to record a variety of tones, from black to white. AND digital cameras gain dynamic and correct range. However, each camera is limited by the qualities of its sensor. Several images of the same scene are combined, each opening slightly differently to expand the dynamic range of the camera. For example, highlight details are taken from an exhibit or plaque, while shadow details are taken from another.
Each exposure captures a portion of the tonal range. Then they are combined into one image using special software.
What is meant?
True Image HDR contains a much wider range of tones - too many, in fact, to display on a normal computer monitor or when printed on paper.
If done incorrectly, the resulting images can appear very unnatural, which is why some photographers discard the whole hand process. If you approach her with care and attention, you can create stunning images of scenes that would be impossible to capture without her.
This is a great technique if you are shooting landscape images in dynamic lighting conditions, but if you are trying to create a portrait in a studio it will not be very useful. To do this, he must be able to assess the tonal range of the scene he is trying to capture. You need to consider how dark the shadows are, how bright the highlights are, how you want them to appear in the final image, and if your camera can capture them to your satisfaction.
They are typically stored as 32-bit files that can transfer up to 4,300,000 shades per color channel. For comparison, standard file JPEG can deliver 256 (8-bit) shades per channel, and a RAW file transfers 4000 (12-bit) to 16000 (16-bit) shades per channel.
So what do you do with this very large file?
The next step for most HDR images is tone mapping. In this case, the program uses a 32-bit HDR image to create an image with a contrast range that can be conveyed in print or on a monitor.
Diana Eftayha reviewed the analysis of the tonal range of the scene and the method of preliminary visualization of the resulting images. You take a couple of photos of the same scene, varying the exposure of each one. If the dynamic range of the scene is more than three images, you can use five, seven, or even more.
While it can be calculated, the exposure changes on its own, it's much easier to let your camera, outer spacing, or even your smartphone do it for you. This means you don't have to touch the camera when taking pictures, which avoids image blur and keeps your images sharp.
Each tonal value will be recalculated at a different scale. As a result, a new image is created in which you can see all the details in both the bright highlights and the darkest areas of the shadows. This is the whole importance of the tone mapping you can get from HDR.
How to use HDR creatively?
Many enthusiasts not only use HDR in combination with software, they have gone further. They set themselves the task of not creating a realistic image, they strive to create an original artistic image that no longer looks realistic. The resulting effect is similar to that used in the hyper-realistic style in painting. Some people like it, but some don't.
The exact process for combining different images depends on the program you are using, although for the most part it is completely automated. The software you will be using will take areas in more detail from your frames and combine them into a composite image. You can control how realistic or surreal you want the final image to be. After you combine different plates into one image, you can edit it just like with any other photograph.
The software you want to use is up to you. Capturing the images you want is usually done by changing the shutter speed between each shot. Any number of images can be combined with each other to create the final photograph, but three are the most common.
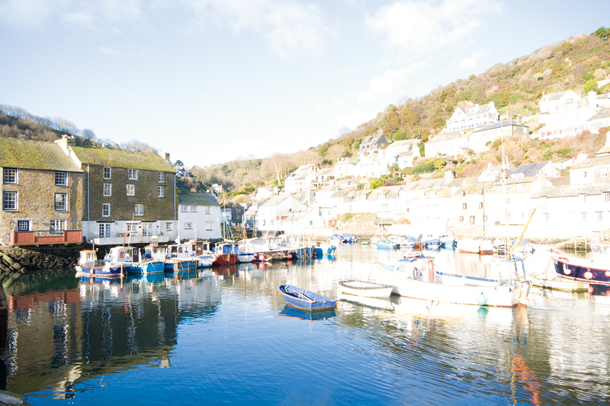 Image at the brightest exposure
What software do you need?
There are many programs that include HDR - some of which are free. The most famous program is Photomatix Pro, but latest version Photoshop (CS5) has a built-in HDR center.
Be the first to know about new translations. Have you ever wondered why this incredible landscape is not depicted in a similar way in the photograph? What happens when you press a button to capture an image with your camera? Cameras alone cannot get such bumpy results.
Our eyes are the best cameras
There is no optical kit in the world that compares to our eyes. At least that's not something you can go up and down when recording your environment with a camera, for example. This means that whatever machine you use will not be able to accurately determine what your eyes are seeing.
Typically HDR programs have a number of sliders that will help you control the tone so you can make the effect just the way you like it.
How do I shoot with HDR?
Essentially, the process is the same as for bracketing. The number of shots you need will largely depend on the actual tonal range of the scene you are shooting. The more contrast, the more frames you need to take.
Our optical assembly has the ability to practically compensate for the differences in brightness that exist in environment, which allows you to create a special "fit" for each point of view. Notice how each area has its own lighting settings.
The camera can't do it, no matter how advanced. When the sensor is capturing an image, these differences between light and shadow are not compensated for correctly, as it is possible to set the camera settings to only one point in the entire scene. This makes the image "dark", "medium" or "clear" when landscapes real life these three attributes almost always combine. Our eyes see it, but the camera doesn't. So what can you do to get a picture that comes close to reality?
Usually three photos are taken, but depending on the shooting situation, you may need to take as many as nine shots, each one or two stops different from the last. Some DSLR cameras have AEB (Auto Exposure Bracketing) that lets you do this without the hassle.
That is, it is better to represent both darker and lighter areas by creating multiple specified points in one photo. Shadows and highlights are balanced and the result is more real. When you adjust image levels, you do something like this, as this setting allows you to adjust isolated areas of the image. However, doing this with a single image may not produce perfect results.
In the 1940s, a photographer thought about using multiple images at different exposures to create a single photograph with a huge dynamic range. In this way, you can create suitable dots for each area, depending on the brightness, and get impressive results and much more similar to reality.
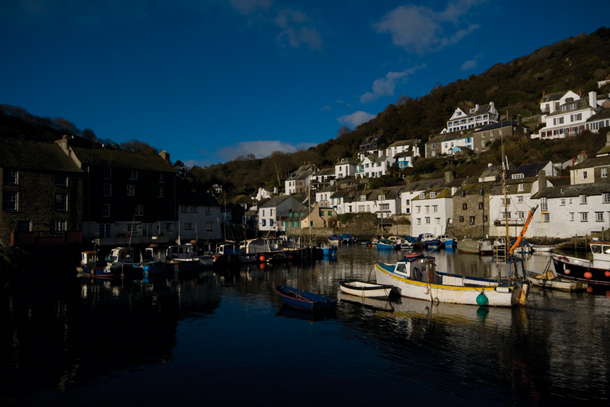 Image at darkest exposure
What other settings should I use?
The sequence in your shots should be as close to each other in content as possible (although obviously the brightness will vary). Any changes caused by movement can create a halo that your software will then have to deal with.
There are programs that simulate this effect with photography only, but the results are inaccurate and often exaggerated and outdated. Record and collect these items: a manual exposure camera, a tripod or fixed mount, a landscape with large changes in brightness, and a suitable image editor.
Do you know what this feature is, what it is for, and what is the ideal time to use it? Well, let's find out everything in the next few lines. Technically speaking, this means the amount of light of varying intensities that can be recorded by a camera lens.
What to do if the megapixel race in smartphones has reached a dead end, it does not allow to enlarge the matrix slim body but want the best photo quality? It is possible to improve the optics using high quality glass lenses, but it is expensive and difficult. It is possible to optimize the hardware and software of the camera to the ideal, but this requires the presence of virtuoso engineers and programmers on the staff of developers. Or you can use the power of modern hardware (fortunately, there are enough of them now) and just add new algorithms for frame processing. One of these options, found almost everywhere in smartphones, is HDR.
From there software smartphone cameras combine these photos into one, resulting in a final image that gains details that would be lost in low light conditions. Then, when activated, it will do all the work by automatically adjusting the exposure of the images. That is, you just have to click on the photo, and the result will be what should be more like what your eyes see and the less what the camera sees.
So, here are some tips on when you should use this feature to capture your images. Typically, large landscapes have large contrasts between sky and ground, for example, making it difficult for the camera to combine all the details in the same image.
What is HDR mode in a smartphone - our article will help you figure it out. We will also try to find out in which situations this option will be useful, and in which only it will spoil the frame.
What is HDR mode
HDR mode (from English High Dynamic Range - high dynamic range) is a special method of taking photos, in which the smartphone's camera sequentially takes several frames with different shutter speeds and exposures, for their subsequent merging into one image. The autofocus of the module alternately concentrates on areas with different indicators of brightness, contrast, and distance from the lens.
Immediately after imaging, the frames are exposed to software processing... They overlap each other, and the system analyzes their quality, choosing the clearest fragments as a basis. Similar parts of other frames are used only for sharpening, saturation, and noise reduction.
The specific algorithm for HDR operation depends on the features and the level of its implementation. The simplest (and least effective) example of its organization is when frames simply overlap and blur a little. In the most advanced versions, the fragments of each image are sequentially analyzed to identify the most successful ones.
What does HDR mode in the camera give?
The main purpose of HDR in a smartphone camera is to increase the detail of the picture and its clarity. For example, if, during normal shooting, objects of different colors are included in the frame, at different degrees distant from the photographer and having different levels of light (dark houses and blue skies are a very common situation), only some of them will be in focus. Other objects will be indistinct, blurry and not at all contrasting.
HDR mode allows you to focus on each of these areas in turn for the best possible quality. Merging frames, in one of which the foreground is in focus, the background in the other, and the small details of the environment in the third, allows you to combine all the successful details in one photo.
Thus, when shooting stationary subjects with a tripod (or simply holding your smartphone firmly), HDR allows you to make shots clearer and more detailed. But this regime also has disadvantages.
Cons of HDR
- Moving objects can not be photographed... Although the camera takes a series of shots at millisecond intervals, the subject may move during this time. As a result, instead of a blurred photo of a car, a fuzzy strip will turn out, and a running man will become a blurred shadow.
- Will not come out to get a bright frame... When shooting a series of frames with different shutter speeds and focus - the camera software in HDR mode"Averages" the brightness values. If in single mode you can get a photo in which the main subject will turn out to be saturated (albeit for the sake of the background), then in HDR the background will be better, but the center will be worse.
- Slow shooting... Even the fastest camera, which takes a frame in a split second, slows down when shooting in HDR. A second delay can play a significant role, and sometimes it is better to quickly make a series of 5-10 frames (this mode is also available almost everywhere) than to wait for one shot to be processed.