A modern router is able to scan, check if the channel is free, or fix an excess of the signal. You can easily find a free window. Often, the router's firmware needs to be updated. Be careful! A loss of power will interrupt the update process - instead of a Wi-Fi channel scanner, you will receive a pile of scrap metal. The wireless access point will only be restored by the official service center, or the technically enlightened Kulibin.
Reasons to use
External interference slows down the speed of information passing. The bitrate drops significantly. Try to place the router next to a working microwave oven - miracles will begin immediately. Interference is created by telephones, the sun, industrial, military objects. Even USB interface 3 a little phonite.
The channel scanner shows a list of available SSIDs, ignoring extraneous factors. Therefore, even a visually free niche sometimes does not work well. Consider the features software building a home network.
If you notice a significant decrease in speed, use shielding, place directional antennas. Avoid crossing the beam line yourself. Microwave radiation is extremely harmful, perfectly absorbed by the aquatic environment of the body. Memory, intelligence, blood counts deteriorate, sleep is disturbed. Immunity drops.
Router admin panel
Even the 300th series of TP-Link is able to find out the congestion of networks. The updated firmware works wonders. The iron itself starts looking for free channels, choosing (even automatically) free bands. The screen will show amazing things: neighbors literally occupied the same rooms. The smart device will monitor, show the status of the networks for verification by the user.
The screen clearly demonstrates the above. If the neighbors had bothered to regularly update the firmware, checking with the analyzer would have shown a fundamentally different picture.

Updating the router firmware
TP-Link firmware upgrade option is the best. Immediately you get a ready-made tool for monitoring frequencies. Of course, the router is only able to check its own operating range (2.4; 5; 60 GHz).
- Always get the firmware from the official site.
- Make sure the following settings match:
- Version.
- Model.
The range of information is very different. Choose a file by carefully examining the label. If the latter is absent, wait a moment to despair. Hardware and firmware versions are often indicated by the admin panel. Avoid self-righteousness: An experimental test can kill equipment.
The software refresh procedure will require access. We believe that setting up a router directly is as simple as possible. As a last resort, perform a hardware reset by pressing the appropriate button.
- Download the firmware file.
- Record on PC.
- Update the software via the cord by selecting the appropriate item in the router admin panel.
- The program requires a cable connection. Otherwise, a fatal crash is possible. Also take the trouble to ensure uninterrupted power supply.

inSSIDer
The software that knows how to determine the density of the download of Wi-Fi channels is widely known. The strange name inSSIDer implies the ability of the device to catch the surfing SSIDs. Replacing the aging NetStumbler will delight primarily Windows users.
- Visit the official website of the project metageek.com/products/.
- Find the product you want.
- Get ready to pay for the license.
The utility will get the user:
- Workload.
- Achievable speed.
- Writes the available SSIDs (Access Point Names).
- Outputs specific parameters, such as RSSI, that allow analysis of the signal.
- The program can catch MAC addresses.
Attention! The utility is powerless to track the interference of household appliances, radio broadcasting, mobile phones, Bluetooth.
Free option
With that said, Android users breathed a sigh of relief: they will have to unambiguously sort through the channel numbers with the pens. However, there is another option. Yes! Acrylic WiFi (acrylicwifi.com/). The novelty is still free, hurry up to download.

The utility collects:
- SSID.
- BSSID.
- Channel load.
- Security type and more.
- Free Wi-Fi Scanner.
- WirelessNetView.
Android
Download the appropriate software:
- WiFiAnalyzer
- Wi-Fi Visualizer.
- iMapper Wi-Fi Pro.
- Wi-Fi Analyzer and Surveyor.
- WiTuners Mobile.
Note! In December 2017, Kaspersky released a number of threat applications (official stores). Therefore, it is better to use router firmware.

Linux
- LinSSID.
- iwScanner.
Mac
- iStumbler.
- AirRadar.
- WiFi Explorer.
- WiFi Scanner.
iOS
Use Fing - Network Scanner. IOS owners just need to visit the AppStore.
Wi-Fi network information (SSID and BSSID)
Signal strength
Signal level graphs at access points.
Inventory
Assigns a name to registered Wi-Fi devices.
802.11ax - Wi-Fi 6
View the latest apps and routers on the market.
Channels
Distribution of Wi-Fi channels and a scanner of Wi-Fi channels at 2.4 and 5 GHz.
Security
Information about WEP, WPA and WPA2 security.
The Acrylic Wi-Fi Home program enables your, including the new 802.11ac and 802.11ax networks. Acrylic Wi-Fi Home is a free Wi-Fi scanner for Windows. view and scan your Wi-Fi networks, including new 802.11ac and 802.11ax networks. Acrylic Wi-Fi Home is a free Wi-Fi scanner for Windows.
As a result of the massification of wireless networks, the effect of saturation of Wi-Fi channels has arisen. With Wi-Fi scanners like Acrylic Wi-Fi Home, you can improve speed, configuration and select the most suitable channels to optimize network speed throughout your home.
Acrylic WiFi sends automatic alerts when new versions of the software are published with improvements. If you liked our Acrylic Wi-Fi Home Wi-Fi and Wireless Network Scanner, help us by sharing information on
Step 1Load Study Range Map
Load a map of the range you want to scan, or use NetSpot tools to draw a map (macOS version only), then click Continue.
Step 2
Non Broadcast SSID
Next, do not forget to include your network in the list of scanned ones if it has a hidden SSID (if it does not broadcast its name). You will need to do this even if you are currently connected to your network, but it is still hidden. This feature is only available in NetSpot PRO and Enterprise editions. If you run free version NetSpot, you can temporarily make the Wi-Fi network you want to monitor visible to other users. In any case, a hidden SSID is not a very reliable method of protection. Then click "Continue".

Step 3
Active scan
To analyze the actual speed of your network's Internet connection, you can optionally enable On-Screen Scanning. Do this or continue by clicking "Continue".
Step 4You are now ready to monitor wireless network... Walk around all corners of the area you want to monitor. Mark points on the map that correspond to where you are currently standing. NetSpot will now capture the first metrics (or data sample). Hold the point until the end of the scan.
Step 5End Scanning
Walk to the next point and click on the map again to capture the next indicators. As soon as you scan at least three points, the Stop Scan option is activated, since you have collected the required minimum of sample data to build the report.

Step 6
Keep on navigating and scanning
Continue navigating and scanning until the entire area of the map is covered, then click the Stop Scan button.
Step 7Find your WLAN in the list of networks
Find your WLAN in the list of networks on the left side of the window. Uncheck other wireless networks, leaving only your checked network.

Step 8
Exploring heatmaps
Examine the heatmaps shown for your wireless network. Use the drop-down menu on the bottom toolbar to select the Wi-Fi monitoring visualization: Signal Strength, Signal-to-Noise Ratio (macOS version only), etc. You can export and save heatmaps.
Yes, operating system will allow you to find nearby networks and connect to them, but what about add-ons? What if you need to have detailed information on all the Wi-Fi networks around you, need to solve problems with your network, turn your laptop into a portable Wi-Fi hotspot, or stay safe on public hotspots? Windows won't help you with all this.
That's why we found six apps for you. They do everything that Windows can't, and more. Five of the six apps are free, while the sixth is not expensive at all.
MetaGeek is an excellent tool for finding and collecting information on Wi-Fi networks in the area where your computer is located. It is also useful in solving problems with your own Wi-Fi network.
For all found Wi-Fi networks, InSSIDer shows the MAC address of the router, the manufacturer of the router (if the program can determine it, it usually can), the channel used, SSID or public name of the network, security type, network speed, and the like. In addition, the program shows the current signal strength of the network.
How would you use the program to solve problems with your wireless network? Seeing that a nearby network with a strong signal is operating on the same channel as you, you would change the channel of your network (most routers allow this) to avoid potential conflicts.
The program also allows you to identify the “dead zones” of your area, where there is no sufficiently reliable Wi-Fi signal. To do this, just walk around your home or office with InSSIDer enabled. In the future, you can either avoid these places, or try to rearrange your router.
Regardless of what you need - to solve problems with your network or find Wi-Fi hotspots to connect - InSSIDer is the program that you will want to download and try.
Price: Free
Compatibility: Windows XP, Vista and 7 (32- and 64-bit)
Download InSSIDer
Here is another great program for finding Wi-Fi networks and providing information on them, such as their distance from you. A radar-like screen shows all nearby hotspots. A separate panel offers detailed information on all found hot spots, including signal strength, network type (for example, 802.11n), router manufacturer, transmission channel, etc.

Next to the radar, the panel provides even more detailed information on the network you are currently connected to, including your personal IP address, external IP address, DNS, gateway information, and more.
Why use Xirrus Wi-Fi Inspector over MetaGeek InSSIDer? For example, because the simpler and more intuitive layout of the Wi-Fi Inspector makes it easier to present information on hotspots. The program also shows the relative physical distance of you from the hotspot. And, probably, no one will deny the usefulness of the radar itself.
However, InSSIDer is better than Xirrus Wi-Fi Inspector in terms of getting more detailed information on surrounding Wi-Fi networks.
Price: Free
Compatibility: Windows XP SP2 +, Vista and 7
Download Xirrus Wi-Fi Inspector
Is beautiful free program, which allows you to turn a Windows 7 computer (the program only works with Windows 7) into a Wi-Fi hotspot, which can then be used by nearby devices - such as a smartphone or colleagues' tablets.
Of course, the computer itself that you would like to convert into a Wi-Fi hotspot must be connected to the Internet and support Wi-Fi. At the same time, the connection to the Internet does not have to be wired at all (although it does not interfere), because the Wi-Fi card of a computer can perform a double function - on the one hand, it can act as a Wi-Fi receiver, and on the other hand, as a transmitter.
Setting up a hotspot is simple: Once connected to the internet, launch Connectify, give your hotspot a name and set a password. After that, the Wi-Fi card of your computer will start broadcasting a Wi-Fi signal to which other devices can connect. It is worth noting that your computer will operate using the Wi-Fi protocol for which it was created. In addition, it will also support earlier protocols as well. So, for example, an 802.11n signal will allow connecting devices with 802.11b / g / n.

Setting a password will restrict outsiders' access to the Internet. The hotspot signal itself is protected by WPA2-PSK encryption.
You can even use Connectify to install local network no external internet connection. Run the program as a hotspot and nearby devices will be able to connect to its network, even if you have no Internet access. This can be used, for example, for transferring files within a workgroup or for multiplayer games.
It's worth noting that connecting my Mac to a Windows 7 computer based hotspot and Connectify caused me problems. However, other computers and devices connected without problems.
Chip's opinion: Google promises a simple solution to maximize WLAN coverage in every home. With Google's WiFi system, the internet giant is making a big difference in hardware. The system is very easy to set up and offers high performance even in the most remote corners of the apartment.
You can get the Google WiFi system with one, two or three "units" - their number depends on the size of your home. In the case of the kit we tested, we are talking about two "units" of Google WiFi, which together should provide complete WLAN signal coverage of an apartment of up to 100 square meters.
Compact and powerful
Dressed in white plastic clothes, Google WiFi is powerful enough with a quad-core processor and 512MB of RAM. At the same time, four antennas are built into Google WiFi - two for the 2.4- and two for 5-GHz band. According to the manufacturer, the system is able to operate simultaneously in two bands and thus achieve, in theory, a maximum data transfer rate of up to 1200 Mbps.
With Beamforming technology, the transmitter power can be further increased. In addition, two Gigabit ports can be used for LAN or WAN connections. Google WiFi uses WPA2-PSK as the encryption method, which is a modern standard.
Google WiFi: expands depending on the size of the apartment
All through the app
The configuration of the Google WLAN system is carried out exclusively through the application (Google WiFi), which is installed on a smartphone or tablet. At the same time, all user configuration actions are accompanied by a really good assistant. Even without his prompts, you must first connect one of the Google WiFi “units” to an electrical outlet and your Internet connection (an existing modem router or modem) - it will not be available through the integrated Google WiFi modem.
Then you should launch the setup application on your smartphone, which is equipped with an assistant. The app will find your Google WiFi “primary unit” via Bluetooth. Then use the camera to scan the QR code located on the back of Google WiFi, then the WLAN connection should be established.
Now you give your network a name, then set a password to connect to it - and you're done! Adding the second "unit" is as simple as plugging it into a power outlet, keeping your smartphone with Bluetooth enabled for a while, scanning the QR code - and you're done too!
Something more, something less: the Google WiFi app won't share a lot of information
You Can't Do Much
The application does not offer a really large number of options for customization. You can prioritize the requests of certain users, create a guest network, add new ones Google devices WiFi, test the speed of your Internet connection and use a couple more functions.
Moreover, it is the connection tests that show "heterogeneous" results: if a pure test of the Internet connection speed (measured by the LAN port of the primary "unit") gives the result in "real" numbers, then the quality of communication between individual "units" of the system is assessed by the application only by school marks ...
Everything is displayed clearly, intuitively, and graphically designed accordingly. But all this is not for those users who are engaged in network settings at a professional level! In particular, it will be in vain to look for the ability to manually set WLAN channels or change other settings in the network.
The best WLAN everywhere!
In day-to-day use, you really won't notice when your device "swaps" one Google WiFi "unit" for another - in this sense, the network is completely homogeneous. So in our test apartment, we could not find a single "bottleneck" that previously met in one or another corner - the system invisibly and constantly connects you to the WiFi you need at a given moment.
Now, the signal strength is really very good everywhere, which is noted not only by subjective feelings, but also by the results of measurements of the Google WiFi app. Perhaps the automatic channel selection works very well here.
Alternative: More Power - Netgear ORBI AC3000 (RBK50-100PES)
Netgear, too, with its WLAN system, which costs about 27,000 rubles, promises the best WLAN coverage in all corners of your apartment or your home. Based on the results of the practical test, we can confirm that it works really well. At the same time, setting up the Orbi system is also very simple.
Separately about BSSID - what is it?
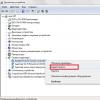
Basic service set identification (BSSID) - unique number (mac-address) of our wireless network. If your router supports MBSSID technology, then you can configure up to several access points on one router. Those. multiple networks within one Wi-Fi network. One SSID can have up to four BSSIDs, respectively, each will have its own MAC address. You can see this in the command line with the command netsh wlan show networks mode = bssid ... This is how it looks:
![]()
What is it for? For different security policies (guest network / staff network), different routing policies (static IP, DHCP), and so on. Yes, you can buy a second access point and configure everything there, but this is additional financial costs + an extra device on the network.
How do I choose the right channel?
Go to the "Analyze" tab at the top of the program and see the following picture:

Each arc is someone's Wi-Fi network, respectively, on the left is the sensitivity of the sensor (signal level), below are the channels. Thus, you can track on which of the channels the greatest number of access points "graze". To make it clearer, try turning on the display of the SSID. This makes the picture even clearer:

Please note that the program itself recommends which channel is most beneficial for our laptop / pc:

Thus, we found out the most "noisy" broadcast, looked at the sensitivity of the receiver and found out that the freest radio channel for our device is 12
What else can you do?
If the signal between the router and the laptop still leaves much to be desired, and the distance between them is very small (1-3 meters), then it is recommended to remove the router from the walls in order to eliminate interference from neighboring devices (this may not necessarily be a router). Try to put the router at different points of your apartment - even minor movements around the room can give up to 90% (!) Improvement in the signal and, accordingly, the speed over the Wi-Fi connection
It is often necessary to quickly check the WiFi signal strength in order to select the clearest channel with good reception. A simple android application Wifi Analyzer is perfect for this task.
With its help, you can easily not only determine free channels, but also check the quality of Wi-Fi reception in various places of an apartment or cafe, or view changes in the signal over time. After starting, a graph will be visible in the main window of the program, which will display the visible wireless networks, the reception level and the channels on which they work. If they intersect on the chart, this will be clearly displayed.

You can also see the "rating" of the channels, by the type of any star ratings, which clearly shows how appropriate the choice of one or another of them is at the moment. Another feature of the application is the analysis of the Wi-Fi signal strength. First, you need to choose for which wireless network the test is performed, and then watch the reception level, while nothing prevents you from moving around the area or checking the change in reception quality depending on the location of the router.
It would also not be superfluous to add that our interest in the WiFi network may be not only in the passive analysis. Using your mobile phone, you can also try to guess the password to