In most apartments and even private houses within any, even a small city, there are almost no problems with the quality of TV signal reception, since cable TV is almost everywhere. In most apartment buildings in cities with a population of over one million, several cable TV operators can be present, which gives residents a fairly good choice.
But as you move away from the city center, the availability of high quality cable TV is gradually "reduced to naught." And outside the city, as a rule, cable TV completely absent.
Therefore, summer residents for the most part are content with the fact that they watch at most several channels of terrestrial television, which they manage to catch on. And image quality is often poor... Especially if the summer cottage is located far from the emitting station of terrestrial television, then on the TV screen you can see a lot of interference from "snow" to "stripes" and a black and white image instead of a color picture.
In most of Russia, terrestrial television is still transmitted to analog format... This method of signal transmission has one significant drawback: signal-to-noise ratio drops dramatically with distance from the emitter.
Noise (interference) with distance from the TV center begins to dominate more and more over the main signal. This is exactly what is shown in the appearance of "snow" on the screen. If the cottage or village is very far from the transmitting station, then the noise will eventually interrupt the signal completely, and it becomes completely impossible to watch a TV channel.
Now the country is introducing the transmission of a TV signal in a digital format, and over time it is planned to completely abandon the transmission of television programs in an analogue format.
What is the advantage of digital TV over analog TV?
Signal transmission "digitally encoded" in comparison with direct transmission in analog format gives several advantages:
- Improving the noise immunity of transmission and recording paths for television signals.
- Reducing the power of the transmitters.
- A significant increase in the number of TV programs broadcast in the same frequency range.
- Improving the image and sound quality in TV receivers.
- Creation of TV systems with new standards of image decomposition (high definition television).
- Creation of interactive TV systems, using which the viewer gets the opportunity to influence the broadcast program (for example, video on demand).
- Start Transfer function.
- Archive of TV programs and recording of TV programs.
- Transmission of various additional information in the TV signal.
- Choice of language (more usual two) and subtitles.
- Expansion of the functionality of studio equipment.
- Ability to add radio to multiplexes
But there are also some limitations:
- Fading and scattering of the picture into "squares" with an insufficient level of the received signal, the data is either received qualitatively at 100% or restored, or poorly received with the impossibility of recovery.
- Almost complete signal fading in a thunderstorm.
- Even a transmitter with a power of 10 kW and a suspension height of a transmitting antenna of 350 m provides reliable reception at a distance of 50 km, and, as a result, the need for a larger number of transmitting centers than with analog TV (more frequent location of transmitting antennas).
Since we are discussing from the point of view of an ordinary user, basically only image quality, then we can single out only one main feature of digital terrestrial TV over the outdated analog one:
Digital TV is highly immune to interference... For this, the signal is encoded with some redundancy. The digital tuner will provide the perfect picture even when there is a lot of interference. And he will do this until the signal-to-noise ratio drops to a minimum, when the signal arrives completely on the verge of the capabilities of the equipment.
That is, in analog broadcasting, as the signal level drops, you will see the picture worse and worse. In digital broadcasting, you will not notice a drop in the signal until the tuner is already able to recover the lost parts of the image, and it “falls into squares” and then disappears altogether.
Types of digital television
By transmission channel, digital TV can be divided into four types:
- Cable (DVB-C)
- Terrestrial (DVB-T2)
- Satellite (DVB-S)
- Internet TV (IP TV)
We will not consider cable TV and IP television at the dacha due to their great rarity. But satellite and terrestrial digital television broadcasting in the country is relevant.
Moreover, satellite DTV has been used by consumers for quite a long time, and in especially remote areas there are no alternatives at all. We will consider it in a separate article.
But on-air DTV began to enter the life of gardeners and summer residents relatively recently. Let's talk about him in more detail today.
Terrestrial digital television in the country
The network of terrestrial digital television broadcasting in the Russian Federation is still in the process of construction and available so far mainly near large cities... But it already covers a significant part of the dacha territories. Therefore, the issue of connection is becoming very relevant lately.
How to connect to terrestrial DTV?
If you want to try to connect digital television in the country, first you need to determine Does your site fall within the coverage area of one of the DTV transmitting antennas... The location of the site will determine how your TV receiver will pick up the digital signal.The most reliable way to find out is to interview the neighbors in the summer cottage, perhaps one of them is already watching TV channels in digital form. Then you can be completely sure that "the signal is reaching you."
If no one in the district has ever heard of digital TV, then you need to try to find out if your site falls within the boundaries broadcasting radius of the local emitting DTV station.
Coverage area
The broadcasting radius of a DTV station usually lies within 20-50 km, depending on the terrain and building density. On average, about 30 km is reliable reception area.
Each region has its own local organization - on-air DTV operator, which is responsible for building and maintaining the network. On their website, you can usually see the locations of broadcasting stations and even coverage maps. Or you can get information from them by phone or written request.
The DTV network in the Russian Federation is being built by the Federal State Unitary Enterprise Russian Television and Radio Broadcasting Network.
Each region has a subdivision of this organization.
You can call and find out everything by the phones of your region from the page.
If you are lucky, and you found out that your summer residence is in the "digital" broadcasting zone, then it's time to decide on necessary equipment for receiving DTV.
Equipment
So, you already have a TV set at your dacha, a plot in the DTV broadcasting zone. We proceed to the installation of digital television in the country. What else do you need to receive a signal? At the very least, you need an antenna.
Antenna for receiving digital television

Universal antenna MV / UHF for digital TV reception
If the digital TV tower is nearby, then it is enough and indoor antenna... I will say even more, I personally was sure to catch the DTV signal in the city of Ufa with a meter piece of wire.
If the signal level is not so perfect, then you will need to install an antenna in the country to receive digital channels. Now most of the antennas on the market are well suited for this, since they support reception of signals in the decimeter range (UHF / UHF).
For example, you can put the antenna "GAL", "Locus", "Zenith", "Meridian", "Ether", etc. I bought my antenna in Auchan for 1000 rubles.
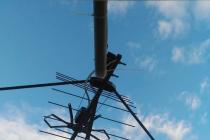
If you know the exact location of the DTV tower, then everything is simple: pointing the antenna on her and that's it. This is usually enough to pick up the signal and watch digital TV without any problems.
If the exact direction is not known, then you need to gradually turn the antenna until you find the best position. Most digital set-top boxes have signal level and quality indicator which is displayed on the TV screen and from which you can find the best antenna position. This is usually done together: one person turns the antenna, the second monitors the signal level.

When you have found the maximum possible signal level and the antenna is installed in the desired direction, you need to search for channels on the set-top box.

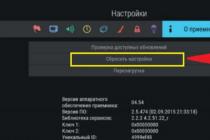
Setting up digital television in the country
The easiest way is to find the item "Autosearch for channels" in the STB menu, and then the STB will do everything by itself: it will find all available digital channels and number them in order.
Digital terrestrial television channel list
Now for the fun part: what channels does digital TV show for free?
Since my dacha is in the suburbs of Ufa, and I write from my own experience, it means that I am considering digital terrestrial television in Ufa. But as far as I understand, list of channels throughout Russia will be the same, with rare exceptions, so the information will be useful to everyone, not just the residents of Bashkortostan.
At our dacha, DTV shows 20 channels: 10 for each multiplex.

Digital TV Channel List
Here full list of channels in Ufa:
| 1 | "First channel" |
| 2 | "Russia 1" |
| 3 | "Match TV" |
| 4 | "NTV" |
| 5 | "Petersburg-5 channel" |
| 6 | "Russia K" |
| 7 | "Russia 24" |
| 8 | "Carousel" |
| 9 | "Public television of Russia" |
| 10 | "TV Center - Moscow" |
| 11 | REN TV |
| 12 | "SAVED" |
| 13 | "The first entertaining STS" |
| 14 | "Home" |
| 15 | "TV-3" |
| 16 | Friday |
| 17 | "STAR" |
| 18 | "PEACE" |
| 19 | TNT |
| 20 | "Muz TV" |
I hope I helped you understand all the nuances of digital TV. If you have any questions, write, I will definitely try to help you.
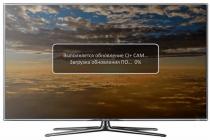
The set of satellite equipment Tricolor TV receiver is a digital receiver for viewing a package of operator's television channels. Thanks to the latest developments of specialists, it became possible to TV without a receiver. The home appliance market offers a wide selection of TV sets with a built-in tuner that supports the CI CAM slot and all the required standards. Having fixed the antenna and completing its settings, it is not necessary to use a receiving device from Tricolor TV to receive a signal.
To receive a signal from a satellite, you must connect the antenna to the F-connector located next to the analog antenna jack.
This method of receiving a signal has a number of advantages:
- a minimum of wires are used;
- no additional space is required to install the receiver;
- there is no compulsory purchase of a receiving device;
- viewing control is carried out using the television remote control.
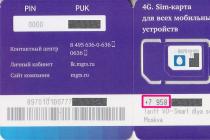
In order to decode the received signals from the satellite, you need to purchase and connect a special conditional access card (smart card) and a module. In the absence of these devices, only free channels can be received.

Installation of the CAM module must be performed with the equipment disconnected from the power supply. The smart card is installed in the module and inserted into the PCMCI slot of the TV receiver. During installation, it is important to observe the correct position of the module. The barcode should be positioned to the monitor.
TV receivers with built-in digital DVB-S / S2 tuners are compatible with these modules. To determine the presence of a built-in receiver, you need to look at the back of the TV. There should be another connector on the rear panel next to the regular antenna connector.

The tuner can support two standards: DVB-S and DVB-S2. If the instructions indicate the presence of only the first option, the TV will be able to open about 50 channels of the mpeg2 format. If the TV supports two standards, with the installed module and the corresponding software version, all Tricolor TV channels are received.
After correct installation of the module, the cable connection phase begins. Then the TV turns on in the channel search mode.
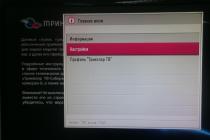
In the menu, using the remote control, you must select a signal source (satellite) and search for channels. In this case, a list of only open channels will be determined. After completing the scan, the system will save all found channels. A number of steps to search for channels are necessary to check the collection of the connection diagram, as well as the compatibility of the module and the TV.

Pay TV Card Registration Process
After the conclusion of the subscription agreement, it is necessary to activate the access card to the services of the satellite operator Tricolor TV. All required actions are performed online at the main site of the satellite provider. The user needs to indicate the desired channel package, enter the number of the subscription agreement and the card ID. In the line with the name "Terminal Model" put CI +.
The completed form is sent for further processing by Tricolor TV specialists and subsequent registration. Until the connection has been established, it is important not to disconnect the TV. It must be included on any of the encrypted channels from the package indicated in the application. After a couple of hours, an automatic connection will occur, and the user will have access to their favorite TV channels.

Description of the module and its functions
Receiving a signal without a receiver makes it possible to receive broadcasting from a satellite and transmit it to a TV set. In order for the module to become a replacement for the receiver, one condition is required - the television receiver must have a corresponding connector. Almost every TV set of a fresh year of release has it, and instructions from the TV will help determine it. Thanks to the CAM-module, it becomes possible to watch high-quality HD channels.
The module installed in the TV performs many useful functions:
- decodes the signal received from the satellite;
- protects against unauthorized broadcast reception;
- transmits a signal to the TV without deterioration in quality;
- frees up additional space occupied by the receiver;
- saves energy consumption;
- has a low cost compared to the receiver.
The module works only with licensed access cards with 14-digit identification numbers. To extend the life of the module, you need to follow some simple rules:
- do not use the device near a source of strong radio waves;
- installation and removal of the module must be carried out according to the instructions with the TV turned off;
- do not remove the module from the TV unnecessarily.
The slot in the TV for the module is shallow, so there is no need to try to push the module into it completely. The image quality directly depends on the TV model, since with a normal connection, the receiver is responsible for this.
Today, televisions with receivers are very popular. With these devices you can connect The built-in receivers in the documents are displayed as a “DVB-S / S2” receiver. As a rule, most models with this function are available in liquid crystal. The most common manufacturers are LG and Samsung.
with a receiver?
In the case of built-in receivers, pay attention to the rear of the TV. Regardless of the model, there must be an LNB IN connector. It is intended for connecting a satellite dish. Additionally, the LNB OUT output must be present. With its help, it will be possible to connect a second receiver to the TV.
There is a VIDEO connector for video signal. His responsibilities include ensuring average image quality. Without AUDIO, you will not be able to hear the audio signal. The stereo headset connects directly to a TV or amplifier. The Internet port will allow you to take advantage of the local network. Additionally, you can connect to a personal computer. Smart TV is checked last on the TV. An audio signal is input through this connector. In turn, the picture on the screen must be of good quality.

Setting up a TV with receiver
Setting up the satellite DVB-S2 tuner built into the TV is quite simple. The menu is slightly different in different models, but in general the instructions are the same. Setting up satellite TV on Samsung TVs is as follows. First of all, you need to go to the menu. There should be a "Broadcast" tab. Through it, you can go directly to the channel setup. When you select the satellite system subsection, the TV will ask for the owner's pin code. By default, manufacturers indicate 0000.
After a successful transition, you can select the LNB settings. At this stage, you need to check if the system has found a satellite signal. If this does not happen, then you need to select the DiSEqC mode. Then you can enter the menu and select the satellite signal. After all that has been done, all settings are necessarily saved.
LG TVs with receiver
All TVs with a built-in satellite receiver from LG are produced with interesting backlighting. Screen resolutions vary widely from model to model. Usually Smart TV is supported. In addition, good viewing angles should be noted. Tuners are mainly installed analog and digital. The average screen frequency is 50 Hz. At the same time, the refresh rate is in the region of 100 Hz.
The audio system in the TV, as a rule, is installed two-channel. The power of one speaker is 5 watts on average. Video signals are supported from 480p to 1080p. For convenience, manufacturers equip models with various connectors. They can be used to connect headphones, speakers or personal computers.

LG 24LB450U model with receiver
This LG LCD TV with built-in receiver has a resolution of 1366 by 768 pixels. The backlight is provided in this model. The viewing angle of the TV is 178 degrees. Analog and digital tuner available. Image processor - "Triple". The sweep frequency is 50 Hz. A special decoder is installed in the TV audio system. With its help, the sound is obtained more voluminous.

All major video formats are supported by this model. Among other things, a large number of component inputs can be distinguished. Standard antenna connectors are provided. Additionally, there is a digital optical audio output. With a stand, the dimensions of this model are as follows: height 556 mm, width 384 mm, thickness 140 mm. In this case, the weight of the device is 3.7 kg. The cost of the model on the market is 12,000 rubles.
LG 22LB450U TV
The resolution of these LCD TVs with built-in have 1366 by 768 pixels. At the same time, the viewing angle is quite large. Also of note is the good range of the Image Processor installed in the "Triple" series. The panel sweep rate is 50 Hz. In this case, the update parameter is within 100 Hz. The color system supports all major standards.
The audio system is installed two-channel. This model has two 5W speakers. There are various sound and optimization modes. This model also boasts a wide range of video signals. Among other things, it should be noted the presence of expansion slots. A standard IPS-matrix is provided by the manufacturer. The cost of this model is 10,000 rubles.
What is the difference between Samsung TVs and receivers?
Televisions with a built-in Samsung satellite receiver, as a rule, differ in their functionality. In this case, various contrast settings are provided. The resolution of many models is in the region of 1920 x 1080 pixels.
The image processor is "Hyper". Among other things, the good refresh rate should be noted. Picture-in-picture mode is available. Another thing to mention is the color system. It works on PAL, SECAM and NTSC formats. Video signals are received by the TV in the range from 480 p to 1080 p. Optical digital audio output is included in most models. Power consumption of Samsung TVs is acceptable. The average of the devices lies in the region of 106 V. When using the economy mode, only 45 V. is consumed.
Model "Samsung UE40H5270"
These TVs with a built-in satellite receiver have a resolution of 1920 x 1080 pixels. Contrast system - "Mega". Additionally, many will appreciate the pleasant backlighting of the TV. Smart TV support is provided. There are also two tuners available.

The image processor is installed in the "Hyper" class. With its help, the refresh rate increased to 100 Hz. There is a two-channel audio system with stereo sound support. A USB port is provided by the manufacturer. There are also connectors for connecting a personal computer to the TV. The dimensions of this model are as follows: height 908 mm, width 558 mm, and thickness 190 mm. The total weight of the TV is 8.3 kg. On the market, it will cost about 30,000 rubles.
Summarizing
As a result, we can say that TVs with a built-in satellite receiver are undoubtedly needed and in demand. They are set up quite simply, and anyone can handle it. The models presented above are quite different from each other. The most popular TV is the LG 24LB450U. In pursuit of better image quality, you can consider Samsung models. The above TV is a pretty good choice.
TVs are getting smarter and more perfect every year. Leading manufacturers do not stand still and constantly come up with new technologies and opportunities for their products. One of these interesting innovations is the built-in digital DVB-S2 tuner on some LG TVs (and many other manufacturers). At first glance, an unremarkable technology, which can even get lost among many others, opens up quite interesting possibilities.
What is it and why is it needed? Due to the fact that the TV has such a device, you can watch satellite TV without using a special receiver. We can say that this is such a built-in receiver. Therefore, you can directly connect the "dish" to the TV and catch channels from the satellite.
Now tuners of this standard are gaining special popularity, so they can be found on many TVs. You can verify the availability of the DVB-S2 standard technology for a specific model by looking at the description for the TV, which is on the manufacturers' official websites. For example, it might look like this:
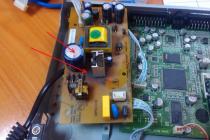
We decided to test the digital tuner on LG TV. In general, everything is good, but not perfect. Unfortunately, it turned out that with the help of DVB-S2 it is possible to catch only completely open channels. In our case, there were no Ukrainian and Russian ones among them. Which is no longer very good. This is due to the fact that special keys are usually sewn into receivers that are used in the CIS to view encoded channels. Such keys are not entered into TVs and there is no way to do this. There is no particular need for this for manufacturers. But then why write an article about a not-so-useful device, you ask? After all, what is so interesting about channels that are broadcast in incomprehensible languages and not always showing interesting programs? But not everything is as sad as it might seem at first glance. TVs that have DVB-S2 also have support for CAM modules. You can insert a special card into these modules to receive Pay TV from the satellite. The module itself is connected to the TV via PCMCIA interface. It looks like this:
To switch between different signal sources (cable TV, HDMI, etc.), press the INPUT button on the remote control and select the desired source.
In general, there is nothing complicated here. It is enough to connect the tuned antenna and start the channel search. If something does not work out, or if you have questions - describe your problem in the comments, and we will definitely help.
Satellite television has a number of advantages over conventional terrestrial or cable television. Firstly, there is a much larger number of channels - entertainment and educational, for adults and children, where everyone can find something interesting for themselves. Secondly, it is a high quality picture and sound. The installation of equipment for displaying satellite TV is usually carried out for a fee by the service provider, but, knowing the correct sequence of actions, you can connect the satellite dish to the TV yourself.
Satellite equipment - functionality and installation
As you know, a satellite chosen by the user at his discretion (usually Sirius 5.0E, Amos 4.0W, Hotbird 13.0E or others) transmits a signal. The task of the satellite dish is to reflect it on the converter, which converts the received data and, in turn, sends it to the set-top box. But only the receiver sends a signal to the TV receiver through the cable.
What you need to mount a plate
The usual kit for mounting a satellite dish includes the following items.
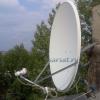
- Plate to transfer the signal from the satellite to the converter. The minimum diagonal is 60 cm, the maximum is 120 cm. The required size depends on the area where the installation is carried out, as well as on the obstacles located in front of the plate.
- bracket(selected in accordance with the diagonal of the plate), anchor for fastening.
- Converter or head. The device is designed to convert the signal reflected from the dish and then transmit it to the attachment.
- Dissek, which serves to combine two or more converters.
- Television cable.
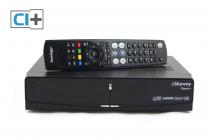
- Receiver... To watch free channels, you can purchase the simplest set-top box. If you plan to view paid content, you will need a receiver with a card receiver.
- F-connectors required to connect the cable.

Plate installation
Satellite dishes should be installed in an easily accessible place... This is necessary in order to always be able to repair or adjust equipment.
Important! The antenna should initially be directed south. On its way, there should be no all kinds of obstacles: buildings, branches, trees and the like, since such obstacles significantly degrade the quality of the received signal.
Instructions are always included with the equipment, and you need to collect the plate in accordance with the recommendations set forth in this document. In this case, during the installation process, the following important points should be taken into account:
- the bracket with the antenna must be very firmly fixed to the wall so that a strong gust of wind does not rip off and damage the equipment;
- Correct mounting of the bracket assumes that the converter is directed downward;
- the cable must be sealed and securely fastened with ties and electrical tape;
- you need to mount it so that the satellite dish rotates freely in all planes, which is required for ease of adjustment.

Connecting to a TV Directly
Modern television panels equipped with a DVB-S2 tuner, allowing you to do without a receiver to receive satellite broadcasting. It is worth knowing that a TV connected in this way will catch free TV channels, but only in a foreign language.
To watch domestic channels requires a CAM module, which connects to the TV through the PCMCIA connector. It can be bought separately or together with a satellite TV package from any of the many operators, be it Tricolor TV, MTS or NTV PLUS.

To connect this antenna directly to a TV receiver, you must a TV cable equipped with an F-connector, plug into the "LNB Satellite In"... The next step is to configure the channels. On TV panels from LG, Samsung, Philips, Sony Bravia, Toshiba, Panasonic and other manufacturers, this process is very similar, the only differences will be in the menu interface and names.

So, after connecting the antenna, you need to turn on the TV, open the settings and perform an automatic channel search. Necessarily needed mark satellite as signal source, after which it will be possible to select the required satellite. Further, if you plan to view only free content, you need to indicate that encrypted channels must be skipped. After completing the search, you can start watching satellite TV.
TVs with a built-in receiver have a number of advantages. First, it is no wires connecting the TV panel and the set-top box, and secondly, it is easy to control, because in this case one remote control is used instead of two, which are usually required when connecting the antenna through a separate set-top box.
Connecting to a TV via a receiver
The easiest and most common way to connect satellite equipment to your TV is through a receiver. The following connectors can be used to connect the set-top box to the TV panel:
- antenna input;
- RCA, aka "tulip" - for transmitting an analog signal;
- component connector;
- SCARD;
- HDMI.
Important! Connecting the set-top box to a TV receiver through a cinch or TV cable with a standard antenna plug or F-connector provides a poor image quality. The best picture can be obtained when connected via HDMI. And from the converter to the receiver, the signal is transmitted through a television cable with a connection through the F-connector.
In addition to the main purpose, an external receiver performs a number of additional functions, for example, playing photo, video or audio from a flash drive or hard disk, connecting a TV to the Internet, etc.
Search for satellite and tune channels
After all the cables are connected, the TV and receiver are turned on, and the satellite dish is installed and directed to the south, you can start tuning the antenna.
With multiple converters
If several converters are connected, you need to start work with the middle one, setting it up for the Sirius satellite. The sequence of actions will be as follows.

Similarly, you need to adjust the remaining two converters: the first is tuned to the Amos satellite, frequency 10722, speed 27500, "H" polarization, and the second - to the Hotbird satellite, frequency 11034, speed 27500, "V" polarization.
Tuning channels
The process of tuning satellite dishes to any other satellites is the same, if the user wishes. This will require data on their location and approximate frequency.
After completing the antenna tuning and achieving a good signal level, you can start searching for channels on the set-top box. This requires run scan, after completion of which a list of all available channels will appear.
Connection nuances
When installing and connecting satellite equipment, there are a number of nuances that must be taken into account. The main ones will be discussed below.
F connector connection
TV cable attaches to all devices with an F-connector... To connect it, you must first cut off the upper insulation by 10-15 mm and bend the shield braid underneath onto the cable. Then you need to cut off the second layer of insulation and open the central core.
Next, you need to screw the F-connector onto the TV cable over the screen so that the cable core protrudes 2-3 mm beyond its edge. Then it is necessary to cut the screening braid protruding from the edges of the F-connector. The cable prepared in this way is connected to a converter, TV or disc.

Diseqc (or disk) - a device that is required to connect multiple converters... From each converter to the disk, you need to bring a cable and connect with F-connector... In the same way, the cable from Diseqc is attached to the receiver.

Advice! The disc must be carefully hidden from moisture ingress during precipitation. The cable joints do not need to be wrapped with electrical tape, as this will lead to the formation of steam. It is better to use heat shrink, it fits much more tightly to the cable and the F-connector.

Multiswitch connection diagrams
A multiswitch or switch is a device designed for multiplying the signal from one dish to several receivers, whether it be a receiver or a TV set, and at the same time provide the devices with independent viewing of various channels in different polarizations.
On a note! Some multiswitches allow you to send a signal to one TV receiver from several independent satellite dishes, as well as from a terrestrial outdoor or indoor antenna.

The cable length from antennas to the multiswitch can be up to 50 meters, and from the switch to receivers or TVs - up to 100 meters. For long lengths or many joints it is recommended to use amplifiers, they will help compensate for the loss of signal.
The connection diagram is as follows. The wires from all antennas converge to the multiswitch, they are connected, after which the cable goes from the switch to the connected devices (set-top boxes or television panels). Their number can vary from 4 to 80.

The multifid is a device that is used when installing additional converters on the satellite dish to achieve the correct angle and required height in relation to the center head. The use of multiple converters is important when satellites are close to each other, and the angle between them is no more than 10 °... In this case, the main converter is tuned to the satellite, from which the weakest signal is received, because only a part of the antenna reflector works for the additional heads.

The most common antennas in the RF are Supral. The assembly of a multifeed for them looks like this:
- the clamp, assembled from two halves, is attached to the converter and tightened with a connecting bolt;

- a clamp with a head is attached to one of the strips, after which it must be tightened with a bolt;
- a strip with a fixed clamp and an empty strip are installed perpendicularly into the adjusting bracket and tightened with screws;
- a free adjusting bracket is fixed into the head holder on the satellite dish, and a bar with the assembled multifeed is inserted into it at an angle of 90 °.
The location of the multifeed in relation to the center converter depends on where the satellites are. To adjust tighten or loosen the screws on the brackets... After the converters are configured, all connections must be carefully tightened.
Frequent mistakes and ways to solve them
When connecting satellite TV, the following mistakes are often made.
- Incorrectly selected tray diameter antennas. This can lead to a deterioration in the signal quality during changing weather conditions. To fix the problem, it is worth replacing the plate.
- Incorrect installation of the traverse for mounting converters. It should not be fixed on top of the bracket, but under it, otherwise there may be problems with the signal even on the main head.
- Application pass-through sockets... In this case, the signal may be completely lost. They should be replaced with the terminal ones that come with the TV set.
- Using splitters... They are only suitable for analog TV. Usually satellite channels are broadcast in two polarizations, which the splitter cannot pass. As a result, some of the content on one of the TVs will be unavailable.
- Lots of connections and cheap cable. This also leads to signal loss or degradation.
- Isolating the dysec with a plastic bag or using electrical tape for winding joints. All this will lead to the formation of condensation. It is better to use heat shrink for connections, and it is recommended to put the dysec in a waterproof box.
- Wrapping F-connectors with electrical tape... It is also better to cover them with heat shrinkage in order to avoid the formation of moisture and, as a result, rust. A protective cap must be put on the free exit of the disek.
As you can see, installing a satellite dish with your own hands is within the power of every person. The main thing is to know the correct sequence of actions and avoid mistakes that are constantly encountered during the installation of such equipment.
Top Selling TVs of 2018
LG 43UK6200 TV on Yandex Market
Sony KD-55XF9005 TV on Yandex Market
LG 49UK6200 TV on Yandex Market
Sony KD-65XF9005 TV on Yandex Market
LG OLED55C8 TV on Yandex Market