Free photo frames online - beautiful photo effects
At your fingertips are always ready to install free photo frames, more than a dozen thematic sections. Style, beauty and quality - that's what distinguishes our photo effects. Over 5,000 photo effects, photo filters and framesPhoto frame flowers new
Interesting online photo frames in golden designs with decorative patterns and. Here you can insert a photo on the album page is revealed, and in the foreground is a sphere of a bouquet of pink magnolias. Complex and multifaceted models with small decorative elements. Vertical photo frame.Photo frame flowers
And then fun! In Funny.Pho.to services you will also find beautiful photo templates that "wear" your photos with special filters and place them in beautiful vintage "plots".Frame pictures new
Retro style gives tenderness and feminine images. Also here, the perfect shot, the grandparents were young. Photo frame online decorative bright colors that you can insert a photo on the background of an open book among flowers and pearl necklaces.Beautiful flower photos free online
Very convenient collages for placing not only a photo, but also for writing it. Insert a photo into this delicate online decorative frame decorated with floral leaves on the background of the water surface, and also on the background of the frame shows burning candles.Do you want to learn how to consistently earn on the Internet from 500 rubles a day?
Download my free book
=>>
This article will tell you how to use the Paint program and how you can insert a photo into a frame using this program?
This program is usually included in Windows image 7 or more new developments of this popular OS. But the paint program included in the standard set Windows programs, is not suitable for this operation.
Of course, you can hastily take a photo with a frame and even insert an inscription. But it is more suitable for novice users.
For more advanced, it is better to use other programs. To work with frames and photos, you need to either download and install on your computer paint program.net.
The difference between the programs is small, but, as a rule, it has very few functions. With such a program, you can open a photo of a downloaded frame, select the desired area and cut it out using the scissors tool.
Then copy the desired photo from your computer and paste it on the cut out section of the frame using the "paste from clipboard" function.
It is often difficult to do this for beginners, since in the standard program you can insert text on a photo, do a little retouching, resize photos, and nothing more.
Although if they suffer for a long time, whatever happens. There are no layers in such a program, but in a similar program paint.net there are layers and for this reason it is much more convenient to work with photographs.
Step one - download frames for paint
So, to insert a photo into a frame, you need to find this very frame on the Internet. Let's open any browser and in the search bar and write, download frames for paint.
Many sites will open where you can download frames on any topic. Next, download the frame you need to your computer. The frame must be PNG format.
Why this format? It's just that images in this format do not contain a background, or rather, there is a background, but it is transparent. Or take a photo from your computer and carry out the necessary manipulations with it.
In paint.net, just like in the standard Paint program, you can upload a photo. Then, anywhere, select a plot in the form of a square, oval or freeform and delete the selected area.
Action two - open a new file in the program
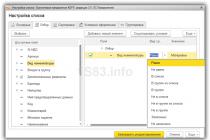
Once you have stocked up on the frames you need, open the paint program. In the left upper corner program we find the inscription "file", click on the word file and find in the drop-down window "open a new file or folder".
We press, and a standard download window will open in front of you, where you need to find the downloaded frame, select it and at the very bottom of the download window, click on the "open" button. After these simple steps, the frame you have chosen will appear in the program.
Step three - importing a photo
In the program we find the inscription "layers", click and find the tab "import from file". We find your photo and open the desired photo. It will open on top of the frame, the next task is to place the photo outside the frame.

To do this, in the program, click on the "layers" button, in the window that opens, we find the image of the arrow pointing down. Click on this arrow, and your photo will be outside the frame.
Now you need to put the photo outside the frame, as you need. Although your photo is in the background, its outlines are highlighted with dotted lines.
Step Four - Photo and Frame Manipulation
Hovering over any corner of your photo with the mouse cursor, you will see a small image of a hand. Next, hold down Shift on your keyboard and simultaneously press left button mice. With the buttons pressed, start resizing your photo.

Such manipulations are necessary in order not to lose their proportions. After resizing, release the "shift" button on the keyboard and with the left mouse button pressed, move the photo to the location you need.
Step five - save the photo in the frame
After you have combined the frame with the photo, you need to merge the layers. The easiest way is to click on the "save as" function, after clicking on such an inscription, a window will appear where you will be asked to combine the layers.
It is recommended to save the received photo with JPG or JPEG extension. Such extensions are best suited for saving photos, because if you save a photo with a different extension, you may not be able to open it on your computer.
To do this, you will have to install additional programs with the desired extension. If you don't know what will happen to your operating system after installing such files, it is better not to risk it.
If suddenly the photo does not want to move, it means that you do not have the photo move function activated. This is very easy to fix. You need to find the “tools” section on the left side of the program and click on the arrow symbol with a cross.
After that, your image can be moved in any direction. After the desired combination, save the resulting photo to your computer. And we use the image at our discretion.
How to Frame a Photo in Paint, Conclusion
Now you know how to frame a photo in Paint, but I would still advise you to download a more convenient program for this. Such free programs there are many now, and you have a choice.
For those who do not like downloading programs to a computer, I can suggest trying to use Photoshop online to insert a photo into a frame. How to use such a service is described in one of my articles.
I wish you to create beautiful collages, no matter what program you use! Good luck to all.
P.S. I am attaching screenshots of my earnings in affiliate programs. And I remind you that everyone can, even a beginner! The main thing is to do it right, which means learning from those who are already earning, that is, from professionals.
Do you want to know what mistakes beginners make?
99% of beginners make these mistakes and fail in business and making money on the Internet! See to it that you don't repeat these mistakes - “3 + 1 BEGINNER MISTAKES THAT KILL THE RESULTS”.Do you urgently need money?
Download for free: TOP - 5 ways to make money on the Internet”. 5 better ways earnings on the Internet, which are guaranteed to bring you results from 1,000 rubles per day or more.Here is a ready-made solution for your business!
And for those who are used to taking ready-made solutions, there are "Project ready-made solutions to start making money on the Internet”. Learn how to start your online business, even for the greenest newbie, without technical knowledge, and even without expertise.


13.11.2016 29.01.2018
Hi all! Today's Photoshop tutorial is about detailed instructions — how to frame a photo using photoshop. All this is done very simply!
I used in Photoshop work CC. The lesson is suitable for any version of Photoshop, including CS6, CS5, CS4 and so on..
Plan your work for the next 5 minutes in Photoshop:
- Find a suitable frame for Photoshop and download it
- Open frame in photoshop
- Open photo in photoshop
- Move photo to frame
- Locate photo
- Save or print
Let's start the lesson.
First you need to select and .
We chose . You can insert yourself most beloved in childhood, or your children or relatives.
After completing the lesson, the result will be something like this:
So, you have downloaded the frame. If you downloaded the same frame as we did, then you also have it in png format.
Step 1. Open the frame in Photoshop.
Open it in Photoshop. Press CTRL+O or menu File - Open, select the frame file.

Select a frame file and click Open

After that, the frame will open in Photoshop.

Step 2. Open the photo in Photoshop
Open your photo the same way.

Step 3: Drag the photo into the frame
Now our task connect the frame with the photo. To do this, we will move the photo to the frame.
Right click on the photo layer, select Duplicate Layer.

Destination select file with frame. Click OK.

Our photo has moved! Change to a document with a border.

Step 4. Putting the Photo Outside the Frame and Repositioning It
Now we see that the photo is too big and it is on top of the frame. Because the photo layer is above the frame layer, you can see it in the layers window.

Drag the photo layer below the frame layer.

Great! Now the frame will be on top of the photo, that's what we need!

Step 5. Scale the Photo Correctly
But the photo is too big, so we need to reduce it.
To do this, select the photo layer, click CTRL+T

The photo will have a transformation selection, use the cursor to lower the photo a little lower so that you can drag the edge of the photo selection.
Now drag the mouse around the corner to the right and down diagonally while holding SHIFT+ALT- this will reduce the photo proportionally.

Once you've positioned the photo exactly on the frame, press ENTER to finish the transformation.
.jpg)
Step 6: Save the photo
Now that you've framed your photo, you can save the resulting image.
Photo printout.
To submit a photo for printing, you must make sure that it has a resolution of 300 dpi. Otherwise, the photo will not print well.
To set 300 dpi or make sure it is set, go to the menu Image - Image Size

An ordinary photo with a colorful frame can be exquisitely decorated to your taste. Moreover, there are many different photo frames on the Internet. But here, many novice users are faced with a problem: they do not know how to insert a photo into a frame.
Today's article is a free Photoshop tutorial for beginners. In the process of getting acquainted with it, we will learn how to insert our photos into frames using the program Adobe Photoshop. If you have never worked in Photoshop - it does not matter, after reading this article, in the future you can easily insert your photos into frames - everything is very simple.
Popular photo frame formats are .psd And .png, a common feature of these image formats is that in images with these formats it is possible to make the background transparent. Just instead of this transparent background, a photo is inserted.
In a .jpg image, instead of a transparent background, the background will be white.
So, let's start inserting our photo into a beautiful Christmas frame in .psd format.
1. First, open Adobe Photoshop. Next, open the image of the selected frame ( Menu File -> Open…) or using keyboard shortcuts Ctrl+O:

In the center of the opened frame, we see an area (denoted by white and gray squares) for inserting a photo.

An area of white and gray squares tells us that in this place transparent background in the picture, it is indicated that way.
In the layers panel (on the right side of the program window), we see that the frame in the .psd format consists of several layers - this is the peculiarity of the images in the .psd format.

If desired, you can turn off unnecessary layers without redrawing the image again. You can fiddle with turning layers off and on a bit by clicking on the eye icon next to each layer.
2. We also open the photo that we are going to insert into the frame.

Select the tool on the left side of the toolbar "Moving". We move the mouse pointer to the photo and holding the left mouse button drag the photo to the window with the frame.
3. We see that the photo is superimposed on the frame and we need to lower it.

To do this, go to the layers panel. We see that another layer has been added to the frame layers. "Layer 1"- a layer with a photo.

In my case, it is above all the layers of the frame. We need to move it under a certain layer so that the photo fits into the frame. To do this, click (select) the layer with the photo and, holding the left mouse button, move the layer with the photo one by one under each layer of the frame. In my case, I had to move the photo layer under all the layers of the frame so that the photo fit into the frame.

4. Now we need to fit the photo to the size of the frame, if the photo is larger than the frame, we reduce it; if less, like mine, then we increase it.

First, make sure that the photo layer is active (i.e. selected). After that, the keyboard shortcut ctrl+t or through the menu ( Edit -> free transform ) call . After that, the following frame will appear around the photo:

Now enlarge, reduce or rotate the photo to fit the frame. So that your photo is not distorted and maintains proportions, hold down the key when changing the photo. Shift. If, when editing a photo, it goes beyond the frame, like mine, then there is nothing to worry about:

After the photo is adjusted to the size of the frame, double-click with the left mouse button or press the key Enter. The edit box around the photo will disappear:

5. Now we save our photo with a frame, for this we select the menu ( File -> Save As...):

In the window that opens, enter the name of our made picture according to your desire, in my case "Christmas Photo". And choose the type of image .jpg. Choose a location to save the photo and click the button "Save".


Here in the field "Quality" put a number "8" — high quality Images. Usually the "eight" is enough to save the image in good quality.
This completes the insertion of the photo into the frame. We received this New Year's photo:

Now consider inserting a photo into a frame with the .png format.
This method of inserting a photo into a frame is no different from the previous one. As I said, a .png frame can also have a transparent background.
1. In the same way, open the frame in .png format.

In the layers panel, we can see that this frame has only one layer.

2. I specifically chose a frame not for one photo, but for several, in order to show that inserting several photos or one is no different, but there are some nuances, which you can read about below.
We open the photo. Calling "Free Transform" and adjust the photo to fit the first framed photo area.

We see that the photo goes beyond the area below - it's okay, in the future we will close this part with the third photo. The photo also extends beyond the top and sides, but this is all hidden by the frame itself.
3. Add and adjust the second photo in the same way.

4. Now we just need to add and adjust the last photo. The layer with the third photo should be above the layers with the previous two photos to hide their collisions with the insertion area of the third photo.
5. I resized the photo, but still, in one of the corners, the photo is outside the area. We need to fix this. To do this, select the tool "Rectangular marquee" and select the protruding part of the photo:

Press the key Delete and the protruding part of the photo is removed. To remove the selection, press the key combination Ctrl+D.
6. That's all. Now we repeat steps 5 and 6 from the previous example of inserting a photo into a frame to save our New Year's photo.
As a result, we got this photo:

If you don't have Photoshop installed, then trial version You can download from our website - Adobe Photoshop.
If you have questions about working in Adobe program Photoshop, then ask them in the comments and perhaps in the next Photoshop tutorial we will consider exactly your question.
For every taste, but they all have different formats - Png, Jpeg, PSD.
How to insert a frame in Photoshop: Jpeg format
- First of all, open the original image.
- The main layer is needed. To do this, double-click on the layer thumbnail with the left mouse button. When the New Layer window opens, just click Yes. The layer will be named "Layer 0".
- Now you need to select the place where the photo will be inserted. To do this, you can use any familiar selection tool.
- Click Delete. A checkerboard pattern that appears in the selected area means that a transparent area has formed. Now press Ctrl+D and deselect.
- Open the photo you want to place in , and then select the Move tool and drag the photo onto the frame. If it is greater than , press Ctrl+T.
- Shift-click any corner handle and drag it inside the photo. The image must be placed above the frame, it should be slightly larger than its size. Press Enter.
- The last step is to change layers. It remains to merge the layers using the keyboard shortcut Shift + Ctrl + E, and the photo is ready.
How to insert a frame in Photoshop correctly: PNG format
- Open the original PNG image and the photo you want to frame.
- You need to select the "Move" tool, click on the second photo with the left mouse button and drag it onto the image with a frame.
- The photo must be placed above the frame.
- Now swap the layers.
- Arrange the photo however you like by pressing Ctrl+T and holding Shift. Merge layers with Shift+Ctrl+E.
- Press Shift+Ctrl+S and enter the file name and type jpeg in the save window that appears, then click Save.
How to insert a frame in Photoshop: PSD format
This format is the most convenient, but in order to correctly insert a frame in Photoshop, you need to take into account some of its features.
- Open the original image and photo.
- Use the Move tool to drag the photo onto the framed image.
- The Layers palette will have many layers, not just one, as is the case with other formats. Find the frame layer and place the photo under it.
- Press Ctrl+T and while holding Shift, reduce the photo to the desired size. Arrange it in the frame however you like. Press Enter.
- In this case, the many layers give room for creativity - many of the elements that make up the frame are on separate layers. If you don't like something, you can disable or remove this item.
- Press Shift+Ctrl+S and save the photo as a PSD or Jpeg if you want to print the photo in a frame.