Matches the data on the server due to synchronization. Accordingly, if it does not work, then the use of the software version of the repository is lost. Therefore, the situation needs to be corrected as soon as possible.
The way to solve the problem will depend on the cause of its occurrence. In any of the cases, you can figure out why Yandex Disk is not synchronized on your own without spending a lot of time.
Reason 1: Sync is not enabled
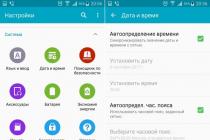
To begin with, the most obvious would be to check if synchronization is enabled in the program. To do this, click on the Yandex Disk icon and find out about its status at the top of the window. To turn on, press the corresponding button.
Reason 2: Internet connection problems
If in the program window, you will see a message "Connection error", then it would be logical to check if the computer is connected to the Internet.

Click on the icon to check your internet connection. "Net". Connect to a work network if necessary.

Also note the state of the current connection. Status should be here "Internet access". Otherwise, you need to contact the provider, which is obliged to solve the connection problem.

Sometimes an error can occur due to a low Internet connection speed. Therefore, you need to try to start synchronization by disabling other applications that use the Internet.
Reason 3: No storage space
Perhaps your Yandex Disk simply ran out of space, and there is nowhere for new files to be uploaded. To check this, go to the "clouds" page and look at the scale of its fullness. It is located at the bottom of the sidebar.

Storage needs to be cleared or expanded for synchronization to work.
Reason 4: Synchronization is blocked by antivirus
In rare cases, an antivirus program may block Yandex Disk synchronization. Try turning it off for a while and see the result.
Reason 5: Individual files are not syncing
Some files may not sync because:
- the weight of these files is too large to be placed in the repository;
- these files are used by other programs.
In the first case, you need to take care of free disk space, and in the second, close all programs where the problem file is open.
Note: files larger than 10 GB cannot be uploaded to Yandex Disk at all.
Reason 6: Blocking Yandex in Ukraine
Due to recent innovations in Ukrainian legislation, Yandex and all its services are no longer available to users in this country. The work of Yandex Disk synchronization is also in question, because. data is exchanged with Yandex servers. The specialists of this company are doing everything possible to solve the problem, but so far the Ukrainians are forced to look for ways to bypass the blocking on their own.
You can try to resume synchronization using a VPN connection. But in this case, we are not talking about numerous browser extensions - you will need a separate VPN application to encrypt the connections of all applications, including Yandex Disk.
Error message
If none of the above methods help, then it will be correct to report the problem to the developers. To do this, click on the settings icon, hover over the item "Reference" and select "Report an error to Yandex".


Soon you will receive a response from the support service regarding your problem.
For timely data changes in the storage, synchronization must be enabled in the Yandex Disk program. For it to work, the computer must be connected to the Internet, there must be enough space in the "cloud" for new files, and the files themselves must not be opened in other programs. If you couldn't find out the cause of synchronization problems, contact Yandex support.
Yandex.Disk is one of the few Yandex services that includes desktop software. And one of its most important components is the algorithm for synchronizing local files with their copy in the cloud. We recently had to completely change it. If the old version had difficulty digesting even several tens of thousands of files and, moreover, did not respond quickly enough to some “complex” user actions, then the new one, using the same resources, copes with hundreds of thousands of files.
In this post, I will tell you why this happened: what we could not foresee when we came up with the first version of the Yandex.Disk software, and how we created the new one.
First of all, about the synchronization task itself. Technically speaking, it consists in having the same set of files in the Yandex.Disk folder on the user's computer and in the cloud. That is, user actions such as renaming, deleting, copying, adding and changing files should be automatically synchronized with the cloud.
Why is it not as simple as it seems at first glance?
Theoretically, the task may seem simple enough, but in reality we are faced with various complex situations. For example, a person renamed a folder on his computer, we detected this and sent a command to the backend. However, none of the users waits for the backend to confirm the success of the rename. A person immediately opens his locally renamed folder, creates a subfolder in it, and, for example, transfers some files to it. We are in a situation in which it is not possible to immediately perform all the necessary synchronization operations in the cloud. First you need to wait for the completion of the first operation, and only then you can continue.The situation can become even more complicated if several users work with one account at the same time or they have a shared folder. And this happens quite often in organizations using Yandex.Disk. Imagine that in the previous example, at the moment when we received confirmation of the first rename from the backend, another user takes and renames this folder again. In this case, again, you cannot immediately perform the actions that the first user has already performed on his computer. The folder in which he worked locally is already called differently on the backend at this time.
There are times when a file on a user's computer cannot be named the same as it is called in the cloud. This can happen if the name contains a character that cannot be used by the local file system, or if the user is invited to a shared folder and they have their own folder with that name. In such cases, we have to use local aliases and track their association with objects in the cloud.
Previous version of the algorithm
In the previous version of the Yandex.Disk desktop software, a tree comparison algorithm was used to search for changes. Any other solution at that time did not allow to implement the search for moves and renames, since the backend did not have unique object identifiers.In this version of the algorithm, we used three main trees: local (Local Index), cloud (Remote Index) and the last synchronized (Stable Index). In addition, to prevent re-generation of already queued synchronization operations, two more auxiliary trees were used: local expected and cloud expected (Expected Remote Index and Expected Local Index). These auxiliary trees held the expected state of the local file system and the cloud, after all the synchronization operations that were already queued had been completed.

The procedure for comparing trees in the old algorithm was as follows:
- If the local wait tree and the cloud wait tree are empty, initialize them by copying the last synchronized tree;
- We compare the local tree with the expected cloud one and, based on the results of comparing individual nodes, we add synchronization operations in the cloud to the queue (creation of collections, transferring files to the cloud, moving and deleting in the cloud);
- For all operations that are queued in the previous step, fix their future effect in the expected cloud tree;
- We compare the cloud tree with the local expected one and, based on the results of comparing individual nodes, we add synchronization operations with the local file system to the queue (creating directories, downloading files from the cloud, moving and deleting local files and directories);
- For all operations queued in the previous step, fix their future effect in the expected local tree;
- If the queue includes simultaneous operations with the same file or directory (for example, transferring a file to the cloud and downloading the same file from the cloud), then we fix the conflict - the file has changed in two places;
- After the synchronization operation is performed in the cloud or with the local file system, we enter its result in the last synchronized tree;
- When the sync queue becomes empty, delete the local wait tree and the cloud wait tree. Synchronization is over, and we will no longer need them.
Why did we have to come up with a new algorithm
The main problems of the tree comparison algorithm were the high memory consumption and the need to compare entire trees even with small changes, which led to a large load on the processor. While processing changes to even a single file, RAM usage increased by about 35%. Let's say a user had 20,000 files. Then, with a simple renaming of one 10Kb file, memory consumption increased abruptly - from 116MB to 167MB.We also wanted to increase the maximum number of files that a user can work with without problems. For example, a photographer who stores the results of photo shoots in Yandex.Disk may end up with several tens or even hundreds of thousands of files. This task became especially relevant when people got the opportunity to buy additional space on Yandex.Disk.
In development, I also wanted to change something. Debugging the old version was difficult because the state data for the same element was in different trees.
By this time, object ids appeared on the backend, with the help of which it was possible to more effectively solve the problem of motion detection - earlier we used paths.
New algorithm
We decided to change the data storage structure and replace three trees (Local Index, Remote Index, Stable Index) with one, which should have led to a reduction in redundancy in the main data structure. Due to the fact that the key in the tree is the path to the element of the file system, as a result of the merge, the amount of RAM used was significantly reduced.
We also abandoned the use of auxiliary trees during synchronization, because each element of the tree in the new version stores all the necessary data. This change in structure greatly simplifies the debugging of the code.
Since we understood that this was a major change, we created a prototype that confirmed the effectiveness of the new solution. Let's take an example of how the data in the tree changes during the synchronization of a new file.
- After the user added a new file to the Drive folder, the program detected it and added a new element to the tree. This element has only one state, local. Since there are no stable and remote states, no memory is allocated for them;
- The program performs an upload of the file. A push comes from the cloud, confirming the appearance of a new file, and the remote state is added to the tree;
- The local and remote states are compared. Since they match, a stable state is added;
- The local and remote states are removed. They are no longer needed, since all the information is in stable.

This example shows that in the new synchronization algorithm, only those elements and events are processed, the data on changes in which were received from the file system or the cloud, and not the entire tree, as it was before. If necessary, parent or child nodes will be processed (for example, if a folder is moved).
Other improvements
In the new version, we also worked on other improvements that affected performance. Saving the tree is made incremental, which allows only the latest changes to be written to the file.Yandex.Disk uses sha256 and MD5 digests to check file integrity, detect changed fragments, and dedupe files on the backend. Since this task is very CPU intensive, the implementation of digest calculations has been significantly optimized in the new version. The speed of obtaining a file digest has been approximately doubled.
Numbers
Synchronization of unique 20,000 files of 10Kb eachCalculation of digests of unique 20000 files of 10kb each (indexing)
Run from 20000 synchronized files of 10Kb
Upload 1Gb. Wi-Fi connection 10 Mbps
What happened
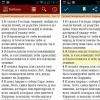
It can be seen from the examples that the new version of the Yandex.Disk software uses about 3 times less RAM and loads the CPU about 2 times less. Processing small changes does not increase the amount of memory used.As a result of the changes made, the number of files that the program can handle without problems has significantly increased. The Windows version has 300,000 files, and the Mac OS X version has 900,000 files.
There is a term for the interaction of a local computer with the Yandex Disk cloud center "synchronization". The application installed on the computer actively synchronizes something with something. Let's see what this process is and why it is needed.
The principle of synchronization is as follows: when performing actions with files (editing, copying or deleting), changes occur in the cloud.
If files are changed on the Drive page, the application automatically changes them on the computer as well. The same changes occur on all devices connected to this account.
When simultaneously downloading files with the same names from different devices, Yandex Disk will assign them a serial number (file.exe, file(2).exe, etc.).
Indication of the synchronization process in the system tray:


The same icons appear for all files and folders in the Drive directory.

The speed at which data is synchronized on Yandex disk can be found by hovering over the application icon in the tray.

It may seem strange that, for example, a 300 MB archive was downloaded to Disk in a few seconds. Nothing strange, it's just that the program determines which fragments of the file have been changed and synchronizes only them, and not the entire archive (document).
This is very convenient if the files of a current project are stored on the Disk. Editing documents directly in the Drive folder saves traffic and time.
In addition, to save space on the system drive, where the cloud directory is located by default, synchronization can be disabled for some folders. Such a folder is automatically removed from the directory, but remains available in the Yandex.Disk web interface and in the program settings menu.
Files in a folder with disabled synchronization are uploaded either on the service page or through the settings menu.

Of course, the application has the function of completely disabling synchronization with cloud storage.

Conclusion: the synchronization process allows you to make changes to documents at once on all devices connected using the Yandex Disk application to one account. This was done to save time and nerves of users. Synchronization saves us from having to constantly download and upload edited files to Disk.
The Program can manage only one Disk - belonging to one specific account. If you log in with a different username, for synchronization a new Yandex.Disk folder will be created with the name "Yandex.Disk - another login". A copy of the previous account's files will be kept.
What happens if I move the Yandex.Disk folder?
If you move the Yandex.Disk folder without specifying a new location in the program settings, the program will recreate the folder in its original location. To move your copy of Disk, click the Disk icon, select Settings from the menu, click Customize folder location and specify a new path to the folder: the program will automatically transfer the files to a new location.
Can third-party programs be trusted to work with Yandex.Disk?
Can I not keep Drive files on my computer?
The Yandex.Disk 3.0 program does not allow you to synchronize all files from your Disk with your computer in order to save space on your computer. For example, if you often work with the Documents folder, enable synchronization for it - this folder will be stored on your computer. The remaining folders will be stored only in the cloud, but will also be available in the program.
You can set up selective sync by following the instructions for Windows , for macOS.
What happens if I delete files from the Yandex.Disk folder?
When you delete files in the program, they go to the Recycle Bin and are stored there for 30 days. After that, they are automatically deleted from the server. Files deleted from the server cannot be restored. Restore files from Recycle Bin is possible only in the Yandex.Disk web interface.
Attention. Files moved to the Trash continue to take up space on your Drive. If you don't have enough space, empty the Trash.
If you want to delete a file from your computer but keep it on the server, set up selective sync as instructed for Windows , for macOS.
Can I restrict access to the Yandex.Disk folder?
If you want to close a folder, for example, from other users of your computer, you can restrict access to it using standard Windows tools. However, keep in mind that restricting access may interfere with the operation of the program.
What happens if I uninstall the program or reinstall the operating system?
Drive files may remain on your computer but will not sync. To automatically synchronize files with the server, install the program and log in.
How to choose another folder for synchronization with the server?
Click the button Customize folder location.
Specify a different folder for synchronization with the server.
How can I find out how much free disk space is left?
How to configure the program to work through a proxy server?
Click the Drive icon in the notification area.
Select the Settings menu item.
Click the Proxy tab.
Select an item Manual proxy settings.
How to hide the Drive icon on the Dock in macOS?
Click the Drive icon in the notification area.
Select the Settings menu item.
Click the Advanced tab.
Turn on the option Hide the icon in the Dock.