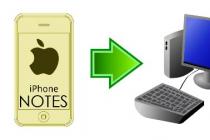
Probably, any iPhone user will agree that the Notes application on a mobile device is an indispensable tool for writing text. The functionality of the application is simple and convenient. But not many people know that text information exchange is available on all Apple devices, and not just between iPhones. In addition, it becomes possible to access records from a PC or laptop.
The last one is just amazing! With its help, having created a note on an iPhone or other "apple" device, you can send it to a computer and work with it further there - for example, edit it or just store it. This is especially necessary for those who like to create large texts.
How to make text messaging with a computer, the instructions below will tell. The most common way to carry out this operation is to use iCloud cloud storage. But you can also use "accounts" in Google or Exchange.
To do this, follow 4 simple steps:
- Go to the settings of the "apple" gadget (iPhone or another - from which you want to transfer the recordings to a PC or laptop).
- Find the icloud service.
- Enter the icloud account data that you created during registration and log in.
- To start the synchronization operation, move the switch next to the notes.
That's all. After a few seconds, all text entries will move to the "cloud". If you want to transfer text entries to another iPhone, you must follow all the same steps, but select the specific device with which you plan to synchronize data.
After all this, you have the opportunity to view the transferred information either on a laptop or PC. How to do it? Let's find out further.
Viewing notes on the computer
To solve this problem, you can use one of 2 methods:
- View through the icloud interface.
- Get records from backup.
If you chose the first method, go to the official iCloud resource and log in with your "account" by entering the login and password that you created during registration. In the pop-up window, select the required section, which contains the entire list of your records. Editing and copying functions are also available here. Of course, you will need the last function, which should be selected.
It will take much more time and effort to extract notes from a copy, so we will not dwell on this method. In practice, rarely anyone uses it, because. You can always use icloud.
How to share notes using Google and Exchange
As you already understood, iCloud is not the only available way to synchronize notes. Transferring records between 2 or more iOS devices is also available through other well-known Internet services such as Google and Exchange. To enable them, you need to log into your mail accounts. To do this, you need to take the following steps:
- Go to iPhone settings.
- Click on the mail section.
- Select the desired "account".
- Make the activation switch and turn on text messaging.
After that, similar actions must be performed on another gadget where you need to transfer information. This completes the operation, and all notes from one iOS device will end up in another gadget. Now you know how to copy notes from iPhone to computer.

How to switch between "accounts" of notes on iPhone
Notes can be saved both locally (that is, in the memory of a mobile device) and be linked to various "accounts" in Internet services. As discussed above, it is possible to work through iCloud, Google and other services. And if it so happens that the user's notes are in different places, there is a way through which he can easily synchronize notes. For this it is necessary.
Saving notes from iPhone is pretty easy. Notes supports synchronization with any IMAP mailbox. Accordingly, you can synchronize them with mail, for example, Gmail, and then synchronize with another program on another platform.

Notes also supports publishing a note to third-party services or sending it by mail.
- To do this, you need to go to the note.
- At the bottom of the screen, select the button in the form of a rectangle with an arrow located in the middle.
- In the menu that appears, select the location for publishing the note, for example, Evernote.
- After a while, Evernote will display a pop-up window in which you need to accept a note and choose a place to save it, this or that notebook.
You can also use third-party software to save and export notes from iPhone, which is enough in the App Store.
Microsoft OneNote
Same features as described above are supported by OneNote. You can publish any of the notes in a third-party service or send them by mail.
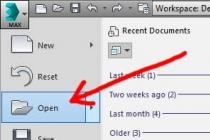
If a notebook with notes is synced with OneDrive and available in the desktop version of OneNote, then it can be exported in various formats. For this:
- select the File menu;
- then Select Export;
- determine what you want to export: a note, a collection, or a notebook;
- select the export format (OneNote allows you to export in ONEPKG - corporate package, PDF, XPS, and MHT formats);
- click the save button.
Evernote

Evernote also lets you share your notes in a variety of ways. There is also an icon in the form of a rectangle with an arrow. It can be found in the context menu at the bottom of the screen when you open a note.
By clicking the icon, you can get a list of possible solutions. A note can be sent by message or email, posted on Twitter, Facebook, printed.
simple notes
Simplenote has a wide range of options for publishing notes to other programs.
- Going into the note, you need to click on the letter I in the circle.
- A menu will appear in which the Send item is selected.
- Next, you need to select the program to which the note will be sent. Here are other services like Evernote and Microsoft OneNote. You can also send a note by mail or message.
In the Simplenote web app, you can export all notes. In the upper right corner of the screen under the user account there is a Download zip link. After clicking on it, Simplenote will upload all notes in txt format as a zip archive. This will also unload the notes in the archive.
Note taking apps for iPhone
In general, the market for iPhone note-taking apps is huge. Moreover, wanting to find a specific program, the user may encounter several analogues. For example, the App Store searches for Simplenote and returns both SimpleNote and Simple Note. Needless to say, these are all different applications with different functionality. Therefore, we focused on the main ones, which allow you to operate notes on different devices and on different platforms.
iPhone Notes
Notes allows you to create notes. This is a standard iOS application and is on every device. You can insert a previously taken photo into a note. Notes are displayed in chronological order. Notes can be published in various services and sent by mail. Print functions are supported.
Notes can be separated by account: iCloud, Gmail, and others, depending on which account the notes are synced with.
Evernote
Evernote is a recognized combiner for taking notes, recording ideas and more. Notes can be combined into notebooks. Each note can be a text entry, a photo. There is direct integration with the iPhone camera. You can also make a calendar event reminder. Finally, it is very convenient to make lists here.
Evernote lets you share, share, and edit your notes together.
The functionality of the basic version can be extended by upgrading to a premium account. There is a shop with the possibility of buying additional services.
Notes are synced to the cloud. Available on other devices and platforms. Recordings can be sent by any available means.
Microsoft OneNote

OneNote also allows you to create notes, add various content to them, including web pages, so that they can later be viewed without an Internet connection.
OneNote has advanced text editing capabilities. It can be formatted as in other Office programs. Wide opportunities for data exchange are supported.
In general, OneNotye Mobile is still perceived as an addition to the desktop OneNote.
simple notes

A simple and efficient note taking app. Not even an application, but a web service, since the cloud is the main place for storing notes, and notes in the web application and in the iOS application are synchronized instantly.
It is possible to provide a note with a tag, send it to other services, and also publish it on the Internet on the Simplenote website for subsequent exchange with other users.
Summary
The standard Notes application from iOS is quite primitive, but it provides the minimum necessary functionality. And most importantly, it is well integrated with Apple cloud services, allows you to synchronize and even export notes.
But if you're looking for something more powerful and advanced, then Evernote and Microsoft OneNote are the best. Perhaps Evernote is a bit easier to use, since it was originally built as a cloud-based note-taking solution. True, it works best with its own cloud.
As for OneNote, the whole complexity of working with it is explained by the fact that it was originally a desktop application, and then they created a mobile one, not really worrying about their relationship - in fact, both programs are united primarily by a common name, and only after the general integration of features. But other than that, it's a great program that works well with the OneDrive cloud.
Other note-taking apps for iOS also look good, but they are far from the leaders, and functionally they are not as good in places as the same original Notes client. But in any case, you can look for something interesting.
Buying a phone has always entailed the not-so-pleasant procedure of “moving” from an old device to a new one, but recently the need to synchronize and other personal information has been added to the traditional transfer of contacts. It's good if your next smartphone is on the same platform as the previous one, but if you decide to "cross over to the enemy camp", then the task becomes much more complicated. In this article, we will consider two options for transferring data - from iOS to Android and vice versa.
IOS → ANDROID
iOS can synchronize contacts, calendar and mail with a Google account, and if you once chose Gmail as your mailbox, there is nothing to worry about - just log in to your account on your Android smartphone and all your information will immediately become available on a new phone.
If you didn’t expect to “move” from iOS in the future, then most likely you have this data tied to iCloud, in which case the procedure will be somewhat more complicated.
Contacts
To transfer contacts on your phone, you need to connect an iCloud account and allow them to be synchronized (settings - iCloud - (sign in to your account) - turn on Contacts). Now they need to be “pulled out” from the cloud - for this, on the computer, open the www.icloud.com page, enter your account, then go to the Contacts item and select the necessary contacts.

After that, in the menu called by pressing the gear button, select the Export vCard item, and a VCF file with a list of contacts will be downloaded to your computer. Now we open the page www.google.com/contacts, in the left menu, select the "Import contacts" item and open the downloaded VCF file (if you already have a preliminary version of the updated "Contacts" available, in which import does not work yet, you need to open the "More" list in a similar menu on the left, select import, after which you will be prompted to switch to the old version of this service). After that, it remains only to enable contact synchronization in the settings of the new Android smartphone.
Calendar
The transfer of events in the user calendar looks very similar - in the iCloud settings we allow calendar synchronization, on the www.icloud.com website we go to the appropriate section and in the list of available calendars click on the Share icon to the right of its name. In the menu that appears, enable the Public Calendar option and copy the link that appears (webcal://....). We insert it into the address bar of a new page, replace webcal with http, and then press Enter - as a result, a file with a name of hundreds of characters and without an extension is downloaded to the computer. This is a plain text file, which can easily be given a more decent name. To connect it to Google Calendar, open the page www.google.com/calendar, find the Other Calendars item, select Import calendar in the drop-down menu and open the newly downloaded file from the computer - after that, all events from it will be added to your calendar on your Google account.

There shouldn’t be any problems with “moving” the mailbox - if you don’t use Gmail, but iCloud (or any other service), just find any client on Google Play that supports it - for example, Mailbox or myMail.
Bookmarks
Here we will consider the most common option - using the standard Safari browser on iOS and "moving" to Chrome and Firefox, which are popular on Android.
Transferring bookmarks from Safari is also carried out using iCloud (in the device settings, of course, you need to enable their synchronization), however, this is not done using the resource website, but the iCloud for Windows client.

It should be marked "Bookmarks", in the options specify the browser (Chrome or Firefox), click Apply and select Merge. After that, the utility will offer to download the iCloud Bookmarks extension for one of these browsers, and as a result, your bookmarks from mobile Safari will appear in the desktop browser. If you have chosen Chrome, you do not need to do anything further (provided that you have logged into your Google account in it). With Firefox, the task will be somewhat more complicated (especially if you have not previously used user data synchronization in this browser) - you need to set up synchronization in it, for which you need to log into your Firefox account (or create one), do the same on an Android smartphone and enter the code obtained there in the desktop browser.
If you don’t want to install iCloud for Windows, you can get by with iTunes instead (for this, bookmark synchronization with iCloud must be turned off in your smartphone settings). To do this, you need to connect your iPhone to your PC, launch iTunes, open the device page in it, go to the "Details" tab, find the "Other" item in it and select the "Sync bookmarks with:" item (where there may be options for Internet Explorer and Safari) , then click "Apply". Now the bookmarks from the iPhone are merged with the bookmarks of one of these desktop browsers - you just have to run it and export the bookmarks to an HTML file, and then import them in the standard way to the desktop versions of Chrome or Firefox, from where they are “sent” to Android using the method described in the previous paragraph -smartphone.
Photo/video
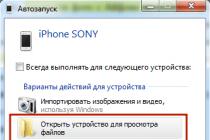
To transfer photos / videos, you can use the Google+ Photos service - to do this, you need to install the official Google+ client on your iPhone, connect to your Google account in it and turn on auto-upload for photos and videos, then select the "Download all photos and videos" item. Once the download is complete, you'll be able to see all of your content in the Photos app on your new Android smartphone. If you do not want to use the Google+ service, you can perform this procedure without connecting to the Internet at all. To do this, you need to connect your iPhone to your computer via USB, open File Explorer, right-click on the smartphone icon in the list of devices and drives and select "Import images and videos". After that, an import window will appear in which you can configure the parameters of this procedure (select a folder, delete files after copying is completed, etc.). Now it is enough to connect an Android smartphone to the PC and use Explorer to copy the resulting folder to its memory (or to an SD card).
Music
Perhaps one of the most difficult tasks when “moving” is, of course, if your music library is stored in iTunes, and not in the form of MP3 tracks organized into folders (in this case, the whole task comes down to simply copying files from a PC to a smartphone using any file manager).
Google itself recommends using its Google Play Music player, which can upload your iTunes library to its “cloud”, from which you can then listen to it not only on an Android smartphone, but also in a browser on a PC. To do this, you will have to install the Google Music Manager utility on your PC and indicate in it that your music library is in the iTunes library, and then wait for the download to complete (in total, at the moment, the service allows you to download up to 50 thousand tracks, which will be more than enough for any user ).

If streaming “broadcasting” your own music over the Internet does not appeal to you, and you don’t want to bother with downloading each album separately (or you use another audio player instead of Google Play Music), you will have to turn to one of the third-party utilities. Unfortunately, they tend to be shareware, like iSyncr for example. This procedure can also be performed using the DoubleTwist audio player, for which there is a desktop client with an interface similar to iTunes.
ANDROID → IOS
As noted at the beginning of the article, iOS can synchronize contacts, calendar and mail with a Google account, so if you used it on an Android smartphone, the task of “moving” from Android to iOS will be much easier than vice versa.
Contacts
If your contacts on your old phone are linked to a Google account, transferring them will be a breeze. First you need to make sure that contact synchronization is enabled on your Android smartphone (most likely, Settings - General - Accounts & Sync), and that the smartphone itself has connected to the Internet at least once after you edited your contacts for the last time. Now it’s enough to add a new Gmail account in the iPhone settings (Settings - Mail, addresses, calendars) and enable synchronization for all available items (Mail, Contacts, Calendars, Notes) in it - after which all of the above will appear in the new smartphone.
If you stored contacts locally, on the phone itself, then the task becomes a little more complicated - in a regular “dialer”, you must first export all such contacts to a separate VCF file (internal memory or on an SD card), and then import them back, but no longer in the phone's memory, but in a Google account. Further actions, as you might guess, repeat the procedure described above. If your contacts application does not support the import/export of all entries in bulk, you will have to edit each contact individually, manually transferring it to your Google account.
If you want to finally break with the "Google past", contacts should be imported into iCloud. To do this, we create a copy of them in a VCF file (either on the phone, as described above, or on the contacts.google.com website, where you need to select the vCard format), and then import them on the www.icloud.com/#contacts page (calling the menu settings using the gear button and the Import vCard item). Note that in the first case, you may receive an error message "Unable to import vCard" without any explanation - most likely, this means that your VCF file was created in 2.x format, while iCloud requires a version not lower than 3.0.

Calendar
Google Calendar is automatically connected to your new iPhone along with contacts, mail and notes (as described above), so no additional steps need to be taken (except to make sure that sync is also enabled in your iOS settings in your Google account settings for calendar) .
If you plan to abandon your Google account, the calendar should be imported into iCloud, and this is no longer such a trivial task. Of course, if you have a Mac, everything is simple - on the page www.google.com/calendar you need to select the desired calendar, in its settings, click on the ical button in the "Closed calendar address" section, copy the suggested URL, paste it in a new tab and press Enter - after that, an ICS file will be copied to your computer, which you need to "feed" to the system application Calendar.

For owners of Windows-based PCs, everything is more complicated - they will have to use iTunes and Microsoft Outlook for this purpose, since iTunes can only synchronize calendars with this program. You will need to import the resulting file into Outlook, then connect your iPhone to your PC, open iTunes on your device's tab, go to the "Details" sub-item and select the desired calendar in the "Sync Calendars" section. Another option is a third-party utility - for example, Copy My Data (Android, iOS), which can transfer not only the calendar, but also contacts, and photos / videos.
Of course, it's easiest to keep using your old Gmail account, but you can also create a new @icloud.com account. To do this, in the iOS settings, select the iCloud section and enable the Mail application in it - after that you will be prompted to register a new mailbox. And in order to receive correspondence sent to the old address, you need to enable redirection for it - in Gmail we call the settings (gear in the upper right corner), in which in the “Forwarding and POP / IMAP” tab we add a new iCloud address using the button “ Add forwarding address. After that, a confirmation letter will be sent to it - click on the link, return to the Gmail settings and make sure that the correct address is indicated in the "Forward copies of incoming messages to addresses:" line, and then click "Save changes".

Bookmarks
Most likely, you used Chrome on Android, but on iOS you will switch to Safari (if you plan to continue using Chrome on iOS, you don’t need to read further this section - the browser itself synchronizes your bookmarks on a new device).
So, in Chrome, select the bookmark manager (Ctrl-Shift-O), click on the gear in the upper right corner and select "Export bookmarks". We import the resulting HTML file into Internet Explorer, after which we connect the iPhone to the PC, launch iTunes and select "Sync bookmarks with: Internet Explorer" in the device properties. A little lower, in the "Add-ons" section, check the box next to the bookmarks and click "Apply" - after that your bookmarks will appear in mobile Safari.

Photo/video
Everything is simple here. We connect the Android smartphone to the PC via USB, copy the photo and video files to any folder on the hard drive (usually they are located on the device in the DCIM folder), then we connect the iPhone, launch iTunes, go to the "Photo" tab in the device menu and turn on synchronization, after which we select the folder in which the necessary files are located. If it contains a video, additionally check the box next to "Include video in synchronization."

If you do not have iTunes (and do not want to install it), you can use third-party synchronization utilities - for example, the already mentioned Copy My Data, or PhotoSync (Android, iOS).
Music
The transfer of music, as well as photo / video, is also carried out elementarily, and according to the same scheme. The music library is copied from the Android smartphone to the PC, dragged to iTunes, after which synchronization is performed in the settings of the connected iPhone on the Music tab - either the entire library in a crowd, or only selected artists.
Results
As you can see, the procedure for transferring personal data, although rather troublesome, is ultimately solvable - after it, all that remains is to “transfer” your favorite applications, or rather, install their versions for the new platform or find the most suitable analogues. However, this is a topic for a separate article.
When we need to remember something, we traditionally write down notes. They are now accepted to be stored in the phone. The disadvantage of this reminder method can be considered attachment to the smartphone. Android and iOS are the most common operating systems. Consider first the question of how to transfer notes from Android to Android. The second topic will be how to transfer notes from iPhone to Android.
You need to go to the store and download the CLONEit program. It is designed to transport notes, calendars and 10 more different data. A versatile product for everyday use when you need to move something from a corporate phone to a personal smartphone.
After downloading the program, connect to Wi-Fi and do the following steps:
This completes the description of transferring notes from Android to Android.
How to Transfer Notes from iPhone to Android
Using Outlook
The iPhone and Android are slightly different platforms. Establishing a connection between them simply by activating Bluetooth will not work. First, let's try the option with the Outlook program. If there are not many notes, then it is better to send them by e-mail. For large volumes we use our computer.

Apple iCloud
Here, information leakage cannot occur, which allows you to maintain complete confidentiality. Again, we will analyze the process of working with iCloud point by point.

Apple iCloud is considered a more acceptable way to transfer notes.
Using Gmail for Migration
Google is universal even in matters of saving and transferring notes. The mail service will help out in a situation where notes need to be copied to your Android from an iPhone. The main requirement is to have an account. Add an account and activate synchronization in mail and on your smartphone. The last step will be to enter the mail service from Android, which will receive all the notes from the account.
Conclusion
We told you the most common and simple ways to transfer notes from Android to Android, as well as ways to transfer notes from iPhone to Android smartphone and vice versa, these instructions will work if you use them to transfer in reverse order. If you have any questions, suggestions or difficulties - ask questions in the comments on this page or our group in contact.
“iPhone”, starting from the first generation, has become an excellent replacement for the classic diary. Keeping records in the ultra-modern compact communicator was much easier and more reliable. Over time, many have already managed to move to more advanced gadget models or migrated to the Android camp, which raised the question of how to transfer notes from iPhone to iPhone or other platforms.
iCloud sync
The most obvious, most convenient method that does not require any labor costs is, of course, online synchronization using the cloud service built into the smartphone. Before you transfer notes from iPhone to iPhone, you need to connect both gadgets to the same Apple ID account. Synchronization can be enabled as follows:
- Open the iCloud submenu.
- Sign in with your Apple ID account.
An identical procedure must be done on the second iPhone. The data will be transferred automatically over the Internet. They are stored permanently in the cloud and can be synced even after the phone is completely "wiped" or broken, so using iCloud is highly recommended.
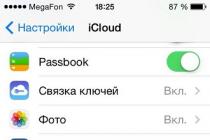
Some users prefer to sync notes using third party servers. In this case, it is necessary to establish exactly which cloud services are connected to the iPhone, and which of them are allowed to use the Notes application.
Information about them can be found in the settings of the application itself in the “Accounts” submenu. Before transferring notes from iPhone to iPhone, it is extremely important to select identical servers for synchronization, both on the sending and receiving device.
Transfer with AirDrop
Starting with the seventh version of the Apple operating system, smartphones and other gadgets have the function of transferring information using Bluetooth and Wi-Fi directly, without the help of third-party servers. So, how to transfer notes from iPhone to iPhone? For this you need:
For this method to work, the receiving machine must also have AirDrop configured and enabled. You can turn it on by calling the “Control Center” (swipe gesture from the bottom edge of the display). This method also works with other Apple devices, so the question: how to transfer notes from iPhone to iPad or iPod media player disappears by itself.

How to transfer notes from iPhone to Android?
The most successful solution for transferring a note from iPhone to Android is to use a mailbox from Google. For this you need:
- Go to the Settings app on the home screen.
- Open the "Mail" submenu.
- Open the "Accounts" submenu.
- Select the "Create a new account" sub-item.
- Select Google and enter the data of the mail service.
- Switch the toggle switch opposite the Notes application.
After a while, all notes stored on the iPhone will be automatically sent to the Google mailbox. After that, they can be downloaded on any Android smartphone.

How to transfer notes from iPhone to computer
In the case of the same methods that are used for the iPhone work perfectly. In the case of Windows, you need to acquire additional software (Outlook and iTunes), as well as a cable to synchronize your iPhone with your computer. The process for transferring notes is as follows:
- First you need to start the Outlook application (part of the Microsoft Office suite).
- Then you need to launch iTunes and connect your smartphone to your computer using a USB cable.
- In the window that appears, in the side menu, go to the “Information” submenu.
- In the window that appears, find the “Synchronize with…” button and select the aforementioned Outlook application.
If the synchronization process goes without incident, then the notes created on the iPhone will appear in the Outlook application.

Accessing a note through a web browser
Also, do not forget about the web version of the Apple cloud service, where you can view all the notes stored in iCloud. To do this, just go to the official website and select the appropriate application, where, in addition to being able to see all the entries, you can edit them, create new ones and send them by mail to other devices, including the new iPhone.