The Beeline provider, in order to keep up with others, decided to release its own router, in which the connection to the networks this operator configurable with a couple of clicks. The router offered under the name Smart Box is built on the basis of the unified Realtek 8197D processor and is equipped with 64 MB of memory.
In fact, all claims that may be about the operation of this device relate more to the firmware. We hope it will be fixed soon. Let's consider how the proprietary Beeline router needs to be configured, and also how to update the firmware in it.
Router "Beeline Smart Box"
On the rear panel, in addition to the standard set of ports and the power button, you can see the mode switch. Router mode is activated when the toggle switch is in the up position. The second mode is "switch".
We will look at how to set up a connection with a Beeline provider. To do this, you can connect a computer to the router via a patch cord or wirelessly (which works in mixed mode b / g / n, it is named “Smart_box-…”). Finally, we will discuss how to update the firmware. The firmware version current at the time of the review is 2.0.19.
Connection setup
To the WAN port, as you can easily understand, you need to connect the "Beeline" cord connector. You can access the router's web interface from a wired or Wi-Fi network (the latter works without a password).
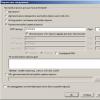
The actions should be as follows: after connecting all the cables, supply power to the router, wait 1 minute, open the web interface. The requirement for configuring the network card is to set the "automatic" mode:

Setting up a wired connection on your computer
On wireless cards, they also include a similar mode ("auto" DNS and IP). The values of the parameters that are needed to open the web interface are given below.
How do I open the GUI?
If a wired network is used to configure the router, the patch cord is connected to one of the LAN ports. In order for the network card to receive IP and DNS from the router, you need to right-click on the connection icon and click "Fix". You can connect to the wireless network without a password, its name looks like "Smart_box-XXXXXX".
Recall that the router is loaded for at least a minute. The address of the graphical interface for Smart Box is standard and equals 192.168.1.1. The default password is the same as the login, this is the word admin:

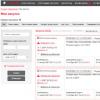
Logging into the graphical interface
Setting up a connection with "Beeline"
While on the start tab of the interface, click the "Quick setup" button. The following page will open:

Connection setup
Here you need to set the parameters:
- Subscriber login of the form "089XXXXXX" (study the agreement)
- Subscriber password - what is specified in the contract
- "Network name" - can be left as it is
- "Password" - value wifi password(may not be used at first)
- We will not turn on the guest Wi-Fi network
- We select one LAN port for the set-top box, if required (just not the one that is used now)
- Click "Save"
Firmware upgrade
The built-in program for the router, that is, the firmware, can be downloaded from the official website of "Beeline". The firmware file occupies 16 or 17 megabytes. Save it to your "desktop". Next, we will look at how to reinstall the firmware in the Smart Box router, and most importantly, how not to make it worse.
Preliminary actions
It is best to do a factory reset before updating the firmware. We turn on the router, wait 2 minutes, press the reset button with a paper clip (the button must be held for 10-15 seconds). The LEDs should blink, then the router will boot up again (but with the default settings).
We will install the firmware by connecting the router to a PC via a wired network. It is necessary. Reinstallation software are performed for the sole purpose: to rid the router of the "bugs" of the previous firmware. If everything works well, nothing needs to be reinstalled.
It is important to know that during the transfer of the firmware file, you cannot turn off the power or break the connection between the devices. After the installation is complete, it is better to wait another 5 minutes, and only then briefly press reset.
Updating the firmware via the web interface
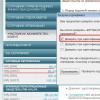
Go to the configuration graphical interface as discussed above. On the start tab, click the "Advanced settings" button. Then, select the "Others" -> "Software Update" tab:

Reinstalling the firmware
Sequencing:
- Click "Select file", find the file on the "desktop" and click "Open"
- Check the reliability of the connection again, click "Update"
- Wait for the reinstallation to complete
- Wait 5-6 minutes
- Briefly press the reset button on the router
Successful setup!
Changing the Internet provider is not a frequent matter, but sometimes it is very necessary. Especially in recent times it concerns Beeline subscribers... Having gained a large customer base at one time, the quality of services gradually began to fall in comparison with developing competitors. However, when changing the operator, one problem arises. The fact is that Beeline, along with the tariff package, widely distributed its Smart Box One branded routers, which were quite good at that time, which were designed to use the Internet only in their network. However, there is a way to save money - to flash the Beeline Smart Box router for all operators. How? I'll tell you now!
Configuring Beeline Smart Box router for all operators
Today you can find a bunch of ads on Avito selling Smart Boxes - at ridiculous prices and in excellent condition with a complete set and box. The fact is that few people know that the Beeline router is easy to set up to work with any provider. It doesn't even require a complicated firmware for beginners.
The secret is that when we enter the control panel under account administrator by default with the username and password admin / admin, which are indicated on the sticker, then the setting WAN port, which is just responsible for choosing the type of Internet connection, is blocked on L2TP for Beeline.

To unlock it, you just need to log into the router from under the super-user.
To do this, open the login page http://192.168.1.1 in the browser and use the pair:
- Login - SuperUser
- Password - Beeline $ martB0x
If these data do not fit, then we try to specify as a password serial number the router indicated on the sticker - it looks like "SFXXXXXXXXXX".

If you are, then read our other article, which understands possible mistakes and suggestions for fixing them
After authorization in the "Advanced settings" section in the "Others" menu, we get full access to all configurations, including the Internet, without any firmware. There are now all types of connections, including via a 3G modem.
Router connection
Configuring the router
Configuring a router for L2TP
Setting up a router for IPOE
Configuring a router for L2TP


4. « Home Internet»
"Wi-Fi router network"
"Guest Wi-Fi network"


Setting up a router for IPOE
1. Open a browser and enter 192.168.1.1 in the address bar. You will be taken to the welcome page. Click the Continue button.

2. The router will prompt you for a username and password. Enter admin in the first field, and admin in the second. Click the Continue button.

3. You will be taken to the main menu of the router. Select Quick setup.

4. "Home Internet"
"Wi-Fi router network"- here you can customize wireless network your router. In the Network name field, enter the name of your network, for example my_wifi, and in the password field, enter the password to access it. Please note that the password must contain at least 8 characters.
"Guest Wi-Fi network"- here you can set up your router's guest wireless network.
"Beeline" TV - if you have connected the service "Beeline" TV, you need to select the port of the router to which you will connect the set-top box. If you are watching live feeds on your PC or Xbox 360, then there is nothing to set up.
To save the parameters you entered, click the Save button.


Fill the form:
Click the Login button.


Firmware upgrade
Reset
Firmware upgrade
2.0.38: (14.7 MB)


Reset
MCPE

Router connection
Connect the cable that our installers brought to your apartment to the Internet (WAN) port, and connect your computer to any of the Ethernet (LAN) ports. You can also connect your PC to your router wirelessly, but it's best to use a cable for the initial setup.
Configuring the router
Configuring a router for L2TP
Setting up a router for IPOE
Configuring a router for L2TP
1. Open a browser and enter 192.168.1.1 in the address bar. You will be taken to the welcome page. Click the Continue button.

2. The router will prompt you for a username and password. Enter admin in the first field, and admin in the second. Click the Continue button.

3. You will be taken to the main menu of the router. Select Quick setup.

4. "Home Internet"- this section configures the connection to the Beeline network. All the configuration data required for connection is already contained in the router's memory, you only need to enter your username and password in the appropriate fields.
"Wi-Fi router network"- here you can configure the wireless network of your router. In the Network name field, enter the name of your network, for example my_wifi, and in the password field, enter the password to access it. Please note that the password must be at least 8 characters long.
"Guest Wi-Fi network"- here you can set up your router's guest wireless network.
"Beeline" TV - if you have connected the service "Beeline" TV, you need to select the port of the router to which you will connect the set-top box. If you are watching live feeds on your PC or Xbox 360, then there is nothing to set up.
To save the parameters you entered, click the Save button.


Setting up a router for IPOE
1. Open a browser and enter 192.168.1.1 in the address bar. You will be taken to the welcome page. Click the Continue button.

2. The router will prompt you for a username and password. Enter admin in the first field, and admin in the second. Click the Continue button.

3. You will be taken to the main menu of the router. Select Quick setup.

4. "Home Internet"- in this section you need to enter any number or letter in the fields "Login" and "Password" (the setting does not affect anything).
"Wi-Fi router network"- here you can configure the wireless network of your router. In the Network name field, enter the name of your network, for example my_wifi, and in the password field, enter the password to access it. Please note that the password must be at least 8 characters long.
"Guest Wi-Fi network"- here you can set up your router's guest wireless network.
"Beeline" TV - if you have connected the service "Beeline" TV, you need to select the port of the router to which you will connect the set-top box. If you are watching live feeds on your PC or Xbox 360, then there is nothing to set up.
To save the parameters you entered, click the Save button.


6. Launch your browser, open the page http://login.beeline.ru
Fill the form:
Login - enter your personal account number (type 0891234567);
Password - enter a password for Internet access;
Click the Login button.
Firmware update and factory reset
Firmware upgrade
Reset
Firmware upgrade
Be careful when following the instructions in this section. In case of an error in the actions, you will need to visit the service center to restore the device.
1. Download the firmware. The current firmware version is 2.0.22: (14.5 MB)
2. Open a browser and enter 192.168.1.1 in the address bar. You will be taken to the welcome page. Click the Continue button.

3. The router will prompt you for a username and password. Enter admin in the first field, and admin in the second. Click the Continue button.

4. Click on the "Advanced Settings" button.

5. In the top menu, select "Others".
6.A page with basic settings of the router will open. In the left menu, select "Software Update". Click the "Select file" button and specify the location of the firmware file that you downloaded earlier.
7. After that, click the "Execute update" button.
8. Wait while the router is updating the firmware, this process takes approximately 5 minutes, after which the router must be rebooted and it will be ready for use.
Reset
Use a hard reset if you need to configure the device again (delete all user settings), you cannot access the web page of the router settings interface, after setting up the router, the Internet connection was not established or the password to access it was lost.
Attention! When performing a hard reset, all user settings will be reset to factory settings!
On the body of the device there is a deep RESET (RESTORE) button that allows you to reset the settings to the factory settings. The RESET button (RESET, RESTORE) can be found on the same side of the router, where the rest of the connectors and buttons are located. In rare cases, the button may be located at the bottom of the router.
To reset the router settings to factory settings, follow these steps: Turn on the power of the router and wait until the device is fully loaded. Press the RESET, RESTORE button using a pointed, thin object (such as a paper clip) for 30 seconds, then release the button. After that, the router will reboot with the default settings (factory settings) and you will need to re-configure it.
You can also reset the setting through the MCPE platform
Or through the web interface of the router. Click on the "Revert to factory default settings" button.

Router connection
Connect the cable that our installers brought to your apartment to the Internet (WAN) port, and connect your computer to any of the Ethernet (LAN) ports. You can also connect your PC to your router wirelessly, but it's best to use a cable for the initial setup.
Configuring the router
Configuring a router for L2TP
Setting up a router for IPOE
Configuring a router for L2TP
1. Open a browser and enter 192.168.1.1 in the address bar. You will be taken to the welcome page. Click the Continue button.

2. The router will prompt you for a username and password. Enter admin in the first field, and admin in the second. Click the Continue button.

3. You will be taken to the main menu of the router. Select Quick setup.
4. "Home Internet"- this section configures the connection to the Beeline network. All the configuration data required for connection is already contained in the router's memory, you only need to enter your username and password in the appropriate fields.
"Wi-Fi router network"- here you can configure the wireless network of your router. In the Network name field, enter the name of your network, for example my_wifi, and in the password field, enter the password to access it. Please note that the password must be at least 8 characters long.
"Guest Wi-Fi network"- here you can set up your router's guest wireless network.
"Beeline" TV - if you have connected the service "Beeline" TV, you need to select the port of the router to which you will connect the set-top box. If you are watching live feeds on your PC or Xbox 360, then there is nothing to set up.
To save the parameters you entered, click the Save button.
Setting up a router for IPOE
1. Open a browser and enter 192.168.1.1 in the address bar. You will be taken to the welcome page. Click the Continue button.

2. The router will prompt you for a username and password. Enter admin in the first field, and admin in the second. Click the Continue button.

3. You will be taken to the main menu of the router. Select Quick setup.
4. "Home Internet"- in this section you need to enter any number or letter in the fields "Login" and "Password" (the setting does not affect anything).
"Wi-Fi router network"- here you can configure the wireless network of your router. In the Network name field, enter the name of your network, for example my_wifi, and in the password field, enter the password to access it. Please note that the password must be at least 8 characters long.
"Guest Wi-Fi network"- here you can set up your router's guest wireless network.
"Beeline" TV - if you have connected the service "Beeline" TV, you need to select the port of the router to which you will connect the set-top box. If you are watching live feeds on your PC or Xbox 360, then there is nothing to set up.
To save the parameters you entered, click the Save button.
6. Launch your browser, open the page http://login.beeline.ru
Fill the form:
Login - enter your personal account number (type 0891234567);
Password - enter a password for Internet access;
Click the Login button.
Firmware update and factory reset
Firmware upgrade
Reset
Firmware upgrade
Be careful when following the instructions in this section. In case of an error in the actions, you will need to visit the service center to restore the device.
1. Download the firmware. The current firmware version is 2.0.15: (22.2 MB)
2. Open a browser and enter 192.168.1.1 in the address bar. You will be taken to the welcome page. Click the Continue button.

3. The router will prompt you for a username and password. Enter admin in the first field, and admin in the second. Click the Continue button.

4. Click on the "Advanced Settings" button.
5. In the top menu, select "Others".
6.A page with basic settings of the router will open. In the left menu, select "Software Update". Click the "Select file" button and specify the location of the firmware file that you downloaded earlier.
7. After that, click the "Execute update" button.
8. Wait while the router is updating the firmware, this process takes approximately 5 minutes, after which the router must be rebooted and it will be ready for use.
Reset
Use a hard reset if you need to configure the device again (delete all user settings), you cannot access the web page of the router settings interface, after setting up the router, the Internet connection was not established or the password to access it was lost.
Attention! When performing a hard reset, all user settings will be reset to factory settings!
On the body of the device there is a deep RESET (RESTORE) button that allows you to reset the settings to the factory settings. The RESET button (RESET, RESTORE) can be found on the same side of the router, where the rest of the connectors and buttons are located. In rare cases, the button may be located at the bottom of the router.
To reset the router settings to factory settings, follow these steps: Turn on the power of the router and wait until the device is fully loaded. Press the RESET, RESTORE button using a pointed, thin object (such as a paper clip) for 30 seconds, then release the button. After that, the router will reboot with the default settings (factory settings) and you will need to re-configure it.
You can also reset the setting through the MCPE platform
Or through the web interface of the router. Click on the "Revert to factory default settings" button.


Router connection
Connect the cable that our installers brought to your apartment to the Internet (WAN) port, and connect your computer to any of the Ethernet (LAN) ports. You can also connect your PC to your router wirelessly, but it's best to use a cable for the initial setup.

Configuring the router
Configuring a router for L2TP
Configuring a router for L2TP

"Home Internet"- this section configures the connection to the Beeline network. All the configuration data required for connection is already contained in the router's memory, you only need to enter your username and password in the appropriate fields.
"Beeline" TV - if you have connected the service "Beeline" TV, you need to select the port of the router to which you will connect the set-top box. If you are watching live feeds on your PC or Xbox 360, then there is nothing to set up.
"Router security"
To save the parameters you entered, click the Save button.

Firmware update and factory reset
Firmware upgrade
Reset
Firmware upgrade
First, define the revision of your router!

1. Revision B1 / B2 / B3 with firmware versions 1.2.100 to 1.2.119: current firmware 1.2.120
If the router revision B1 / B2 / B3 has a software version lower than 1.2.100 (1.2.99 and lower), then you need to update first to 1.2.100, THEN to the current firmware 1.2.120
For revision B5 / B6, you need to update to firmware 1.2.254, then to the newer 1.2.255
2. Router D-Link DIR 300 / NRU revision B1 / B2 / B3 / B5 / C1 works correctly in the Beeline network only with specially developed firmware from D-Link. This firmware has been optimized by D-Link specialists to work in our network.
if you have D-Link router DIR 300 / NRU revision B1 / B2 / B3 / B5 / C1 with factory firmware, you can update the firmware to a customized one at the nearest D-Link service center, the update procedure is free, you need the device itself and a valid subscription agreement.
Please note that services for restoring unsuccessfully flashed routers and returning from a customized firmware to the factory one are provided in the D-Link SC on a paid basis.
For routers of revision C1, after a successful firmware update, you must reset the router by holding the RESET button on the side panel for 30 seconds. After that, make the standard settings for the router.
Do not install the firmware for DIR-300 / NRU hardware revisions B1, B2, B3 on the DIR-300 / NRU router with hardware revision B5. This leads to the inoperability of the router.
3. Open a browser and enter 192.168.1.1 in the address bar. The router will ask you to enter your username and password. Enter admin in both fields. Click OK.


5. On the left in the menu, go to the "System" section, then the "Software update" subsection. Click on the "Select file" button, and in the window that appears, select the file with the firmware. Click the Update button.

6. Wait while the router updates the firmware and reboots, this process can take up to 5 minutes. Do not unplug the router at this time.
Reset
Use a hard reset if you need to configure the device again (delete all user settings), you cannot access the web page of the router settings interface, after setting up the router, the Internet connection was not established or the password to access it was lost.
Attention! When performing a hard reset, all user settings will be reset to factory settings!
On the body of the device there is a deep RESET (RESTORE) button that allows you to reset the settings to the factory settings. The RESET button (RESET, RESTORE) can be found on the same side of the router, where the rest of the connectors and buttons are located. In rare cases, the button may be located at the bottom of the router.
To reset the router settings to factory settings, follow these steps: Turn on the power of the router and wait until the device is fully loaded. Press the RESET, RESTORE button using a pointed, thin object (such as a paper clip) for 30 seconds, then release the button. After that, the router will reboot with the default settings (factory settings) and you will need to re-configure it.

4. You will be taken to the page quick setup router. Click on the "Advanced Settings" button.


D150L

Router connection
Connect the cable that our installers brought to your apartment to the Internet (WAN) port, and connect your computer to any of the Ethernet (LAN) ports. You can also connect your PC to your router wirelessly, but it's best to use a cable for the initial setup.

Configuring the router
Configuring a router for L2TP
Configuring a router for L2TP
Open your browser and enter 192.168.1.1 in the address bar. The router will ask you to enter your username and password. Enter admin in the first field and 1234 in the second. Click OK.
You will be taken to the router's quick setup page. It also consists of three sections, let's consider the purpose of each of them:
"Home Internet"- this section configures the connection to the Beeline network. All the configuration data required for connection is already contained in the router's memory, you only need to enter your username and password in the appropriate fields.
"My Wi-Fi network" - here you can configure the wireless network of your router. In the Network name field, enter the name of your network, for example my_wifi, and in the Password field, enter the password to access it. Please note that the password must contain at least 8 characters.
"Beeline" TV - if you have connected the service "Beeline" TV, you need to select the port of the router to which you will connect the set-top box. If you are watching live feeds on your PC or Xbox 360, then there is nothing to set up.
"Router security"- here you can change the password for accessing your router.
To save the parameters you entered, click the Save button.
After clicking the Save button, the router will take approximately 1 minute to establish a connection.
As soon as the router establishes a connection, opposite the Status line, you will see "Internet connected". Congratulations, you have completely configured your router to work in the Beeline network.
Firmware update and factory reset
Firmware upgrade
Reset
Firmware upgrade
Be careful when following the instructions in this section. In case of an error in the actions, you will need to visit the service center to restore the device. It is recommended to flash the router by connecting a cable from a PC to any of the LAN ports. When flashing a router via Wi-Fi, there is a risk of getting an inoperative device that can be restored only in a service center, or not restored at all.
1. Open a browser and enter 192.168.1.1 in the address bar. The router will ask you to enter your username and password. Enter admin in both fields. Click OK.
2. You will be taken to the router's quick setup page. Click on the "Advanced Settings" button.
3. On the left in the menu, go to the "System" section, then the "Software update" subsection. Click on the "Select file" button, and in the window that appears, select the file with the firmware. Click the Update button.

4. Wait while the router updates the firmware and reboots, this process can take up to 5 minutes. Do not unplug the router at this time.
Reset
Use a hard reset if you need to configure the device again (delete all user settings), you cannot access the web page of the router settings interface, after setting up the router, the Internet connection was not established or the password to access it was lost.
Attention! When performing a hard reset, all user settings will be reset to factory settings!
On the body of the device there is a deep RESET (RESTORE) button that allows you to reset the settings to the factory settings. The RESET button (RESET, RESTORE) can be found on the same side of the router, where the rest of the connectors and buttons are located. In rare cases, the button may be located at the bottom of the router.
To reset the router settings to factory settings, follow these steps: Turn on the power of the router and wait until the device is fully loaded. Press the RESET, RESTORE button using a pointed, thin object (such as a paper clip) for 30 seconds, then release the button. After that, the router will reboot with the default settings (factory settings) and you will need to re-configure it.
You can also reset it through the web interface of the router. Open your browser and enter 192.168.1.1 in the address bar. The router will ask you to enter your username and password. Enter admin in both fields. Click OK.
4. You will be taken to the router's quick setup page. Click on the "Advanced Settings" button.
5. On the left in the menu, go to the "System" section, then the "Configuration" subsection. Click the "Factory Settings" button.

N150L

Router connection
Connect the cable that our installers brought to your apartment to the Internet (WAN) port, and connect your computer to any of the Ethernet (LAN) ports. You can also connect your PC to your router wirelessly, but it's best to use a cable for the initial setup.

Configuring the router
Configuring a router for L2TP
Configuring a router for L2TP
1. Open a browser and enter 192.168.1.1 in the address bar. The router will ask you to enter your username and password. Enter admin in the first field and 1234 in the second. Click OK.
2. You will be taken to the router's quick setup page. It also consists of three sections, consider the purpose of each of them:
"Home Internet"- this section configures the connection to the Beeline network. All the configuration data required for connection is already contained in the router's memory, you only need to enter your username and password in the appropriate fields.
"My Wi-Fi network" - here you can configure the wireless network of your router. In the Network name field, enter the name of your network, for example my_wifi, and in the Password field, enter the password to access it. Please note that the password must contain at least 8 characters.
"Beeline" TV - if you have connected the service "Beeline" TV, you need to select the port of the router to which you will connect the set-top box. If you are watching live feeds on your PC or Xbox 360, then there is nothing to set up.
"Router security"- here you can change the password for accessing your router.
To save the parameters you entered, click the Save button.
Attention! When performing a hard reset, all user settings will be reset to factory settings!
On the body of the device there is a deep RESET (RESTORE) button that allows you to reset the settings to the factory settings. The RESET button (RESET, RESTORE) can be found on the same side of the router, where the rest of the connectors and buttons are located. In rare cases, the button may be located at the bottom of the router.
To reset the router settings to factory settings, follow these steps: Turn on the power of the router and wait until the device is fully loaded. Press the RESET, RESTORE button using a pointed, thin object (such as a paper clip) for 30 seconds, then release the button. After that, the router will reboot with the default settings (factory settings) and you will need to re-configure it.
You can also reset it through the web interface of the router. Open your browser and enter 192.168.1.1 in the address bar. The router will ask you to enter your username and password. Enter admin in both fields. Click OK.
4. You will be taken to the router's quick setup page. Click on the "Advanced Settings" button.
5. On the left in the menu, go to the "System" section, then the "Configuration" subsection. Click on the "Reset" button.

Wi-Fi router"Beeline"

| Default wireless network name (SSID) | Beeline_router |
|---|---|
| Default wireless (Wi-Fi) password |
Hello friends.
Probably, there is no such person who would not have heard about the Beeline company and their Internet of the same name. Like any "serious" provider, they like to install branded routers in the Beeline.
The pros are obvious: ease of setup and operation, as well as user support - the hardware is the same and possible problems have been known for a long time. And castrated, sharpened for the majority, the settings do not allow the user's playful hands to break everything.
This article discusses one of the most popular, widespread and, in general, a good router Beeline SmartBox.
As it should be in such cases 🙂 is an OEM device. True, these are not typical repainted DLinks, but exotic from SERCOMM)
In fact, the router is a slightly modified reference Realtek_RTL8197D.
You can see more details about him or below
Brand name: Beeline SmartBox.
Chip: Realtek 8197D (600 MHz)
RAM: 64 MB
Wi-Fi: 802.11b / g / n 300Mbps, 2 internal antennas: 2 × 2 MIMO
Interfaces: 5 RJ-45 connectors with auto-sensing cable type, USB 2.0 port
From software features: DLNA, FTP-server, SAMBA-server (connection usb devices as a network drive), making it an interesting option for building a basic home media center.
In general, the device is not bad and worked stably for me, giving out the tariff maximum over Wi-Fi.
However, as an enthusiast, I lacked freedom, SSHa and the ability to dig deeper inside, as well as the ability to fine-tune. That is why I started looking for alternative firmwares for the "smart box" and soon realized that they did not exist and would not be available in the near future ...
Well, the situation is unpleasant, but not hopeless. 🙂
Since there are no alternatives, you need to squeeze the maximum out of the stock, if possible, get a normal console and raise the privileges to root. And for this you need to merge and unpack the stock firmware.
Let's get started:
Attention... The following points are taken from under Linux systems and I do not guarantee that you will be able to do it all under Win-like OS.
When preparing, the following were used: Debian Lenny, binwalk, squashfs-tools, a little savvy and red-eyed.
1) I merge the latest firmware from here
wget http://static.beeline.ru/upload/images/help/devices/routers/SmartBox/SmartBox2019.zip
2) Unpacking 7zip, I find img file of incomprehensible, at first glance, content.
7z x SmartBox2019.zip
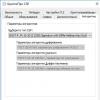
3) Run by passing as an argument img Schnick, to which he cheerfully reports about Secomm signatures and even tells us hardware id, but this is not the main point. Inside we find a pinched binar ( bin-file), unpack the archive and get
Binwalk output
S1000_Smart_box_SERCOMM_BEELINE_2019.bin which once again emphasizes the SERCOMM origin of the device 🙂
4) Here he is a binar, it would seem, happiness is nearby. But it was not there.
By itself, a binary file does not provide any human-readable information ( binary, cap).
And here the very anal carnival begins:
We set it again on it and among the signatures, bootloader and garbage we find squashfs ‘ ofsky image (Briefly: Read-only file system, widely used in compressing * nix boot images).
Happiness is near, I thought. It remains only to unpack ...
Merging from the repository squashfs-tools containing everything you need to unpack and anticipating ... unsquashfs is talking
Filesystem uses lzma compression, this is unsupported by this version
Which means the file is craftily reaped lzma and he cannot unpack it.
Hmm, I climb on Github for latest version squashfs-tools, collect from source and ... Again I break off.
After scratching the turnips and combing makefile I notice that support lzma disabled by default. I change the parameter and ... pay attention to the comment, which for LZMA required LZMA SDK.


