Creating an image (exact copy) of a CD / DVD with the Alcohol 120% program is a simple process, and the created image will help you recover lost data.
To start the CD / DVD image creation procedure, insert the source disc into your CD - ROM drive and launch the program, for example, from the desktop, by clicking on the program shortcut.
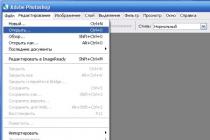
In the main operations menu, click on the "Create images" link. The Imaging Wizard will open.

If you have more than one drive installed in your computer, select the drive you want from the list of DVD / CD drives. Next, click "Reading Options".

Specify a local drive to place the image.To create a folder for the created image, click on the "New folder" button.

Enter a name for the folder and click OK.

Select the format of the created image. The Media Descriptor image format (* .mds) is used by default. Attention: when creating an image .mds two files are created, for normal work image needs both files.

Enter the name of the created image file or leave the name suggested by the program by default. Then you can rename.
Skipping read errors This option is enabled by default as the original CD / DVD may be damaged on the work surface. I advise you to always select this option, especially if you will be creating an * .mds image file.
Fast skipping of erroneous blocks (not for every drive) This option is used for special CD formats to speed up the imaging process.
Improved Sector Scanning (A.S.S.)... This option allows large error blocks to be skipped, thereby increasing read speed.
Read subchannel data from the current disc This option is for special CD formats where some data is stored in a subchannel of the disc.
Measuring positioning data.New protections SecuROM 4.8x install irregular data on the spiral track of the CD. The data positioning measurement option is only used with the following data types: "Securom * NEW (4.x / 5.x)", "StarForce 1/2/3" and "VOB ProtectCD V5". The best results are obtained when the DPM read speed is kept as low as possible.
Data type.Some CDs are copy-protected. For example, StarForce is a copy protection family tied to physical structure spiral CD track. And new versions of StarForce block the work file system at the time of checking the key disk and make sure that with hard disk the protected data was not read, and special protective components make sure that after decryption no one can take a dump. The Alcohol 120% program can bypass these obstacles. However, sometimes the created image cannot be written to a disc and will be intended only for the emulator.
If you do not know what data type your source CD / DVD is, leave the default data type (Custom).
Press the "Start" button to start the image creation procedure.

The image file will be ready when the progress bar reaches 100%. After completing the image creation, the main window of the Alcohol 120% program will open. You will see the created image.

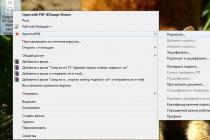
To mount the created image to a virtual drive, right-click on it. Select "Mount to device" from the context menu.

If you have created more than one virtual drives, specify which drive the program should mount the image to.
To unmount the image, in the "My Computer" folder (Computer, This Computer), right-click on the virtual drive.

Select "Unmount Image" from the context menu.
Alcohol 120%- a program for recording, creating and reading disk images (.iso, CloneCD, CloneDVD, Nero Burning ROM and other formats). The program also emulates CD, DVD, and the fifth version of the program and BD-ROM. The program can write exact copies of discs (on a writeable CD / DVD drive). But many, for some reason, have questions when using it. Next, we will analyze how to use it some other points.
After installing the program and launching it, we will see a window like this
The program window is conventionally divided into 4 parts, they are signed, so it will be difficult to get confused.
- Basic operations are operations that can be done on images or disks.
- Settings. I don't need to explain everything clearly.
- The field displays disk images or files. Images added to or created in the program will be displayed in a large white box.
- Devices. The devices display your real CD / DVD drives and virtual ones. It also displays what they are currently emulating or which disk is inserted where.
After installing the program, many people want to uninstall it immediately because they do not know what to do next, how to emulate the image? The fact is that the developers, for some reason, by default set the number of emulated CD / DVD roms to 0. That is, first we need to create a virtual CD / DVD rum for this in the menu "Settings" select item "Virtual disk"

After clicking, we will see the following window

In this window in the section "Virtual disk" in subsection "Number of virtual disks" select the required number of virtual disks. Personally, I do not need more than 1, if you have create more of them then you can delete them in the same way. It is better to leave the following fields unchanged (this is the principle of how the disk will be designated in the system), but you can change it by reading the warnings above.
After pressing the button "OK" will be created virtual disk... In field "Devices" you will see a new device.

And if you go to "My computer" then among your CD / DVD Roma you see another virtual one, but the system recognizes it as hardware. I have it right. The letters of the carriers will most likely be different. the composition of iron is different for everyone.

The letter of the virtual rum can also be changed, if necessary, and you will not figure it out yourself, write in the comments, I will add, it is simply not necessary as such. In addition to the letter, you can configure almost any parameter of the CD / DVD rum, but again, I repeat, there is no need for this.
So we created a virtual disk and you can run our images, be it an image of music, games, programs. All we need is to have an image, for example, download it from somewhere. For example, I downloaded Max Payne's dilogy. And now I will run the image on a virtual CD / DVD ROMe.
All we need to do this is just drag the image with the mouse to the main window of the program. The image can be opened from the program itself by clicking "File" - "Open" and choose the location of the image. But dragging and dropping is faster.

As a result, we will see that it is displayed in the window.

But that's not all, now it needs to be mounted on a virtual CD / DVD ROM. To do this, click on it with the right mouse button and select Mount to device. If you have created several virtual disks, then when you click "Mount to device" you will have to choose which one exactly. Because I have only one, he himself mounts on it.

After the image has booted to the virtual media in "My computer" you will see that it is inserted. (virtual disk on the right.)

All now you are from the folder "My computer" you can do with the image the same as with a regular disk. Install (in this case, the game). View which folders are inside the image (although this can be done without an emulator), etc. If you no longer need the image, you can unload it from the virtual CD ROM for this, just right-click on the image in the program and select "Dismantle image".
If you want to create an image from physical media or write an image to physical media, use the area "Basic Operations" and follow the instructions.

I would like to refute some of the rumors.
The program works on all operating systems of the Windows family. From Windows XP to Windows 8 (latest version).
The program is easy to install and the same easily removed. If someone does not delete it normally, then most likely it was downloaded from a dubious source.
Alcohol 120% is a great program for working with images that most users might see with an ISO label. This application has a good set of tools, and from this article you will learn how to mount an image in Alcohol 120%, how to make and record it. It is noteworthy that there will be two ways to create: an image of the disk itself and an image from files and folders.
How to create an image of Alcohol 120%
Surprisingly, the function of creating an image is less popular in use than the function of mounting, but it is precisely this function that is fundamental. It is appropriate to use it in those situations when you want to put all the files from the disk on a computer and later transfer them to other users. In any case, you just need to know about creating images if you are going to work in Alcohol 120%.
- After launching the program, go to the image creation menu by clicking on the item of the same name in the sidebar.
- In the new window that opens, first of all, specify the drive of the drive in which the disc is located. This can be done in the drop-down list at the top of the program.
- Go to the "Reading Options" menu and enter a name for the future image, set its location and select a format (ISO is recommended).
- After all that has been done, press the "Start" button.
It remains to wait for the end of the process, after which you can close the program.
How to capture an image
So, you've created an image, but what if your friend asks to burn it to disk? Everything is very simple, to do this, without leaving the program, follow these steps:
- On the sidebar of the program, select the "Burn images to disk" item.
- In the new window, click on the "Browse" button, and in the window that appears file manager select the image file you want to burn.
- Read the information about it and click "Next".
- Select the drive containing the blank disc, specify the write speed, method and click the "Start" button.
All of the image files will be written to the selected drive. Wait for the end and exit the program.
How to create an image from files
Soon we will talk about how to mount an image in Alcohol 120%, but first it is worth mentioning how to create an image from files, because most often users need this:
- From the main menu select go to "Image Mastering".
- In the window that appears, click the "Additional file (s)" or "Add folders" button, in accordance with the type of data you want to add to the image. All this is done through the "Explorer".
- After selecting all the required data, click "Next".
- At this stage, in the "Place the image" window, select the directory in which it will appear. Also indicate the format in the list of the same name.
- After completing all this, click "Start".

The image creation process will start. Wait until it finishes, after which you can close the program window.
How to mount an image in Alcohol 120%
What if there is an image, but there is no disk on which to burn it in order to view all the data stored in it? It's very simple - you need to mount it. Now instructions will be given on how to mount an image in Alcohol 120%:
- Run the program.
- Open the image folder in Explorer.
- Holding LMB on the file, drag it to the working area of the program window.
- The file will be added, now you need to click on it and select "Mount to device".
- Immediately after that, the "Explorer" window with autorun should appear, if, of course, it was in the image.
- Open "Explorer", it will contain the mounted drive.

This is how easy it is to mount an image to a device without burning it to disk.
Conclusion
Now you know not only how to mount an image in Alcohol 120%, but also how to create it, as well as burn it to disk. This program has several more wonderful functions, but in comparison with the listed ones they are less popular, and their use is much easier, therefore it does not need detailed guidance for use.
Both programs are good, but UltraISO is better suited for slightly scratched discs, since it tends to try to read this place many times, or in the end to skip a bad sector.
As for Alcohol 120%, it also copes with its task just like UltraISO, but is not designed to work with broken discs. In the event that there are a lot of bad sectors, Alcohol 120% will stop creating a disk image, while UltraISO will try to skip this sector several times and move on.
Now let's move on more specifically to the question: “ How to create a disk image using Alcohol 120“, Step by step and with screenshots!
Let's create a disk image using the Alcohol 120% program as an example.
So, insert the disc you want into the drive. Click in the program on the button " Creation of images«.
A window for creating a disk image will open, here you need to configure something and start creating an image.
In the item DVD / CD drive, select your drive into which you inserted the disc from which you want to make an image. Pay attention to the settings item “ Data type“, There you can choose which disc you want to work with. If you are creating a disc image for Playstation 2, then select the appropriate item from the list.
Now click on the button " Start" and the disk image will start to be created... When the process is over, the image will be ready for use, then you can remove the disc and see the created image in the list of Alcohol 120% images.

Installation instructions for Alcohol 120% and information on how to mount using this program, for example, a game image.
The method of storing data on DVDs or CDs remains quite popular. But it often happens that an optical drive that has just been recorded does not recognize a disc. It is especially offensive when there is something very important on it. Why is this happening? First, it depends on the quality of the blanks themselves. Cheap, low-quality disks sometimes fail after a few months. Secondly, scratches may appear on the disc, and then it will also be difficult to read.
If there is enough space on the hard disk, then you can store on it required files in the form of images, thereby saving yourself from loss important information... The recorded file can then be easily written to the same disc or opened using a whole arsenal of programs.
Alcohol 120% is a leader in this arsenal. With the help of this software, images of the most common formats are made. And also mounted virtual drives, with the help of which they are then read. By the way, many games in global network distributed in the form of images.
In order to start working with the program, you need to download and install it. The downside of Alcohol 120% is that this software is paid. But if you take into account the multifunctionality and the relatively low price of the program, then you can close your eyes to this moment.
You can purchase and install Alcohol 120% on the official website. Can be used free version within 15 days, and then activate after payment. The software is Russified and works on almost all Windows operating systems.
Installation process
After downloading, run the installation file.
In the language selection window, select Russian and click "Next".

In the window of the installation wizard that opens, proceed in the same way.

Then "give the go-ahead" license agreement and press the installer button again.


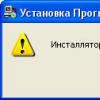
If Windows requires a restart, then execute. After rebooting, the Security Warning window appears.

We do not pay attention and click "Run".

Windows will then ask which program components the user wants to install. We select everything and continue until the installation wizard completion window exits.

Click the "Finish" button. At this, the Alcohol120% installation can be considered complete.

How to work in Alcohol 120% and create an image through it
Launch installed program... In the upper left corner, click on the "Create images" button.

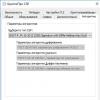
Then click on the "Reading Options" tab. The next step is to select a folder to store the image. By default, the program installs it on the local drive "C". But since this disk contains the installed operating system, it is better to create a storage folder in another partition of the HDD.

After that, we need to check the boxes "Skip reading errors" and "Improved sector scanning". This is necessary for hard-to-read discs or scratched discs.

From the drop-down list, select the image format - "ISO Image".

Press the "Start" button to start mounting.

We are waiting for the green status progress bar to reach the end and Alcohol 120% completes the creation of the image. The operation window will automatically close upon completion.
Sergey / /