Despite the high level of reliability of Android devices manufactured by Samsung, one of the leaders in the world market of smartphones and tablet computers, users are often puzzled by the possibility or need to flash the device. For Samsung Android devices, the best solution for software manipulation and recovery is the Odin program.
It does not matter for what purpose the procedure for flashing a Samsung Android device is carried out. Having resorted to using the powerful and functional Odin software, it turns out that working with a smartphone or tablet is not so difficult as it might seem at first glance. We will deal step by step with the procedure for installing various types of firmware and their components.
Important! The Odin application, if the user does it incorrectly, can damage the device! All actions in the program the user performs at his own peril and risk. The site administration and the author of the article are not responsible for the possible negative consequences of following the instructions below!
Drivers will need to be installed to enable Odin to communicate with the device. Fortunately, Samsung has taken care of its users and the installation process usually does not cause any problems. The only inconvenience is the fact that the drivers are included with Samsung's proprietary software for servicing mobile devices - Kies (for older models) or Smart Switch (for new models). It should be noted that when flashing through Odin with Kies simultaneously installed in the system, various failures and critical errors may occur. Therefore, after installing the drivers, Kies must be uninstalled.


Step 2: Put your device into download mode
The Odin program is able to interact with a Samsung device only if the latter is in a special Download mode.


Step 3: Firmware
Using the Odin program, it is possible to install single- and multi-file firmware (service), as well as individual software components.
Installing single-file firmware
- Download the ODIN program and firmware. Unpack everything into a separate folder on drive C.
- Run Odin as Administrator. The program does not require installation, so to run it, you need to right-click on the file Odin3.exe in the folder containing the application. Then select from the drop-down menu "Run as Administrator".
- We charge the battery of the device by at least 60%, put it into the mode Download and connect to the USB port located on the back of the PC, i.e. directly to the motherboard. When connecting, Odin should determine the device, as evidenced by the filling in the blue color of the field ID:COM, displaying the port number in the same field, as well as the inscription Added!! in the log field (tab log).
- To add a single-file firmware image to Odin, press the button "AP"(in versions Odyn up to 3.09 - the button PDA)
- Specify the path to the file for the program.
- After pressing the button "Open" in the Explorer window, Odin will start checking the MD5 amount of the proposed file. Upon completion of the hash sum check, the name of the image file is displayed in the field "AP (PDA)". Go to tab Options.
- When using a single-file firmware in the tab Options All checkboxes must be cleared except for F. Reset Time" and "Auto Reboot".
- Having defined the necessary parameters, press the button Start.
- The process of writing information to the device memory sections will begin, accompanied by displaying the names of the device memory sections being written in the upper right corner of the window and filling in the progress bar located above the field ID:COM. Also in the process, the log field is filled with inscriptions about ongoing procedures.
- Upon completion of the process, in the square in the upper left corner of the program, the inscription is displayed on a green background "PASS". This indicates the successful completion of the firmware. You can disconnect the device from the computer's USB port and start it by long pressing the power button. When installing a single-file firmware, user data, unless explicitly specified in the Odin settings, is not affected in most cases.

Necessarily! If installed, remove Samsung Kies! I'm on my way: "Control Panel" — "Programs and Features" — "Delete".


Installing a multi-file (service) firmware
When restoring a Samsung device after serious failures, installing modified software, and in some other cases, a so-called multi-file firmware will be required. In fact, this is a service solution, but the described method is widely used by ordinary users.
Multi-file firmware is called because it is a collection of several image files, and, in some cases, a PIT file.

Firmware with PIT file
The PIT file and its addition to ODIN are the tools used to repartition device memory. This method of carrying out the device recovery process can be used in conjunction with both single-file and multi-file firmware.
The use of a PIT file when flashing is permissible only in extreme cases, for example, if there are serious problems with the device's performance.


Installation of individual software components
In addition to installing the entire firmware, Odin makes it possible to write individual components of the software platform into the device - the kernel, modem, recovery, etc.
For example, consider installing TWRP custom recovery via ODIN.

It should be noted that the above methods of working with Odin are applicable to most Samsung devices. At the same time, they cannot claim to be absolutely universal instructions due to the presence of a wide variety of firmware, a large model range of devices, and small differences in the list of options used in specific applications.
- First rule, flash only with a charged battery on the smartphone and uninterrupted power supply on the computer.
- Second rule, do not pull out the USB cable during Android flashing.
- Third rule, The USB cable must be original and undamaged. Recently, it is very important to use exactly the USB cable that came with the phone, since if you use non-original ones, it is possible to break the device!
- Fourth rule, the path to the firmware should not contain Russian-language folders ( C:folderwrong, C: or C:samsung - right).
There are firmware
single file– consist of one firmware file;
Two-Three-Four-Five-file(multi-file) - consist of more than one file (firmware from service centers);
Firmware extension * . tar or * . tar.md5
Preparing for the firmware
- Download official Samsung firmware
- Install the driver on the PC
- Download and unzip the ODIN program
- One-piece, original USB cable
Where to download Samsung Firmware
Or use a special utility that quickly downloads Samsung firmware to your computer - Samfirm instruction.
- firmware SER - Russia and CIS
- firmware SEK - Ukraine and CIS
Other regions - CSC
Albania:
ALB
Algeria:
ALG
ALR
Argentina:
ANC
ARO
CTI
UFN
PSN
Aruba:
ARU
Australia:
OPP
OPS
VAU
XSA
TEL
HUT
Austria:
AOM
DRE
MAX
MOB
MOK
ONE
TRG
ATO
Baltic:
SEB
Belarus:
MTB
VEL
Belgium:
BAE
BSE
PRO
XEB
Bosnia-Herzegovina:
BHO
BHT
TEB
Brazil:
BTA
Btm
TMR
ZTA
ZVV
ZTO
ZTM
Bulgaria:
CMF
GBL
MTE
MTL
OMX
PLX
VVT
Canada:
RGS
BMC
TLS
Chile:
CHB
CH
CHL
CHT
China:
CUH
INT
TEC
TIY
CMC
CHN
M00
Colombia:
COB
COL
COM
COO
Cyprus:
CYV
Egypt:
EGY
Finland:
ELS
SAU
NEE
France:
OFR
AUC
B.O.G.
COR
DIX
FTM
NRJ
ORC
ORF
SFR
UNI
VGF
XEF
Germany:
DBT
DTM
DUT
EPL
MAN
MBC
VD2
VIA
XEG
Greece:
AOC
COS
EUR
GER
TGR
VGR
CYO
Romania:
PAN
VDH
WST
TMO
XEH
TMH
India:
HFC
HYA
INA
IND
INU
IMS
REL
TAT
INS
Israel:
cel
PCL
PTR
Italy:
GOM
HUI
ITV
OMN
TIM
VOM
WIN
XET
FWB
Kazakhstan:
EST
KCL
KMB
KZK
SKZ
Korea:
SKT
Kor
Mongolia:
MPC
Netherlands:
BEN
MMO
ONL
QIC
TFT
TNL
VDF
VDP
XEN
KPN
New Zealand:
VNZ
TNZ
NZC
Norway:
TEN
NEE
Pakistan:
WDC
PAK
Poland:
ERA
IDE
pls
PRT
XEO
Romania:
CNX
HAT
ORO
COA
Russia:
AZC
BLN
EMT
ERS
GEO
MTV
SER
SNT
Singapore:
BGD
XSO
XSP
Slovenia:
MOT
SIM
Slovakia:
GTL
IRD
TMS
ORS
South Africa:
XFA
XFC
XFM
XFV
XFE
Spain:
AMN
EUS
FOP
XEC
ATL
Sweden:
BAU
BCN
BME
BSG
BTH
COV
HTS
SEN
TET
TLA
XEE
VDS
TNO
Switzerland:
AUT
ORG
MOZ
SUN
SWC
Taiwan:
TWM
B.R.I.
TCC
TCI
CWT
Thailand:
CAT
THE
THL
THO
THS
Tanzania:
SOL
Tunisia:
ABS
RNG
Turkey:
BAS
KVK
TUR
TLP
TRC
Ukraine:
KVR
SEK
UMC
SOUTH AFRICA:
MID
ARB
XSG
AFR
IT
Great Britain:
BTC
O2I
O2U
ORA
TMU
TSC
VOD
XEU
VIR
H3G
CPW
USA:
AWS
DOB
TMB
CLW
Uzbekistan:
USD
Vinisuela:
VMT
Vietnam:
XXV
PHU
XEV
DNA
FPT
SPT
TLC
VTC
VTL
[hide]
After installing the drivers and downloading the firmware, you need to put Samsung into firmware mode (bootloader or download):
For flagship smartphones (S8, S9, S10)
To do this, turn off the device and perform the following steps:
For smartphones and tablets, it looks like this:
Turn off smartphone / tablet and hold down the buttons “Volume Down” + “Center Button” + “On / Off” button 
we get this menu, release the buttons and press the “Volume Up” button

For older smartphones (before mid-2011):
If you can't switch to Download mode

[hide]
2. Connect Android to PC and wait until the drivers are installed.


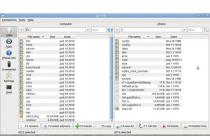
3. Run Odin, a window should appear in the upper left corner that the device is connected: 
4. Add firmware files to the Odin program
Now let's move on to the firmware process, more precisely, how to set everything up correctly so that it works!
When flashing, programs and their data may be lost (but not melodies, pictures, etc.)
Firmware
Samsung single-file firmware and multi-file firmware are flashed differently!
If the firmware is single file
Insert firmware into AP or PDA field (press the button)

If the firmware is multi-file

do not change anything and do not check the boxes in the left corner (if this is not required): 
5. After selecting the firmware files, press the button START, and Android which will last from 2 to 5 minutes. Then a message will appear PASS or RESET, the firmware is installed and the smartphone will reboot (you can disconnect samsung from the PC). 
This firmware is finished. Good luck with your flash!
Samsung won't boot after flashing?
Video Instructions for the firmware
Samsung smartphone via ODIN
Errors that may occur during the firmware process
During the process of flashing Samsung smartphones and tablets, various errors can occur:
- Can't see device
- Process hung
- Crash during firmware
- unexpected cliff
- Error starting device update
Firmware kernels (boot.img, zImage), recovery files and modems
How to flash a modem?
If you are told to flash the modem, then this means that you need modem file paste into field Phone and flash it.
How to flash the kernel or Recovery?
If you are flashing a third-party kernel or Recovery and you have Android 5.X.X and higher pre-installed, then you need to make certain changes to the Android settings:

Flashing the kernel, kernel or CWM means that you need to insert the file into the AP or PDA field and flash it.
Possible problems when installing Recovery
If suddenly, after flashing a custom recovery, you see that the recovery remains standard, then this instruction will come in handy:
- In ODIN uncheck AUTO REBOOT
- Flash custom Recovery
- Turn off Android device
- (if Samsung just started to boot, then repeat procedure 1-4)
- Apply patch (root rights)
- How to create a tar file with img
- to a Samsung smartphone
Read more articles and instructions in the section Articles and Android Hacks or Android Firmware. Stay with the site Android +1, then it will be even more interesting!
Samsung, it is important to familiarize yourself a little with the device itself. So you can learn some useful things that you previously did not even suspect. Therefore, let's take a short excursion into the space world of Samsung Galaxy devices - such as n9005 Note, n900, S3, N7100 and others.
Galaxy devices are very popular, stylish and high-quality gadgets.
The Samsung smartphone market today is an impressive share. The mobile giant in the modern world is the biggest competitor for another popular company that even children know about - Apple. And this is no coincidence, because Samsung presents to the public a large number of a wide variety of devices in all possible price categories. This, in principle, gives the company a certain advantage - the availability of devices for all segments of the population. If a person cannot afford a smartphone for 20,000 rubles, but he needs modern functions, then budget models can provide some of them. And Samsung does a pretty good job in this regard: the company's devices in the budget price segment have a large number of necessary functions in their arsenal.
The most popular are models of the Galaxy series. They include both premium smartphones S, S Edge, Note, as well as more affordable ones - A, Grand, Grand Prime and others. How do these devices differ from each other?
As you know, the Galaxy S and S Edge are the top smartphones of the company, which are released every year with new features, functions and features, getting a new number in the name (the latest version of the series is the seventh). Note is positioned as a tablet phone (quite a popular word today), a device for business people or creative people. For those who constantly need a big screen, the main feature of this device is the S Pen, which allows you to create quick notes, sketches and other types of handwriting right on the screen in various applications.
Grand and Grand Prime are positioned in the segment of budget smartphones as the most popular. And this is no accident: the devices have two cameras - front and main, touch screen, support for high-speed networks, access to the global network, the ability to install almost any program (except complex games and applications) and use them.
Naturally, far from all available mobile devices from Samsung today were named above.
What you need to know before flashing a smartphone?

So, if you are going to do this difficult task, then we hasten to please you. Because anyone can flash or reflash Samsung Galaxy (such as n9005 Note, n900, S3, N7100 and others). To do this, you just need to familiarize yourself with the initial data, some features, and most importantly, follow the instructions.
What do you need before starting your mission?
- The Samsung device itself with a charged battery (at least 80 percent). This is necessary for an unexpected stop of the device and further program failures.
- Original USB cable for connecting to a computer. The cord is supplied in the kit, but if suddenly you don’t have it, you can use the available one. However, it is worth remembering that such actions are performed at your own peril and risk.
- Internet connection with unlimited traffic. You need this in order to download the firmware itself, which can weigh more than one gigabyte. In principle, tariffs with limited traffic may also be suitable, if this does not provide you with any inconvenience. If you are not sure what your tariff is, be sure to check with your Internet provider.
- Desire and patience, which will become your faithful companion. You may not be able to flash or reflash your Samsung Galaxy the first time. Do not be upset in this case. Better try to carefully review whether you did everything right and whether you could have made a mistake somewhere.
What are the ways of firmware?
You can flash your device (Samsung Galaxy n9005 Note, n900, S3, N7100 and others) using both official Samsung tools and third-party utilities. Let's take a look at each of these values, then move on to their instructions.
- Firmware update with official software. This can be done from the smartphone itself, without using a computer, or with its help by directly connecting the device via the USB port. This is necessary for those who just want to upgrade the version of the operating system - for example, from Android4 to Android 5.0.
- Flashing or flashing with third party tools. The most popular service in this matter is the Odin program. It is easily installed on a computer or laptop and is provided to users free of charge.
Official firmware update
Without using a computer
- So, you have decided to update the version of the operating system of your smartphone without any cords and other devices, but only by the device itself. Go!
- Initially, we connect to a Wi-Fi network. Without this, there is no point in going further. If there is no access to wireless networks, but there is a computer with access to the global network and a USB cable, then go to the next paragraph called "Using a computer."
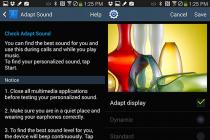
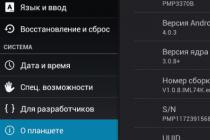
- Now go to the "Settings" menu and find the "About device" item. Here we will need a tab called "Software Update". Click the update button.
- If your smartphone writes that updates have already been installed on your device, it means that there are no available firmware for your device. That is, the latest available version of the operating system is installed.
- Otherwise, you need to agree to download updates and wait for it to complete. When finished, click on the install button. After that, your Samsung Galaxy will start updating the system, during which the device cannot be used. In no case do not turn off the phone, do not try to restart it or remove the battery - you can get a "brick", that is, a completely non-working device.
- Only when you see the familiar home screen and a message that you have successfully completed the firmware update procedure, you can use the device as usual.

Using a computer
- To work, you must have access to the Internet for a computer or laptop. Otherwise, you cannot do anything.
- Download the Smart Switch software on the PC from the official website of the company (http://www.samsung.com/global/download/smartswitchwin/).
- Now we connect the smartphone with a USB cable to the PC and wait until the device is detected.
- The program itself will show you the availability of a new version of the operating system for the device in a special small window. If the outcome of events is positive, the “Update” button will appear, which you will need to click on.
- It remains to wait for the download and installation of updates. Installation may take a long time, so please be patient.
- As in the previous version, in no case turn off the device, do not unplug the cord from the computer. Keep both your PC and phone running smoothly to avoid unexpected breakdowns.
- After a successful firmware update, you can continue to work with your smartphone in normal mode.
What should you know after flashing?
Samsung in its official manual (instructions) for upgrading the operating system recommends doing a data reset after such manipulations. Otherwise, Samsung warns of possible system failures. This will not necessarily happen with your gadget, but you can take it into account if you find such problems in the future work with the phone.
However, it is worth remembering that before resetting, it is important to save all available data: photos, contacts, videos, music, documents. You can do this manually, by simply transferring information to a computer, or using the Smart Switch utility, which allows you to back up your Samsung Galaxy n9005 Note, n900, S3, N7100 and others smartphone data.
Firmware using a third-party Odin program
To begin with, read the main points that in no case should be violated. You have been warned about this several times, so that later you don’t clutch your head and say to yourself: “What have I done?”. Therefore, it is better to play it safe and carefully watch what needs to be done and what you are doing.
- You perform all operations at your own peril and risk. This is the most important rule, because after flashing in an unofficial way, you lose Samsung warranties.
- Do not pull out the power cord of a computer or laptop, that is, ensure unconditional operation of the PC.
- Charge your smartphone at least 80-90 percent so that it cannot be discharged during the update.
- When connecting to a PC, use only the original cable.
Preparing and configuring services
As you may have noticed, these rules are the same as those for updating through Samsung's official means, so it will be easy for you to comply with them. Now let's move on to the most important thing:
- First, download the Odin utility. It can be taken from the site (http://androidpru/odin-firmware-samsung/).
- Now download the firmware file for your device to your computer. If you don’t know where to do this, you can use the Samsung Firmware Linker program, which allows you to find and download the firmware specifically for your device.
- Download the driver for your device to your computer. This is necessary for the correct detection and configuration of the smartphone when it is connected to the PC. You can use the resource (http://androidp1.ru/drviver-for-android/).
- Be sure to save all important data from the device to any other medium, just in case. Because when flashing, partial or complete loss of information from the gadget is possible.
- The preparatory work is over, and we are moving on to the main process. We put the phone into firmware mode. If you do not know how to do this, then try this option: turn off the device, hold down the volume down, central and lock (off) buttons at the same time. When working properly, you must exit to a special menu, where using the volume up key you agree to start in firmware mode. If you do not get into such a menu, then find this information specifically for your device.
- If everything worked out for you, then you can connect the device to the computer via USB. Wait a while for the necessary drivers to install.
- After that, you can launch the Odin app on your computer. On the left in the corner you will see that the gadget is connected, which means we are moving on.
- Now you need to add the firmware files in the correct order. If everything is very clear for single-file firmware (insert the firmware into the AP or PDA field by clicking on the appropriate button), then you will have to tinker with multi-file ones a little longer.

Multi-file firmware
Let's figure out which files and in which field you need to insert:
- PIT is inserted into the PIT field.
- tar.md5 - in BL or Bootloader.
- File CODE_xxxxx.tar.md5 - in AP or PDA.
- File MODEM_xxxxx.tar.md5 - in CP or PHONE.
- tar.md5 - in CSC.
Continuation
- Please note that you do not need to put any checkmarks on the left if the firmware itself does not provide for this.
- After the correct arrangement of the firmware files, press the START button and wait for the program to complete. When finished, the word RESET or PASS will appear on the left. The device will now reboot and be ready to use again. You can disconnect your smartphone from your computer.
Conclusion
If after flashing or flashing your device you cannot turn it on (the so-called "perpetual reboot"), then try resetting it. It is also known by its other name - Wipe. We hope that you still get to flash or flash your Samsung Galaxy n9005 Note, n900, S3, N7100 and others without any incidents. Good luck, dear readers!
Galaxy S4 supports load mode (). In this post you will find a description of how to enable it correctly.
Allows you to install OTA updates and other files manually, but to work with the mode you will have to install it on a PC Odin 1.85, Odin 3.04 or Odin 3.07, depending on your device.
On devices from Samsung used instead Fasboot / Bootloader fashion that you may have come across while working with HTC or Nexus devices. To start it, there are several options. Below is a brief description of each of them.
 If your smartphone has stock firmware installed, then:
- turn off the device and remove its battery for 5 seconds;
- put the battery back;
- hold down the Volume Down, Home and Power buttons;
- when a message with the text "Warning" appears, they must be released;
- to confirm the download of the device in Download Mode, press Volume Up;
- you will see
- Now you can connect the device to the PC by first launching Odin.
Note that this method works for devices with root access, as well as with all factory restrictions.
If on Samsung Galaxy S4 installed custom rom, you can download directly from the homescreen. To do this, in the appropriate menu, you must select the reboot and the option "Download".
If there is no such menu in your firmware, then you can use another method. You will have to download and install several files. Here is a list of what needs to be done:
- Download one of the files (for I9505 International , Sprint , T-Mobile or AT&T).
- Copy it to your smartphone's internal SD card.
- Boot your smartphone into recovery mode: turn off S4, then press and hold the Volume Up, Home and Power buttons.
- In the settings menu Android clear Cache and Dalvik Cache.
- Create Nandroidbackup("backup and restore").
- Select the option "install zip from sdcard", then "choose zip from sdcard".
- Find the previously mentioned file and install it.
- After successful completion of the process, restart the device.
Now to download Galaxy S4 you must hold down the Power button until the Device Options screen appears. There you need to select the option "reboot", and then "Download", then click OK. The smartphone will boot in the required mode.
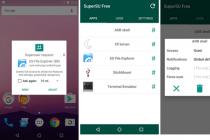
Odin will be a very useful tool that will allow Samsung brand owners to flash their devices. Next, detailed instructions for firmware via Odin will be given. It is worth noting that the program was developed by professionals, so you don’t have to worry about the quality of the final result. Flashing through Odin is very simple and does not require users to have deep knowledge in certain aspects of Android devices.
Similar about Odin
The application was developed for Windows OS. After downloading the program, you get the opportunity to flash your phone or tablet from Samsung. Once upon a time, Koreans used the utility only as professional software, introducing updates for their devices. Luckily, its files have been leaked to the internet, allowing every Samsung fan to use it. You can download the application on many fan sites dedicated to the Korean manufacturer or Android devices in general. have long ceased to be dangerous for your devices. However, not all users dare to take such drastic measures, getting rid of the stock and leaving for the free floating of pirated programs. It is worth noting that Samsung firmware via Odin will open up new features of your device that are not available in stock solutions.
This is where the dilemma arises, because many people establish some kind of identity that looks like this: flashing = big risk = loss of warranty on the device. But all these are just myths based on old stereotypes. Today there is just an insane number of Samsung device owners in the world, so a measure was taken to create software that would be suitable only for these devices and only in a high-quality form. It was Odin that became such an application, “arriving” from the world of Scandinavian mythology. And here you can be 100% sure that you will definitely not harm your phone or tablet by using this program.

Program versions
In order for the firmware through Odin to be successful, there are a number of various versions of the program, each of which is designed for a particular device from Samsung. As the main file extensions, the following can be noted: .bin, .tar and .md5. By the way, the most stable versions are 1.85, 3.07 and 3.10.6. Next, we will indicate how the Samsung firmware should go through Odin, and also talk about the main options of the program.
Program Options
So that you don’t “get lost” in the Odin program, let’s take a quick tour of the main options:
- Auto Reboot - if this option is checked, your device will automatically reboot after the firmware is successfully completed;
- Re-Partition - allows you to redistribute the file system according to factory presets (RFS);
- F. Reset Time - the function allows you to reset the counter of previous firmware;
- PIT - if the Re-Partition function was checked in the second one, you will need to specify the path to the .pit file, which will make it possible to redistribute the device's file system;
- CSC - designed to open a file that contains data specific to certain states and operators;
- PDA - the option is needed to select the necessary files with the firmware;
- Phone - allows you to select the modem file that is needed for the firmware process.
You need to be extremely careful when using the Odin program. This is especially true for the Re-Partition function, because if you do not have a .pit file, then it is better not to check this option. Finally, it is worth remembering that the software is intended only for Samsung devices. Flashing other brands of phones through Odin can lead to unpleasant consequences. Alternatively, you can use FlashTools or KDZ Updater.
Preparing for the firmware process
In order for the Samsung firmware through Odin to be successful, several preparatory steps must be completed. The algorithm of actions will be as follows:
- First of all, you need to download and install the USB drivers for your device. If you wish, you can use Samsung Kies, during the installation of which the drivers will be installed automatically.
- Then you need to make sure that the device has backup copies of important files that will be lost after the firmware. It is advisable to create backups on an external memory card or computer.
- Next, we charge the phone / tablet up to 100% (or at least 80%), so that power is not lost during the firmware process.
- In the settings, enable the "USB Debugging" option, which is available in the "For Developers" section. We make sure that the Samsung Keis application is not running. Otherwise, disable it through the "Device Manager".

It is worth noting that when installing official firmware via Odin, the chance of damaging the device is extremely low. Of course, if you follow all the instructions. Nevertheless, all actions are performed at your own peril and risk, so if you are not sure of the final result, it is better to take your device to a service center. Next, let's move on, in fact, to the firmware process.
Firmware process
As an example, we will describe how the firmware should work through Odin. The algorithm is the following:
- First of all, download the official firmware for your device to your computer.
- Next, turn on the download mode on the device. As a rule, in devices from Samsung, it is launched by pressing the following key combination: Power (Turn on / off the device) + Volume Down (volume down key). After we confirm the action by pressing the Volume Up button (increase the volume). Be sure to press the keys at the same time.
- Next, we launch the Odin program on the PC and make sure that the Auto Reboot and Reset Time options are checked. This is extremely important.
- We connect the phone or tablet to the PC using a USB cable. After detecting your device, the program will change the color of one of the ID:COM boxes.
- Next, press the PDA button located in the Odin program interface and select the .tar or .md5 file.
- Click on START, after which the firmware process starts. Disconnecting your device from the PC during installation is strictly prohibited.
- As soon as your device successfully completes the firmware process, it will automatically reboot. At this point, you can remove the cable from the PC and start using the machine. As you can see, everything is very simple.
This instruction for firmware via Odin is the most common. If you stick to all the points, you will be successful!

Creating Root Access to Samsung Galaxy Note 2 Phones
If you need to open the "superuser" mode, then the Odin and SF-Autoroot programs can help. So, we follow this algorithm of actions:
- Download SF-Autoroot for a specific phone model, which can be found in the settings menu item "About phone". The files themselves can be easily found on the Internet. If you cannot find a file for a particular model, it is better to leave everything in stock mode, because other actions can harm the device.
- Download Odin and install the USB drivers for the phone.
- Turn off Galaxy Note 2 and put it into download mode. It turns on by simultaneously pressing 3 buttons: Volume Down + Home + Power. Then, to confirm the actions, press Volume Up and connect the device to the PC.
- In Odin, click on the PDA button, where we select the required file with the tar.md5 extension. After that, check the boxes next to the options Auto Reboot and F. Reset Time. We make sure that no other functions are checked with flags.
- Press "Start" and wait for the end of the installation.

As you can see, flashing through Odin is not the only advantage of this program. If everything is done wisely and according to the instructions, the application will be a great help for owners of Samsung devices.