In this article, I will show you how to enable USB debugging on your Android phone or tablet. At the end of the article, we will figure out what it is for.
This article is suitable for all brands that produce phones on Android 9/8/7/6: Samsung, HTC, Lenovo, LG, Sony, ZTE, Huawei, Meizu, Fly, Alcatel, Xiaomi, Nokia and others. We are not responsible for your actions.
Attention! You can ask your question to a specialist at the end of the article.
Enable USB debugging on Android phone
To enable USB debugging, you need to activate the Android developer mode according to the following instructions:
In the "Settings" of your device, the "For Developers" section should be displayed. Let's move on to the next step.
Turn on USB debugging like this:
- We go to "Settings", select "For Developers" (on some Chinese phone models, specify "Settings", then "Advanced" and "For Developers"). At the top of the page we find the switch and translate it into the "On" position.
- In the Debug menu, enable USB Debugging.
- In the "Allow USB Debugging" window, confirm that debugging is enabled.
Now debugging is enabled, and you can use it for the desired purposes.
Enable USB debugging from a computer
This method will be relevant when it is not possible to enable USB debugging on the device itself due to a broken touchscreen, an idle screen, or a general problem with the device. It is important that a third-party Recovery - or CWM - be installed on the gadget. This is required to have root access to the OS.
We perform the steps:

After rebooting, you will be able to work with your device using QtADB, ADB, MyPhoneExplorer and other similar programs - i.e. in USB debugging mode. To disable USB debugging mode on Android gadgets, you need to open the "Developer Menu", then uncheck the "Use USB debugging" line.
Possible problems
To work with gadget debugging via USB, special ADB drivers are used, which are available on the Google website at the link https://developer.android.com/studio/index.html. Consider the problems if ADB does not detect the device and it is not possible to use USB debugging mode.
We check that the gadget is detected by the computer:
- Check the USB cable for damage. Attention should be paid to areas near the plugs, strong bends. Try using a different cable to connect. If the problem is the cable breakage, then replace it with another one.
- Try plugging the plug into a different USB port on your PC.
- Connect your Android gadget to another computer.
- Disconnect all USB devices from the PC. Some of them may interfere with the gadget to connect normally to the computer.
- Check that the official firmware of the device manufacturer is used.
Make sure you have the correct ADB drivers installed. There are different versions of drivers for different gadgets, which are distributed on the official website by models of tablets and smartphones.
not running Android
There are many ways to get superuser rights (ROOT rights), but most of them require you to enable USB debugging mode. What is USB Debugging mode and how to enable it, you can learn from this article.
So, the first question is: what is the USB debugging mode for?
USB debugging is used to enable the user to use the debugging service for applications and devices on the Android operating system (in other words, checking the operation of applications and the system as a whole, possible failures, and much more), which is called adb.
The second question is more interesting: how do you enable USB debugging?
In all Android devices, regardless do you have a smartphone or tablet, USB debugging mode can be found along this path: Menu -> Settings.
But, despite the fact that the USB debugging mode is in the settings, the location of this option on different devices may vary, so it is worth describing 5 possible locations for the USB debugging mode.
How to enable USB debugging: option #1.
Go to: Menu -> Settings -> Development -> USB debugging - check the box next to this item.
How to enable USB debugging: option #2.
Go to: Menu -> Settings -> For Developers ->
How to enable USB debugging: option #3.
Go to: Menu -> Settings -> Applications -> Development -> USB debugging (this option is more relevant for devices running Android 2.2 -3.0).
How to enable USB debugging: option #4.
Go to: Menu -> Settings -> More -> Developer Options -> USB Debugging - check the box next to this item.
How to enable USB debugging: option #5.
This option is suitable for devices running on Android 4.2 and higher.
Go to: Menu -> Settings -> System -> About smartphone e (Tablet) -> We are looking for the item "Build number" and click on it about 7-10 times, after that we return back to Settings -> For Developers -> And check the box next to USB Debugging.
Further, only those users who have devices on Android 4.2 and higher read.
After you turn on USB debugging mode and connect your device to a computer or laptop for the first time and enter any of the commands, or start getting ROOT rights, you should see a window asking you to trust this computer, which is now your device is connected. This message will appear every time you connect your device to a new computer or laptop. Check the box next to "Always allow debugging from this computer" and click on the "Yes" button. After that, you can get ROOT rights and perform other actions that required you to enable USB debugging mode to perform.
What to do if you have enabled USB debugging, but the device is still not detected?!
The first thing you need to pay attention to is the presence of installed drivers on the connected computer or try to update (reinstall) them. Also, the most common user mistake is that the device is in a locked state at the time of connection, so it is worth unlocking it. Attention!!! USB 2.0 ports should be used for correct operation, USB 3.0 ports are not recommended for such operations.
If you did everything correctly, but you still couldn’t establish a connection with the computer, then you should try changing the way you connect to the computer. To do this, you need to: connect the device with a USB cable to the computer, and then on smartphone e or tablet e in the retractable curtain, click on "USB connection" and in the window that appears, select the PTP mode.
If you do not have a USB cable handy, but you can connect using Wi-Fi, then the following instruction will be useful for you.
So, the first thing you have to do in order to activate the connection of your device via a Wi-Fi network is to get the IP address and port of the device (this operation requires ROOT rights), you can do this using the program ADB Wireless, which can be downloaded from Google Play absolutely free.
After launching the ADB Wireless application, you must press the red button, which will turn red in the future, and wait until the connection is made. At the bottom, information will be displayed in the form adb connect (your IP address).
After performing all the manipulations, we can consider the connection to Android successful, which allows us to use commands in the future adb.
How to enable USB debugging on an Android smartphone or tablet
Android users who want to modify firmware or use additional features of the operating system are faced with the need to enable USB debugging. In this article, we will understand what this hidden feature is for and how it can be enabled on different gadgets.
USB Debugging or USB-Debugging is primarily used by developers, which explains the location of this option. Enabling the function allows programmers to check the health of the system or a separate application, make backup copies of the work done, for example, the created application that is in testing mode, flash the gadget, restore its operation in case of unexpected system failures, or get Root rights. Some of these features can be useful not only for developers, but also for ordinary users when copying files or folders from a PC to a smartphone or vice versa. This concludes the introductory part and proceed directly to the ways to enable USB debugging.
Enable USB Debugging
Regardless of the manufacturer of the gadget or the version of the operating system, the debugging function is located in the settings. Only in the settings, its location differs depending on the version of the operating system or the manufacturer of the gadget. So, we present the most common places to look for an option.
In a considerable number of Android devices, to enable debugging, just go to the settings, open the Development item and check the box next to the USB Debugging option.

In some gadgets, in the settings, instead of the Development item, there is For developers. This is just a spelling of the name, so the process of enabling debugging remains the same.
In the third case, the item intended to enable debugging can be located in Applications. If you do not see the words Development or For Developers, then go to Applications and look for the item there. This location is used in Android versions 2.2 - 3.0.

On some gadgets, Developer options are located in the More item in the device settings. This is where you need to look for the USB Debugging option.
In versions of the Android operating system above 4.2, Developer options are hidden in the default settings. Fortunately, they can be returned. To do this, you need to go to the information item about your smartphone or tablet, which, as a rule, is located in the settings themselves or in the System section. In the paragraph we find the line Build number and click on it about 10 times. Returning to the settings, you will notice that the item For developers is unlocked and visible. Note that when using gadgets from Samsung, LG or Xiaomi, the item about the device is located in the General section in the device settings.
Actions after enabling USB debugging

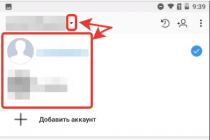
When connecting the gadget for the first time after enabling debugging, a pop-up window will appear on the display, which is designed to confirm that you trust the computer to which the Android device is connected. Note that a similar request will appear every time you connect your gadget to a new computer or laptop. Checking the box in the pop-up window and clicking the OK button will enable USB Debugging.
In some cases, the gadget may not be immediately detected by the computer after debugging is enabled. In this case, you need to check the availability of Android drivers on your computer. Some gadgets are not detected when the screen is locked. We also do not recommend using the USB 3.0 connector. Finally, a fairly effective way can be to switch the connection mode to the computer. To do this, after connecting, you need to pull the information curtain and change the connection mode to PTP.
By activating USB debugging using one of the above methods, you can easily get Root rights or test custom firmware and other applications.
On devices running the Android OS, access to any actions that make changes to the system is hidden by default. For example, through a USB connection of a smartphone to a PC, you can perform simple actions to transfer images, audio or videos. Now we will tell you how to expand the capabilities of the gadget, i.e. how to enable usb debugging on android.
We, summarizing, can say that without enabling USB debugging, it is impossible to perform the following actions:
- Restore normal operation of the device.
- Obtain Superuser rights (ROOT).
- Install a program that was downloaded from a third-party resource.
- Flash your smartphone or tablet.
- Send any file from your computer to your Android gadget.
- Make a copy of any folder from the smartphone's file system or a backup copy of the applications available on the device.
The debugging mode is aimed primarily at developers, but, taking into account the foregoing, we can conclude that an ordinary user also has to resort to this tool in certain cases.
How to enable usb debugging mode on android
Although it is not difficult to activate this option, users have a problem finding its location. We'll look at the options below.
On Android versions 2.3
To activate debugging, go to " Settings", open the section" Applications", we find the item" Development” and in it, opposite the line “ USB Debugging»Tick the box. At the request of the system, press the button " Yes", ready:

On versions of Android 4+
In this case also, through " Settings" In chapter " System» find the item « About phone» and press « Version Information«:

Next, we find the parameter " Build number” and make a few quick, light clicks on it until the message “ You became a developer". Now, back in the settings section " System” we will see that a new item has appeared - “ For developers", click on it and opposite the line" USB Debugging» put a tick:

On some models of Android devices, when you connect your smartphone to your computer, the " USB connection options", then here you will also need to check the box" USB Debugging«:

In the system request for permission to debug, confirm the action by clicking on the " OK«:

On Android 5+ versions
As in previous versions, the first step is to go to " Settings", then go to the item" About phone", find the string " Build number"," tap "on it several times until a joyful notification of the system appears below" You have become a developer!". After that, we return to Settings"and click on the line" Additionally«:

We can see that now there is a menu " For developers", open it and set the slider in the active position in the line" USB Debugging» on the request for permission to debug, press the button « OK«:

On versions of Android 6.0
In conclusion, we bring to your attention a video tutorial on how to enable usb debugging mode on Android sixth version:
And on this we say goodbye to a new topic, we hope that this material was useful for you and now you can confidently enable developer mode on your smartphone. Good luck!