"You may not have permission to use this network resource" error message when you try to access a Windows XP-based computer over a network
Have you seen such a message when sharing a folder on the local computer? probably not once :), so today I once again received such a message.
and so there is a problem:
When you try to access a networked Windows XP-based computer, you may receive an error message that resembles the following:
No access to xxxxxxx. You may not have permission to use this network resource. Access denied.
Note. In this error message, xxxxx is the IP address or name of the computer running Windows XP.
Below are the solutions that helped me.
trying to solve by the Microsoft method
To resolve this issue, set the restrictanonymous registry entry to 0. To do this, follow these steps:
Click the Start button, select Run from the menu, type regedit, and then click OK.
Locate and double-click the following registry key:
HKEY_LOCAL_MACHINE\SYSTEM\CurrentControlSet\Control\Lsa
Double-click the restrictanonymous option in the right pane.
Make sure the Value field is set to 0, and then click OK.
Close Registry Editor.
Restart your computer.
If it gave such an error in Windows XP - when trying to access over the network \"There is not enough server memory to process the command\"
then we do the following
- Click the button Start and select command Run.
- Enter the regedit command and click the button OK.
- Find the following section:
HKEY_LOCAL_MACHINE\System\CurrentControlSet\Services\LanmanServer\Parameters
- In the right pane of the Registry Editor window, double-click the setting IRPStackSize.Note. If the parameter IRPStackSize missing, create it by doing the following:
- In the Parameters registry folder, double-click in the right pane of the Registry Editor window.
- Move the cursor to the item Create and click the item dword parameter.
- Enter IRPStackSize. Attention! The parameter name "IRPStackSize" is case-sensitive.
- For Number System, select Decimal.
- In the Value field, enter a value greater than the current value. If the parameter IRPStackSize was created as a result of the steps described in point 4, the default value will be 15. It is recommended to increase the value by 3. Thus, if the previous value was 11, enter 14 and click the "OK" button.
- Close Registry Editor.
- Restart your computer.
These steps helped me! I hope they help you too. Set the parameter > 20 immediately.
The issue is detailed on the website.
When trying to access a folder or file, the user may receive a system message “Access to the specified device, path, or file is denied. You may not have the required permissions to access this object." The culprit for this dysfunction is usually some kind of virus or anti-virus software that blocks access to the desired file. Below I will analyze in detail the essence of the problem with accessing files, and also explain how to fix it.
Reasons for access denials
This error message occurs when a user tries to run a file or open a folder he needs, but access to them is blocked for various software and hardware reasons.
Such reasons for "Access denied to the specified device, path or file" can be:
- Blocking by a virus of access to files necessary for the user;
- Blocking access to files by the antivirus;
- The folder or file required by the user is damaged or deleted from the PC;
- Network access to the required file (directory) is lost;
- The shortcut of the required file is damaged;
- Windows OS has blocked access to the file, considering it suspicious.
How to fix device, path or file access denied
To get rid of the "access denied" error, you need to do something like this:

In the case of network access, make sure that your network is active and the file is in its original location.

Conclusion
In most cases, the cause of the "Access Denied" error is the activity of virus and antivirus software that blocks access to the required files or folders. To solve this problem, first check your PC for viruses, disable your antivirus, and only then use the other alternatives outlined in this material.
When trying to connect to another computer on the local network, or when trying to access a shared "shared" network folder, the user may encounter the message "You can't access... You may not have permission to use this resource"(further text omitted). Typically, the occurrence of an error is associated with a situation in which the account does not have the appropriate rights to access another PC (or a shared network folder).
No access - list of reasons
Consider a list of causes that cause problems accessing another PC on a local network. They may be as follows:
- The account under which you connect to another computer (or a “shared” folder) does not have the appropriate access rights;
- Network access to another PC is blocked by a virus program;
- Your computer (as well as the target computer) does not have the "Client for Microsoft Networks" components, as well as the required "File and Printer Sharing Service for Microsoft Networks" installed;
- For some reason, the Browser Service service is disabled on your computer with an archaic version of the OS;
- The user does not have permission to access the desired directory at the NTFS rights level.
How to fix the no access issue
To solve problems with the lack of access “You may not have rights to use this resource”, we recommend using the methods outlined below. At the same time, it does not hurt to check your computer for viruses (for example, using Dr.Web CureIt! ) - in some cases they are the causes of this problem.
Method number 1. Checking the presence of the necessary network components
- First of all, you need to check if the following components are present on the PC - this is "Client for Microsoft Networks".
- And also do not forget about the "File and Printer Sharing Service for Microsoft Networks."
- To do this, click on the "Start" button, in the search bar, enter ncpa.cpl and press enter.
- In the list of network connections that opens, hover over your network connection, right-click, and select "Properties".
The list of components for this connection opens. Here look for the indicated two components, and if there are none, then click on the "Install" button and add them to the system.

Method number 2. Using the system troubleshooter
To remove network problems, you can use a special system tool designed to solve this and similar problems. Launch "Control Panel", then "Network and Internet", then select "Homegroup". Here, click on "Run the HomeGroup Troubleshooter". After that, the appropriate diagnostics will be carried out, and, possibly, the existing problems in the connection will be resolved.

Method number 3. Reset local security settings
In some cases, problems with accessing another networked PC are caused by a number of restrictions in the security settings. To reset these settings, run the command prompt as an administrator, and type in it (or copy from here):
secedit /configure /cfg %windir%\inf\defltbase.inf /db defltbase.sdb /verbose
and then press enter. After performing the reset, restart your PC.

Method number 4. Create a guest account
The following method helped a number of users to get rid of the error “No access to ... You may not have rights to use this resource”:

Method number 5. Checking for access to the desired folder
To check access to the desired network folder, do the following (operations must be performed on the PC where this folder is located):

Now we need to set access to this folder via NTFS. Once again, hover over this folder, click on the right mouse button, select "Properties". Go to the "Security" tab, and click on the "Edit" button at the top.
Click on "Add", add the already mentioned group "All" (just enter the word "All" in the appropriate field), and click on "OK". Then set the permissions for the "Everyone" group (put all the checkboxes below "Allow"), and click on "OK". The "no access to.." problem can be solved.
 Set all permissions, and click on "OK"
 Conclusion
If you have problems accessing a network computer (or network folder), which are accompanied by the appearance of the indicated error text, I recommend that you follow the whole range of the listed tips, from the simplest to the more complex ones. I recommend paying special attention to the first three methods, thanks to them the lion's share of problems with network access on user PCs was fixed.
Problem: Unable to access network resource. The network folder is displayed...
but when I try to log in, the system displays a message:
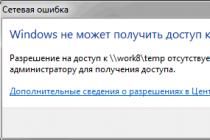
Windows cannot access \\computer\network_share. Permission to access \\computer\network_share missing. Contact your network administrator for access.
In the Windows XP operating system, a similar message sounds like this:
No access to \\computer\network_share. You may not have permission to use this network resource. Please contact the administrator of this server for the appropriate access rights. Access denied
Why is there no access to a network resource?
The reason may be the following factors:
- The user does not have permission to access the share.
These rights are configured on the tab Access and are relevant only for configuring network access. - The user does not have permission to access the folder at the NTFS permission level
Customize on the tab Security. This setting controls access rights for both network and local access. - The user does not have network access permissions or NTFS rights.
How to share a network folder with all users
The settings must be made on the computer where the network resource is located.
Go to Computer Management:

Opening the section Shared folders. Highlight a subsection Shared Resources and find out the local path to the folder that is open to the network.
In our example, we see that the network resource temp
matches local path c:\temp
:

Find the local folder, right-click on it and call Properties:

1 The first thing to check is network access permissions. Opening a tab Access and press the button Advanced setup:

We press the button Permissions:

We check for whom network access is open, and we also check the rights.
In order to enter the network resource, all users could enter the list Share Permissions need to add a group Everything.
In our case, full access for the group is open. Everything. So, everything is in order with network permissions:

2 The second thing to check is NTFS permissions. Go to the tab Security and check the global permissions to access the folder.
In our example, we see that only users and administrators of the local computer can see and enter this folder. This means that if we try to log in to a network resource as a user who does not have an account on the local computer, we will be denied access.
In order to allow access to the folder to all users, even those who do not have an account on the local computer, you must add the same group to the list Everything. To do this, press the button Change:

We press Add:

Adding a group Everything and press OK.
Attention! It is NOT necessary to search for a group in the list of groups and users. You can simply write the word “All” with your hands - always with a capital letter.

A strange error occurred while allocating one subnet (main domain) to another subdomain (new domain) in the same forest. Users from the primary domain do not see public folders on the server of the new domain. Windows XP computers don't report anything, they just show empty contents of shared folders. And on "net view \\dcgs") I get "Error 5. Access denied".
And Windows Server 2008 and other later operating systems specifically report the error:
No access to \\dcgs. You may not have permission to use this network resource. Please contact the administrator of this server for the appropriate access rights. Login failed: Destination account specified incorrectly.

The most interesting thing is that the list of shared folders is perfectly displayed by IP address:
\\192.168.200.1\ and when displaying by NetBIOS and DNS names, the above error appears. Most likely a DNS issue. Therefore, I will describe a more complete solution - both from the client side and from the DNS server side.
Step 1. Client
On the client side, you need to follow these steps:- On the DNS server, remove old entries that prevent proper mapping.
- On the client (from where access is made), flush the DNS cache with the command. ipconfig /flushdns
- Use nslookup on the client to verify that the name resolves to the correct IP address. Sometimes, the problem of incorrect permission can be in the hosts file and the like.
- You must end the current session on the client and sign in again. The shares should now be accessible.
Step 2. Client
Sometimes, after the actions taken, the error may reappear. The reason may be in the DNS suffixes of the connection:C:\Documents and Settings\user>nslookup Default Server: dcgs.gs.k43.guap.ru Address: 192.168.200.1 > dcgs Server: dcgs.gs.k43.guap.ru Address: 192.168.200.1 Non-authoritative answer: Name: dcgs.guap.ru Address: 194.226.199.245 > C:\Documents and Settings\user>ipconfig /all IP configuration for Windows Computer name. . . . . . . . . : COMP16 Primary DNS suffix. . . . . . : k43.guap.ru Node type. . . . . . . . . . . . . : Unknown IP routing enabled. . . . : No WINS proxy enabled. . . . . . . : none The order in which DNS suffixes are looked up. : k43.guap.ru gs.k43.guap.ru LAN - Ethernet adapter: DNS suffix of this connection. . : gs.k43.guap.ru Description. . . . . . . . . . . . : Intel(R) PRO/100 VE Network Connecti on Physical address. . . . . . . . . : 00-11-22-33-44-55 Dhcp is enabled. . . . . . . . . . . : Yes Auto tuning is enabled. . . . . : yes IP address. . . . . . . . . . . . : 192.168.200.2 Subnet mask. . . . . . . . . . : 255.255.255.0 Default gateway. . . . . . . . . . : 192.168.200.1 DHCP server. . . . . . . . . . . : 192.168.200.1 DNS servers. . . . . . . . . . . : 192.168.200.1 Rent received. . . . . . . . . : December 12, 2012 9:53:24 am The lease expires. . . . . . . . . : December 20, 2012 9:53:24 AM In this example, we first used a different DNS server for the k43.guap.ru domain, and not the current gs.k43.guap.ru domain. The machine is in two domains and is logged in as a user from another domain. Somehow this results in the "wrong" order of the DNS suffixes.
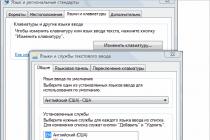
In the network adapter settings, in the Internet Protocol (TCP-IP) settings, on the "General" tab, click the "Advanced" button and specify the desired order of DNS suffixes:

After that, we check the correctness of the permission:
C:\Documents and Settings\user>ipconfig /all Windows IP configuration Computer name. . . . . . . . . : COMP16 Primary DNS suffix. . . . . . : k43.guap.ru Node type. . . . . . . . . . . . . : Unknown IP routing enabled. . . . : No WINS proxy enabled. . . . . . . : none The order in which DNS suffixes are looked up. : gs.k43.guap.ru k43.guap.ru LAN - Ethernet adapter: DNS suffix of this connection. . : gs.k43.guap.ru Description. . . . . . . . . . . . : Intel(R) PRO/100 VE Network Connecti on Physical address. . . . . . . . . : 00-11-22-33-44-55 Dhcp is enabled. . . . . . . . . . . : Yes Auto tuning is enabled. . . . . : yes IP address. . . . . . . . . . . . : 192.168.200.2 Subnet mask. . . . . . . . . . : 255.255.255.0 Default gateway. . . . . . . . . . : 192.168.200.1 DHCP server. . . . . . . . . . . : 192.168.200.1 DNS servers. . . . . . . . . . . : 192.168.200.1 Rent received. . . . . . . . . : December 12, 2012 11:49:57 AM The lease expires. . . . . . . . . : Dec 20, 2012 11:49:57 AM C:\Documents and Settings\user>nslookup Default Server: dcgs.gs.k43.guap.ru Address: 192.168.200.1 > dcgs Server: dcgs.gs.k43.guap. ru Address: 192.168.200.1 Name: dcgs.gs.k43.guap.ru Address: 192.168.200.1 >
Step 3DNS Server
On the DNS server, check the interfaces on which clients are listening:
Since records of type A are created in DNS for interfaces marked with checkmarks, the following situation may theoretically arise. Let the DNS server listen on two addresses: 192.168.200.1 and 169.254.0.17. When a client resolves a server name to an IP address, it can encounter any of the specified addresses. If the firewall settings set permission to connect to 192.168.200.1, and the rest is prohibited, then when receiving the address 169.254.0.17, the client will not be able to connect to the DNS server. Or if the second address was used as a RAS connection (essentially a modem connection), but when the connection is broken, this address is no longer available, but the client cached it, then the connection problem will occur again.
Step 4DNS Server
This step is optional. There is a useful checkbox in the DNS server settings:- Go to the properties of the DNS server.
- In the "Server Name - Properties" window, select the "Advanced" tab.
- Check the "Allow automatic deletion of obsolete entries" checkbox. By default, the period is 7 days. Choose the most preferred one.