Timelapse is a spectacular and very popular type of photo and video shooting with a reduced number of frames. As a result, at normal speed, accelerated playback of the picture is obtained. In this way, you can shoot various phenomena and processes (running clouds, traffic on city streets, melting ice), which take several hours in time, and then show them in a video in one minute.
However, many do not dare to try themselves in time lapse, as they are sure that this effect is feasible only on advanced SLR cameras. In fact, you can shoot an interesting accelerated video using an Android smartphone.
In our article, we will tell you step by step how to make a timelapse on a mobile device, and what is needed for this.
Step 1: Prepare your smartphone
To shoot a quality timelapse, it is important to meet certain conditions so as not to be disappointed in the end result. And you need to start, in fact, with the gadget itself:
- A smartphone should have a good camera that can shoot even in difficult conditions, for example, at dusk.
- Make sure that the device has a large amount of memory. One minute of high-definition video takes from 100 to 300 MB. Therefore, before shooting a time lapse, you need to either free up more space in the device’s memory, or set up the camera to save photos and videos to an external SD card.
- Charge your smartphone to 100%. The fact is that shooting timelapse can take more than one hour. If you are not sure that the battery capacity is enough for the entire time lapse preparation process, connect the charger or power-bank.
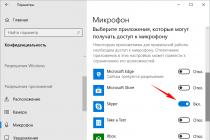
- To prevent an accidental call from interrupting your work, set the Do Not Disturb mode. You can do this in the "Profiles" section of your phone's settings. In extreme cases, you can remove the SIM card from your mobile phone.
Among the Fly smartphones, models with powerful processors, 13 MP cameras and capacious batteries are ideal for creating timelapse according to all the necessary parameters:
- Fly Selfie 1
- Fly Cirrus 16
- Fly Cirrus 14
- Fly Cirrus 13
- Fly Cirrus 12
- Fly Cirrus 7
By the way, it can also be used as an external charger due to a capacious 5000 mAh battery, and Fly Selfie 1 allows you to use the front camera for timelapse shooting - its resolution is 13 MP.
Step 2: Stabilize your smartphone
Timelapse shooting is carried out on a firmly fixed device. If you shoot video handheld, camera shake can greatly ruin the effect of fast motion video. Therefore, the smartphone must be fixed in a tripod. For details on how and with what help this can be done, read our article "Tripod for a smartphone". The best option is a tripod or flexible holder.
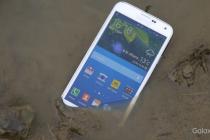
However, a stabilizer for a smartphone can be made with your own hands from improvised means. To do this, you will need a couple of clothespins and a pen (a thick felt-tip pen or pencil will also work). Here is a tripod for Fly Cirrus 12 we made in just a couple of minutes:

Step 3. Finding an Idea
It is clear that it makes no sense to shoot a static object using time lapses. Objects in the frame must move, even if it takes several hours. And here your possibilities as an operator are endless. The most obvious is to install a camera in a window, filming a crowded street or traffic. A spectacular video can be obtained if beautiful cumulus clouds float in the sky.
However, excellent video will turn out not only in an urban environment. By installing a smartphone in a field or in a forest, you can make a beautiful video with the movement of insects or falling leaves.
Step 4. Selecting an application
Over the past few years, quite a few applications have been released for Android designed to capture timelapse. We have chosen the most convenient and reliable, which even an inexperienced user can handle.

Android application that allows you to create two types of timelapse:
- Photo Lapse
- Video Lapse
The first type can be used to record processes that take several days or weeks to complete, such as losing weight, gaining muscle mass, or growing a flower. Accordingly, the second type is suitable for capturing the movement of objects in the frame. You can add the finished video to YouTube directly from the application, as well as watch the best time-lapses of other users.

A feature rich app for creating amazing time lapse videos on your device. Framelapse lets you create spectacular time lapses effortlessly with a simple and intuitive interface.
The main functions of the application
- Frame interval for speed adjustment
- Video length
- Set to automatically stop recording
- Built-in calculator to adjust recording duration
- Auto focus options.
- Self-timer, white balance, color effects, exposure compensation
- Video resolution and rotation.
- Instant playback and fast rendering
- Frame rate indicator
For those new to timelapse, the app contains detailed guide and a list of frequently asked questions.

An extensive set of settings and ease of use - for this Lapse It application is loved by a huge number of users. In the convenient menu of the program, you can set the shooting frequency, select quality up to 1080p, add music, export to H264, MP4, MOV and FLV.
Here you can also watch and be inspired by the best timelapse videos and add your own masterpiece.
Step 5. Shooting a timelapse
So, if you have prepared a smartphone, come up with an idea, picked up an application and installed the gadget on a tripod, you can start shooting. In our case, we used the Time Lapse Camera app to demonstrate the melting of an ice cube.
Working with the application is extremely simple:
- Choose the type of time lapse (in our case, video)
- Open the side menu
- Choose a resolution (it is better to set the maximum)
- Set the frame interval (from 6 to 24 seconds)
- Choose the maximum duration (from 1 minute to infinity)
If desired, you can set the recording start timer and filter. We used the default settings, choosing maximum resolution, 6 seconds interval and unlimited duration. As a result, the application added up 30 minutes of recording into 8 seconds. The result can be seen in this video:
Now you know what timelapse is, how to shoot such videos on a smartphone, and what is needed for this. Made a cool video? Share a link to it in the comments to this article!
If there is one thing better than videography, it's the ability to record time-lapse videos. Being able to watch different scenarios being fast-forwarded is a feast for the eyes. In a time-lapse video, the frames are captured at a much lower rate than usual, and when the video is played, time appears to be moving faster. Some smartphones already have the time-lapse feature built-in but if your smartphone does not have this feature, you can install some great time-lapse recording apps that can let you do that. so without further ado, here is a list of the 8 best time-lapse apps for Android and iOS:
If you are looking for a fast time-lapse app with almost zero rendering time, then Framelapse is the one you should download. With this app, you get a lot of control over the settings. You can change the camera settings like exposure, white balance, timer, and even apply filters to your time-lapse. And for the video, you can define the frame interval, video duration, and the orientation. With the option to let you choose the resolution and the bitrate of the app, Framelapse if one of the easiest time-lapse apps to use in this list.

If you don't mind the occasional ads that pop-up, then the free version of the app is all you should need. However, if you want the app ad-free with a few more features like custom bitrate, white balance lock, exposure lock, etc., then you can download its pro version which costs only $2.99.
When it comes to shooting time-lapse videos, Lapse It boasts all the features that you can possibly think of. Ranging from manual settings like focus mode, ISO mode, scene mode, and white balance to choosing the interval after which each frame is clicked, Lapse It gives you the complete control. Not only can you shoot time-lapse videos in the app, but also stop motion videos. And once you've shot a video, you can change its resolution, codec, frames per second, and even add an audio or an effect before finally rendering it.

The only downside of the app is that most of the features are available only if you buy the pro version that costs $2.99. With the free version, there's not much that you can do but wonder what all possibilities you'd be opened to if you buy the pro version.
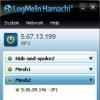
Hyperlapse is the time-lapse app from Microsoft. It has a simple user interface with the options to shoot as well as import videos. If you choose to shoot a new one, you get the option to change the video speed anywhere from 1x to 32x. And if you want to stabilize the video with the audio left intact, you can do that by setting the speed to 1x. Once the time-lapse video has been shot, you can select the resolution(720p or 1080p) and the location where you want to save your time-lapse video. You can even share your masterpiece with others after the rendering is done.


Hyperlapse is Instagram’s take on time-lapse apps and it’s the simplest time-lapse app you will ever come across. Contradictory to what you may be thinking, it doesn't require you to have an Instagram account. You can create time-lapse videos even when you are in motion and they will be stabilized using Instagram's in-house stabilization, removing any bumps that might occur during their recording. The time-lapse videos can be created up to 12x the speed of the original video and then shared with others.

The app's interface is just the camera, the option to change the speed of the time-lapse and that's pretty much it. If you'd like a simple time-lapse app that does the job well and does not bog with options and ads, Instagram’s Hyperlapse app is the one for you.
TimeLapse is a very powerful app for recording time-lapse videos. Like many other apps, TimeLapse offers manual controls like saturation, brightness, contrast, and exposure. In addition to this, you can record 4K videos and save RAW images. This is something no other app in this list offers. Along with the ability to record tilt-shift videos, you get absolutely no time-lapse flicker. And once they are recorded, you can even edit them on a frame level.

With its free version, you are restricted to only a certain number of videos. To record more, you'll have to buy its pro version. Though it costs $4.99, it is worth every penny. If you're serious about recording time-lapse videos, then this is the app that you should download.
iTimeLapse Pro brings the idea of sharing your time-lapse videos with others using the app. Share your photos to the app's gallery for others to see it and, if you want, you can see theirs too. The app clicks a series of images and, then, combines them to make a video. You can choose whether you want to click these series of images manually or after a set time interval. After the time-lapse video is compiled, you even get to add an audio before finally rendering it.

Sometimes, you may not feel like compiling a time-lapse video in a single sitting. iTimeLapse Pro lets you create different sessions so that you can save any pending video that you may want to work on later. For an app that costs only $2.99 and has some unique features, I would totally recommend it.
Like most other apps in this list, iMotion lets you create time-lapse videos while giving you the complete control of video tools like exposure, white balance, orientation, etc. In addition to this, there are features like manual mode and WiFi remote that you can use. The time-lapse videos you record are autosaved and can be shot at up to 10 fps. And once you record them, the app also gives you the option for reverse playback. Like most other apps, iMotion, too, lets you share your time-lapse videos from within the app. For an app that costs zilch, there isn't much you can complain about it.

Use the Best Time-Lapse Apps on Android and iPhone
Now that you know some of the best apps that can be used to record time-lapse videos on Android and iOS, you can go out and discover the videographer within you. These apps let you experience time-lapse the way your phone's stock camera app might not. So, try out these best time-lapse apps and let us know your thoughts. Also, tell us the app you found to be the best? Sound off in the comments section below.
As smartphone cameras are getting better each year, you are able to do much more with it than taking photos. Earlier we talked about the best and for Android. And as you can guess from the title, today, we’ll take a look at some of the best apps to do time lapse on your Android.
Time Lapse Apps for Android
1. Timelapse
This is the most stripped down version available in the Play Store. The app made the list because it is free, there are no ads, and is really easy to use. You can set duration and the recording will stop automatically.
You can reset the fps after you have shot the video and the app will render a new video. This is what I did to improve the quality of the video I shot.
Though it is free and easy to use, it is not without issues. During the tests, I found that the resolution of the time-lapse video was not up to mark. There is no way to use the front camera as well.
Verdict: The app is free and comes without any ads which are good for people who are looking for free alternatives with no in-app purchases and minimal bells and whistles.
2. Time Lapse Camera
The app name will show as Time Spirit when you download it. Not sure why some developers change the name, makes it confusing really.
That said, when you open the app, there are two primary options to choose from. One is photo lapse and the other is video lapse. In the former, you can take photos, every day or whenever you feel there is some progress, up to a max of 30, and the app will create a photo lapse out of it. It is good for gym stories where you can show your transformation over a period of time.
The video lapse option works better when you want to shoot something then and there. The developers call it video lapse so that users can differentiate between the two. It's cool by me.

You can add audio files like music in both the format, choose a max resolution of 1920×1080, and choose a duration between 1 minute to 12 hours. There is a start time which will come in handy if you want to be in the video, and you can set frame intervals. There are a number of filters to choose from. You can shoot using both the front and back camera.
I wish the app worked in the background though. You will have to keep the app open when shooting. Also, you cannot turn your screen off. The timer is only available in video lapse which I don't understand. The screen dims when you begin recording. I think this is done to save battery since recording can take a lot of time, but sadly, there is no way to control it.
Verdict: The app is completely free and there are no ads which are really cool because it comes with quite a bunch of useful features that you will find useful.
3.Lapse It
Lapse It is probably one of the most famous time-lapse camera apps in the Play Store. It is one of the few apps that are capable of doing time lapse and stop motion videos and is actually good at it.
You can use existing images or videos to make a time lapse of the same which is something I liked. It offers more control over the speed of the video. Some features that previous apps were missing but should have been there like focus, exposure, modes, and white balance are there.

4.Microsoft Hyperlapse
Hyperlapse is a simple little app from Microsoft. It is free to use and comes with no ads whatsoever. The moment you launch the app, you will be asked to begin recording your first time-lapse video.
The app is bug-free and works great but offers a limited number of features. You can adjust speed, choose between different resolutions and stabilize the audio at 1x while the video is recorded in time lapse.

Unfortunately, there is a watermark which I didn't like at all. There is no way to remove it either. The app is popular among users because of its simple UI and direct approach. I wish it had more features for advanced users.
Verdict: Hyperlapse is a cool little app that will get you started with your time-lapse video on your Android in no time. The app could use more features though.
5 Framelapse
Framelapse is another time-lapse video maker for Android that is comparable in features and price to Lapse It above. There are features like frame interval, a timer to begin and end recording, zoom, and focus, exposure and color effects, set orientation and video resolution.
It supports only MP4 video format but supports both front and back facing the camera. The pro version will remove ads, allow you to set custom video duration and frame interval, and lock exposure.

One thing that I liked is that Framelapse will allow you to record with your screen off(sleep mode) which no other app allows. I wish there was 4K support and ISO support for people who use DSLR. Still, no app that does it so far. It also lacks manual focus.
Verdict: Framelapse is a nice app that takes things further by adding sleep mode which works beautifully. It really helps save battery life.
6. Time Lapse Calculator
Installing this app on your phone before an actual Time-lapse app because it can calculate parameters of a time lapse. Now, this app comes in handy for both amateurs and professional photographers as it has a detailed set of parameters like Shooting interval, Shooting length, Shots count, Result Clip Frame Rate, Result Clip Length, Photo Size, and Total Size.

You can simply upload your requirements and the app would calculate how many frames would be required to shoot the clip, how much time, and how much space would it consume.
Verdict: This is a must-have app for all the people who want to optimize their time-lapse shoot. It calculates crucial information which you would have to otherwise guess.
Wrap Up: Time Lapse Apps for Android
If you are looking for a free time-lapse app for your Android smartphone, I suggest Time Lapse Camera because it is free and comes with more features than Hyperlapse. If you have the money and want to go professional, Lapse It and Framelapse are both good. The former has more features but the latter offers sleep mode. Depends on the situation you will be shooting in.
A scene from the movie: the main character is unable to cope with internal demons and understand what he really wants. Under an incredibly sad Radiohead track, he lets the love of his life go to another country, not wanting to torment her with his doubts. They are destined to meet only in a year. To convey to the audience the feeling of a long period of time, the director fills the space between the events on the screen with magnificent landscapes: days change into nights in seconds, flowers bloom and fade instantly - a magical spectacle captivates the eye and prepares for the next chapter of the story. To create this, the tripod-mounted device's camera must capture images at a very low frame rate. Then the photos are glued together - the so-called time-lapse is obtained.
The expression “in any incomprehensible situation, use a smartphone” can easily become the motto of almost any resident of a big city aged 20 to 40 years old. With the help of smart touch devices and fast mobile Internet, we learn the news, listen to music, communicate with friends, count the number of steps taken per day, order food and pay utility bills - the emergence of an application for shooting accelerated videos so that everyone can bring original video diaries from their holidays , was only a matter of time.
In social networks, the time-lapse technique became widespread after the release of Hyperlapse from Instagram last summer. Still - the application interface is impossibly simple, and the result is not ashamed to show to friends and subscribers. Only one thing is upsetting - the Instagram product is still the prerogative of the App Store. However, a holy place is never empty.
Applications for recording time-lapse video
Choosing the right shooting tool is determined by the operating system of your smartphone or tablet. It is easier for owners of iPhone, iPad to use the mentioned Hyperlapse.
There is no point in dwelling on the appearance of the program - there are only two buttons on the viewfinder screen: release and change active camera. Having finished with the recording, the program will speed up the passage of time on the video from 4 to 12x - the user only needs to drag the slider. After saving the video, they offer to export it ... it is clear that not to Odnoklassniki. That's it: you can't process the finished video or go back to the previous timelapse to change its speed again.

TimeLapse - Free
TimeLapse is heavy artillery or hardcore in the time lapse software club for iOS devices - whatever. The good news is that there are a lot of settings for setting, the bad news is that there are even more of them than you need. The preset modes are suitable for shooting clouds, crowds of people, watching family tomfoolery, traffic on the streets of the city, recording from a car, following the city at night, sunrise and sunset, the course of the day, and even several preset profiles for the flowering process - you have to google whether it blooms plant one or four days before capturing the event.


A timer of up to 59 seconds is enabled for delayed start of recording. White balance and focus shift changes are blocked at will - a unique feature of the application. To save battery life, the creators have provided a lever to reduce the brightness of the screen.


TimeLapse has a built-in editor where you can import previously taken photos and videos, viewing them frame by frame. IN free version created timelapses have resolution from 360p to FullHD. The picture is scaled - however, only in 16:9 proportions. There is a set of filters - sepia, vignette, inversion, color correction and other "decorations", and, among other things, a deflicker to suppress flicker. The maximum speed is 60x.


The program is simple, like the Instagram product, but it differs in support for downloaded videos from the device’s memory and turning on the flash during the process. When importing previously created clips into Hyperlapse Mobile, events on the video will run 4 times faster by default, and the limit of the application's capabilities is 32x acceleration. A fly in the ointment: after saving, a frame with the logo of the creator company and the name will appear at the end of the time-lapse, but if desired, it can be cut off in any standard video editor.
Why are these applications needed?
Clips recorded using special software and a standard video camera with subsequent acceleration will differ. Time-lapse programs stabilize the picture, even if the device itself does not have such a function. Hyperlapse from Instagram uses the gyroscope and accelerometer of the device for this, Microsoft boasts of a special image processing algorithm - thanks to it, Hyperlapse Mobile recognizes faces in the video and focuses on them. However, do not overestimate your smartphone or tablet - none of the listed applications can completely eliminate the effects of the would-be operator's shaky hands.Now there is a fashionable word - Timelapse or just in Russian - Timelapse.
What is TimeLapse and what is it for?
Usually Time Lapse was used for scientific purposes to show quickly the processes that took place. long time(destruction of rocks, weathering of the soil or change in the course of the river and other long-term natural processes)
Thanks to digital technology, TimeLapse has now become an artistic technique that allows you to emphasize dynamic processes.
Do not think that TimeLapse is filmed only by studios or professionals using special equipment.
In this article I will explain how you can shoot TimeLapse with your own hands, anywhere and how to process video in TimeLapse format using well-known programs - Adobe Photoshop, Adobe Premiere Pro.
How to start shooting TimeLapse?
Scene!
You need to decide what exactly you will shoot.
Notice how quickly the scene can change.
For example, if you want to shoot a wall on a building, it’s not a fact that something will change here even in a day or a year 🙂
For example:
- Construction - you can film how the house will be built.
- Parking - cars will accurately move and change their position.
- Changing actions - sunrise, sunset, cloud movement and other natural phenomena that will be completed in the process of shooting.
Example Video TimeLapse:
What's more, you don't even have to leave their apartments to shoot Time Laps.
When shooting a scene, it is important to pay attention to framing. After all, if you want to shoot objects at a distance of 2-3 km. the viewer will not be able to understand what exactly is happening at long distances.
The only exception is if you make a time-lapse for sunrise - that is, shoot long-range plans or very global objects - high-rise buildings, bridges.
Example Video TimeLapse:
But this does not mean that you need to go to the other side of the world to shoot TimeLapse.
You can easily find your scene to shoot.
Why not try shooting a very dynamic scene full of color and movement?
Do you think I'm talking about landscapes? No, gentlemen!
I'm talking about how beans grow!
See what it looks like in TimeLapse mode -
or the second shooting option
You have decided on the shooting location. Let's see how it works?
Shooting intervals
To accommodate a week of filming in 2-3 minutes, it is necessary to shoot the object at a certain interval. For example, you will shoot the growth of bean sprouts every minute for a week.
Let's count. We will shoot every minute.
How many frames will it be?
1 hour - 60 minutes, so 24 hours in 60 minutes = 1440 frames per day.
For a week it will be 1440 x 7 days = 10,080 frames.
Depending on the shooting interval, you can make the video smooth, without jerks.
If you want to speed up TimeLapse - you can increase the shooting interval - let's say every 5 minutes.
Of course, there will be few frames, but in my experience the video will not be very beautiful. The subject will twitch.
For example, when I was shooting clouds that were practically "frozen" in the sky due to low winds, I was forced to increase the interval to 10 minutes.
If the weather began to change and the wind increased, y reduced the shooting interval to 30 seconds.
Of course, you can speed up your video during editing, but note that the interval time should be chosen taking into account the dynamics of the scene.
If you are shooting timelapses of auto racing and seed growth, the intervals should definitely be different.
Although sometimes, long shooting intervals allow you to get amazing videos.
A simple home idea: how about taking pictures of your garden every day for a year.
You will only have 363 frames per year, but the effect will be amazing.
Now we know what is critical for the TimeLapse is the scene and the shooting interval.
Equipment for TimeLapse
cameras
How to shoot Time Lapse? Any digital technology.
Digital camera, SLR camera, mobile phone or even action camera.
The good news is that some of the devices already have a frame shooting option.
For example action sony camera HDR-AS30VW already allows you to easily make Time Lapse
In my review of the Sony action camera, I told
In principle, many action cameras have a similar option - the same GoPro. It is very convenient. You need to select the shooting interval, photo quality in the action camera settings and switch to the TimeLapse mode.
Given that the action camera has waterproof box- you can make TimeLapse even underwater. But not for long, because the battery won’t last for a long time, and you won’t be able to extend the power under water 🙂
I'll disappoint you right away, for long-term shooting with short intervals, you will need an additional source of energy. For example, it can be a laptop that is connected to the camera via USB. This is useful if you are shooting a time-lapse in nature and there is no electricity nearby.
If you shoot from a window at home or on a balcony, you can easily conduct electricity and constantly charge the action camera. Enough for days or even weeks.
Shooting time depends on the size. microSD cards And established quality frame.
If you do not have an action camera and a fancy camera?
Timelapse manually.
In this case, you can make TimeLapse even manually.
How to do it?
You can do this even with a mobile phone or digital device.
What needs to be done here?
1. Fix the device securely.
2. Disable all automatic settings (auto-focus, auto-balance and other auto-services).
It is advisable to do this so that the device does not start changing the frame settings itself depending on the illumination of the scene.
In addition, these options are very draining of your battery.
Moreover, to save money, you can turn off the display of captured photos. In order not to waste energy on an external display.
Now you can press the shutter yourself at a constant interval. Let's say count to 30 and press.
Or just set yourself a timer on your watch.
Of course, this is not very convenient, you will not be able to make such a photo session all day long. But for small videos, 2-3 minutes should be enough. If you want to add more motion effect during the time-lapse shooting, you need to move the tripod after the frame every time
How to do it - I explained in the picture
How to shoot TimeLapse with a SLR camera?
If you want to make a high-quality timelapse with a good extension, you will need a SLR camera.
Yes, of course - on a 20 megapixel camera you will get high-quality video.
But there are also disadvantages:
Time-lapse will consume your camera's shutter resource. Whether it's worth it or not is up to you.
For example shutter Canon cameras 7D which costs about 2500 dollars. - guaranteed quantity: 150 thousand operations.
Is it a lot or a little? Probably depends on how much you shoot.
Also, not all expensive DSLRs have this option in the menu. To be honest, I was also surprised why in Canon cameras with a price range of 1 to 2 thousand dollars. there is no such thing. Just like panoramic photos. How to take panoramic photos - read my next article.
The TimeLapse option is already available in some SLR cameras, for example Nikon d200,300, 700,7000 and also in action cameras GoPro, Sony.
Camera remote control
Perhaps the manufacturer believes that real professionals want to manage all the camera settings themselves.
Therefore, you need to use the camera remote control. It allows you to set shooting intervals, shutter speed and number of shots.
This way, you don't have to watch the shooting interval, and you remove the jitters that can occur when pressing the start button. These responsibilities are taken over by the controller.
Cameras have a special separate remote control connector. This connector is not only in expensive DSLRs. For example, I have 2 cameras of different classes, all have such a connector.
Canon G11, Canon EOS 70D.
Photo of the connector for connecting the camera shutter remote control.
The average cost of such a remote control is about 20-30 dollars on eBay. There are remotes that control via cable and connector - they are cheaper. And there are those who control through the radio channel.
You have a remote control in your hands, and the receiver is placed on the camera shoe and controlled remotely.
The question is price and desire.
I give an example of such wireless control panels -
Camera Power:
If you want to make a timelapse in nature, you need to save batteries.
First, turn off all the options that consume a lot of energy: Wifi, GPS, viewing the photos taken on the display, turn off the display altogether.
To create high-quality photos, always turn off automatic lens modes. It's auto-focus, image stabilization. Otherwise, if the light changes and objects move throughout the day, the auto-focus will constantly adjust and discharge your camera.
In what format to shoot TimeLapse?
RAW or JPEG. Most expensive digital cameras can shoot in two modes at the same time. To save space, I would disable JPEG and leave only the RAW format. In the next step, you will be able to improve the photo and convert this format when processing to JPEG.
There is a special adapter for Canon cameras Canon ACK-E6AC, which will allow you to connect the camera through a 220V socket to supply power constantly.
The price of this adapter on eBay - Chinese - about 12 dollars, branded, Canon - about 120 dollars.
Please note that after connecting the 220 volt adapter, you need to close the battery cover, otherwise the camera will not turn on. For this, a special groove for the power cable is provided. Closed with a rubber plug.
Canon ACK-E6 AC - this is a simple adapter adapter that simply mimics a camera battery (i.e., plugs into the battery compartment) and is supplied with constant pressure through the power supply. Now you do not need to run to change batteries. The camera will work continuously. Don't let the power indicator scare you that there is no power, but the camera is working. The fact is that branded batteries allow you to transfer this information to the camera. There is no such option for this power supply. But it is very convenient. With such a power supply, you can shoot TimeLapse for at least a whole year. 🙂
Tripods, rails and more
Desirable and mandatory condition. I’ll tell you right away, in any case, you will need to fix the camera. Otherwise, after you combine all the photos in the video, your frame will constantly twitch. It is not possible to keep the camera constantly at one point during the entire shooting period.
As a last resort, you need to mount the camera on a fixed surface. And if you still want to make a constant movement of the camera along a given trajectory, you will need a tripod.
In this case, you will be able to achieve the same vertical camera height when moving horizontally.
Do not take cheap aluminum Chinese tripods so that your camera is not blown away by the wind. It is better to buy a sturdy and heavy tripod so that it does not stagger in case of sudden gusts of wind. As a last resort, try to secure it - for example, hang a heavy backpack on it and or stretch it with guy wires.
I use a ManfrottoMK190XPRO4-BH tripod which absolutely does the job for TimeLapse, panoramic and macro shots. In my review, I described the features of this tripod here -
By the way, for shooting TimeLapse, I found in the depths of the Internet a very original solution for the movement of action cameras based on a simple kitchen timer.
Watch the video - how it works. The idea is very simple, but it works!
We take a square kitchen timer for 60 minutes. We attach the camera connector to the top cover. We install the camera, start the timer for 20 minutes. The timer knob starts to move slowly and we get a slow tour of the entire scene. A little “file” and we get a cool effect of the camera passing through the scene for 2-3 dollars. 🙂
Watch the TimeLapse Timer Usage Video -
If you no longer want to “file” and fiddle around with a camera mount, you can already take ready-made solutions. This scene walk timer already has a connector for the camera and nothing needs to be done. The price of such joy is about 15-20 dollars. eBay.
For very advanced time-lapsers, there are special rails or movable carts that can be synchronized with the camera. Photos taken from the website of the cart manufacturer - www.snailbox.ru
And if you want to achieve the effect of "passing" the camera during the TimeLapse shooting, rails will come in handy. See
How rails work for TimeLapse shooting - watch the video
Well, for very wealthy photographers, there are heads with automatic rotation control in all axes.
how it happened - watch the video
No need to limit yourself to the already standard paid expensive options.
For example, I use the TimeLapse shooting trolley that my son built for me from the Lego MindStorm EV3 constructor.
The advantages of this solution are the ability to fine-tune the stepper motor and set the trajectory of the trolley and its speed from the computer itself. You can configure all this in the children's constructor control program 🙂
The caterpillar drive provides a smooth ride, and the stepper motor allows the cart to move slowly. The trolley can be disconnected from the PC, because there are batteries in the middle of the unit, or directly controlled via a laptop. You can complicate the program - not only ride back and forth, but you can turn the cart and camera or raise it to the desired level.
How it works - watch the video.
Additional accessories for TimeLapse
Blenda- If you plan to take photos in sunny weather, take a lens hood to take away the glare from the sun.
Light filters- If you want to shoot at the sea - also take polarizing filters on the lens.
Memory card- It is advisable to take a memory card of class 10 with a size of 64GB or more. Of course, if you shoot in RAW. Yes, and in fashionable cameras with 20 megapixels. the size of a JPEG photo will be somewhere between 15-20 MB, depending on the size of the compression. Count the number of frames per shooting cycle.
Nutrition- you can take several batteries or take a booster.
What is a booster and how can it extend the life of the camera - .
For action cameras, a battery bank may come in handy. For myself, on eBay, I took a bank of 23,000 mAh - I have enough with my head. 🙂
Umbrella, raincoat - do not forget to take care of the equipment if it suddenly starts to rain.
How to set up a shoot?
We switch the lens to manual mode (now we do not have autofocus).
Turn off the stabilizer on the lens
Set the white balance to manual.
Set the diaphragm.
Set ISO (depends on the place and time of shooting - you need to try - there are no universal recipes)
By the way, Canon cameras allow you to save your settings in Custom mode - C1-C3
Once again, do not forget to turn off GPS, WiFi - if your camera has this function.
In night shooting TimeLapse reduce ISO so that the frames "do not make noise"
And most importantly - first take a few test shots and select the desired parameters. Otherwise shut down the entire TimeLapse session.
How to combine all photos into a movie in TimeLapse format?
You have captured all the frames in TimeLapse format.
Now you have let's say 2500-4000 frames of photos.
How now to combine them into one short film of the TimeLapse format (TimeLapse)?
First of all, let's go back to the basics of cinema. To watch a movie, the viewer is shown an average of 24 frames.
Therefore, you need somewhere around 24 photo frames to get 1 second of perfect video.
However, this does not mean that you need to use such a capture interval for TimeLapse.
For example, I shot with an interval of 3-5 seconds. - you can see the result here.
Test video from the balcony
Don't forget to turn on the option of sequential numbering of your photos in the camera. This is necessary so that the program correctly collects all the photos in one sequential video series.
What programs can be used to work with TimeLapse ?
The most popular are:
- Adobe Photoshop
- Adobe Premiere Pro
- Adobe After Effects
- QuickTime Pro
- Sony Vegas Movie Studio HD
At the input, you upload a package of photos and at the output, after processing, you get a video in the desired resolution and format.
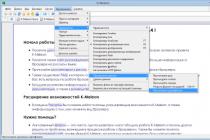
Not everyone knows that it is even possible to create a TimeLapse movie using the most popular graphics program Adobe PhotoShop.
How to mount TimeLapse with help from Adobe Photoshop tutorial video
Here is a video instruction on how to make TimeLapse using Adobe Premiere Pro
How to Edit TimeLapse with Adobe Premiere Pro - Tutorial Video
Once you've put together a video, it's natural to want to add music to the video. I would like to remind you that YouTube policy has become very strict lately. I would not recommend that you put famous tracks and music, because after a while the Channel automatically bypasses all videos and blocks them for copyright infringement.
There are 2 options - find free music backgrounds or buy a track from the official copyright holder.
And what to do with smartphones? Why are they skipped in this article?
Perhaps you `re right. The phone is always at hand.
If you look at Android applications for TimeLapse, then there are a lot of them.
I chose only free ones with a rating of more than 4 stars. .
Why not make yourself a little TimeLeps while you're at work.
Download the program and put your phone on the window. 🙂 You will see the result yourself.
Dear reader - thank you for reading the article.
If I missed something or you want to add something -