If you are assembling a computer and you need to install a cooling system on the processor, or when cleaning the computer, when the cooler is removed, you need to apply thermal paste. Despite the fact that the application of thermal paste is a fairly simple process, mistakes occur quite often. And these mistakes lead to insufficient cooling efficiency and sometimes to more serious consequences.
In this manual, we will talk about how to apply the thermal paste correctly, and will also show the most typical mistakes when applied. I will not disassemble how to remove the cooling system and how to install it in place - I hope you know this, and even if not, it usually does not cause difficulties (however, if you have any doubts, and, for example, remove back cover the battery from the phone you do not always succeed - you better do not take it).
If you removed the cooling system from the processor, then be sure to remove the remnants of the old thermal paste from everywhere you find it - from the processor itself and from the heatsink sole. To do this, use a cotton towel or cotton swabs.

It's great if you can get some isopropyl alcohol and moisten a wipe with it, then cleaning will be much more effective. Here I note that the surfaces of both the heatsink and the processor are not smooth, but have a microrelief to increase the contact area. Thus, removing the old thermal paste as thoroughly as possible so that it does not remain in the microscopic furrows can be important.
2. Place a drop of thermal paste on the center of the processor surface

Correct and Incorrect Amount of Thermal Paste
It is the processor, not the heatsink - you don't need to apply thermal paste to it at all. There is a simple explanation why: the area of the heatsink sole is, as a rule, larger than the surface area of the processor; therefore, we do not need protruding parts of the heatsink with applied thermal paste, but they can interfere (including shorting the contacts on the motherboard if there is a lot of thermal paste).

3. Use a plastic card to spread the thermal grease in a very thin layer over the entire area of the processor.
You can use the brush that comes with some thermal greases, just rubber gloves, or something else. The easiest way, in my opinion, is to take an unnecessary plastic card. The paste should be spread evenly and in a very thin layer.

In general, this is where the process of applying thermal paste ends. It remains to carefully (and preferably the first time) install the cooling system in place and connect the cooler to the power supply.
Immediately after turning on the computer, it is best to go into the BIOS and look at the temperature of the processor. In idle mode, it should be around 40 degrees Celsius.
Replacing thermal paste is the topic of my article, which will help you, dear friends, solve one of the most frequent. What do you think, why replace thermal paste? Outwardly, this tool looks like an ordinary toothpaste that we see every morning, but it is not created for the oral cavity. Thermal paste provides reliable thermal conductivity between the chips and the cooling system. In particular, this substance is applied to the processor.
In general, the paste is perfect for anything that connects to the radiator. It is applied to various chipsets and bridges on the motherboard. The heat is transferred to the radiator, which, in turn, through the fan, takes it out behind the system unit. Although, not all radiator designs need it. For modern systems that are equipped with a pair of small coolers, special gaskets should be used. You can also use heat-conducting paste, which allows you to fix the radiator on the heating element. In most cases, replacement of thermal paste is required by the processor or video card. This is what my post today is about.
Preparation phase
So, before removing the radiator and squeezing the newly purchased tube onto the microcircuits, it is required. After that, start the "machine" again, if the problem with performance and overheating has not disappeared, then you will have to resort to replacing the thermal paste.

Thus, replacing the thermal paste is the last measure that should help. If you don't have enough technical skills, I recommend contacting the "advanced" guys from service center or hand over the device to the point warranty service... Our procedure is actually very simple. All that is needed is to disassemble the system unit, remove the cooling system and apply a thin layer of paste on the processor surface. That's all. This is easier than it sounds.
Why do we need thermal paste?

To answer this question, I propose to delve into the essence of the problem. Heated air is discharged by contact specific element and a radiator. Moreover, both devices must be tightly pressed against each other. How can you achieve this effect. You can, as it should, sand both surfaces, but this will take a lot of time and effort. At the same time, manufacturers run the risk of spending too much money on the development of such a design, that is why thermal grease is actively used in electronics.
Due to the improved thermal conductivity, the developers of "hardware" increase the stability of work and the cost of their own products. Just imagine how many problems manufacturers would have with such a pricing policy. And at the moment when world manufacturers realized this truth, the first sample of a special paste, endowed with first-class properties, appeared. We can say that it was at this stage that a real revolution in cooling iron took place. Even the iron Schwarzenegger did not dream of this when he went into the past.

So, before you start reading the main part of the section "replacing thermal paste", arm yourself with the following tools:
- the most thermal
- a set of screwdrivers
- cleaning agent
- dry napkins.
With screwdrivers, you can access the insides of your computer. There are also such models of "boxes" that do not require a screwdriver or a grinder - everything is held on latches. Wipes and cleaning agent will come in handy for removing old paste.
In the first step, do not forget to disconnect your PC from the network and peripherals. We open the lid of the system unit, under which a heatsink with a processor is hidden. Most likely, you are using classic models from AMD or Intel with "native" heatsinks. Once you get to the microcircuit motherboard, the cooling system should be disconnected. It is not difficult, it is fixed with simple latches or a couple of screws. And don't forget to clean the dust off the radiator.
Remember to remove the old thermal grease.

If it is tightly stuck, alcohol will help you to soften the thermal paste and a flat screwdriver - if nothing helps at all (it should be scraped very carefully, without damaging the processor or cooling system) The new layer, which is applied after removing the old one, should be very thin. You can smudge it with a plastic card. Although for this purpose, a finger will also work perfectly.


Once these operations are completed, you can reassemble the device in reverse order. We turn on the computer and check its performance. Moreover, I recommend keeping the computer in active mode for at least one hour. If your PC is back to its former power, then congratulations!
If replacing the thermal paste did not bring the desired result, then you should disassemble system unit again. Check how tightly the radiators are pressed. It is quite possible that you have applied too little / too much paste, which is why the normal heat transfer is disturbed. Try adding / removing a little thermal paste and check the device's performance again.
If you are using a secondary cooler other than the standard cooler, I recommend that you carefully study its mounting. Do not ignore the advice of experienced users and printed instructions... If you need to remove the motherboard, it is best to use a special tool. Sometimes the motherboard does not allow you to safely disconnect the cooling system, so you have to disassemble everything thoroughly. Or take your unit to the nearest service center.
And the last question that interests everyone. How often does the thermal paste need to be replaced? Relying on own experience, I will say that a new paste can be applied once a year and a half. Clean the dust off the computer at about the same interval.
In this video, everything is shown in detail and clearly! Good luck! =)
Despite its modest size, the processor is the heart of the computer. In just one second, it is capable of performing more than a million operations, while it heats up so much that touching it you can get burned. To cool the processor, a cooler is installed on it.
The heat sink takes in excess heat and the fan dissipates it. The surfaces of the heatsink and processor are uneven, even if the surface is smooth like a mirror. One micron is enough to create an air cushion between these parts. It hinders the outflow of heated air, because it does not conduct heat well. Thermal grease fills in any irregularities, improves adhesion and thermal contact between surfaces.
Advice. If the computer does not overheat, then the paste is changed annually. At a constant temperature of the processor in the region of 70 degrees, the replacement is done once a quarter. Sometimes the cause of such overheating is a too thick layer of paste, such an application is a mistake.
Do I need to change it
Over time, the paste loses its heat-conducting properties. Completely dry thermal grease will overheat the processor. This is fraught with such troubles for the user:
- The operating system starts to slow down, and the computer shuts down at the most inopportune moment.
- Constantly elevated processor temperatures will lead to damage. A failed processor with an integrated video card will be more expensive to repair, since it is a single design.

How to choose a paste
The composition of thermal pastes includes silicone and zinc oxide. More expensive pastes contain microparticles of ceramic, metal or carbon. A simple paste will satisfy the needs of most consumers. If you are a fan of overclocking, then give preference to a paste that contains heat-conducting metals: silver, copper or gold. They greatly improve the heat transfer process. It turns out that there is very little paste compound between the chip and the heatsink, but there are many metal particles, the overwhelming majority of which conducts heat well.
Paste application rules
The correct application of the thermal paste is fundamental to good cooling. The slightest flaws will nullify the work of the most powerful and productive cooler. The basic principles are as follows:
- the thickness of the layer should be minimal;
- thermal paste must completely cover the surface of the chip;
- gaps and gaps are not allowed, the application must be continuous;
- on a round chip, the paste is applied with a dot and pressed with a radiator, under pressure the drop will be evenly distributed;
- on a square processor is applied in several ways: with a cross, parallel lines and the method of distribution with a finger or credit card.
Advice. Do not detach the radiator after installation to see if the thermal paste is evenly distributed. Thus, you will break the adhesion of the surfaces and you will have to start the process again, completely removing the already applied layer.
Practical part
First of all, you need to prepare the surface. Remove the old thermal paste with a cloth soaked in alcohol. You cannot use petroleum-based solvents for this purpose. They will not only destroy the sole of the radiator, but also permanently plug microcracks. The greasy layer cannot be removed in the future. Thermal paste will not be able to fully fulfill its function.
After cleaning the surface, do not touch it with your fingers to avoid leaving greasy marks. Sand the surfaces with sandpaper if necessary. Then follow these steps:

- Apply a drop of paste to the chip. About the size of a grain of rice. We do not put anything on the radiator, since the radiator area is larger and the excess can get onto the motherboard, thereby closing it.
- Now you need to distribute the paste in a thin, even layer. This can be done with your finger, credit card, or the device that comes with the thermal paste. When using a glove, make sure that talcum powder does not come into contact with the thermal grease. This will reduce heat transfer.
- Now we very carefully put the cooling system in place at a slight angle to avoid the formation of air bubbles.
- Do not smear the paste on the round chip. We put the droplet in the center, and then press the radiator on top. The paste will distribute itself evenly from the center to the edge.
- Connect the cooler to the motherboard.
- Build and turn on your PC. Make sure the cooler is turned on.
- Enter the BIOS when the system starts up. This can be done by pressing the Del key. If you did everything correctly, then the processor temperature should be 40 degrees. The same goes for the video card.
The effort spent freshening up the thermal grease on the processor and graphics card will pay off handsomely. The temperature of the device will be within normal limits, the fan will not make much noise, and the PC will freeze.
Replacing thermal paste on a computer: video
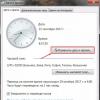
We set, then “Computer”, “Sensor” and we can clearly see the temperature of all “iron”, which is subject to heating. The picture shows "not critical" temperatures, but a week ago it was different. 
I will tell you one case about my home PC (the screen of which you see) and how the Aida 64 program helped me Extreme Edition... Somehow I was impatient to change the thermal paste at the same time, after all the operations I had done, I was happy to put the entire system back together, screwed on the side covers and sat down at my "car" ... I immediately wanted to check the result of my work and launched AIDA when I saw the CPU temperature - 90 degrees, it became bad, this is with an almost "complete simple" system. Naturally, I took off the PC case cover and saw my jamb (it’s not called otherwise) the cooler on the processor was turned off (and the BIOS settings for overheating of the “stone” were not set). This is how AIDA saved me from going to the store.
Digress, let's continue ... For all the gestures I did, I needed: a clean rag, alcohol, a vacuum cleaner without attachments, a paint brush, thermal paste, see the picture (a 1.5 gram Syringe is enough for you three times for sure) and some tools.


Replacing thermal paste on the video card
Let's start with the video card, release it, unscrew the bolt and snap off the clamp, as shown in the figure.

Councilor, tk. the bolts are small and there will be a lot of them, take any box (you can from matches). We will put the bolts into the box, then it's easier to find, because something will always be lost, roll up, roll off or vacuum up ... More important point, I wrote about a brush and a vacuum cleaner, so it is imperative to clean all the parts of the computer with a brush (since the dust there has been coking and needs to be "disturbed"). Then carefully, without touching the "iron", remove all the dirt with a vacuum cleaner. No thermal paste will help if the cooling system (grilles, cooler) is clogged with dust.
We take the video card and unscrew the four bolts that hold the cooling system (in different models differently) and turn off the cooler (see pictures). I turned off the cooler with pliers, very carefully, slightly swaying we pull it towards ourselves. We remove the cooling, also neatly, without any sudden movements - horizontally to the board, swinging it.


We removed the cooling of the video card and what do we see ?! The dry, gray mass is the old thermal paste and must be completely removed. We need a solvent (in our case, alcohol), a plastic card and a rag. Because it's easier with the grill (it's hard to damage it, unlike the processor and chipsets), just take a plastic card to clean off all the remnants of thermal paste (very carefully), wipe the grill surface with a cloth moistened with alcohol and let it dry for a couple of minutes. See pictures.


Now the video card processor itself (very carefully, without haste).
We remove the old thermal paste (in no case scratch the surface of the "stone"), I first blotted the old thermal paste with an alcohol-alcohol cotton swab, and then carefully wiped the video adapter processor with a cloth (you can also remove it with an eraser - the main result is the result).
Next, we apply the thermal paste to the processor, in a thin layer, gently 1-2 mm, so that it does not protrude beyond the edges, because under the influence of heat, the thermal paste will spread over the entire surface (here just oil porridge can be spoiled;). In this case, I used a cheap thermal paste "KPT - 8" tube of 125 grams (I do not advise saving on thermal paste as I do - it is better to buy a 1.5 gram syringe - about 250 rubles). To apply and distribute over the surface of the "stone", I used a plastic card, applied thermal paste to the edge of the card and gently spread it evenly.

That's it, you can put the video card back together, I advise you to screw the bolts with a "cross" and do not forget to connect the cooler back !!! We put it aside.


Replacing thermal paste on the processor
The queue has come to the "heart of the computer" (the main processor). We turn off all power from the motherboard, turn off the processor cooler, system coolers (if any), front panel button connectors, SATA connectors, front panel USB devices (card readers and additional USB outputs) and front panel audio outputs.

We unscrew the processor cooler (4 bolts - put it in the box), release the grill that stands under the cooler (if necessary, be sure to remove the dust) and gently shaking it horizontally relative to the motherboard, remove the grill. In no case do we abruptly pull it - this can damage the processor's "legs" (bend it or, worse, break it off). As with the video card, remove the old thermal grease from the grill.


We clean without removing the processor surface and remove the dust that has accumulated under the "stone" cooling system. The computer on which I do this procedure and photograph in operation for 1.5 years - think what is going on with you :).

This is how the processor should look like after cleaning.

We take thermal paste, apply it to the processor surface, snap the grill back, screw on the cooler and immediately connect it to the power supply to the mat. board (so as not to forget later).


We figured out the processor, exhaled. :)
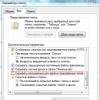
Now let's take care of the South Bridge (highlighted in a red rectangle in the picture), try to keep your attention and accuracy in mind. Completely around the perimeter of the motherboard, unscrew all the bolts that hold it about 8pcs with a Phillips screwdriver. We take out the motherboard, turn it over and see that the radiator grill is held by two plastic fasteners. On the reverse side, press on the fastener with your finger (there are springs) so that it crawls out onto you and with pliers squeeze the "burrs" of this retainer. Thus, we alternately squeeze out two fasteners on the front side of the motherboard, slightly shaking the grill - remove.

As I noticed that the "native" thermal paste on bridges is similar in properties to resin and it is very difficult to remove it, but we have no place to retreat ... I took a thin flat screwdriver (at my own peril and risk) and with very gentle, filigree movements removed all base of thermal paste with grate and chip. Then he degreased with an alcohol-free cloth and removed the residues. Again, you choose the tool that is more convenient for you, it can be a plastic card, an eraser, a wooden ruler, etc. The main thing is not to damage it mechanically.


Here's what happened. Let it dry for a couple of minutes.
Here I did not save and took a good expensive thermal paste, the pictures are given at the beginning of the article, carefully squeezed the contents out of the syringe onto the chip and, waving the tip of the same syringe, distributed the thermal paste over the surface. We put the grating back in, squeeze out the fasteners one by one on the back side of the "mother" and use a flat screwdriver to open the fasteners (make sure that the fasteners do not fall out back). We put everything in reverse order and remember the order of connecting all devices. You can start AIDU and see the result of the work done - the temperature.
Yes, and at the end of the article, I'll remember how I bought it new computer(about 5 years ago) and a year later I got under the processor ... what a surprise it was that the guys who assembled my PC in the computer salon did not even bother to drip thermal paste.
Moral: Hope for the service, but do not make a mistake :) Good luck to everyone !!!
Hello everyone. As I promised, I'm talking about applying thermal paste. In the last article, let me remind you, we learned, and today we will learn how to properly apply thermal paste.
There were times when there was not a lot of information on the Internet. Having learned about something interesting, people tried to experience everything themselves, not really knowing how it was done and why. But these are people ... they have logic. Its. Not always logical. As a result, it turned out it was not clear what.
So it was with the first attempts to apply thermal paste - they applied it in the wrong place, not so much and not as much as needed:
Now I need to say thank you to the Internet! You can find any information. But you have to be careful, because not all information can be trusted.
Correct replacement of thermal paste on the processor
As I said, not everything you read on the Internet can be trusted. And there are enough advisors. Be careful, you may be advised to use solid oil instead of thermal paste. Yes, I've seen this on the forums.
How often should the thermal grease be changed?
First you need to understand if you need a replacement thermal paste. You should not listen to "experts" who recommend changing it every six months. Delirium is everything. Yes, it dries up over such a period, but this does not mean at all that it needs to be changed. For your information, only when it dries, it begins to perform its functions 100%. And when you first apply it, the thermal conductivity will not be maximum.
So remember - there is no mandatory period for replacing thermal paste! You need to proceed from the circumstances. 
Each processor model has its own critical temperature, so do not stick to the generally accepted indicators. There is no STANDARD optimum temperature. Everything is individual.
So, if the system malfunctions precisely because of the processor temperature, then it's time to replace the thermal paste! In other cases, it’s better not.
Still her have to replace if you are removing the CPU cooling system. And also it has to be replaced every time in the laptop when it is dust-free. Because in a laptop, in order to clean the cooling system from dust, it must first be disconnected from the processor. By the way, if yours, then it's time to clean it from dust.
I think the question “ How often should the thermal grease be changed?" I answered. Moving on.
When you remove the heatsink of the cooler from the processor, you will see residues of dry thermal paste on both the processor and the heatsink. Before applying a new one, you should get rid of the old one, otherwise you will not notice the benefits of replacing the thermal paste.
By the way, sometimes it happens that the heatsink dries to the processor so hard that it is not so easy to disconnect them. In this case, do not try to use a knife, screwdriver or other flat metal objects. It will be enough to twist them along the central axis using brute force. But be careful not to bend the processor legs.
The second way to remove the heatsink from the processor is to heat them up with a hairdryer. Take a regular hair dryer from your wife or mom (or daughter) and heat the processor for 1-2 minutes. The temperature will make the thermal paste slightly softer, even though it is dry. This is due to the fact that it contains metal pollen, and any metal becomes slightly more elastic when heated. 
If everything went well, you will have a processor in one hand and a heatsink in the other. Now you need to wipe off the old thermal grease from both the processor and the heatsink. This is done with a cloth or cotton wool. And if it comes off badly, then with an eraser (eraser). And if everything is really bad, then you should use alcohol. Just don't overdo it.
Never erase old thermal grease with rough objects, because you can damage the plane, create microscopic scratches on it, which will then be unfavorable for heat dissipation.
Let's summarize. How to erase old thermal paste from the processor and heatsink? Answer - cloth, cotton wool, soft paper, eraser and alcohol can be used but not cologne, only pure alcohol.
So we got to the most important issue of today - thermal paste application... If you search on YouTube for something like “ correct replacement of thermal paste" or " correct application of thermal paste"Then I assure you, you will only get confused. You will be faced with a lot of options, under each video there will be almost as many dislikes as there are likes and a whole bunch of abuse.
Someone puts it in one drop in the middle of the processor, someone spreads it like a sandwich. There are people who experiment and apply it now along the perimeter, then in the center, then with a plus, then with a cross, then a strip, then in a checkerboard pattern. So what? The difference in the end is 1-2 degrees!
Now you know what it is correct replacement of thermal paste when and rules-that, in fact, there are none. Such is the paradox. Good luck with your applications! =)
Have you read to the very end?
Was this helpful?
Not really
What exactly did you dislike? Was the article incomplete or false?
Write in comments and we promise to improve!